
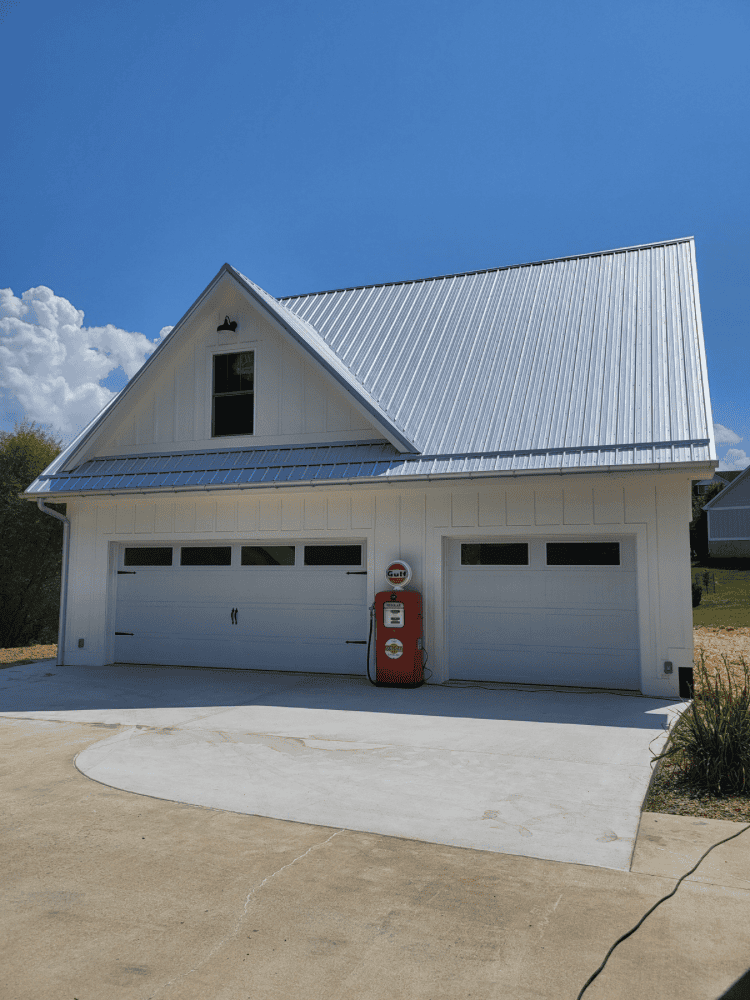
Y’all know I recently shared all about our backyard detached garage ideas a few weeks ago. So now, it’s time to share all our DIY garage floor ideas for this spot. My husband was super excited to try something new on this garage floor.
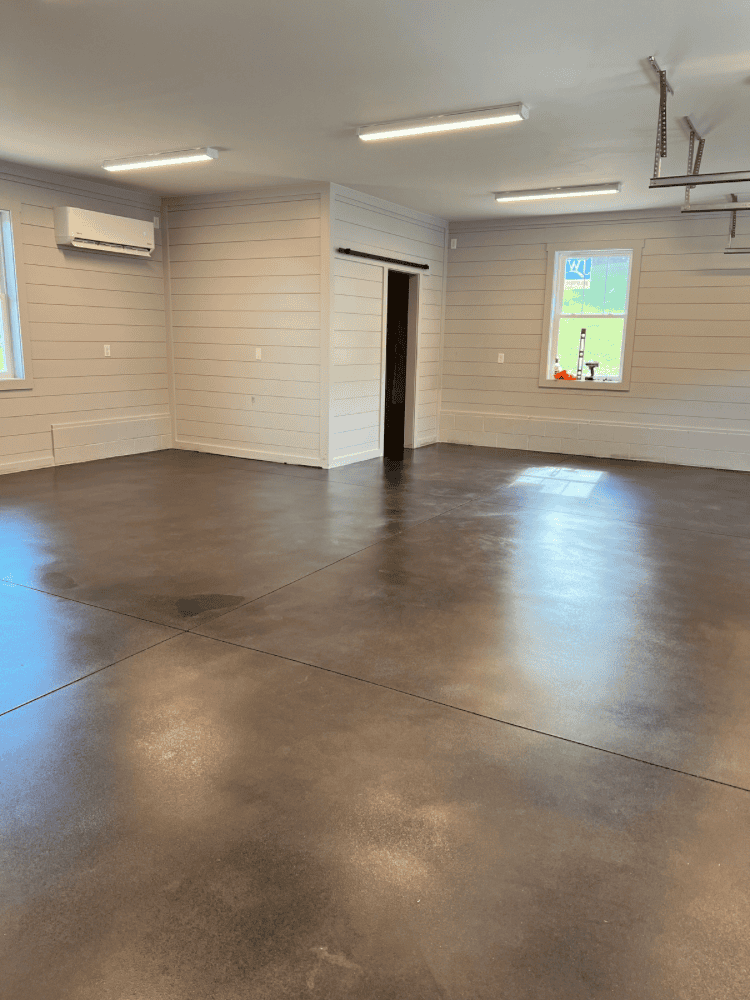
Our garage floor in our main house is your typical epoxy garage floors. So for this flooring, he wanted to try something new. He decided to use a concrete stain for this flooring and do it himself. And it turned out to be amazing!
However, there were a few hiccups along the way. But, he managed to fix everything and get it looking perfect! So if you’re looking for some garage flooring ideas, be sure to keep on reading. Especially if you want something different than the traditional epoxy coatings.
This post also contains affiliate links, which means I make a small commission off anything you purchase through here, at no additional cost to you. Please read my full privacy policy for more details.
Choosing Concrete Stain
My husband looked at a variety of colors and options as far as concrete stain goes. And he ultimately decided on using the brand Direct Colors. He got the 1 Gal Everstain Acid Stain in Black.
It is also available in many different colors such as coffee brown, azure blue, English red, and desert amber to name a few. Using this product will create a translucent variegated or marbled finished to your garage floors.
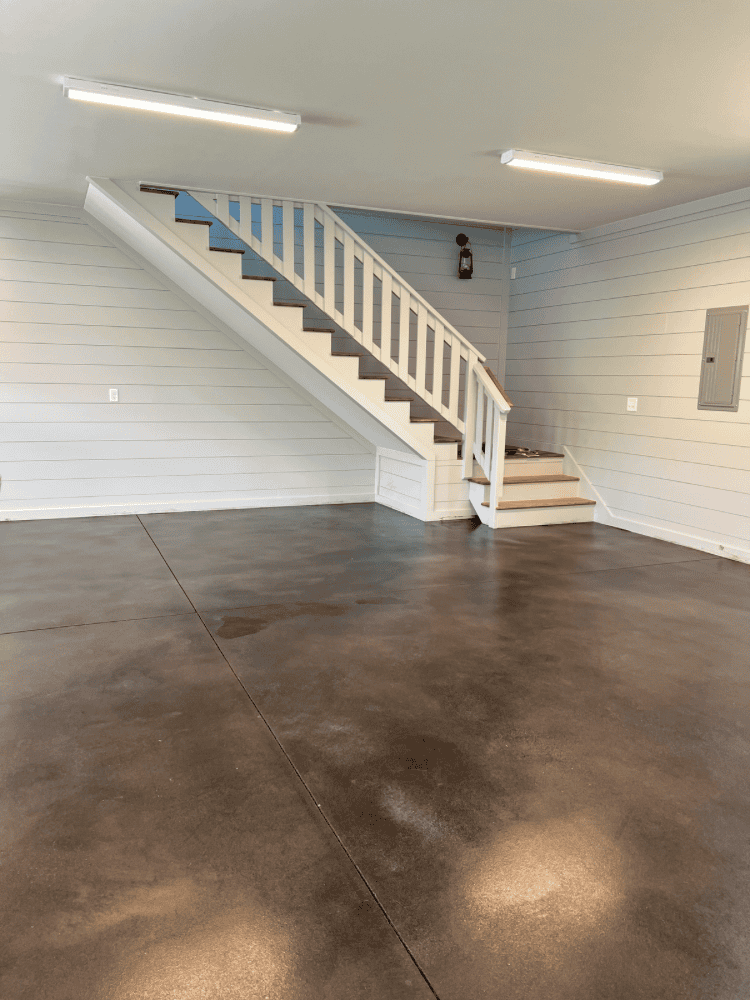
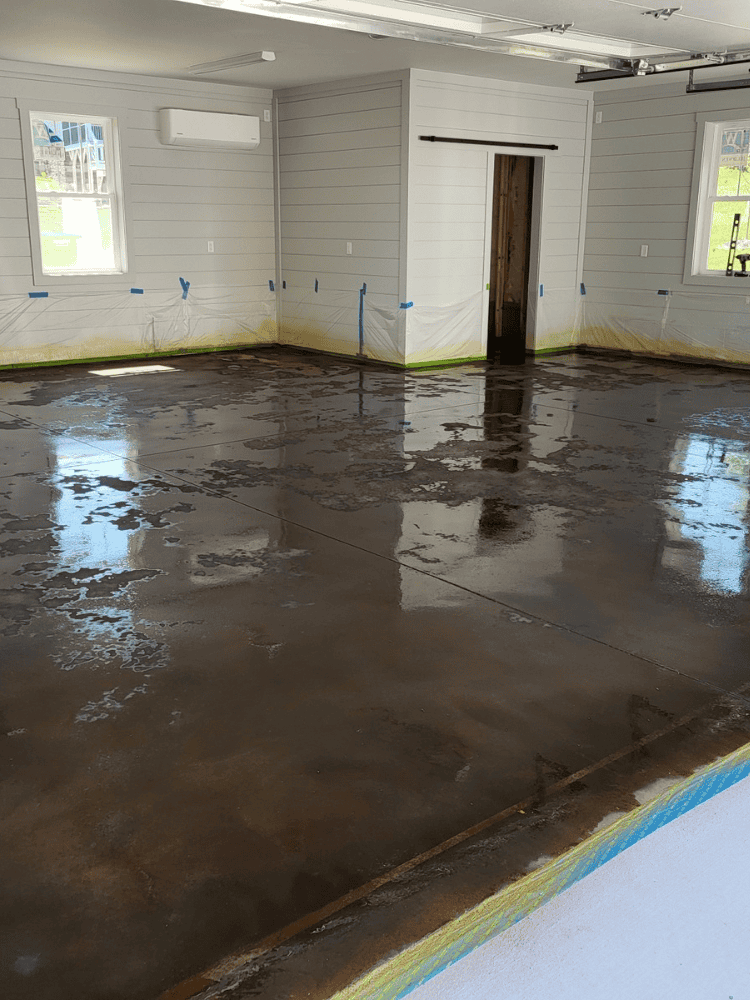
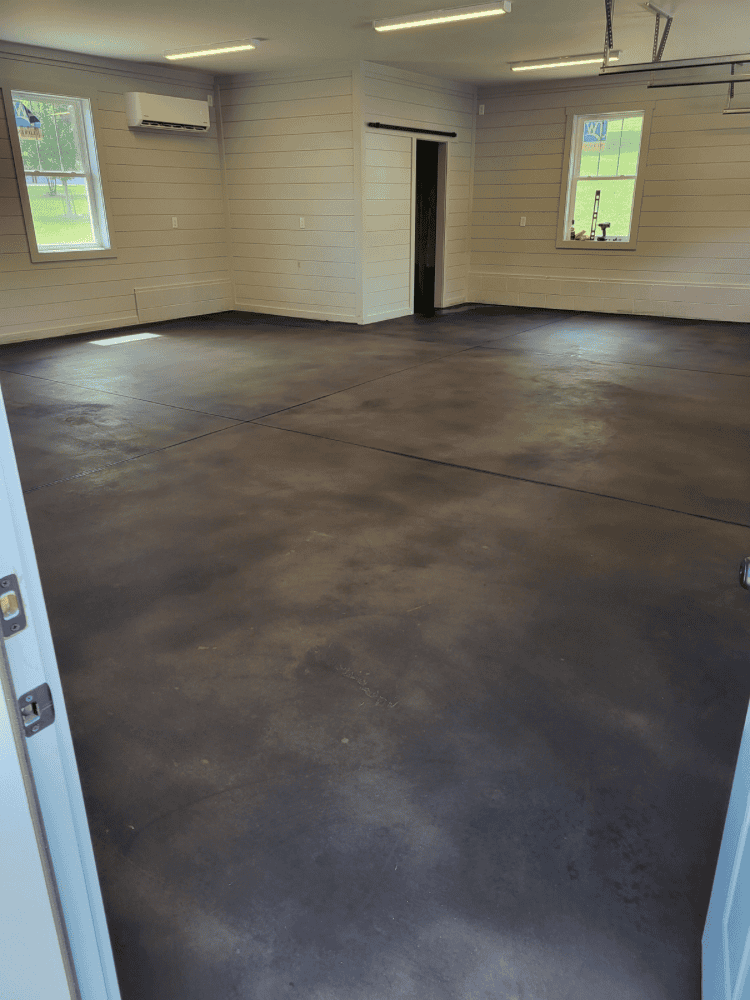
Since this stain is reactive, it creates unique results on each slab it is used on. For example, my husband thought it would be a dark black color, but the end result looks more dark brown.
Which he loves, but be sure to test it out first before staining your whole garage floor in case you don’t absolutely love the color.
How Much Concrete Stain Do I Need?
Once you’ve picked out your product, of course now you need to figure out exactly how much you need to order. Thankfully, Direct Colors has an ordering calculator on their site that will help you order the right amount.
But, as I mentioned above, be sure to get the trail kit, or test with only a 4 ounce option, that way you don’t order too much and end up not liking the end result. To order the right amount, you definitely need to know the exact square footage of the space you will be working on.
The average coverage rate for this product is 200 square feet per gallon (using 2 coats). But, of course it also depends on concrete porosity too. Usually, at least 2 or more coats are required for the finished product.
Why Use Everstain Acid Stain for Garage Floors?
This specific stain is a great choice for concrete floors, countertops, walls, and various other architectural elements. And it makes for some great DIY projects too.
It offers a long lasting way to stain your concrete floors in your garage while ensuring longevity, durability, and a natural appearance, even in heavy traffic areas.
As I mentioned above, it will create a unique appearance depending on your concrete slab since the stain interacts with concrete minerals to reveal a distinctive marbled finish.
So this is a good option if you are going for a unique marbled look to your garage floors! You can also use this product both for interior and exterior projects.
How to Apply Everstain
Everstain Acid Stain MUST be neutralized and sealed in order to work. And it is best applied using an all plastic pump sprayer, brush, foam applicator or sponge.
And you also need to keep in mind the temperature when staining concrete garage floors. This product works best anywhere between 40 and 95 degrees.
Before you start the entire floor area, be sure to test a small section that is mostly hidden first. That way you can test the products out and make sure it’s a good idea for your space.
Pre-Application
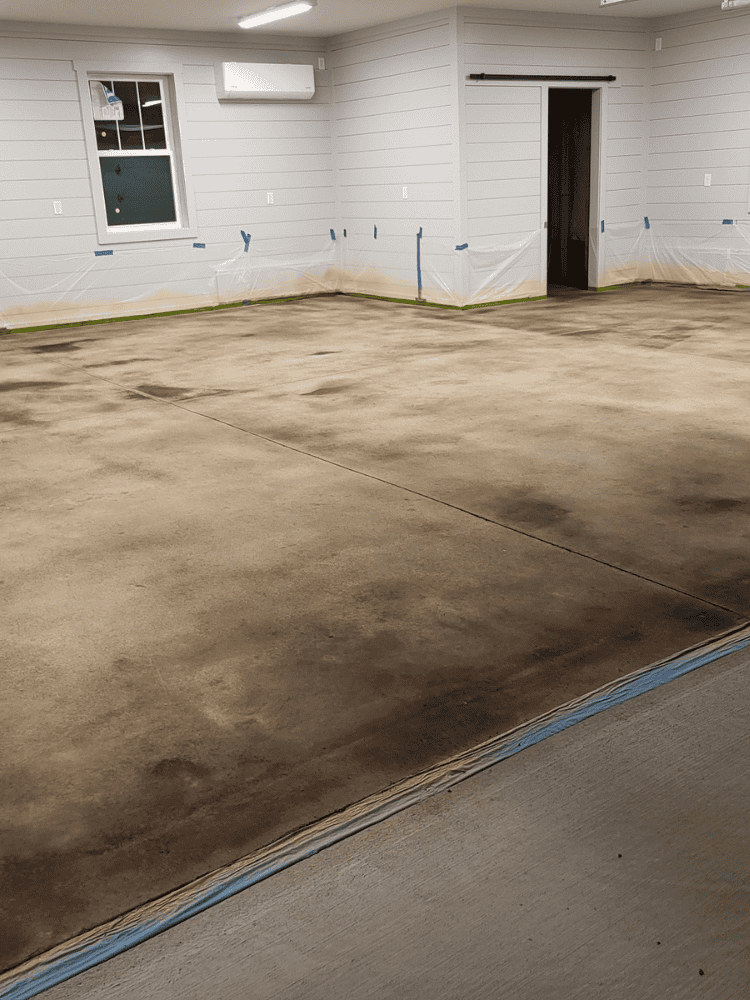
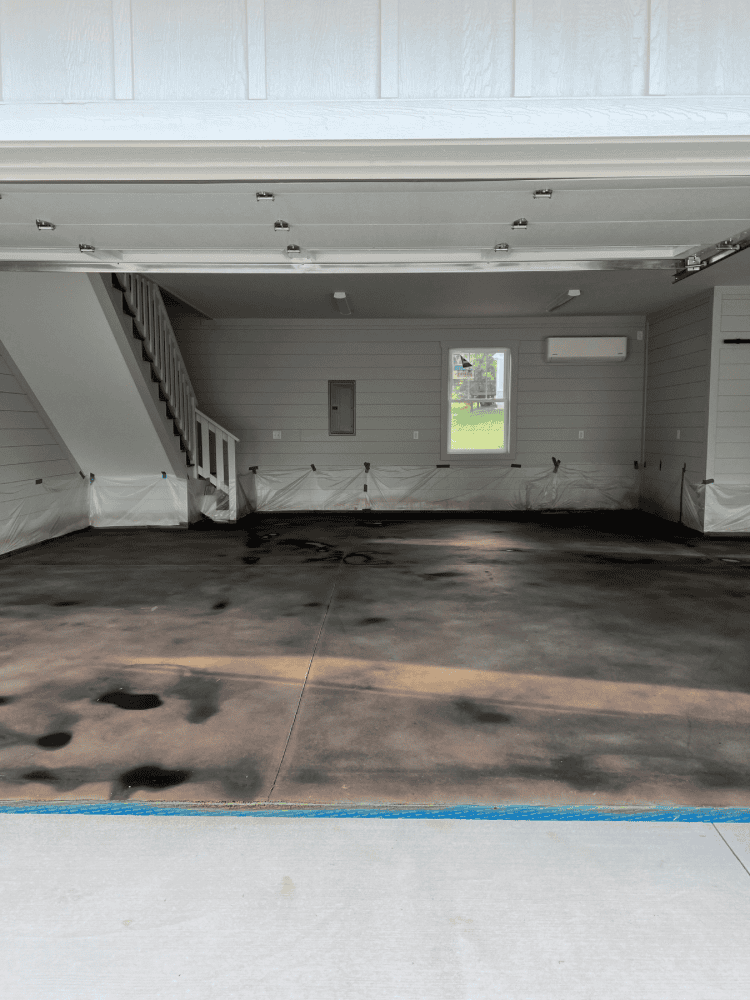
Before adding any product to your bare concrete floor, there is a little bit of a pre-application process you must do first. You definitely need to make sure the floors are completely clean.
Make sure there is no dust, paint, dirt, oil stains, grease, adhesive, sealers, rust, algae, mildew, and chemical pollutants on the floor. Basically, it needs to be squeaky clean.
You don’t want anything to interfere with the product and cause a chemical reaction. It is not recommended to acid wash though, as it could alter the surface’s reactivity. Just use a eco-friendly degreaser and ensure complete rinsing to remove any and all residue.
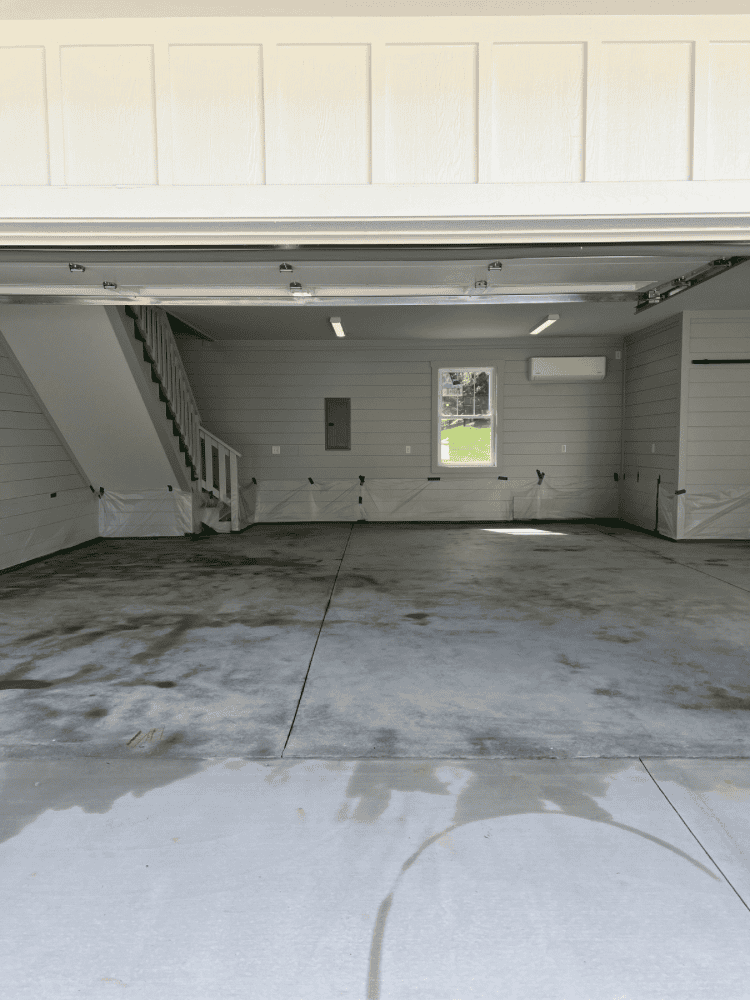
My husband ended up cleaning the garage floors twice, to make sure they were clean as whistle before beginning the application process. Also, you need to make sure your new garage flooring is completely cured, if it is cement based, before applying anything.
Typically, the curing process takes around 28 days. So don’t just automatically begin this process on very new flooring if it isn’t cured completely yet. And, be sure that your flooring is sound, not flaking or spalling. You will also need to perform an absorption test before starting as well.

To do so, pour water on concrete surface and wait 3-5 minutes. If the water is not absorbed, you will need to clean them again and etch them with the CitrusEtch product. This will open up the pores of the concrete and allow water to absorb.
Materials Needed to Apply Concrete Stain
You definitely want to protect surfaces not intended to be stained before beginning. That way, it will help prevent accidental application.
But, be sure to avoid using tape on the concrete floor surfaces before or after staining, as the adhesive will interfere with the stain’s effectiveness.
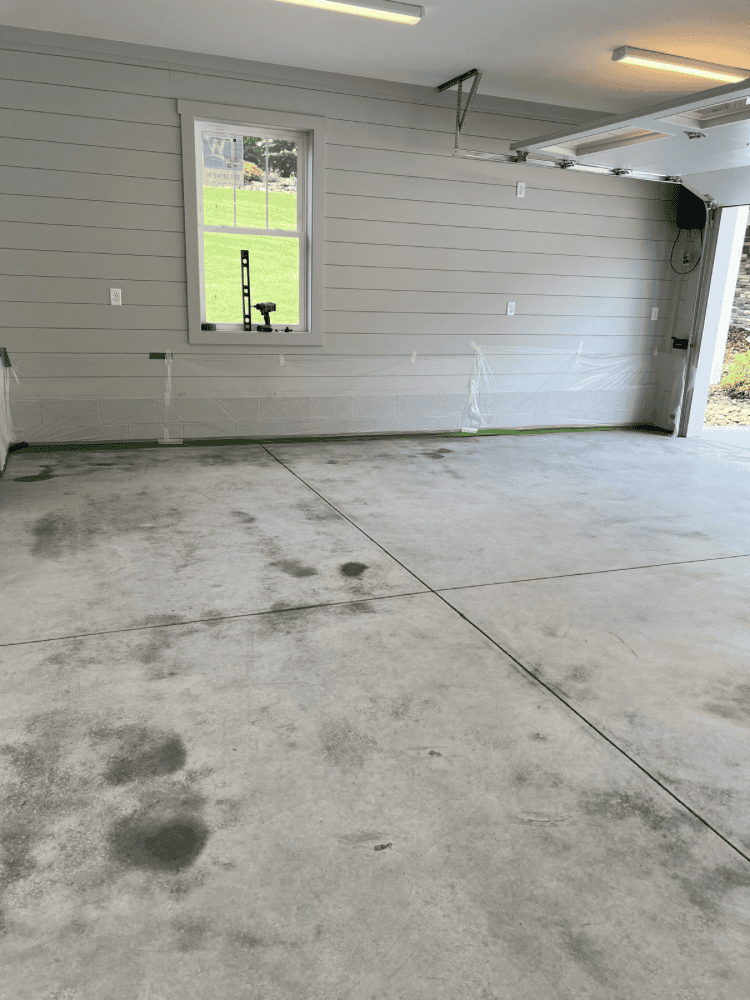
My husband had our painter come help him apply plastic sheets around the walls of the garage floor before starting this process for a protective layer.
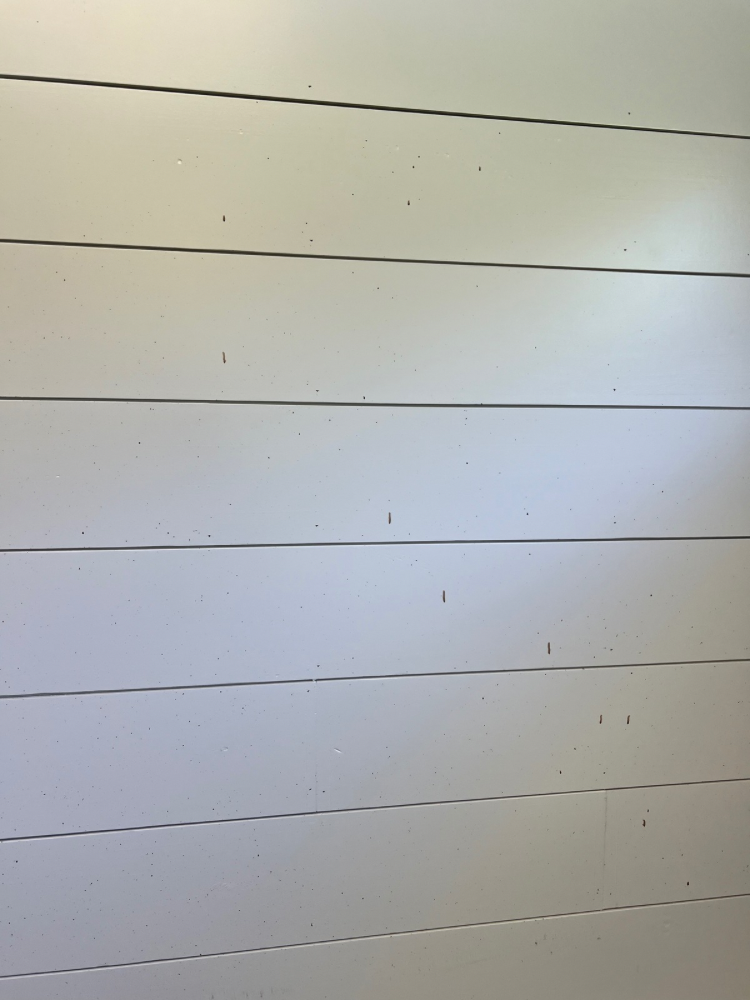
He thought it would be a great way to prevent stain splatter. But, one of the hiccups was that the plastic wasn’t tall enough on the walls. It did help protect some of it, but the stain sprayed a lot more that he anticipated and got above the plastic too.
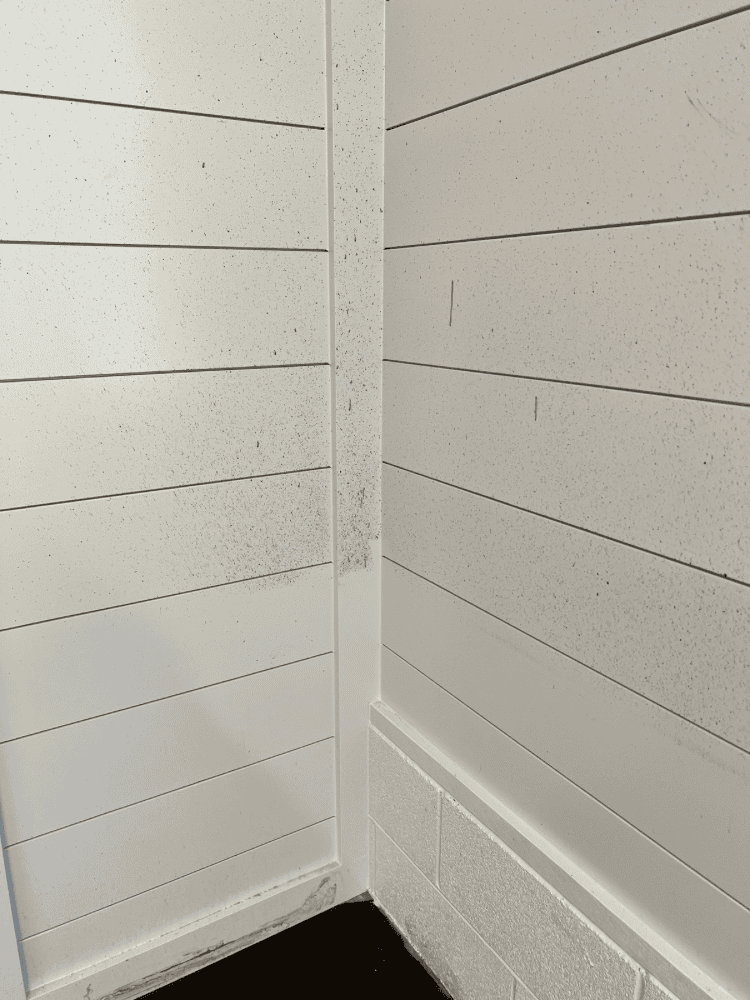
So much so, that we had to hire the painter again to come back and repaint the walls after he was done staining the floors! So, if you can do this process before the walls are completely painted and finished, that would be ideal!
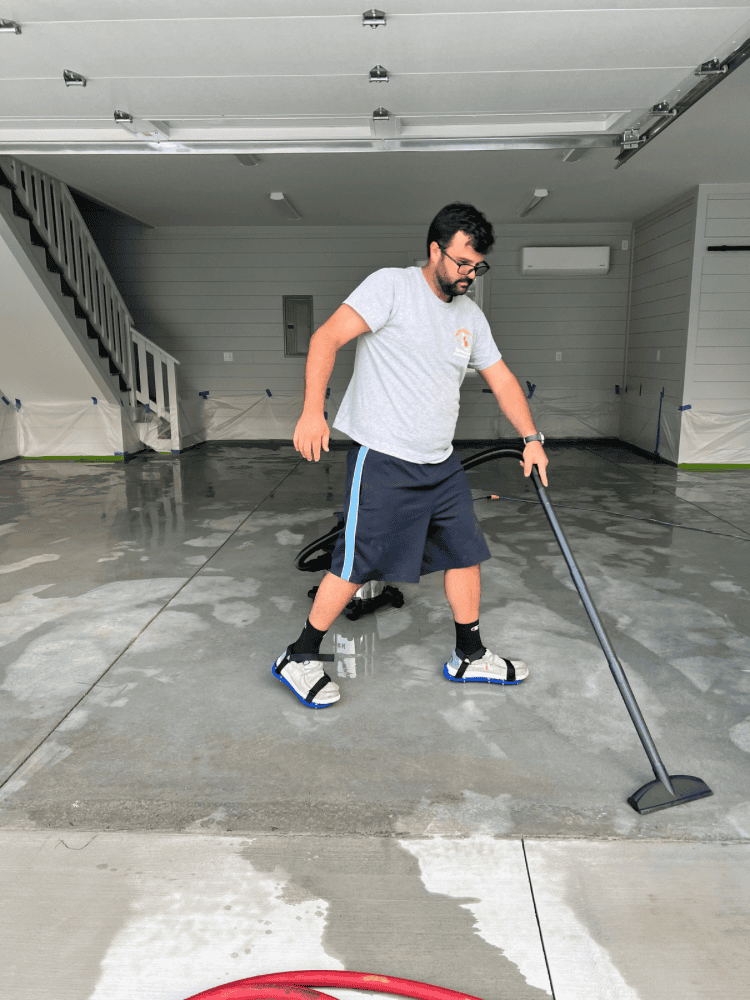
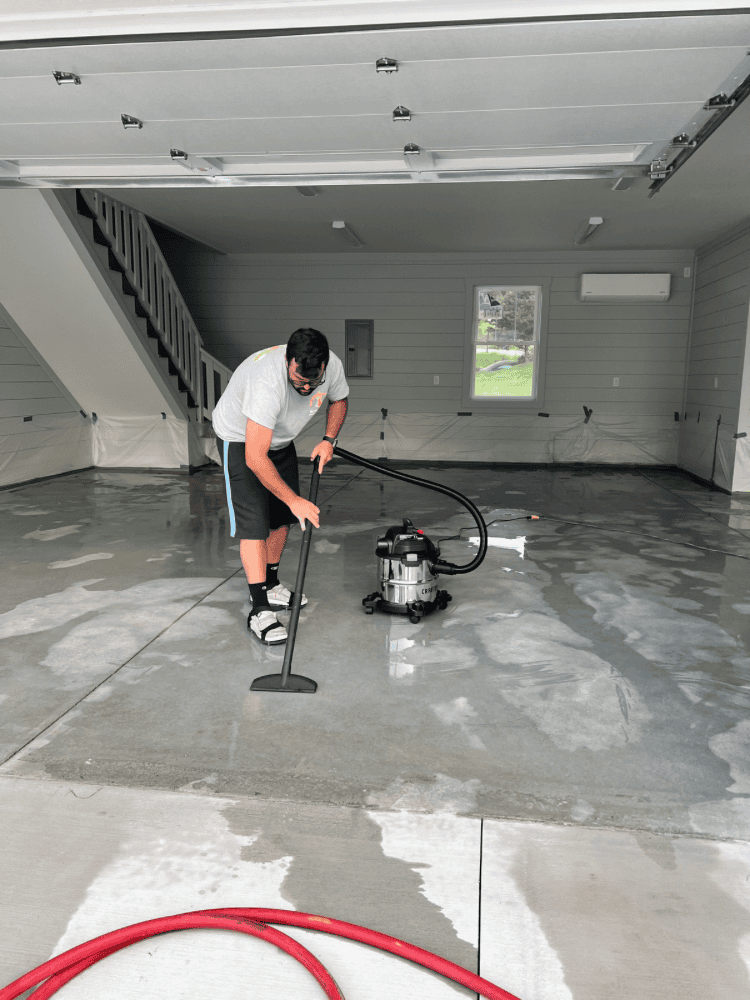
You will also need an all plastic pump sprayer to spray the stain on the floors with. To remove any extra residue when staining, you need a hose and a long handled deck brush, with a wet vacuum as well.
Using a pressure cleaner can cause the concrete to chip, so it is not ideal to use that for residue removal. When staining, you will also need spiked shoes, that way you don’t mess up the areas that are already stained.
How To Stain Garage Floors
Now, that we have all the preliminary items covered, you can start staining! Using the sprayer, my husband applied the stain liberally and continuously in a circular motion over the surface.
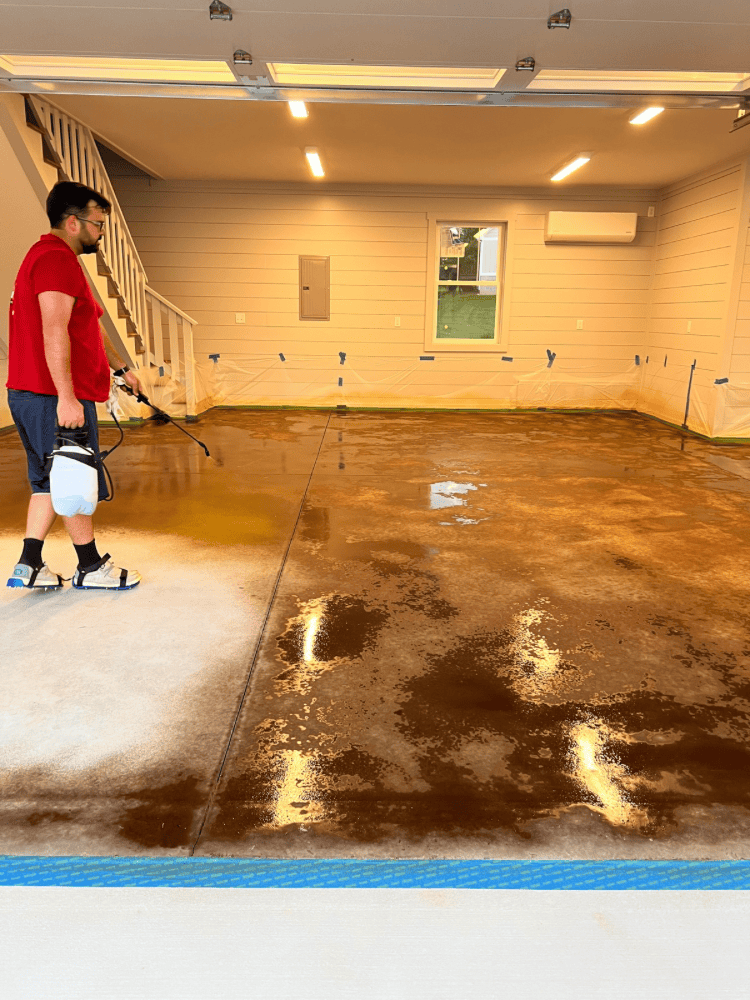
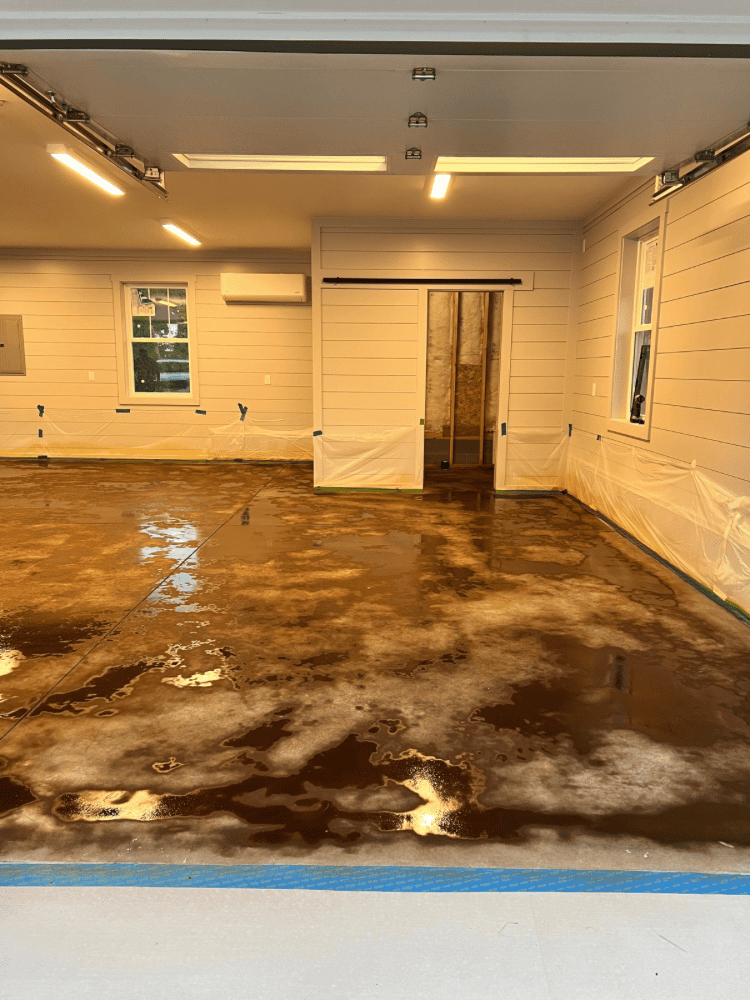
To avoid excessive puddling of the stain, maintain a controlled application rate, aiming for 200-400 square feet per gallon.
Check for fizzing and foaming, which is signs that the stain is reacting as expected. Various colors react differently so don’t worry if this doesn’t happen right away for you.
Allow the stain to sit for a minimum of 5 hours before rinsing. My husband let it sit overnight each time he stained before rinsing to ensure everything had an adequate reactive time.
Neutralization
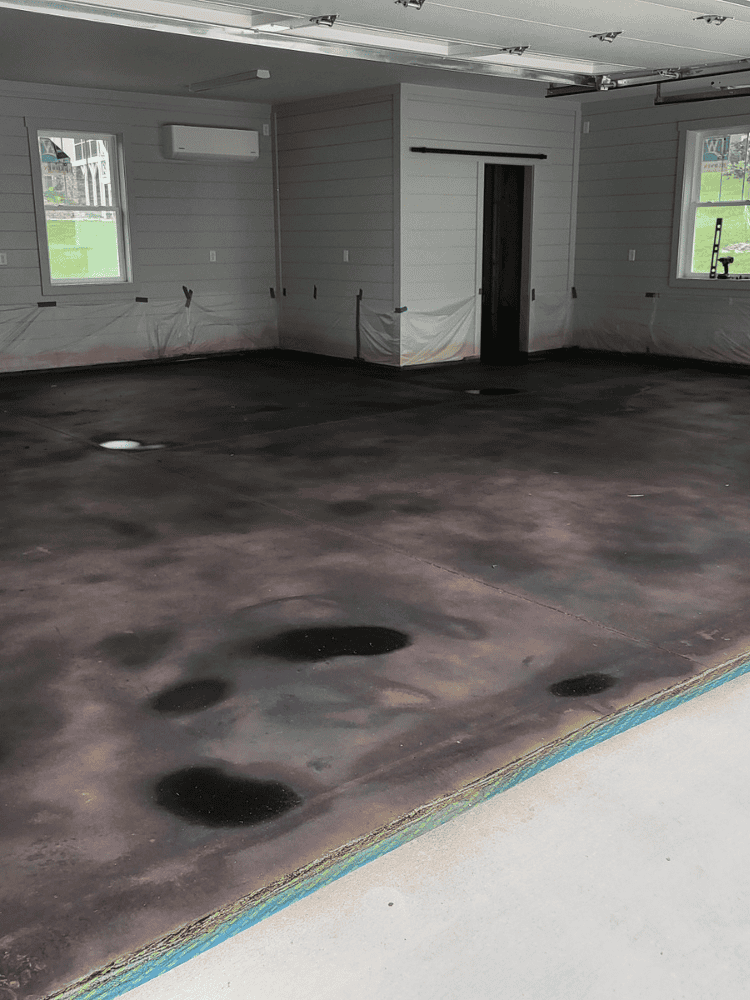
The next step in this process is to neutralize the area because the stain can leave a powdery residue behind. You can remove this by neutralizing the surface with a commercial pH neutralizer.
Such as ProClean Neutralizer™, ammonia, or baking soda, followed by thorough water flushing and stiff brush scrubbing.
Rinse the floors again to remove all neutralizers and residues. Keep in mind though, if you are using ammonia or baking soda, this will require additional time to cleanup and remove all the residue.
You should continue to rinse the floors until you achieve a final rinsing of just plain, clear water. Use a white rag to wipe the floor with to test it out. If it comes back all clear, you are good. If not, continue rinsing until you achieve that.
Sealing
All stained concrete MUST have concrete sealers used as well to complete the process. You cannot skip this step!
Be sure after the neutralization/rinsing process, that all garage floors are completely dried out. You can use fans to help you achieve that.
For best results, use either EasySeal™ or AcquaSeal™ acrylic sealer. EasySeal™ (since it is solvent based) generally enriches the stain’s color and darkens it more than the AcquaSeal™.
If you are using a gloss finish sealer, you may consider adding OxiGrip™, which is a slip-resistant additive and will help the floors not to be so slippery. Once sealed and dry, your garage floors are good to go!
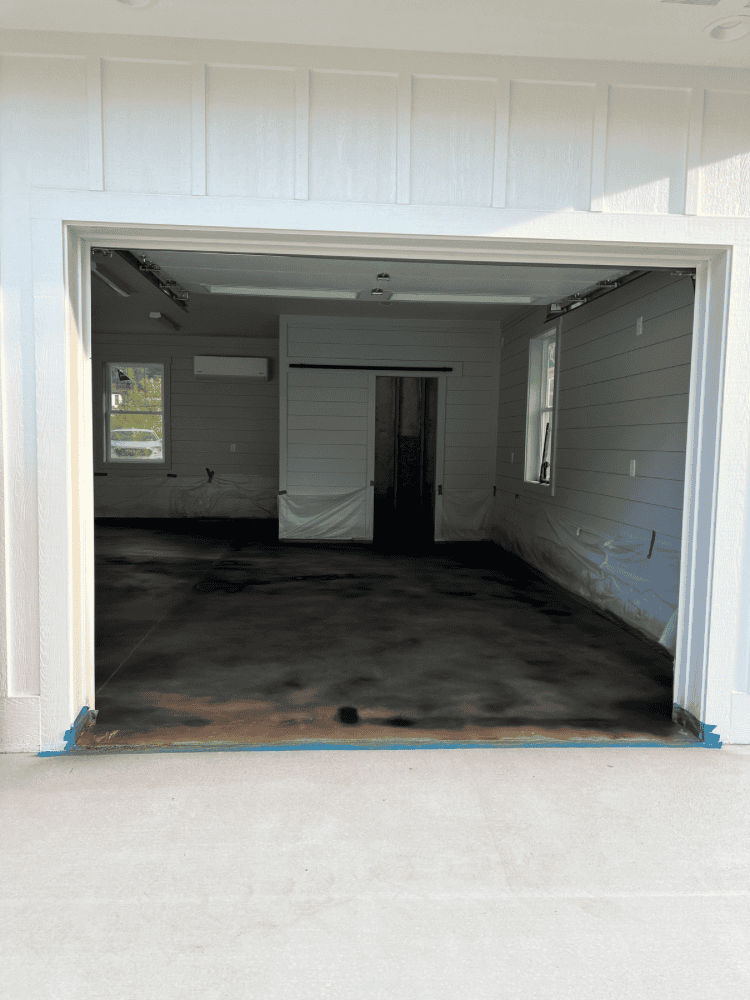
Enjoy Your New Garage Floors!
If you’re looking at all the different garage flooring options you can do, I hope you consider this stain idea! I think it looks so much better than the traditional epoxy flooring.
Especially since it has such a unique appearance to it. It may not be the best garage floor ideas for a novice DIYer, but you could always hire someone out to do this process for you too; especially if you aren’t on a tight budget.
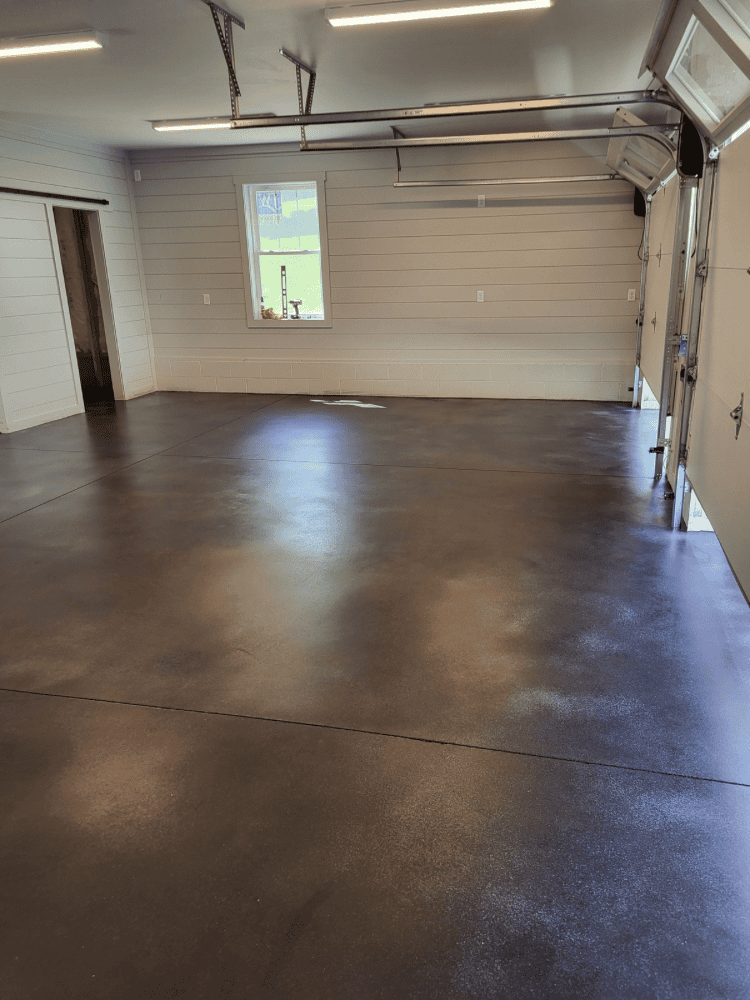
I will say, it was challenging for my husband to do it himself, but he is very happy with the end result! The garage floor looks amazing and was an excellent option for us.
It definitely took a little effort, but this garage floor option turned out to be one of our favorite DIY projects to date! Garage floor stain is a very popular choice, but you do have a variety of options to choose from too if this isn’t your thing.
You can always just use the epoxy resin with decorative flakes, roll-out vinyl flooring, or garage floor tiles, such as porcelain tiles or a rubber tile too. Tile flooring would definitely have a nice, visual appeal to it, but would also be a lot of work.
However, we have a lot of tile going on in the garage bathroom too. Which I can’t wait to show you here coming up soon! We are almost done with that project too and it is looking amazing so far!
No matter what flooring materials you end up choosing, there are many DIY garage floor ideas out there that will all create a wow factor once completed! I hope you enjoyed this post and I hope it gave you a little inspiration on how to do your own garage flooring too!


Leave a Reply