
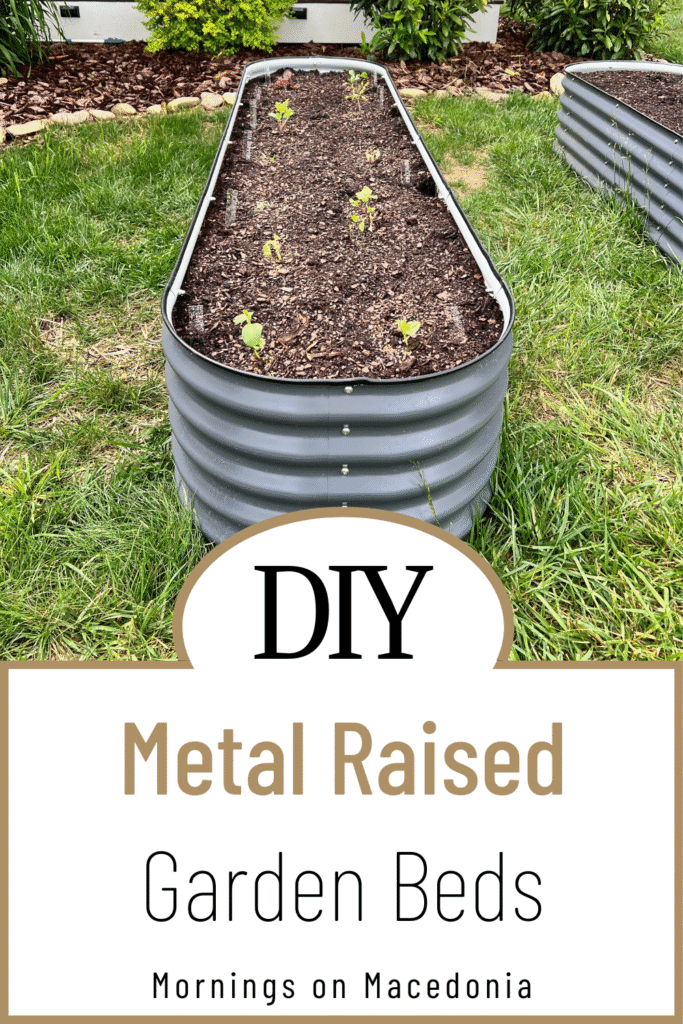
I am so excited to share all about my new DIY metal raised garden beds I got this year! Y’all may remember several years ago I attempted to do raised garden beds too.
But unfortunately, I didn’t really know what I doing at that point and the deer ended up eating every single thing that I planted anyway! I was just trying to plant some fruits like raspberries, blueberries, and strawberries; but I didn’t get very far in the gardening season.
So this year I wanted to try something new, and really focus my efforts on trying to grow vegetables. We ended up getting rid of those old garden beds from several years ago and decided to try out a new metal-raised garden bed instead.
And so far, it has been a game changer! Not only are they super cute, but they seem to be working out quite well so far.
I’ll be sharing all about how to put these metal raised beds together and just how easy it is to do yourself as well! Keep on reading for all the info!
This post also contains affiliate links, which means I make a small commission off anything you purchase through here, at no additional cost to you. Please read my full disclosure policy for more details.
What Metal Garden Beds Should I Use?
Before doing anything, you should research all your options when it comes to garden bed kits. If you prefer wooden raised beds rather than metal, that is totally fine too!
Just be sure it is pressure-treated lumber! It’s whatever you think would be best for your space. We ended up going with Vego Garden Beds and I am so happy that we did!
They make your garden bed project go as smoothly as possible. They ship your garden boxes out to you super quickly and the process of putting them together is not that bad.
I was super intimated at first because it was a ton of metal panels and screws and washers, but once I figured it out, the process went by easily. Plus, you can watch the step-by-step guide Vego Garden has on their website too.
Which Configuration Should I Use?
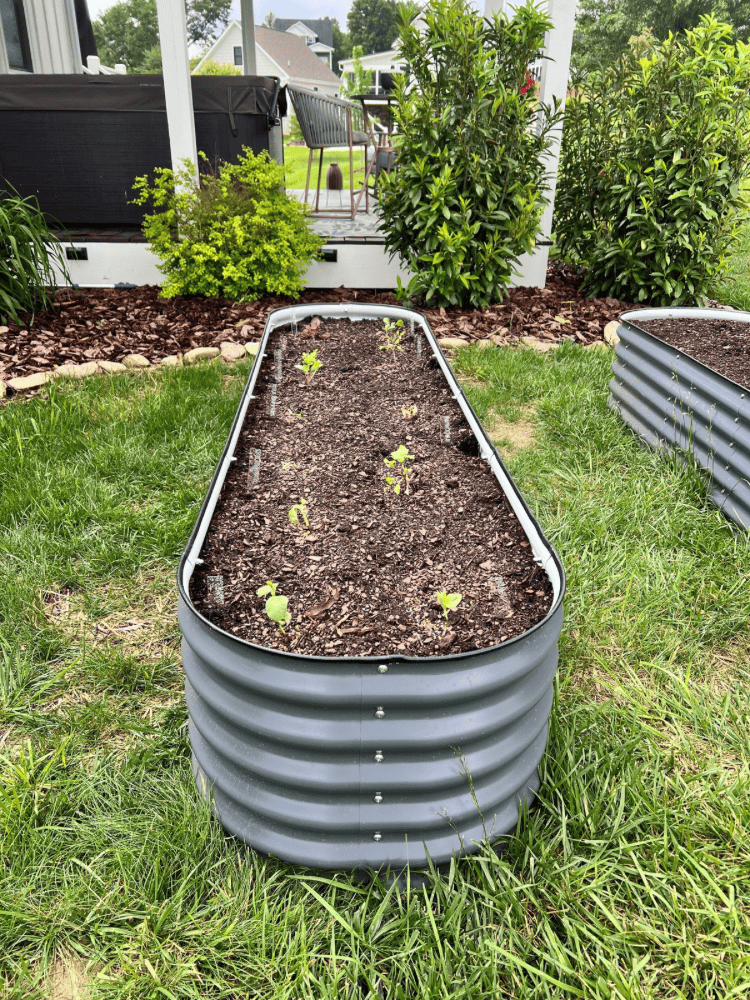
They offer a ton of different metal raised beds too. I ended up getting two of their 17″ Tall 9 In 1 Large Modular Metal Raised Garden Bed Kits. The color I went with was modern gray, although I had a hard time choosing because I really loved all the colors they offered!
And I just love the look of the corrugated metal too. It really is a more elevated raised garden bed than the ones I had before! These beds are both sleek and efficient, which I love!
And the specific kit I got allows you to create your raised bed in different configurations. Such as 3.5′ x 6.5′ or 2′ x 8′ configurations. Which are among the most iconic designs for anyone who is new to garden beds!
The height of these beds makes a perfect way for easy and quick access while also keeping the pests away too. These specific beds are great for growing not only veggies, but flowers and succulents too!
And it was actually one of the very first raised bed designs that Vego Garden launched. It’s a classic for a reason because the whole thing not only looks beautiful, but works wonderfully too!
If you’re interested in trying them out too, be sure to use my code “MORNINGS10OFF” for $10 any garden bed frame design you choose! Some of their beds even have an automatic irrigation system too, which makes watering your garden much more easier too!
How To Put Together Metal Raised Garden Beds
The first step in putting together these raised garden beds is to remove all the plastic coating that is on each panel. I like to lay out all the pieces in the way that I am going to put together the bed after taking the plastic off too.
Make sure you have all the right materials you need laid out to make this process go by even more smoothly. If you ordered your bed from Vego Garden too, then they literally send you everything you need to make these DIY metal raised beds.
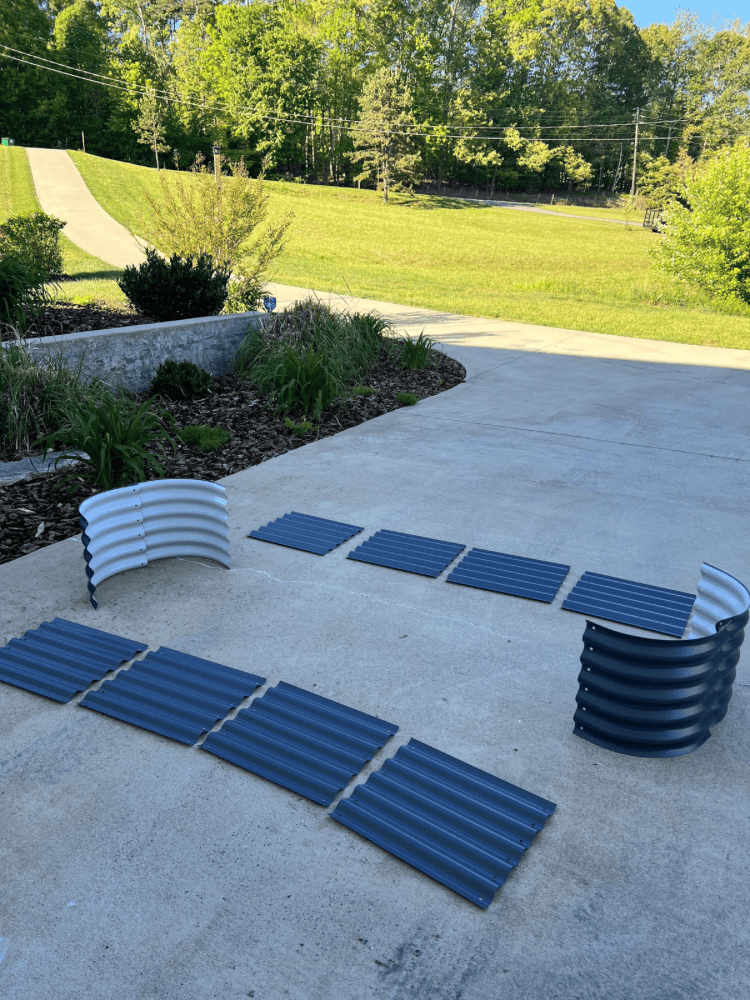
It was nice not having to get out any additional tools or anything to make them! I opted to create a 2′ x 8′ configuration with my kit. Then, the next step is to add in all the screws.
The first two rows of screws have a protective hubcap on them, that way you don’t scratch up your hands when digging around in the bed. And be careful when assembling the sharp edges of the metal panels together.

I ended up slicing my hand pretty good when one slipped away from my grip! But other than that minor snafu, everything else went together easily. There are no bottom frames for this bed, just a metal rod that you place in the middle when you’re done assembling the bed for extra support.
I put the beds together on our driveway, where I had plenty of space for all the materials and to move around. And then it was super easy to carry them to the final garden destination spot once they were built!
Making a Garden Area
When deciding where to place your garden beds, you want a nice level surface with ample room. You may need a tape measure to make sure you have enough space too.
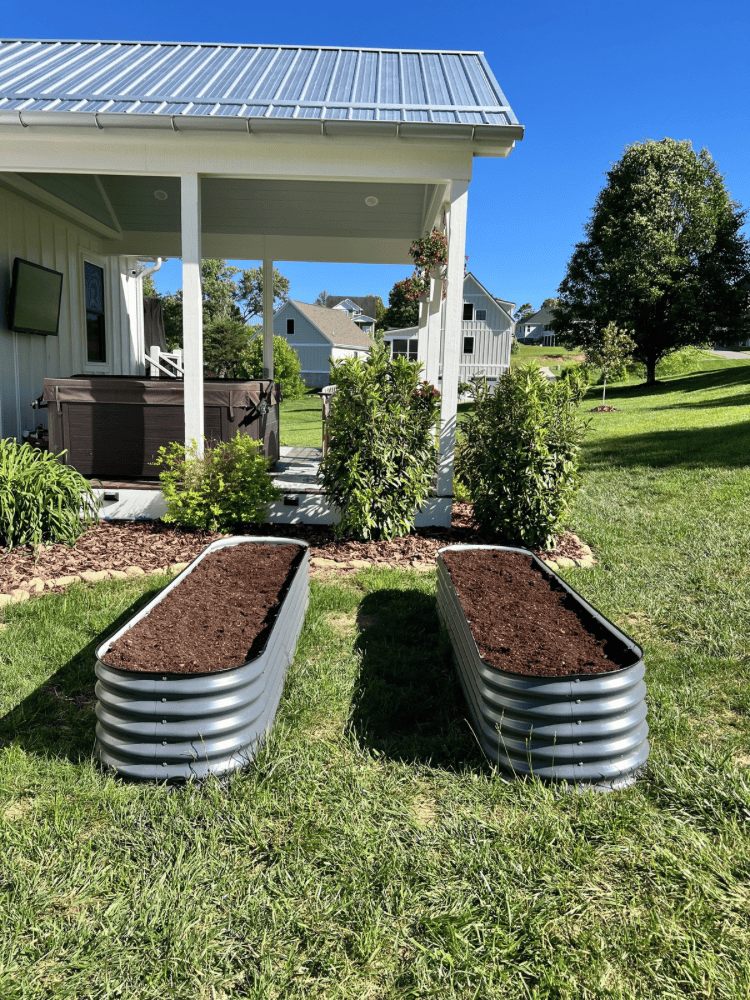
Once you decided where your garden is going to go, you can easily move the beds to that location and get everything set up. We moved them to where my old DIY Stock Tank Pool was.

We actually ended up getting rid of that pool unfortunately after summer of last year. There wasn’t anything wrong with it, but for the past few years I have been dealing with some painful sun rashes so I have been trying to limit my exposure to the sun.
Now, gardening instead of laying out by the pool seems to be treating me better, although I do miss it! It was such a fun DIY project and if you ever want an affordable pool option, you’ve got to check that post out!
But back to the beds, this is the perfect spot for them to soak up all the sunny days and grow and thrive!
Now, you may be worried about filling up the raised beds with high-quality soil and wonder how expensive is it going to be??
But, I have a few ways you can try to keep the cost down. First, inside of the bed, lay down some flattened out cardboard.
Not only does this help with better drainage, but also helps prevent weeds from growing in your bed too. Then, fill it almost to the top with some mulch instead of soil.
Mulch is a great filler because it doesn’t cost as much as potting soil. Then, on top of the mulch, fill the remainder of the bed with the high quality potting soil. After that, you’re all ready to start planting everything!
Planting In Your Raised Garden Bed
Now that you have it all together, you can decide what plants you want to start growing! Like I mentioned above, I am going to do some vegetables in my raised beds.
I am also doing an experiment on seedlings versus seeds and seeing which ones work better. So I will definitely let you guys know how it goes.
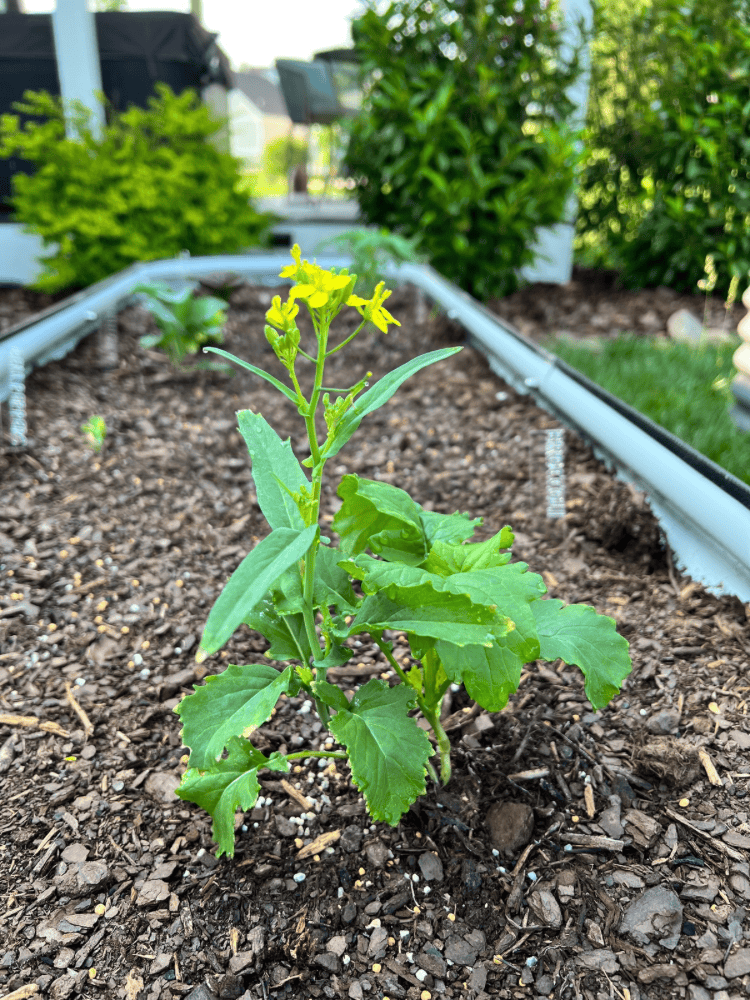
Right now, I am trying to keep them alive and thriving. I love how gardening is a learn as you go process. I am definitely not an experienced gardener, but I hope to learn a lot from doing these raised beds this year!
And I love to document and share my journey with you all too. That way, if you’re starting out too, we can learn together! Do you have any raised garden beds at your home too? If you do, tell me what you like to plant below!
And be sure to check out all my other gardening related posts here too:

Leave a Reply