
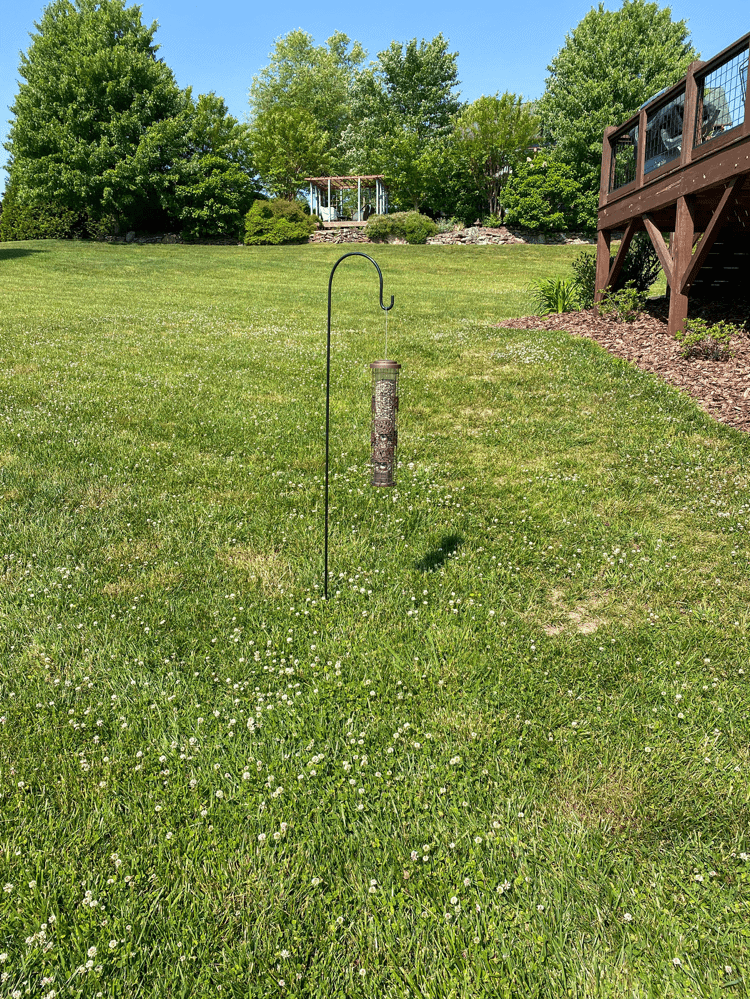
This weekend we decided to give our little bird feeder a much needed upgrade. I got a nice little bird feeder and stand from my mother in law for my birthday a few weeks ago. And while the stand was fine on it’s own, we thought it would be fun to make something a little more custom and elevated for it. Plus, the wind around our house can get really bad sometimes and those stands don’t usually hold up too well. Hence, the DIY bird feeder upgrade project was born!

This post contains affiliate links. Click here to ready my disclosure policy.
Materials Needed:
- Bird Feeder
- Bird Seed
- Wooden Post, 4x4x8
- Quick Setting Concrete
- Wood Stain
- Hanging Hooks
- Hanging Basket
- Flowers
Set Up Wooden Post
The first thing we did for this DIY bird feeder upgrade was to dig a hole with post hole diggers in the spot where we wanted to hang it.
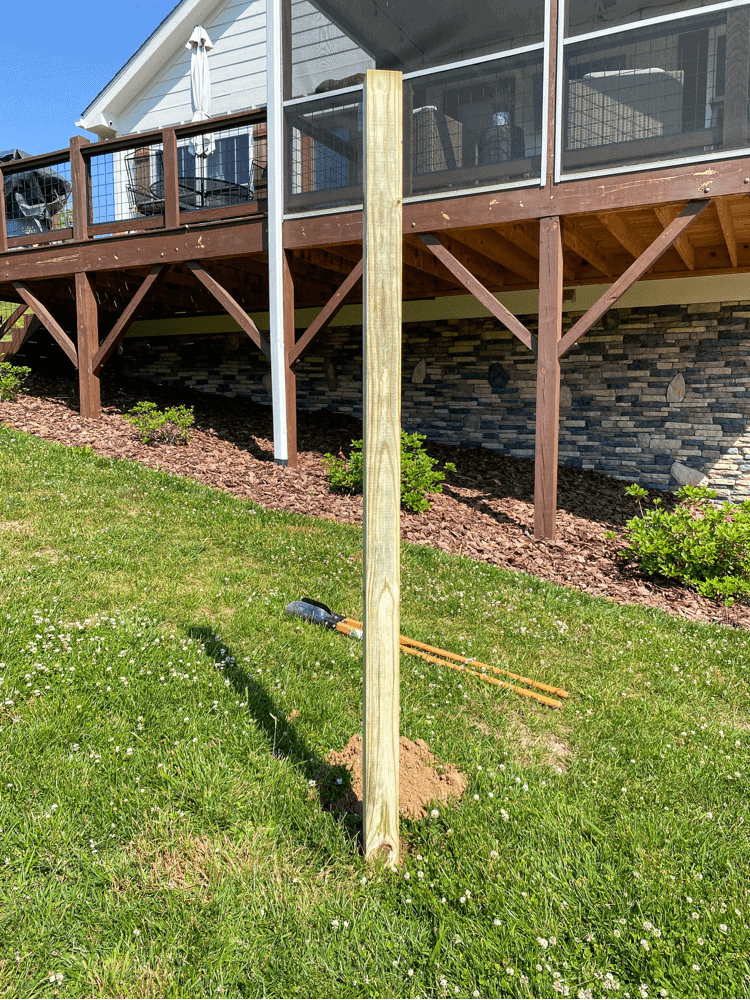
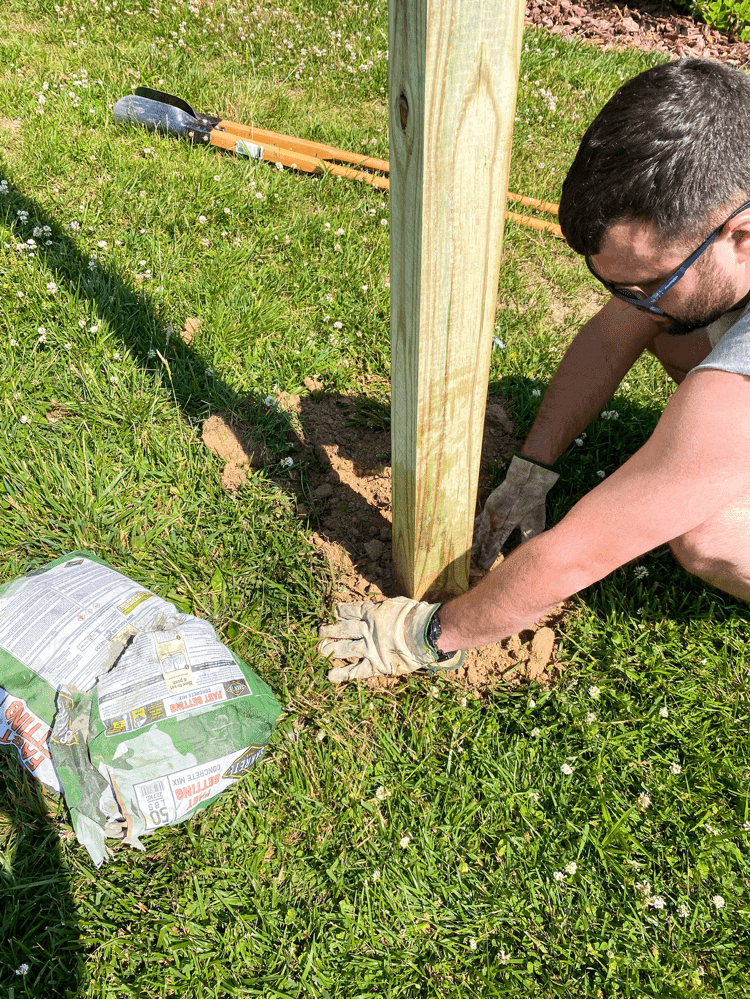
Then, we sat the wooden post inside the hole to make sure we dug it deep enough for it. After that, we filled in the area with quick setting concrete.
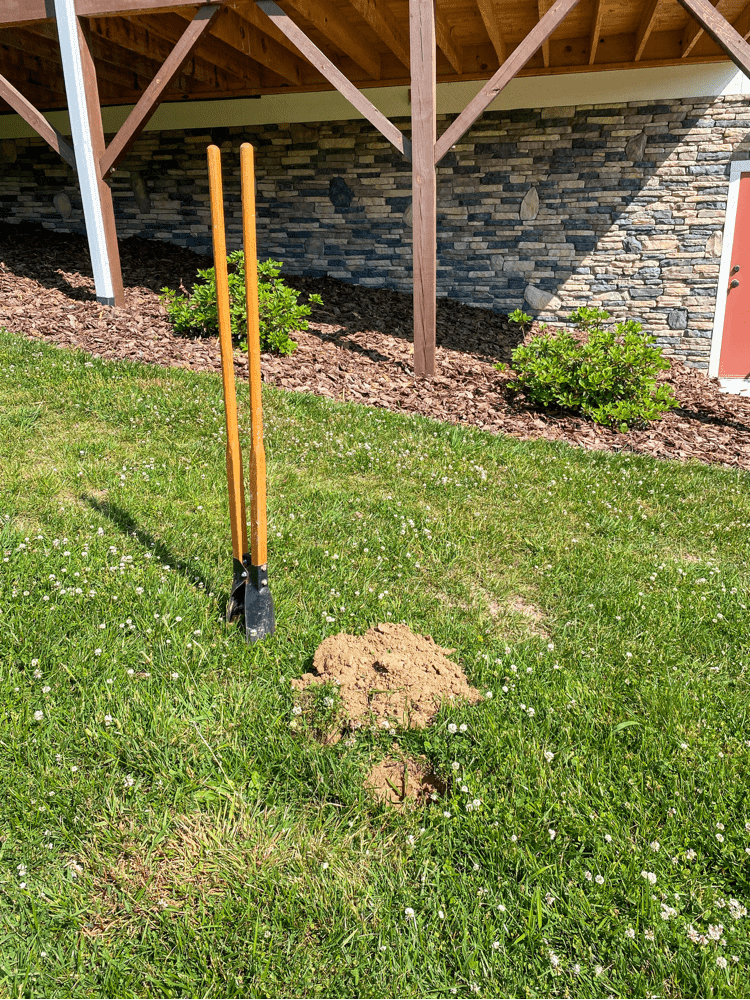
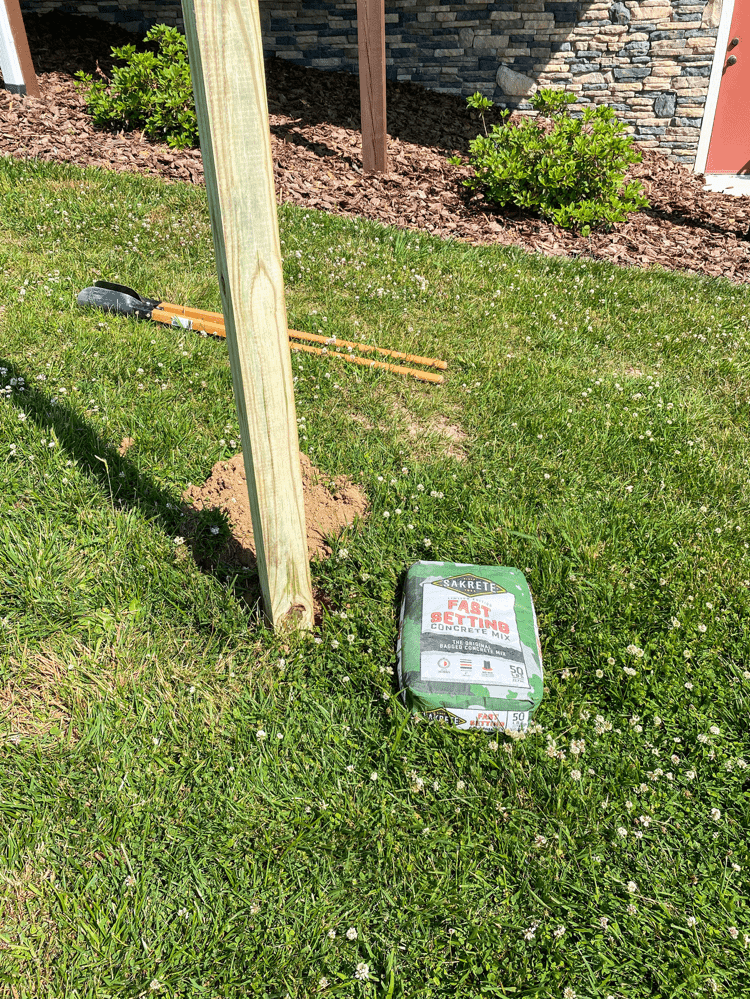
All you have to do for that is pour some of the material around the hole, and then water on top to activate it. There is no mixing required which makes it super easy!
If you remember, we did this method for our string lights at our old camper a few years ago.
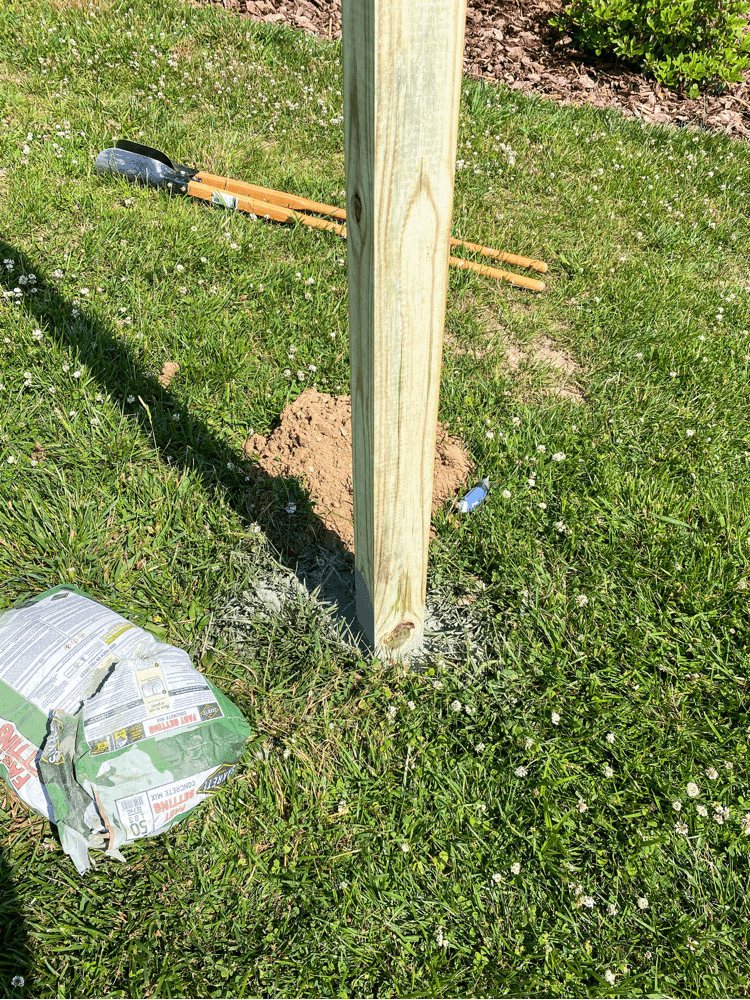
After activating it with water, we placed the dirt on top of it. We also ended up mulching a small spot around the post once we were done.
We had an extra bag leftover and thought, why not? It really made it look put together and finished the look perfectly.
Stain the Wooden Post
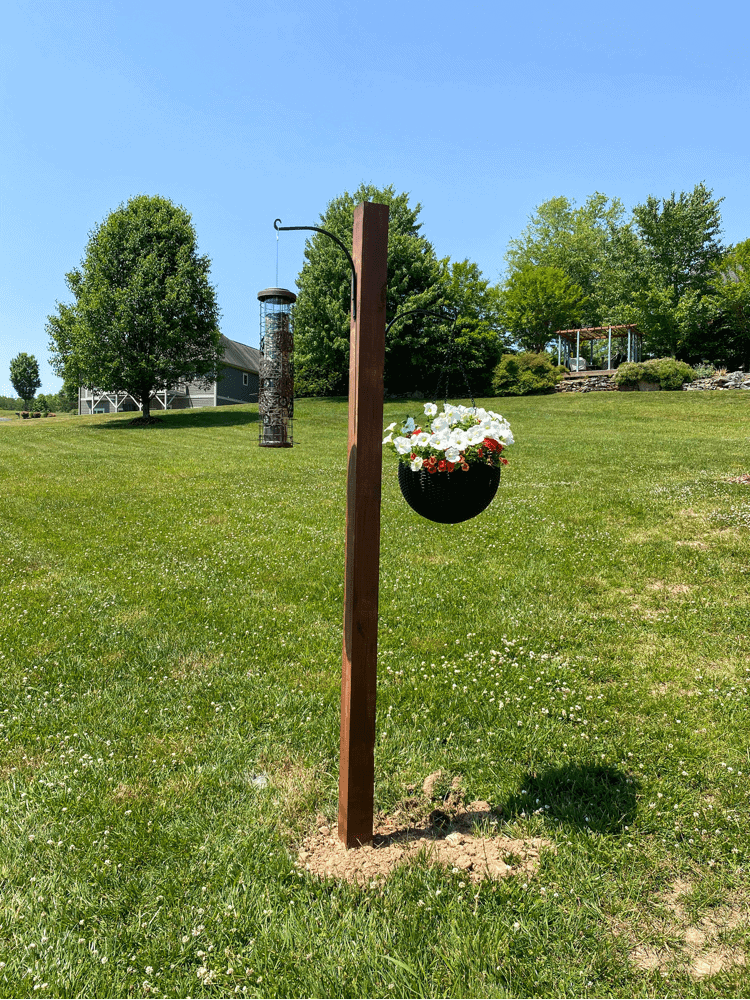
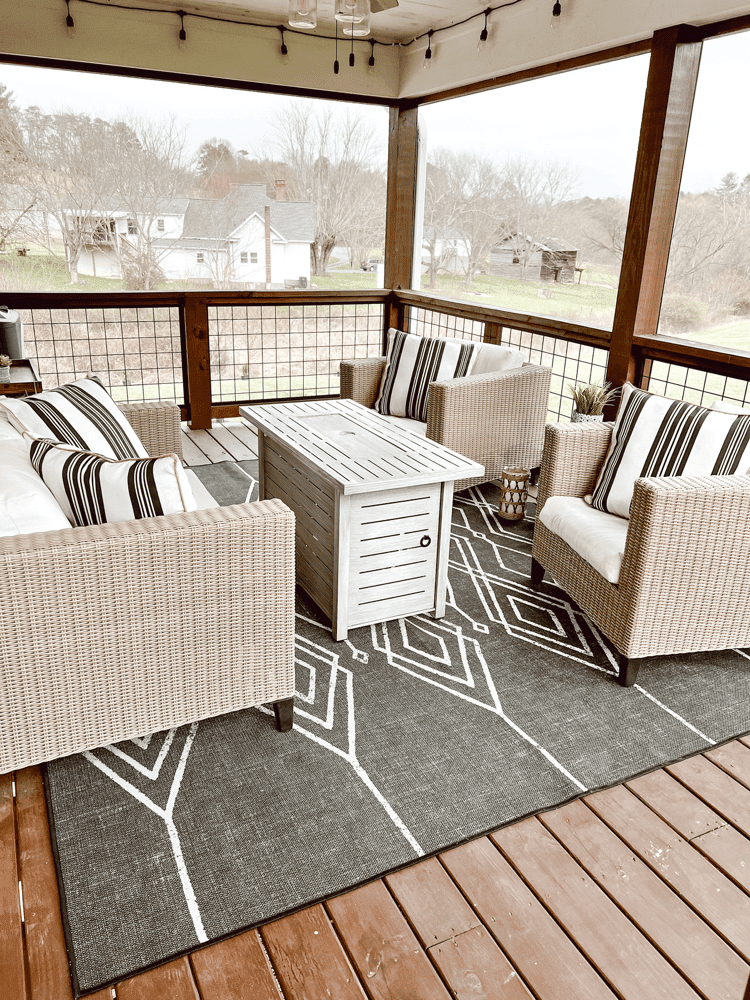
After you have the wooden post securely set up, now you can stain it or paint it whatever color you desire! We decided to go with the same stain that we already have on our back porch.
Since this bird feeder is right off the porch, we wanted it to match and tie in together nicely.
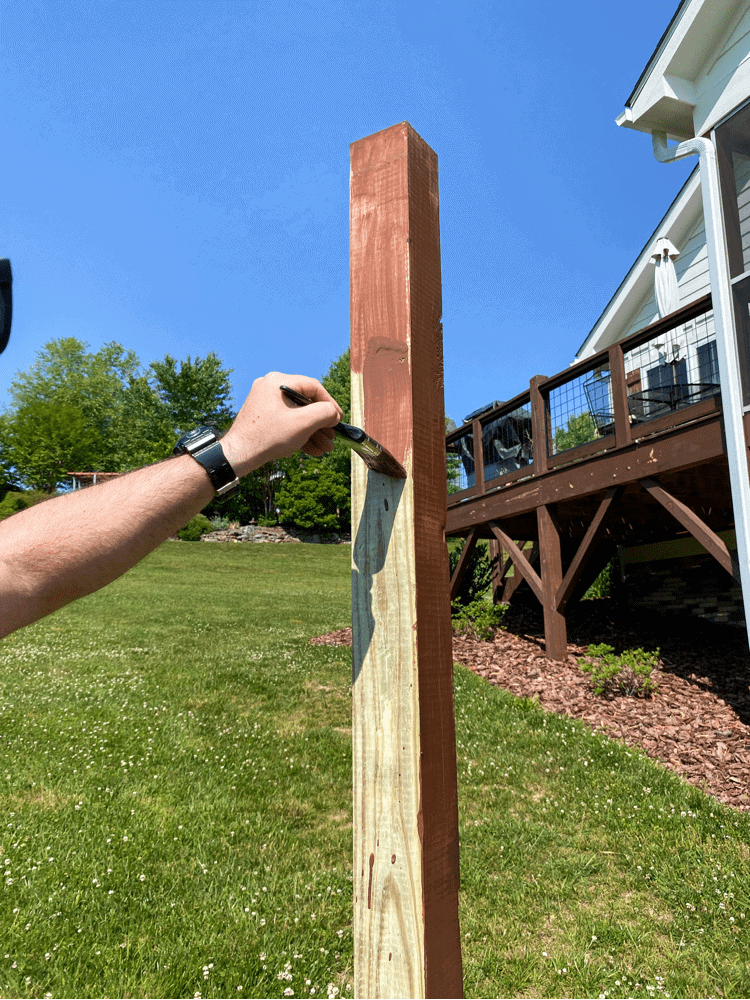
We used a Valspar stain in the color Classic Mahogany. We actually need to re-stain our back porch too. If you can see from the photo above, there are several spots where the stain is chipping away.
So I guess that will be another DIY project for a different day for us coming up soon!
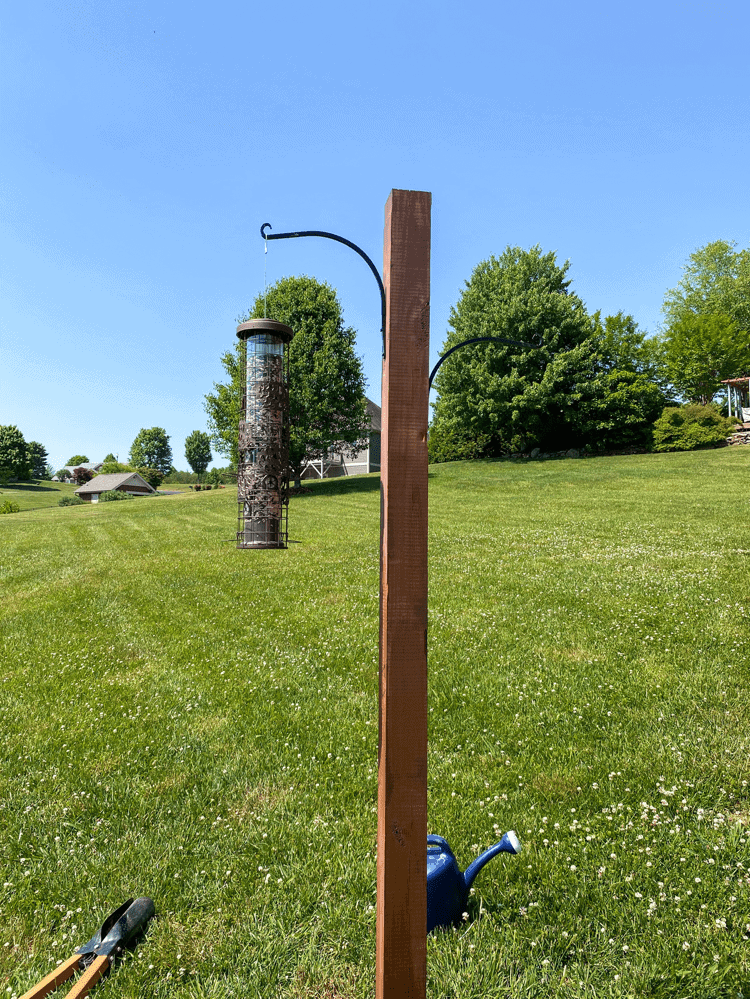
Adding the Hooks to the Post
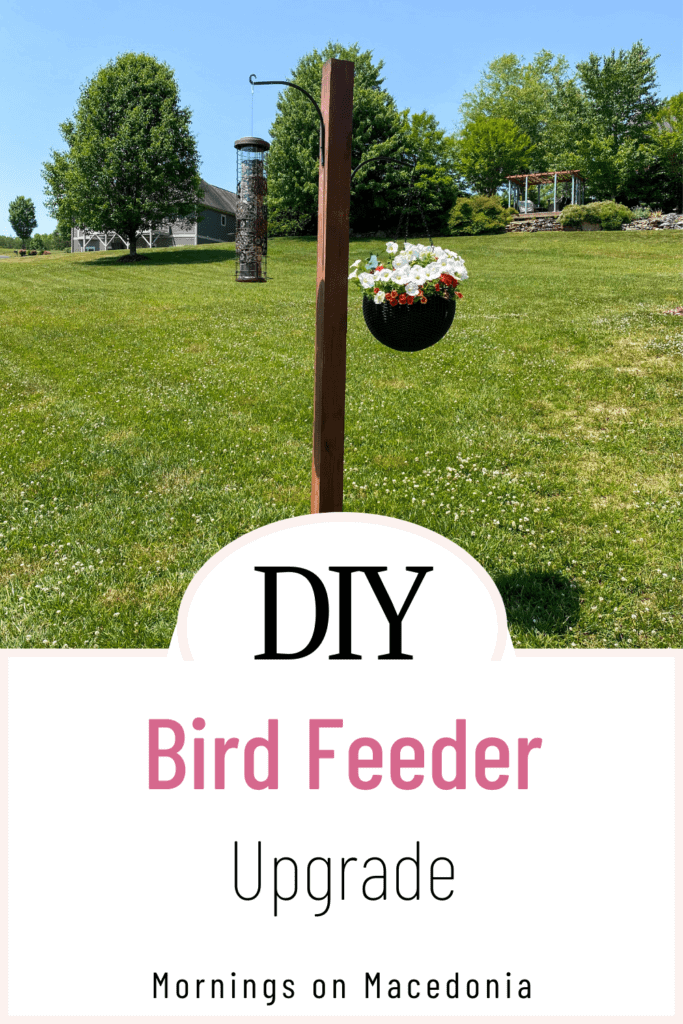
Next up is to add the hooks to the post. This is what we’re going to use to attach the bird feeder to. We got two hooks because we wanted to add in a hanging basket of flowers to make it more aesthetically pleasing as well.
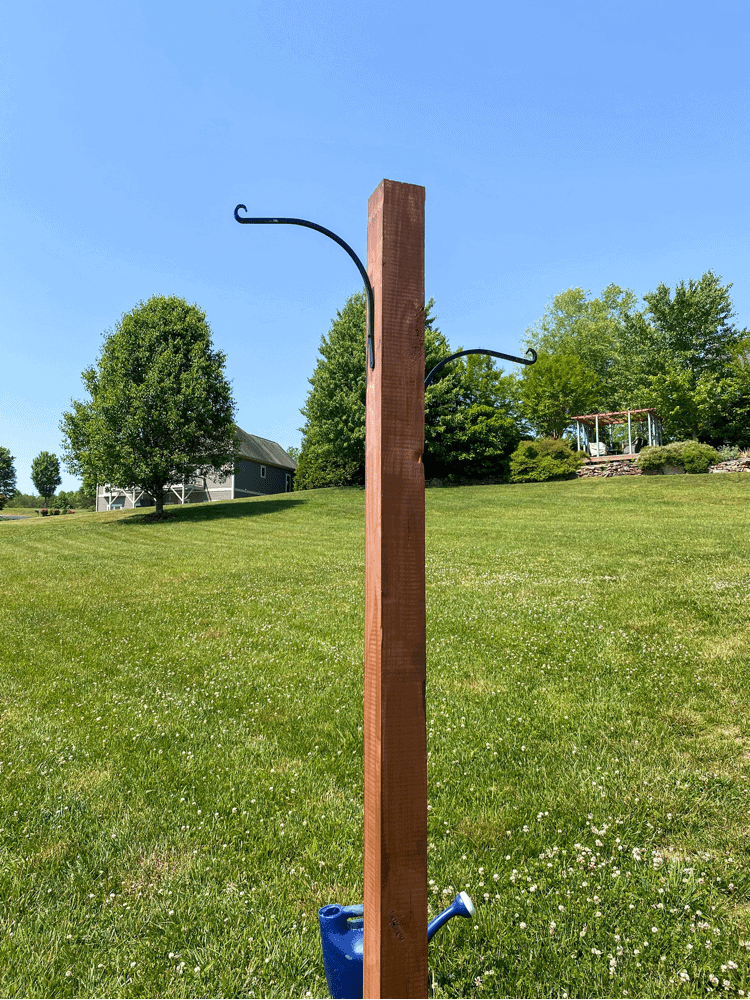
We also chose to hang them asymmetrical to make it more pleasing to the eye as well. I just love how it turned out and the hooks really tie everything in together.
We also upgraded the hanging basket to a more permanent hanging basket too. But, the container they already come in would have been just fine too. I just like how the basket we got also matches the hooks as well!
I linked the exact hooks we used above too, if you’re interested. They are very sturdy and cheap! Also, If you want to see the whole process in action, check out the reel I shared on my Instagram here:
Well, I hope you enjoyed this little DIY bird feeder upgrade. This was such a simple, inexpensive upgrade to do and it really made the area look much nicer in my opinion.
Plus, the birds seem to like it much more than the first one too! And I will take that! It makes me happy to see them eating away on the new and improved bird feeder!

What a lovely spot for birds to feed and to hang a basket! I love how this project turned out. Thanks for sharing how to recreate this Charity!
Thank you so much! I am so glad you enjoyed it!
Great post and how-to for a DIY bird feeder. We really enjoyed reading this post. Thank you for sharing.
Thank you so much! I am glad you enjoyed it as well!
That bird feeder look so lovely. Suddenly Bo want to have one at my home. Thank you for sharing.
Awe thank you. You should definitely get one for your home too!
Oh I love these – what a lovely transformation! The basket is so pretty. Thank you so much for sharing x
Thank you. I am glad you like it too!
This bird feeder is lovely and I’ve liked how you have upgraded it! x
Lucy | http://www.lucymary.co.uk
Thank you so much Lucy. I am loving the upgrade too!
This looks cute! A lovely spot for the birds to come and have a snack, haha! I’d love some more bird feeders in my garden.
Thank you Jenny! I definitely enjoy watching them!
Hi Charity,
Nice job on the transformation of the bird feeder.
A quick question for you – do you have squirrels that take food from the bird feeder? They can be a bit of a pain here – I know squirrels have to eat too, I just wish that it wasn’t at the expense of the birds! 🙂
No, the squirrels haven’t bothered it at all. However, the one I have (and linked in the post) is specifically designed to be squirrel proof as well!
I’ve been wanting to do something different with the stand of the bird feeder/house I have, as it’s very flimsy and doesn’t hold up well, that might be because the squirrels love the bird house but I like them so that is okay lol. 🙂
Lol yes I understand that! I like them too but This bird feeder is supposed to be squirrel proof so maybe I won’t have to deal with them too much with this one!
What a beautiful upgrade! What type of wild birds are you attracting in your area?
Crystal | http://www.amazingbaby.app
We have cardinals and finches and a lot of other ones that I don’t know the exact names of! Lol
VERY detailed and in depth DIY and I love the final product!
Awe thank you so much! I am so glad you think so!
Love this idea, adding the flowers to it as well. I’ve been looking for a hanging bird feeder, ever since our climbing frame got removed and there’s nowhere now to hang the feeders.
Thank you, you should definitely try this out then!
Watching birds come to a feeder brings me so much joy, especially when I am simply sitting outside in a shady spot with a book or perhaps just thinking! Love this easy way to set up a feeder literally anywhere in the yard. 🙂
Yes, it’s right behind our screened in porch so we love to sit out there and watch the birds come and go!
This is interesting, it looks so pretty and better. I think the longer, the better in my opinion looking at the two ways.
Yes that’s why I upgraded it to that
You’ve inspired me to go and do my own DIY bird feeder. Yours look so lovely.
Awe thank you so much! I am so glad I inspired you to make one too!
This looks like a great upgrade and such a cute addition to your garden. Your garden looks so pretty. Thank you for sharing your DIY tips. I can’t wait to have my own garden so that I can have things like this in my garden.
Lauren x
Awe thank you so much. I am so glad you like it too!
What a cute idea. It really is a great upgrade! It adds a touch of class.
Thank you! I am glad you think so!
Lovely post. You made it seem easy to make this beautiful bird feeder. Thank you for sharing. ☺️
Pastor Natalie (ExamineThisMoment)
Letstakeamoment.com
Awe thank you. So glad you enjoyed it too
I love this bird feeder – looks so cute. We’ve recently moved, so I think this would look good in our garden. Your garden looks amazing too!
https://www.mumlifeand.me
Yes, you should definitely try it out for yourself then!
LOVED reading this! This would be such a fun and cute DIY to do once we’re in a house of our own:)
Thank you! It definitely would be!
I love the bird feeder upgrade! It turned out great and I love the flower basket too!
Thank you so much! I do too!
Thanks for sharing, your new upgrade to your bird feeder, it looks lovely 🙂
Thank you. I am glad you think so!