
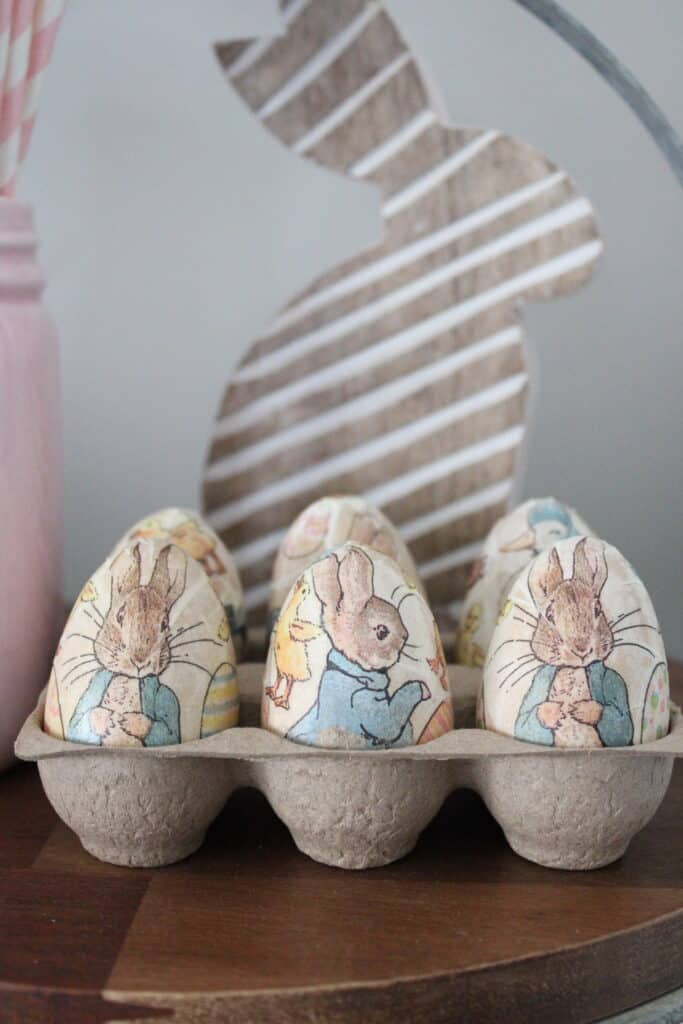
I wanted to try something a little new for my Easter crafting this year. I love the look of vintage easter eggs, but I didn’t want to buy any. However, I knew I could probably make some myself that looked vintage enough. So I thought I would share this little tutorial on how to decoupage Easter eggs if you want to try it out too!
And it turns out, it’s really easy to make decoupage Easter eggs! You only need a handful of materials, and you can honestly make a ton of eggs with that. It all depends on how much you want to do.
I completed these eggs all in one afternoon and then let them dry overnight and that was it! So it didn’t take up much of my time either which is always a good thing!
Keep on reading below for my easy tutorial on how to create these cute, vintage inspired Easter eggs!
This post contains affiliate links. Click here to read my privacy policy.
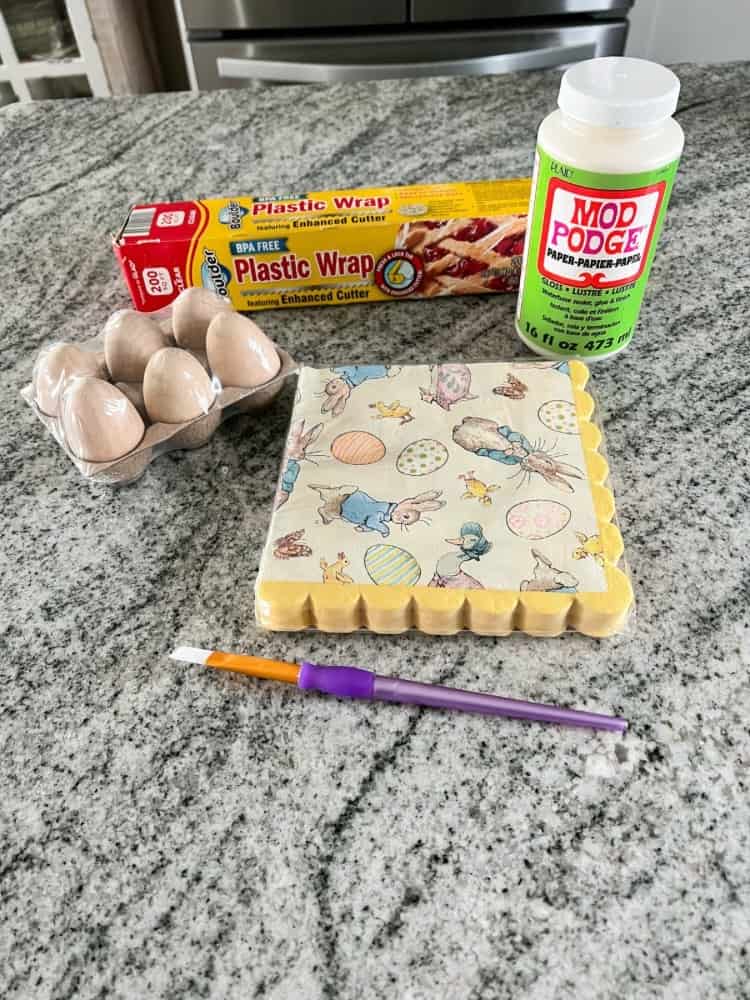
Materials Needed for Decoupaging Easter Eggs:
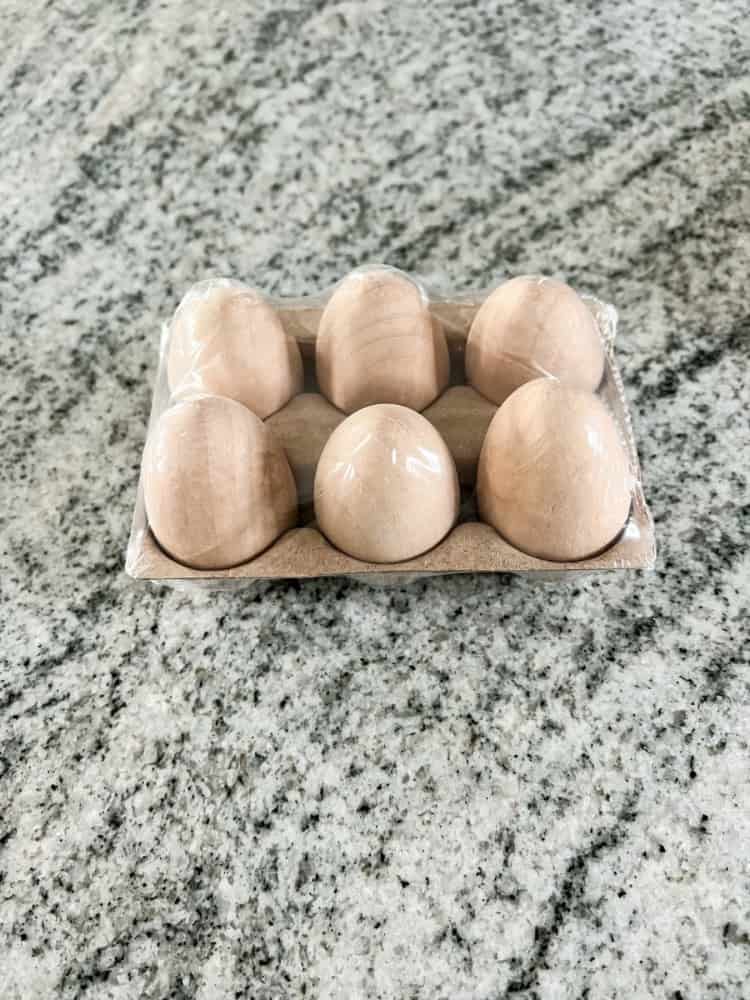
Eggs (I used wooden ones from the Target Dollar Spot)
Mod Podge
Water
Paintbrush
Plastic Wrap
Easter Themed Napkins
See how minimal the list is?! I’m guessing you already have most of these items at home! But just in case, I created a shopping list with everything you may need here below:
Can You Decoupage Real Eggs?
As I mentioned above, I am using wooden eggs for this project. But, I know a lot of people are wondering if you can decoupage real eggs too.
Which, technically, of course you can! It’s just a lot more work to decoupage a real egg. You would of course have to drain it and dry it before using it. But yes, it is possible!

However, I figured I would just save us all a step and go for the faux eggs first!
Can You Use Napkins Or Tissue Paper When Decoupaging?
You can definitely use tissue paper for decoupaging too. If you find some Easter themed tissue paper you would rather use for this project, then go for it!
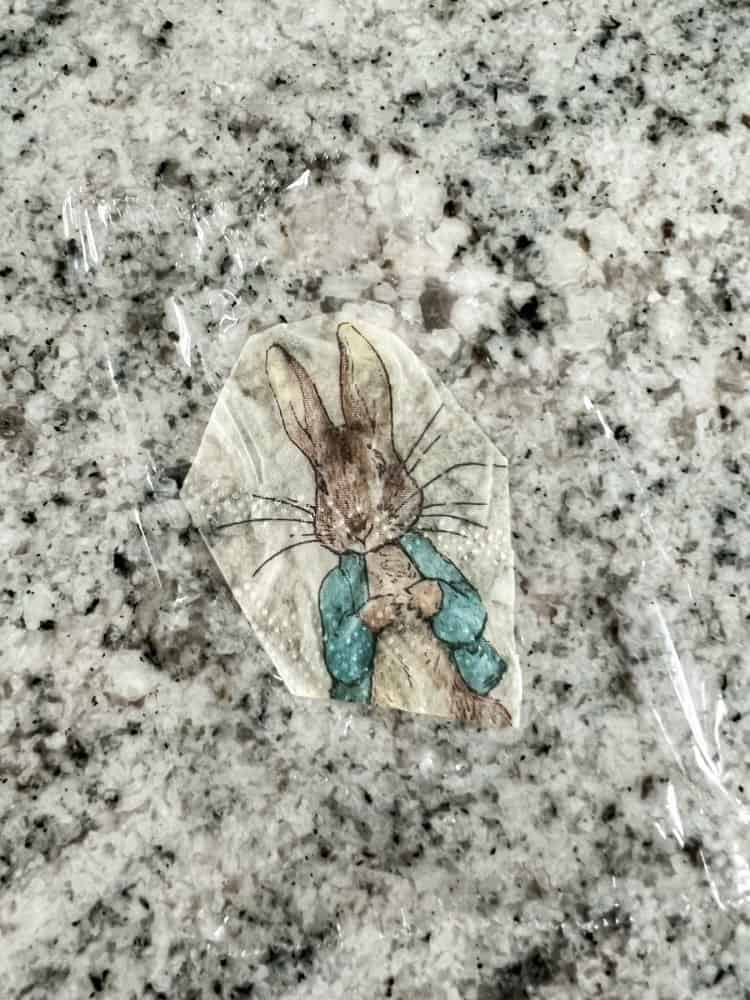
Like I mentioned above, I am using paper napkins. I found these at my local Marshall’s and thought they were too cute to pass up! Plus, I thought it fit the whole vintage Easter eggs vibe really well too!
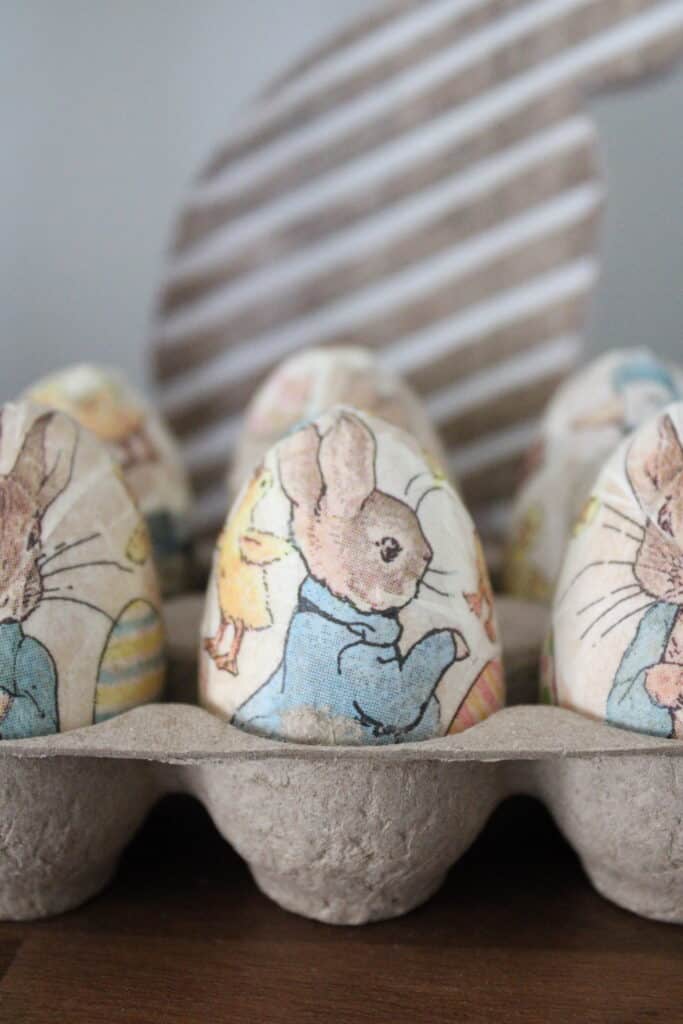
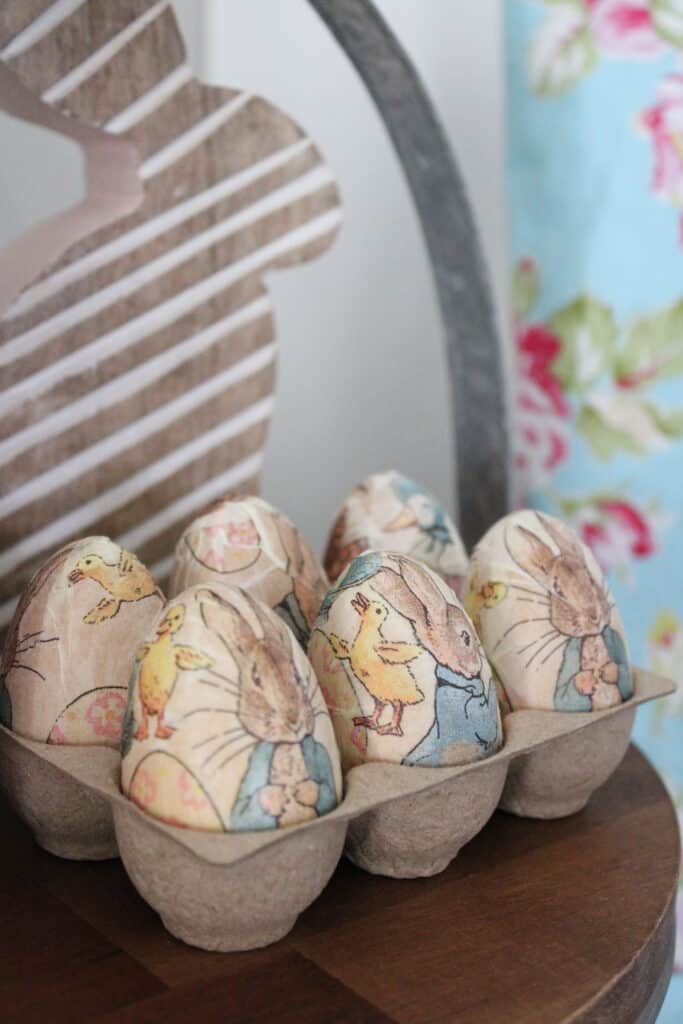
I think the Peter Rabbit theme is absolutely adorable and looks perfect on the wooden eggs!

How Do You Decoupage Wooden Easter Eggs?
Now that we got the material of the eggs out of the way, the real question is how do you decoupage wooden Easter eggs and where do you even start?! Well, don’t panic friends! Because it is actually quite simple!
I was a little intimidated at first because I have never decoupaged anything before. But, I figured it couldn’t be too hard and after learning a few things here and there, I figured it out!
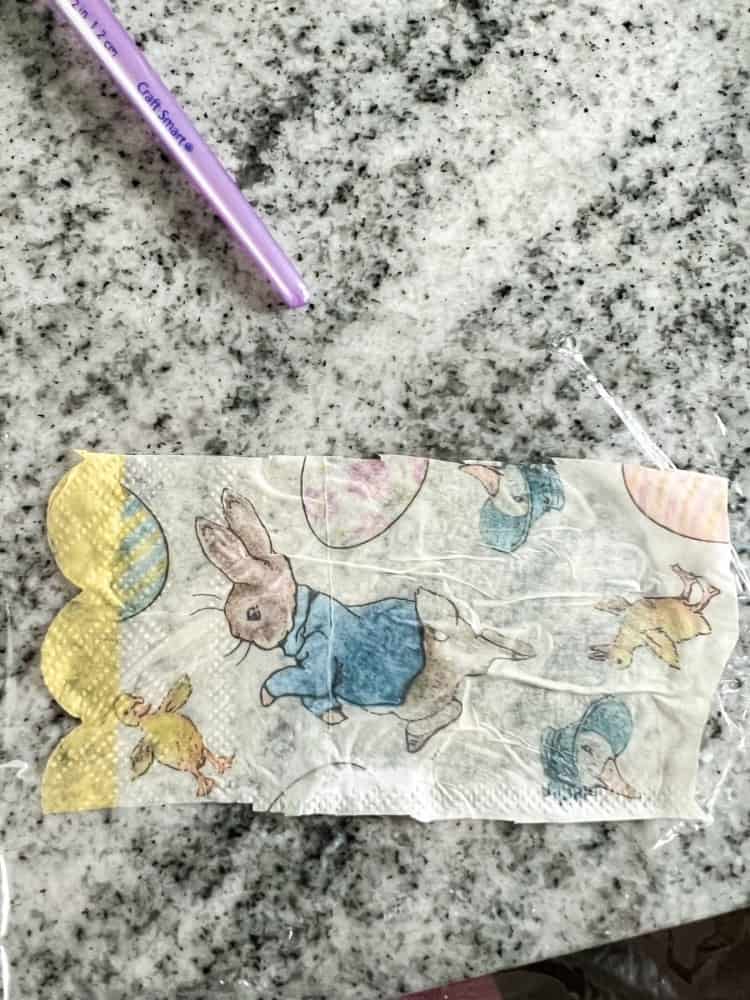
Cut Out Images From Paper Napkins
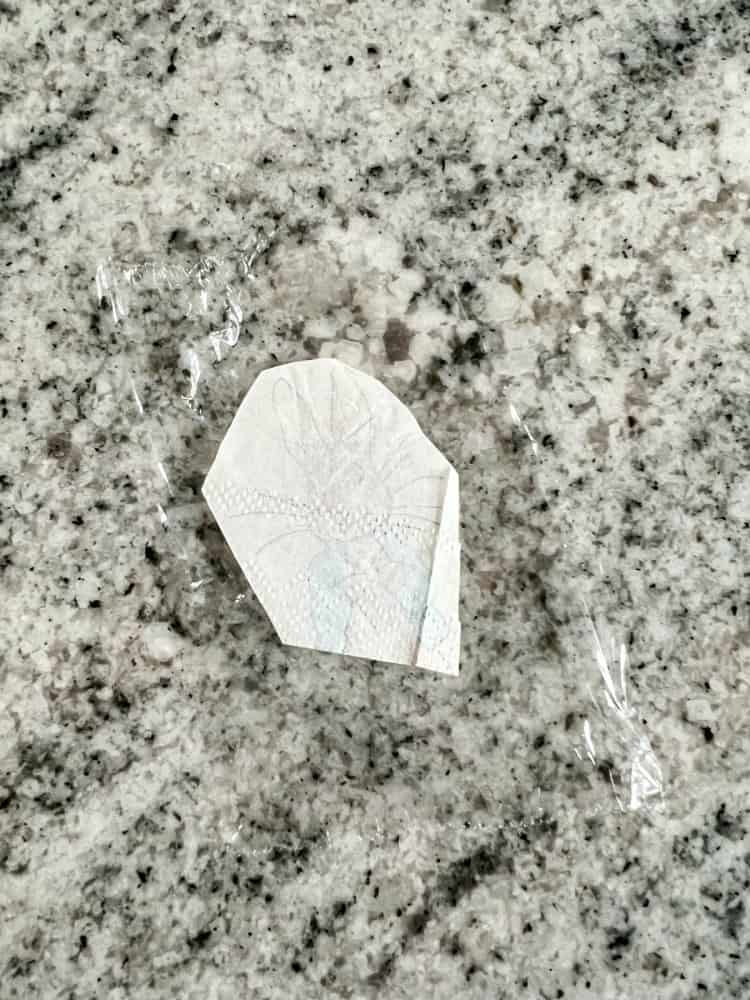
The first thing you wanna do is cut out all the images on the paper napkin you want to use on the egg. This was the most tedious part of the whole craft!
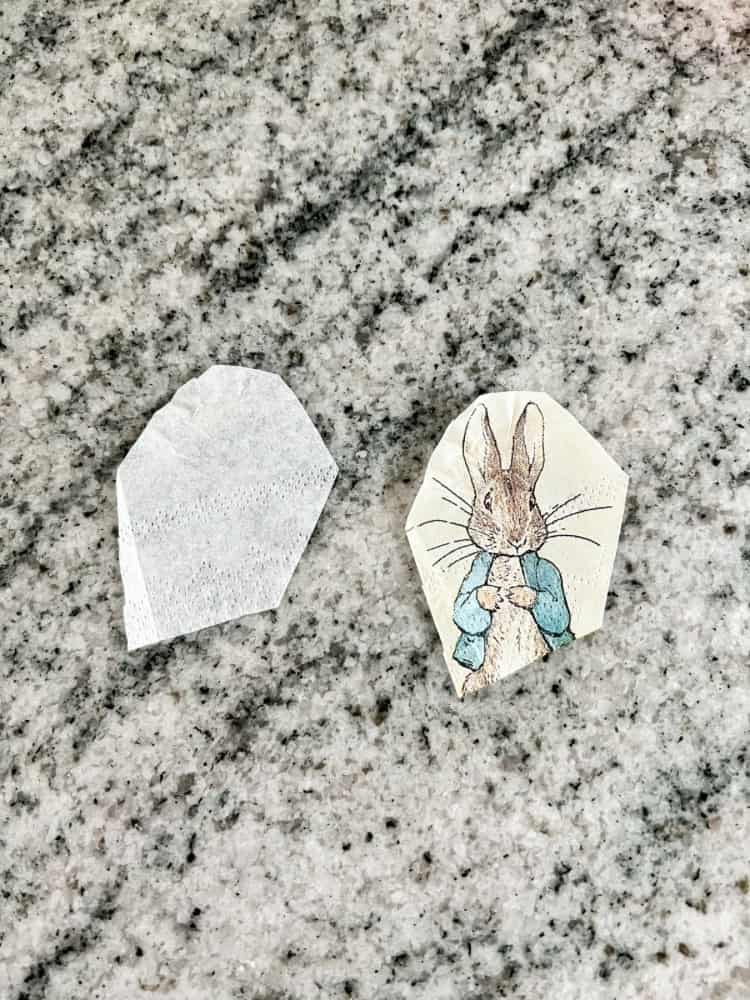
And don’t worry if some of the images are cut off from the napkin edge, you want to use some of the smaller pieces like that for overlapping. I started off with a big image first, like one of Peter Rabbit fully, and then added smaller pieces after that to fill the entire egg.
After you have the images cut out, you then want to separate them from the white paper backing of the napkin. This was fairly easily to do, it started coming apart a little when cutting already. But, I recommend to not separate the two until after you are done cutting everything out.
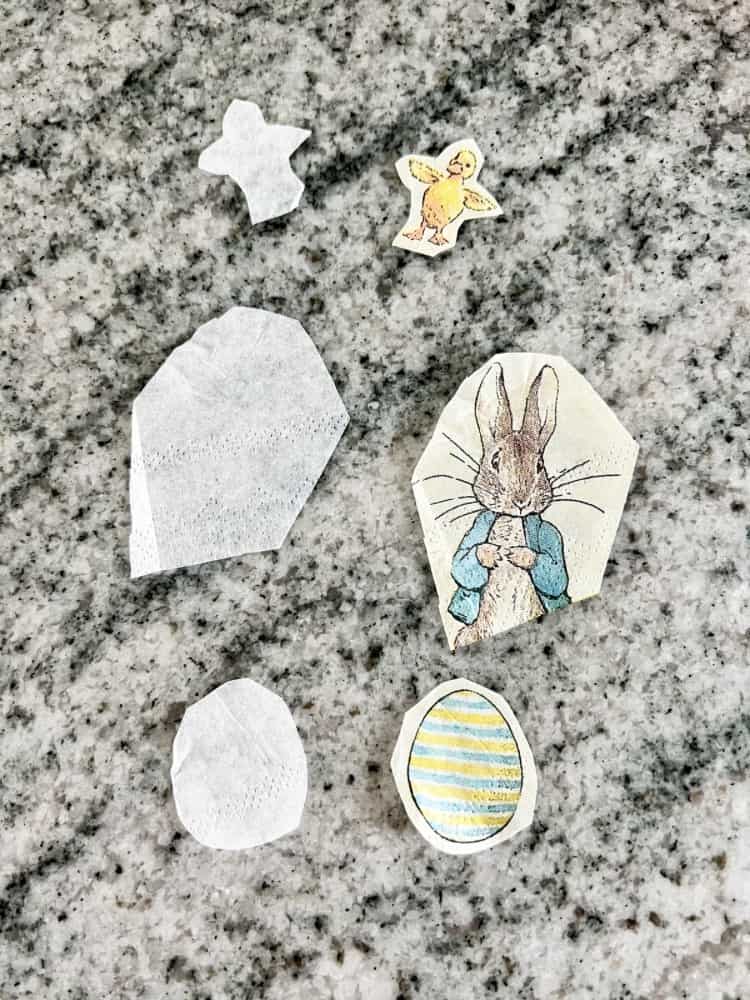
It is much easier to cut out images from the napkin when it is thicker. Once you have it down to one ply, it is very challenging to cut!
Place Images Face Down On Plastic Wrap
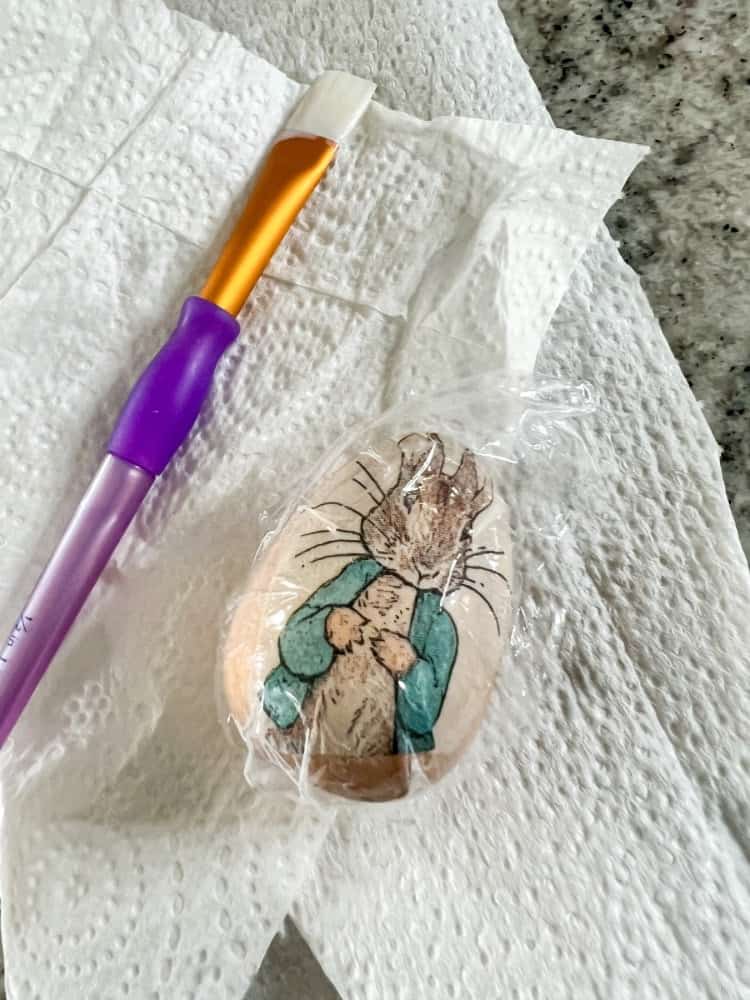
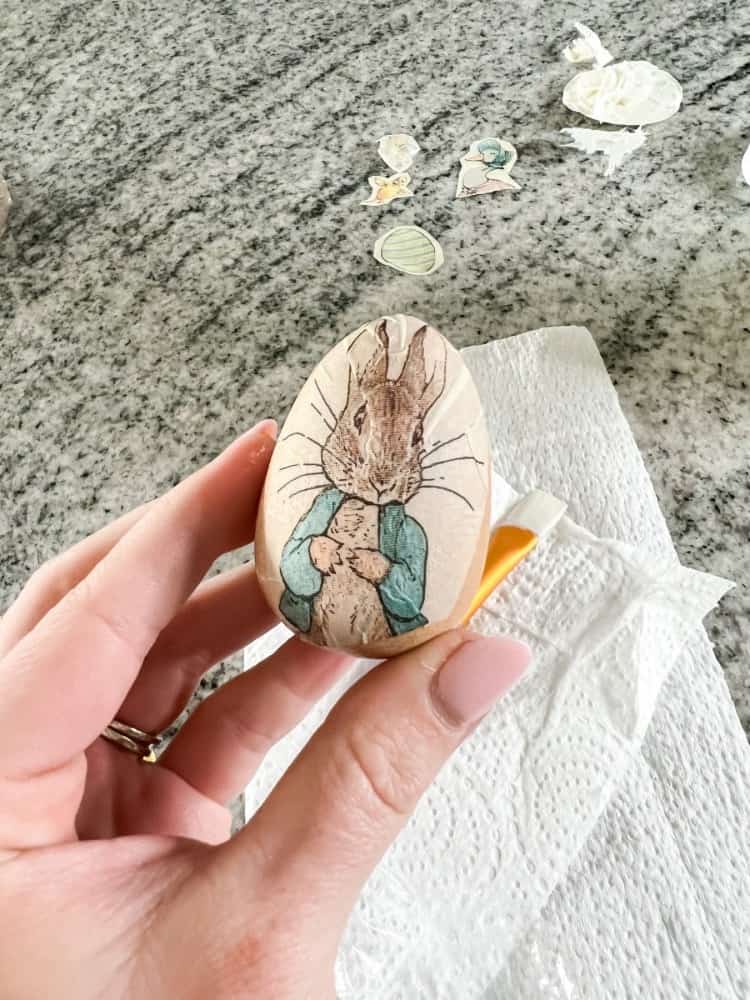
The next step to decoupage Easter eggs is to then place all the images face down on plastic wrap. I then used my paintbrush and dipped it in a little water and added it to the image. That helps it adhere a little better to the plastic wrap.
Then, I applied a thin layer of Mod Podge to the image as well. Also, apply some to the surface of the wooden egg, where you will be placing the image.
Apply To Wooden Eggs
Once the Mod Podge is applied, place the image with the plastic wrap onto the egg. You can then try to smooth out the image by rubbing on the plastic wrap until you get the desired results.
Now, since it is a very curved surface, the results won’t be perfect. I had quite a few wrinkles in mine, but again, I think it gives it a more vintage inspired look. Which was exactly what I was going for anyway!
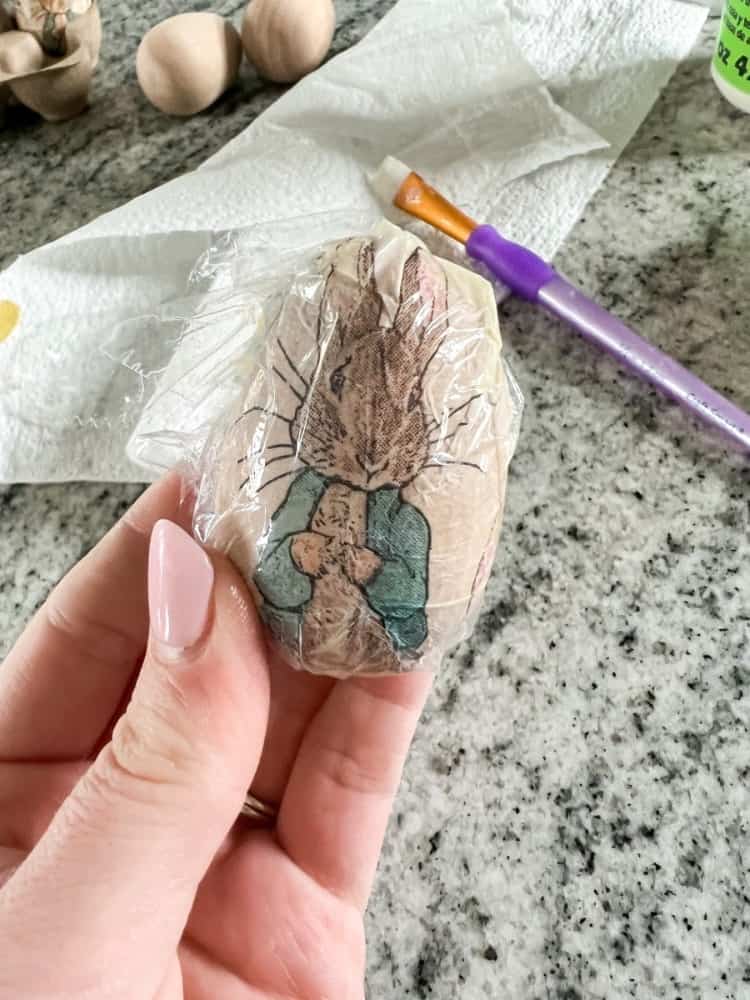
Then, carefully peel the plastic wrap away and smooth out any more imperfections with your fingers. Apply another coat of Mod Podge once you have the image down where you want it.
Repeat this process until you have the entire egg covered with Easter images! Let them dry overnight and then you can use them for decoration or whatever your heart desires!
Do’s And Dont’s Of Decoupaging
I realize the process is somewhat tedious to do. It’s very easy, but time consuming. So I decided I was going to try to skip a few steps on some of the eggs.
But, they definitely didn’t turn out as cute as the ones I did with the above method. I was tired of cutting out individual images, so instead I just cut out a strand that was roughly the same size of the egg.
I then used the plastic wrap method, same as above, to adhere it to the egg. However, as you can imagine, there was a ton of overlap and wrinkles when doing it this way.
Yes, it was much easier, but I don’t think the end results were worth it. I liked taking the extra time and care to creating the beautiful decoupage Easter eggs pictured above instead!

Enjoy Your Eggs!
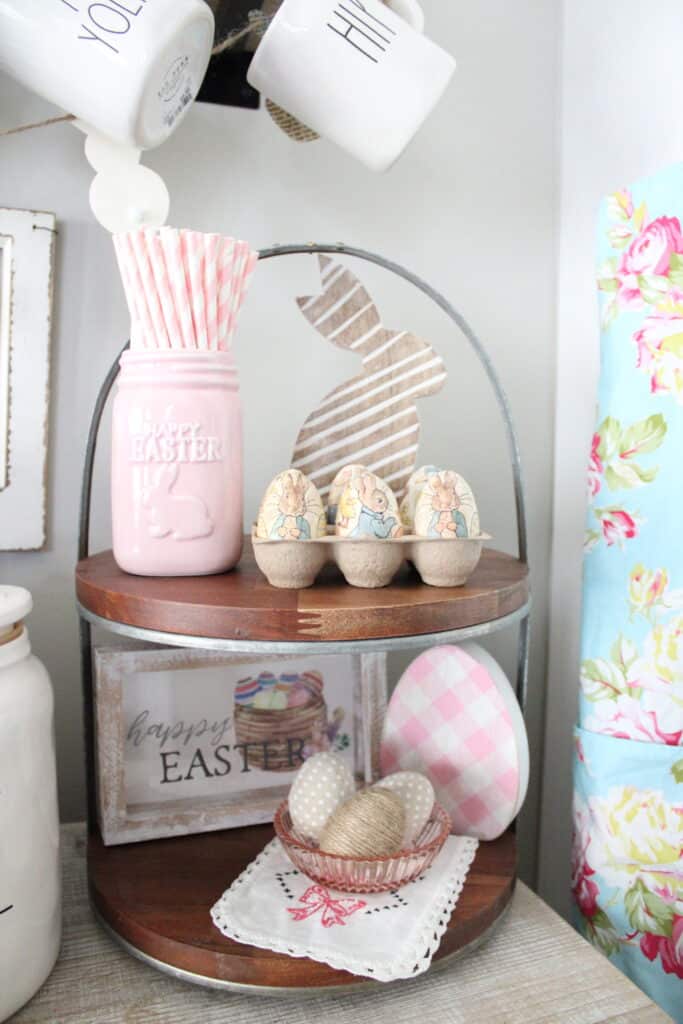
Well, that’s it my friends! I told you this was a super easy DIY Easter craft! I loved the way they turned out and how vintage they look!
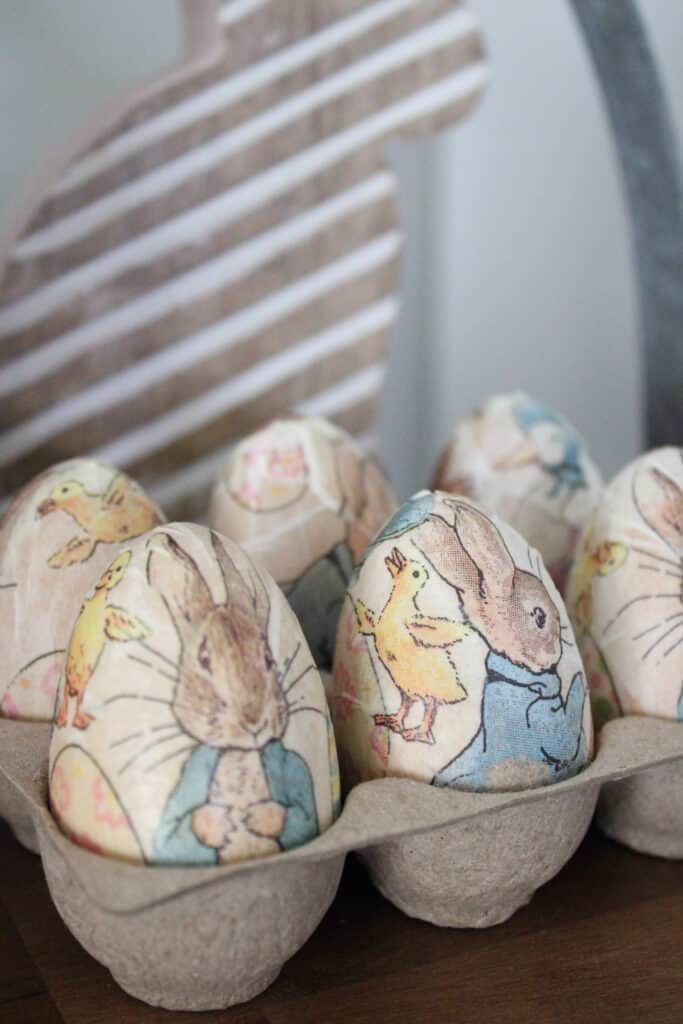
They will go perfectly with all my other vintage Easter decor as well. Have you ever decoupaged before? If so, let me know below! I would love to hear how it went for you too!

Love Peter Rabbit! These eggs are so cute. Thanks for tje directions. Linda
Thank you! I love the Peter Rabbit theme to them too!
These are adorable!
Awe thank you so much!
I love this decoupage Easter egg idea! I did something similar with fabric and a clear glass plate for Easter years ago. I will have to get out the Mod Podge and give this idea a try. Thanks for sharing!
Oh that idea sounds cool too! Thank you so much!
Love these DIY posts! The breakdowns are amazing, and the activities are so much fun. This is such a cute project! Thanks for sharing 🙂
Thank you so much, so glad you enjoyed it too!
This is such an interesting Easter-themed creative activity! These eggs look great! x
Lucy | http://www.lucymary.co.uk
Thank you Lucy. So glad you think so too!
These instructions on how to decoupage Easter eggs are fabulous! The eggs are adorable – great job! I’m inspired to try this project for Easter!
Thank you, you definitely should try it out sometime!
These are incredibly cute! I remember doing something similar as a child with my mother. She loves easter time and we would often do easter based crafts. I have a vague memory of something like this!
Thank you so much! That is such a cool memory!
I’ve never heard of this before but it sounds so fun!! I’ll have to try it one day. 🙂
Thank you, you definitely should try it out sometime!
Oh wow… decoupage on eggs! Love craft. My auntie knows how to make decoupage on straw totes. They are lovely!
Thank you. I bet those straw totes are beautiful too!
Wow what a neat idea and such a beautiful way to decorate for Easter. Will have to send along to my friends with kiddos so they can give this one a try!
Yes, you definitely should!
These Easter eggs look wonderful! Thanks so much for sharing your ideas! I love it.
Awe thank you! I appreciate it!
I love the eggs do u think it would work on real boiled eggs
Super cute
I’ve read that it can, but I don’t really want to try it out myself! I will stick to the wooden eggs! Lol
This is such a lovely idea and it looks so good; I love craft ideas like this — thanks for sharing!
Thank you Molly. I am so glad you like it too!
Oh these are great!
I love Peter Rabbit
Might suggest this craft to my daughter who adores arts and crafts and is always looking for something new to try
Thank you Donna! You definitely should. It was a great craft to do!
This is one of the coolest things I’ve seen! Decoupaging sounds so fun and relatively easy to make. I think the creativity is amazing and would be great for a lot of things including easter eggs. Thanks for sharing!
Thank you, yes, you could definitely decoupage a ton of things! The possibilities are endless!
I love the napkins-they are so perfect for this project! I have done decopage before, so may have to try it on eggs. Thanks for the cute idea!
No problem at all! I hope you get a chance to try it out soon!
The napkins have three layers—did you just remove one layer or two layers? My egg is still wet, but it doesn’t look as white as yours. I got my eggs at Target.
I thought my napkins only had two layers. I removed it until there was only one layer of the napkin remaining though
Thanks. I ordered the ones you linked. Susan
What cute eggs! Do you paint your wooden eggs first or do you decoupage all the egg with plain part of the napkin?
Thank you!! I didn’t paint them, I just decoupaged the whole egg. No paint!