
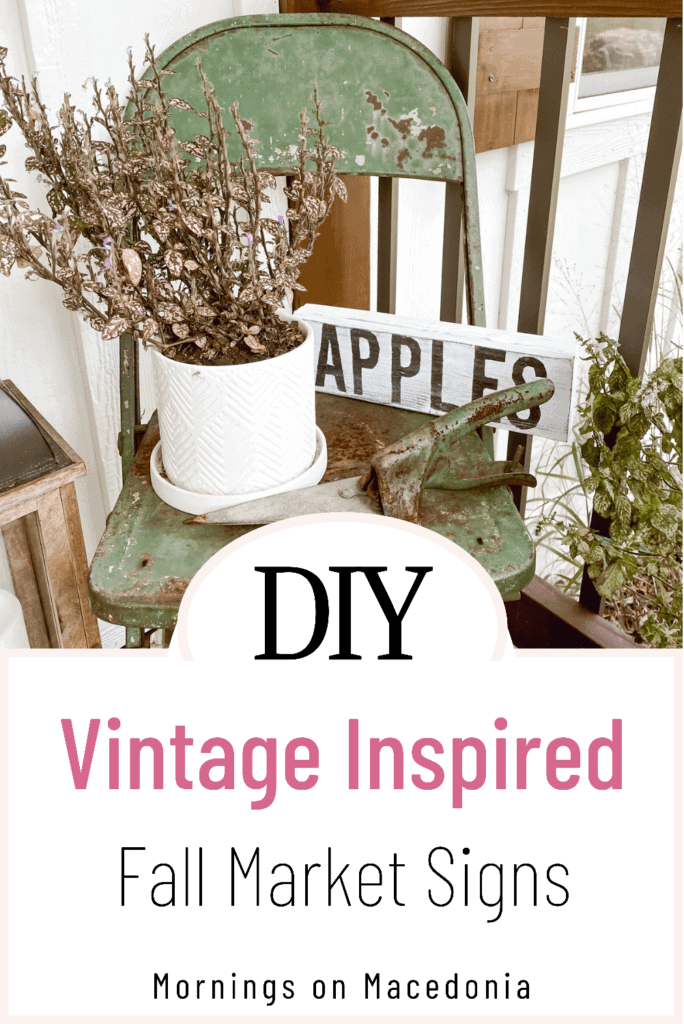
Don’t you love a good, chippy sign?? I know I sure do, but unfortunately a lot of those good vintage signs come with a pretty price tag. So that’s why I thought I would share with you all these vintage inspired fall market signs.
It all came together with just a few supplies and didn’t cost much at all! I was inspired by my friend Jenn’s Instagram Reel and that’s where I got the idea to make these little cuties. My plan is to decorate my porch with them for Autumn!

This post contains affiliate links. Click here to read my disclosure policy.
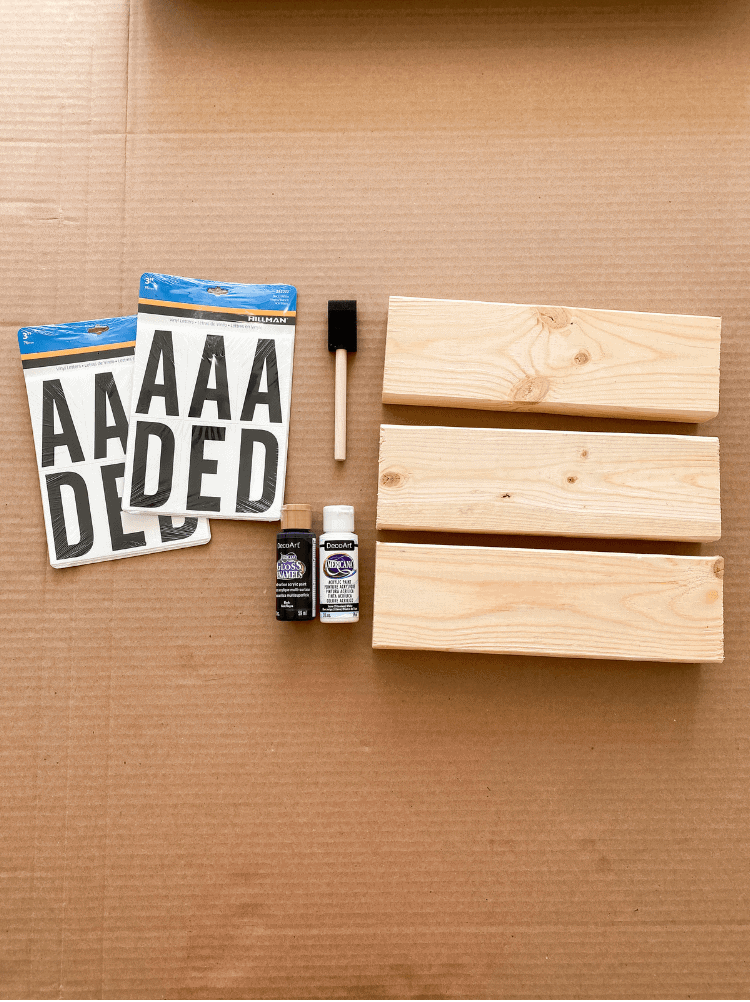
Materials Needed:
- Wooden Boards, cut to your choice of length
- White Acrylic Paint
- Black Acrylic Paint
- Foam Brushes
- Sandpaper
- Mailbox Letters

Cut Your Wooden Boards For The Signs
I was lucky and already had a bunch of scrap wood cut down to the same size. So therefore, I didn’t need to use a saw or anything to cut down my boards with.
If you need to cut down your boards you have, you may also need a saw for this part. But I was just able to grab 3 of the same sized boards without any measuring or cutting! So talk about an easy DIY.
I will say the only downside was that since they were already pre-cut, I didn’t have one long enough to do a “Pumpkins” sign. You could be better off pre-measuring and cutting them yourself to make sure you have enough room for what you want them to say.

Paint The Signs Black
The first step to these vintage inspired fall market signs is to just paint all the wooden boards black. I used two coats total for both sides and let them dry fully in between.
I just used the cheap foam brushes to paint the black on. No need for it to be absolutely perfect here because we are going to paint it white on top and then sand it.
So it doesn’t need to be completely coated, unless you want it to if you prefer not sanding them down at the end.
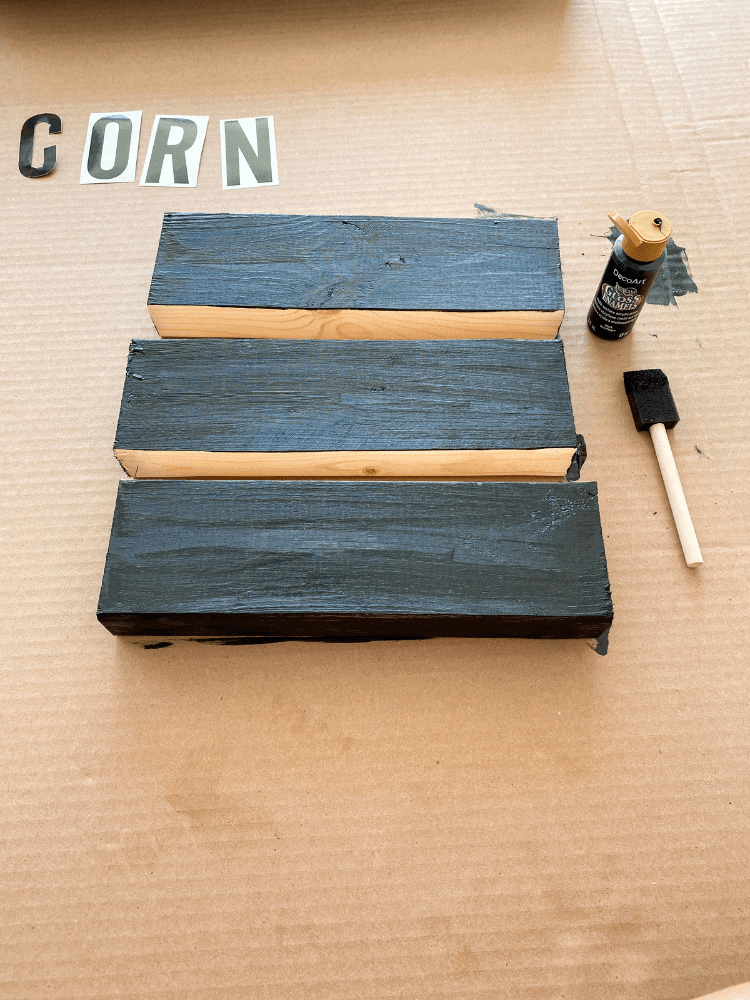
Cut Out Your Mailbox Letters
I did not realize that the mailbox letters had a white backing to them, so I had to cut them out so it would be just the letter itself.
If you wanted to use just some alphabet stickers instead, you definitely could and it may be a little easier. However, I liked the font of the mailbox letters. I felt like they fit the whole vintage vibe here a little more.
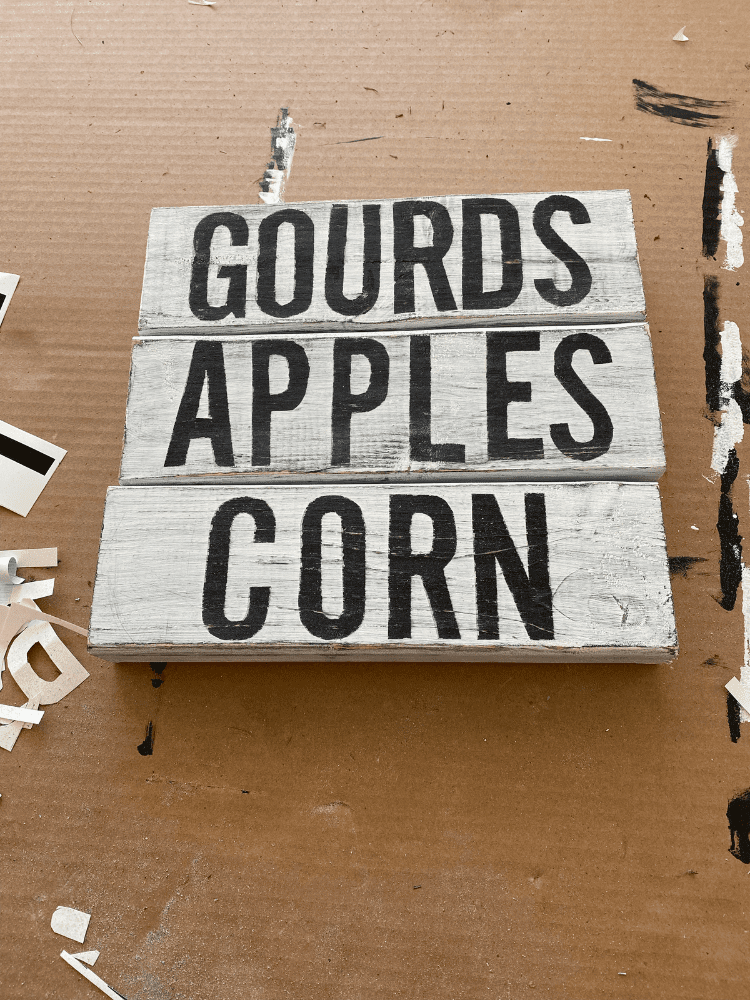
I then used fall produce terms to create these vintage inspired fall market signs. I decided on “Corn, Gourds, and Apples”. Like I said above, I wanted to do “Pumpkins” too but it didn’t really fit well on the size of the wooden boards I had already.
You could do as many or as little as you want and come up with really any kind of fall saying as well! Once you have came up with your saying, simply stick the mailbox letters on the sign where you want them to be placed at. But check and make sure your black paint is all dry before doing that.
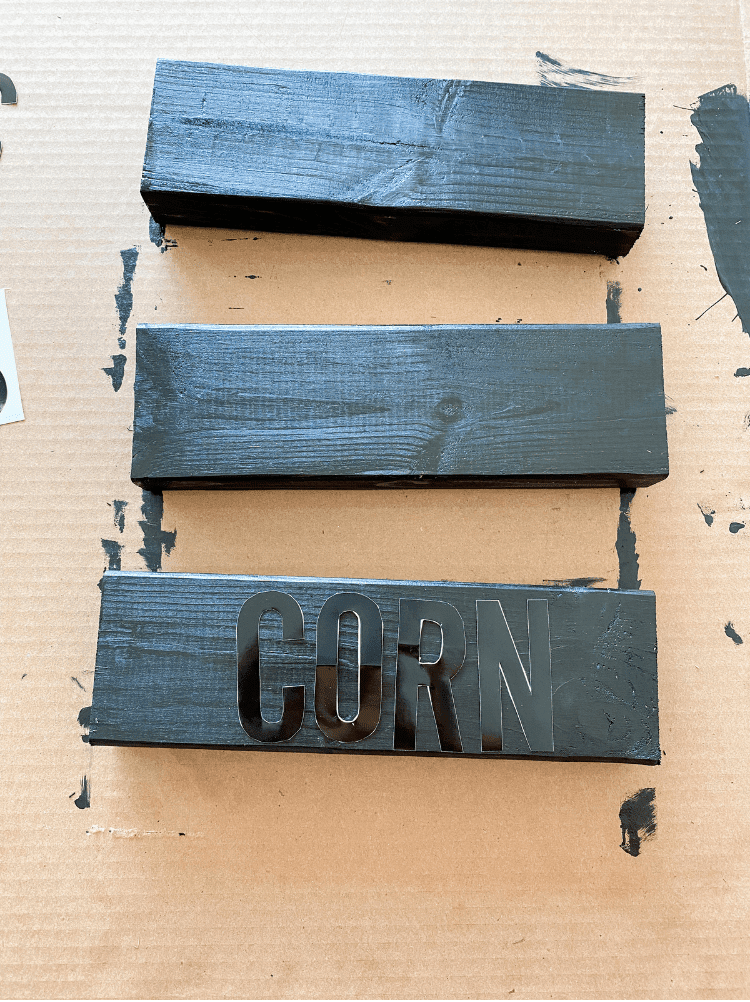
Paint The Signs White
After you have placed the mailbox letters on the signs, you now need to paint over them with white. Again, I used two full coats here and let them dry completely in between.
Don’t worry about going over the letters fully because after the paint dries here, you will peel the letters off!

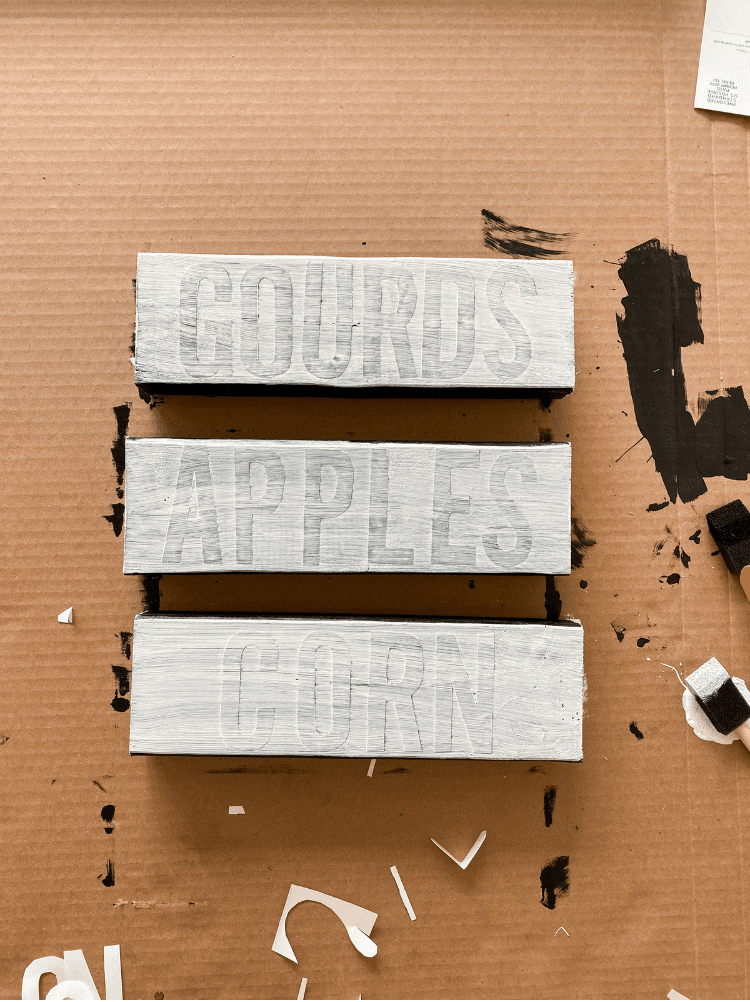
Peel The Letters Off and Sand!
The next step to these vintage inspired fall market signs is to peel the letters off. They should come up fairly easily. And don’t worry if some of the white paint bleeds through on the letters.
They are supposed to look vintage and rustic. However, if there is a spot where a lot of paint bleed through, you could easily touch it up with a little black paint. I did have to do that to one letter, but the rest of them were just fine.
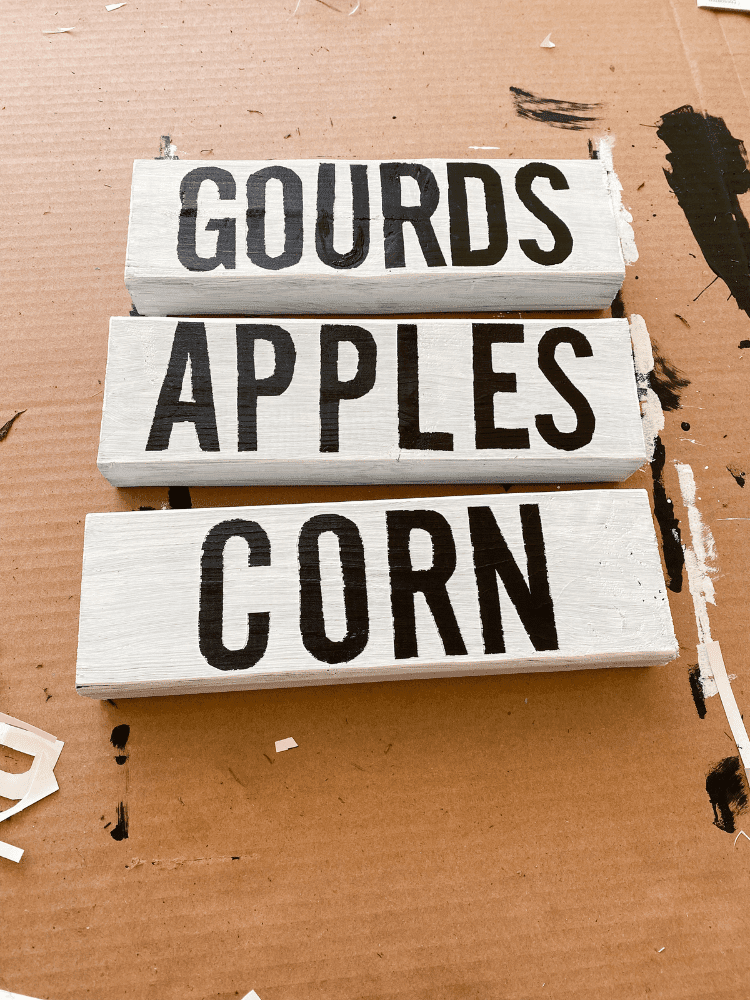
You can be done here at this step if you want. Or if you want to continue to make them look even more vintage, then let’s sand them down! I just used a single piece of sandpaper and lightly sanded the signs down.
You could do as much or as little as you want to here. I liked having just a little bit of the natural wood color showing through, especially on the edges of the sign. I felt like that made it look really old and rustic!
Conclusion
Well I hope you enjoyed this little easy tutorial of these Vintage Inspired Fall Market Signs! It was a lot of fun to make and only took me a couple of days. So really anybody can do it!
If you’re looking for a simple DIY project, then try these out and let me know how it goes! I can’t wait to start decorating my porch for fall with these adorable little signs!
I love vintage style home bits, and this sign is so cute 🙂 thanks for sharing a budget-saving way to get what you want x
Thank you. I love a budget friendly way to get some good decor!
I love vintage and vintage-style signs and I was just looking at some to brighten up the decor in my home. I hadn’t thought of making my own but this is perfect!
Thank you. You definitely should try making your own for sure!
Hi Charity,
How very impressive! Not being very artistic myself (I didn’t even know that you could get foam paintbrushes!), I’m always amazed at the wonderful things that creative people can make. And you have done a great job with these signs – I love the distressed look that you’ve achieved. Thanks for the tutorial 🙂
Lol yes, the foam paintbrushes are like the cheapest ones. Thats why I get them!
Ah I love these! I love how vintage they look but also how easy they are to make. Perhaps I might try something like this for Christmas decor!
Yes, I was thinking I want to make some for Christmas too!
Ah these are amazing and so super simple to make. I love that you can distress them even more if you want them to look more vintage!
Rosie
Thank you. I love distressing them too!
This sign looks awesome. I love the rustic look of this. Thank you for sharing your guide to creating this project.
Lauren – bournemouthgirl.com
Thank you. I am so glad you think so as well!
these turned out beautiful! thanks for sharing such a fun and creative craft with us. i love when crafts turn into beautiful home decor. very multifunctional.
Thank you. I love doing crafts for home decor too!
Love these – they’re so cute! They look so simple and easy to make too, I must give them a try. I really love the vintage feel of them too! Thanks for sharing x
Thank you! You definitely should try them out!
These market signs are amazing and I love the vintage look that they bring! x
Lucy | http://www.lucymary.co.uk
Thank you. I do too!
Wow, these look so authentically old! I love that it is the sandpapering that gives them a battered, rustic edge and literally anything could be written on them.
Thanks for sharing!
Yes, you could really get creative with these for sure!
I love the vintage look of these signs and it looks like an easy (albeit multistep) project! Thanks for sharing.
Thank you. I am loving the vintage look to them as well.
Lovely ideas, never though about the sign like this and so simple
to make. Thanks for sharing..
Thank you. I am so glad you think so
This is such a clever and easy idea! I love vintage signs, so I might have to give this a go 🙂 Thanks for sharing!
Thank you. You definitely should. They were a lot of fun to make
I love these signs! Thanks for showing a budget friendly way to make something so aesthetically pleasing for autumn 🙂
Thank you. It was very budget friendly for sure!
Agreed, chippy signs and a bunch of other DIY themed signs from where I live are pretty expensive. It’s a good way you’re sharing the creative how-tos here for free. Thank you so much!
https://www.lifebeginsattwenty.com/
Thank you. It definitely is a more cost effective way to do so for sure
Wow, this is my first time visiting your blog. I think vintage is stylish and cozy at the same time. Nice to see some DIY projects like this. Keep going!
Well thank you! I hope you stick around because I definitely share a lot of easy DIY projects like this!
I love how these came out! Thanks for sharing.
Thank you, I am so glad you think so!
This is such a simple but cute idea!
I love a bit of handmade on a budget, especially for seasonal stuff that isn’t out for that long!
These look really good and to think, you can customise your own.
Thanks so much for sharing!
Thank you. You could definitely customize these to however you wanted for sure!
That is really cute! I should try this with my Mom. I would love this for my house! Thanks for sharing this idea with me!!
Yay! Glad you enjoyed it. And yes you definitely should!
I’m feeling seriously inspired to grab all the goods and make these now! I just moved into my new home and I’m ready to DIY all the things. Thanks for the inspiration!
Awe yay. I am so glad. You definitely should try it out sometime
These turned out SO good! I love it. Will most certainly be making some for myself. Yay!
Thank you! You definitely should. They were a lot of fun to make!
Such an inventive thing to do! They look really great.
Thank you! I really appreciate it!
Such a good idea! I love how these came out. I like that vintage look but sometimes its hard to find good signs!
Thank you so much. It is hard sometimes so you have to take matters into your own hands!
I can’t believe how easy this is to make! I would have never guessed it was mailbox letters. That’s genius. I thought it was a stencil, which is too much work for me. lol Thank you so much for sharing this cute idea. Decorating for fall is my FAVORITE!
Thank you so much! Decorating for Fall is definitely my favorite too. And Christmas as well!
So cute, and such a great idea. I am kind of jealous I hadn’t thought of this before finding this post. 🙂 Can’t wait to go to my local hardware store now.
Awe yay. So glad you love them too!
I love these signs with the distressed look! They’re so cute & perfect for the Fall.
Thank you so much my friend! I appreciate it