
Who doesn’t love a super easy Dollar Tree pumpkin craft?? I know I sure do. And I’d rather make some awesome DIY mercury glass pumpkins myself than spend a fortune on them in an high end store.
So if you’re looking for some of the best Dollar Tree pumpkin crafts to do on a budget, then you’ve come to the right place!
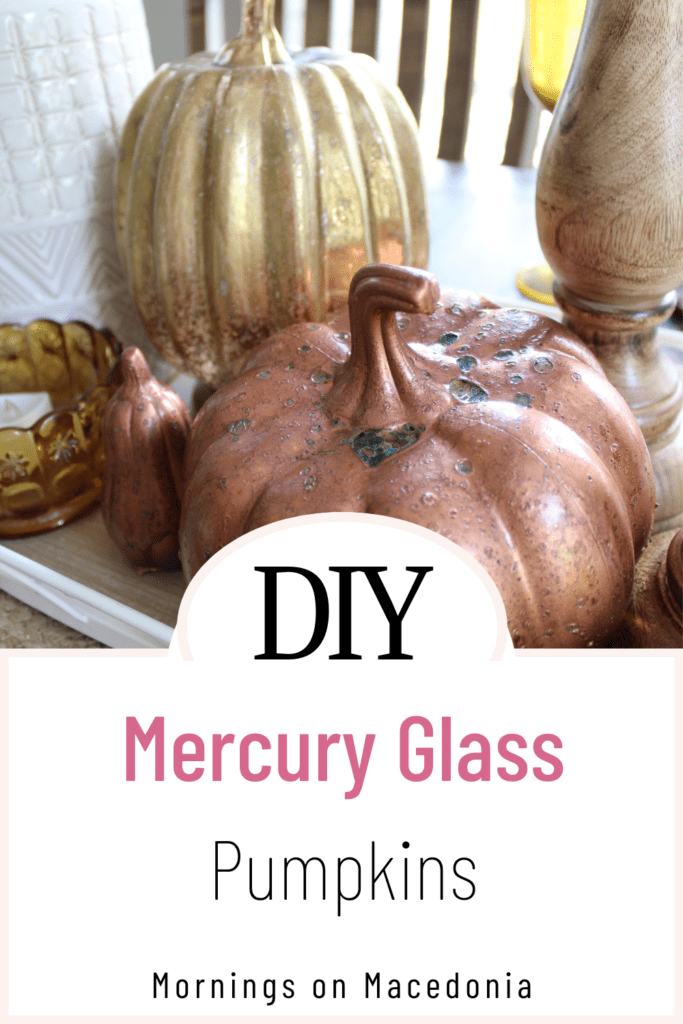
With only a handful of materials needed for this easy DIY, you will have some beautiful faux mercury glass pumpkins in just a few minutes!
I absolutely love how they turned out and I can’t want to decorate and style with them for the fall season!
This post contains affiliate links. Click here to read my disclosure policy.
Materials Needed for DIY Mercury Glass Pumpkins:
- Dollar Tree pumpkins
- Target Dollar Spot pumpkins
- Metallic spray paint, I used copper and gold
- White distilled vinegar
- Spray bottle, to pour vinegar in
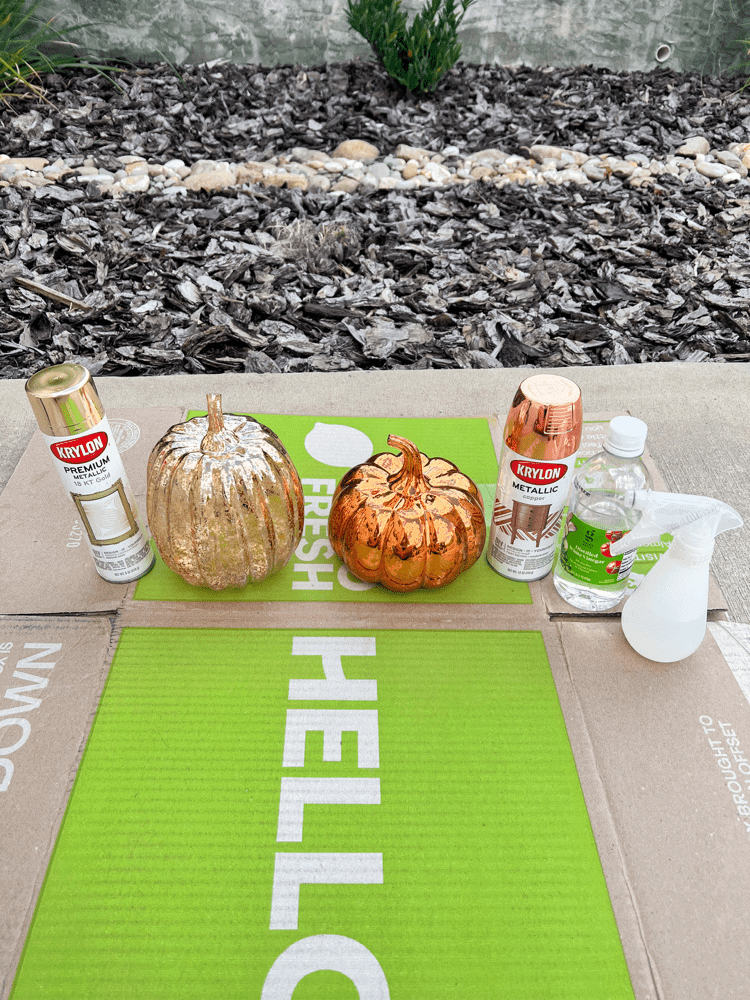
Spray the Pumpkins with Vinegar
I originally went in to my local Dollar Tree looking for the little mini glass looking pumpkins. However, my Dollar Tree didn’t have the mini ones and just had the bigger ones instead.
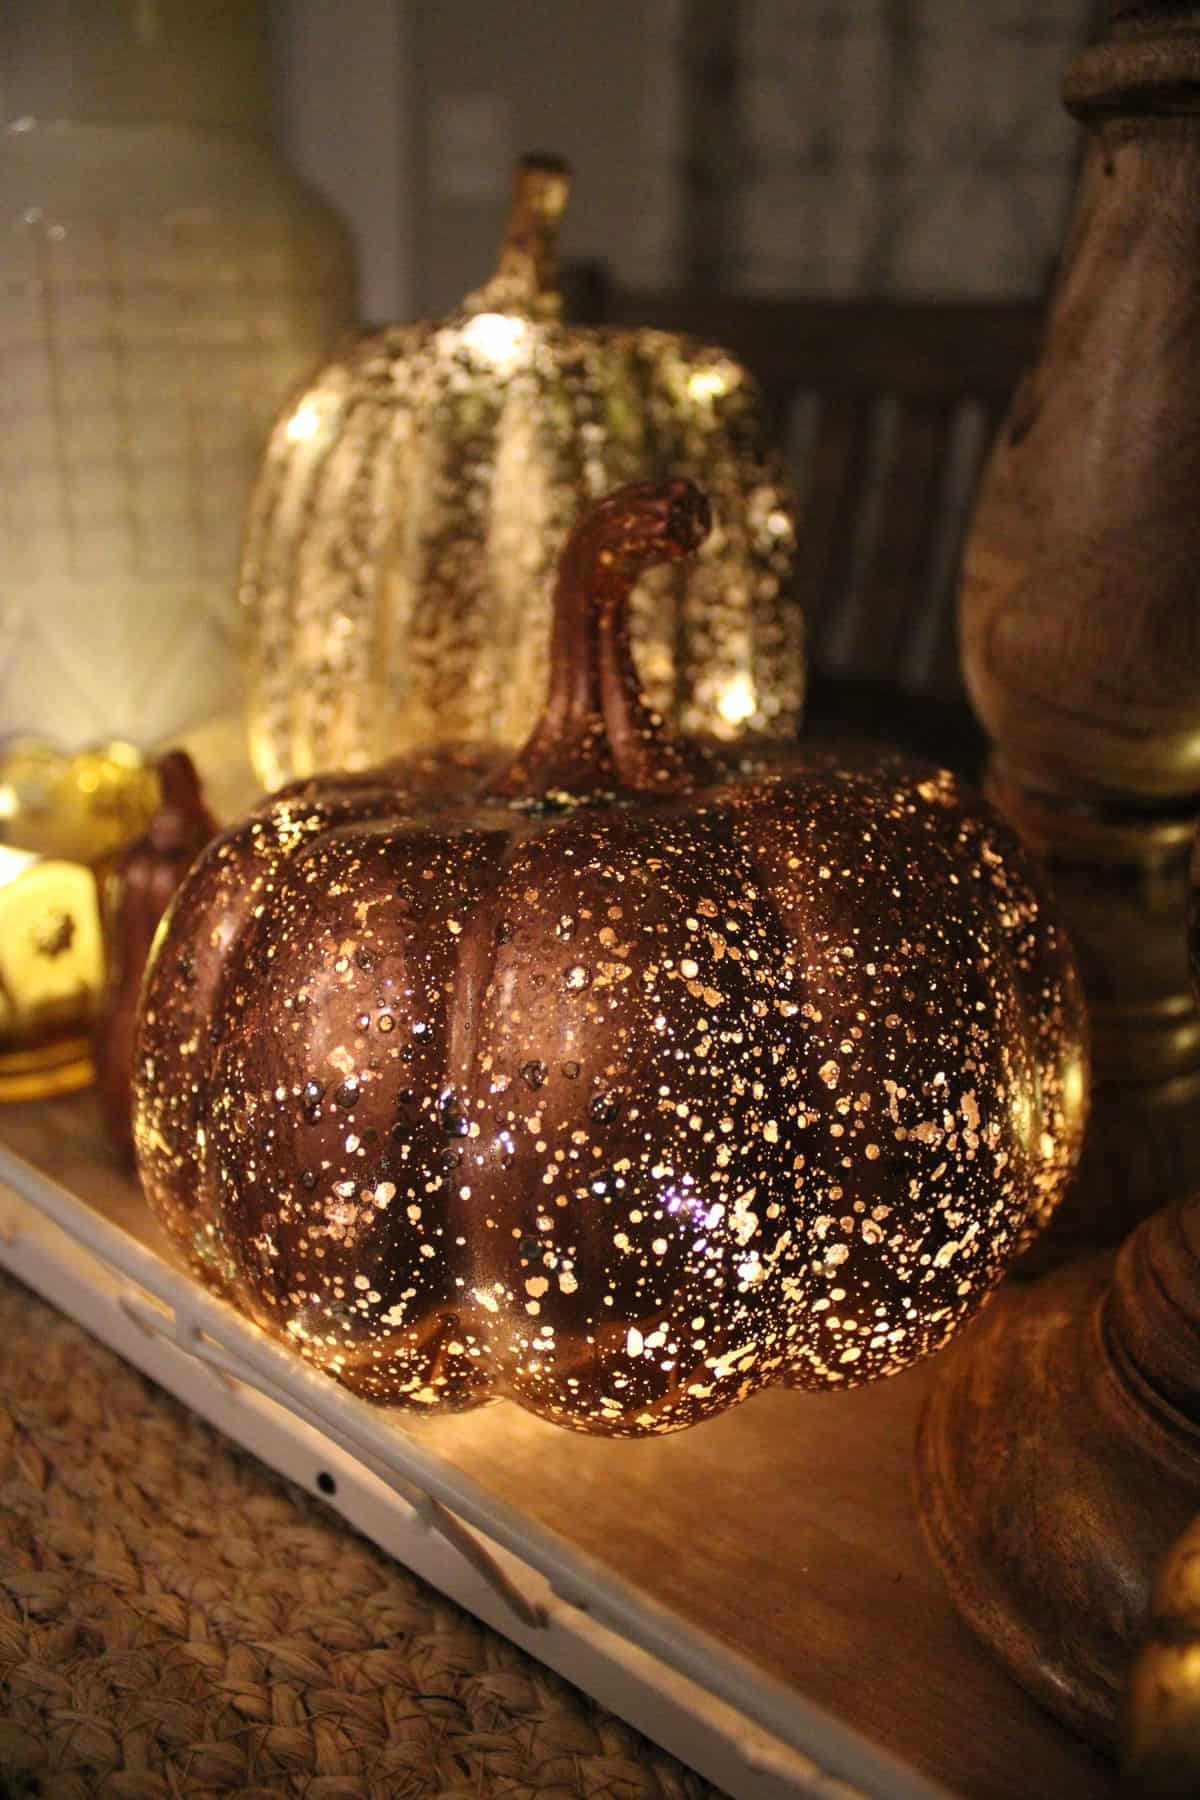
But, I ended up liking the bigger ones more anyway because they already had a light inside of them. So I could get a nice cozy glow from them as well. And they were still only $5 each so they didn’t really break the bank.
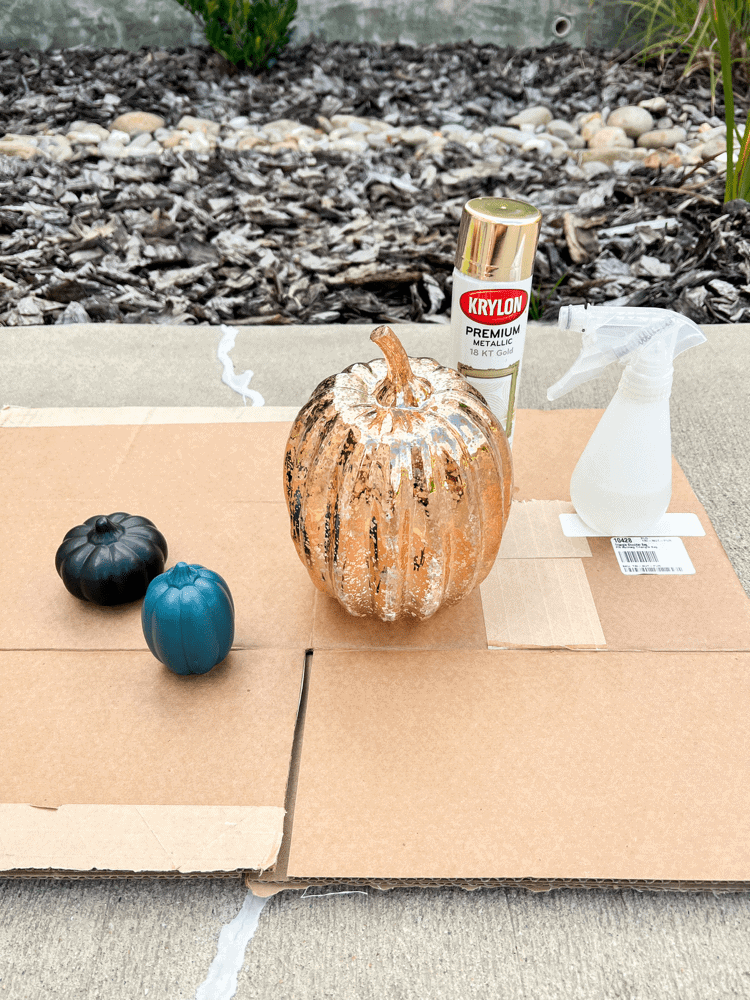
I also ended up getting some tiny pumpkins and gourds from the Target Dollar Spot to experiment on as well. These pumpkins weren’t glass looking, just regular ceramic, so I wasn’t sure how they would turn out.
I started with the bigger pumpkins from the Dollar Tree. The first thing you need to do to create these DIY mercury glass pumpkins, is to spray them all over with vinegar.
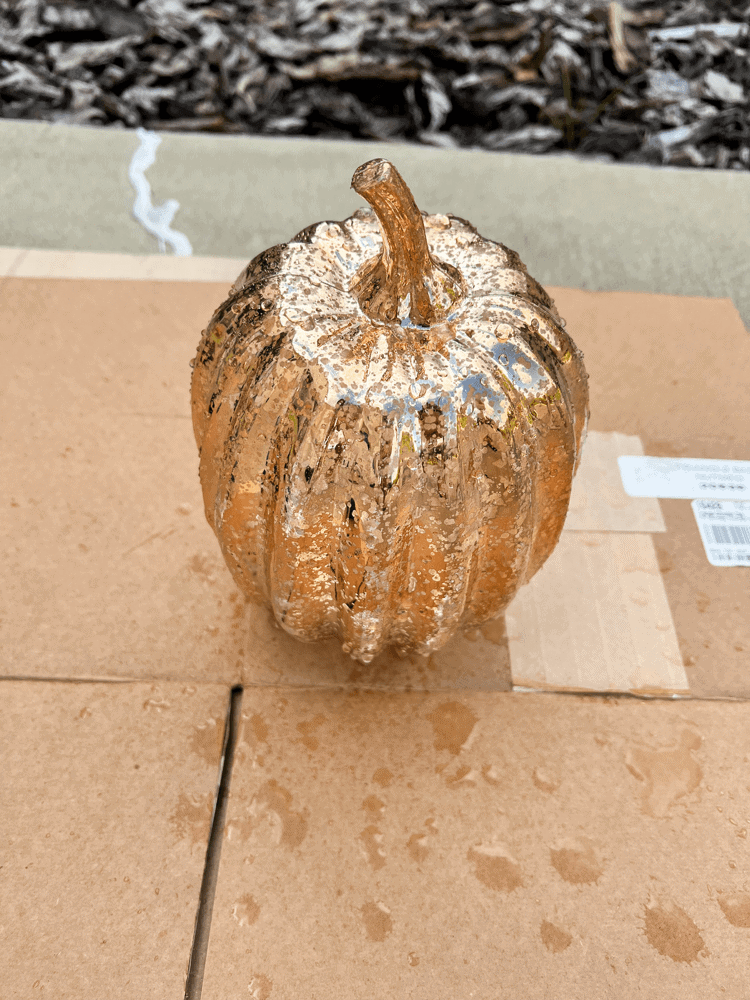
Simply pour your white distilled vinegar into a spray bottle and go to town on the pumpkins!
Spray the Pumpkins with Spray Paint
The next step is to spray the pumpkins with spray paint right after the vinegar. No reason to let them dry in between. Just go for it again!
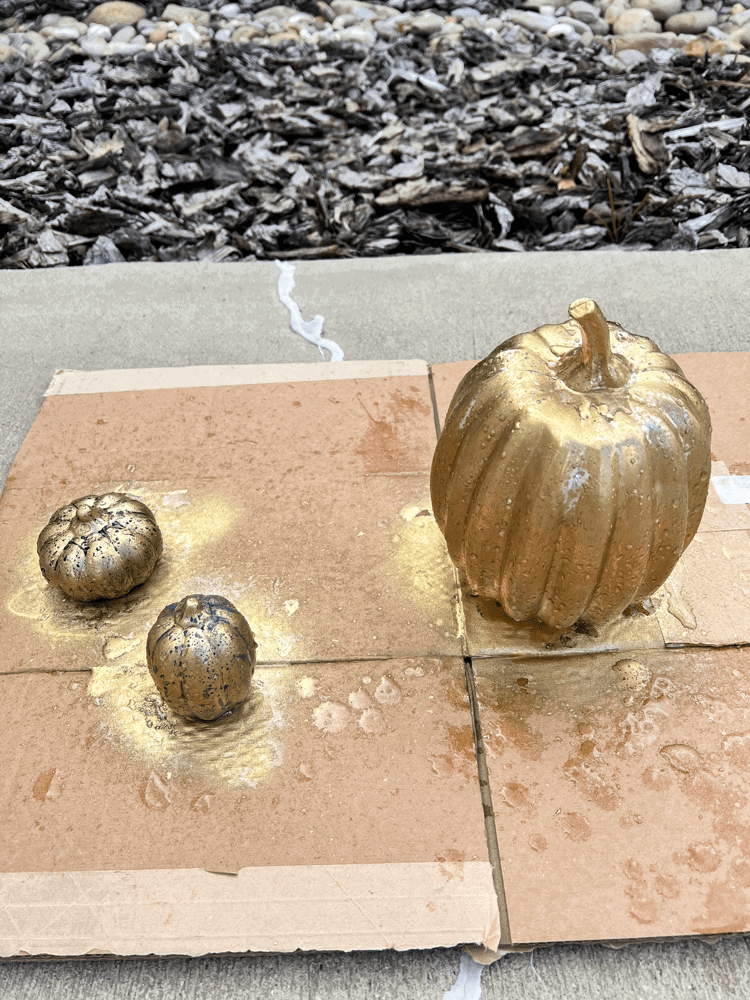
Like I mentioned above, I used copper and gold. But you could also do silver as well. Any of the metallic spray paint colors will do here.
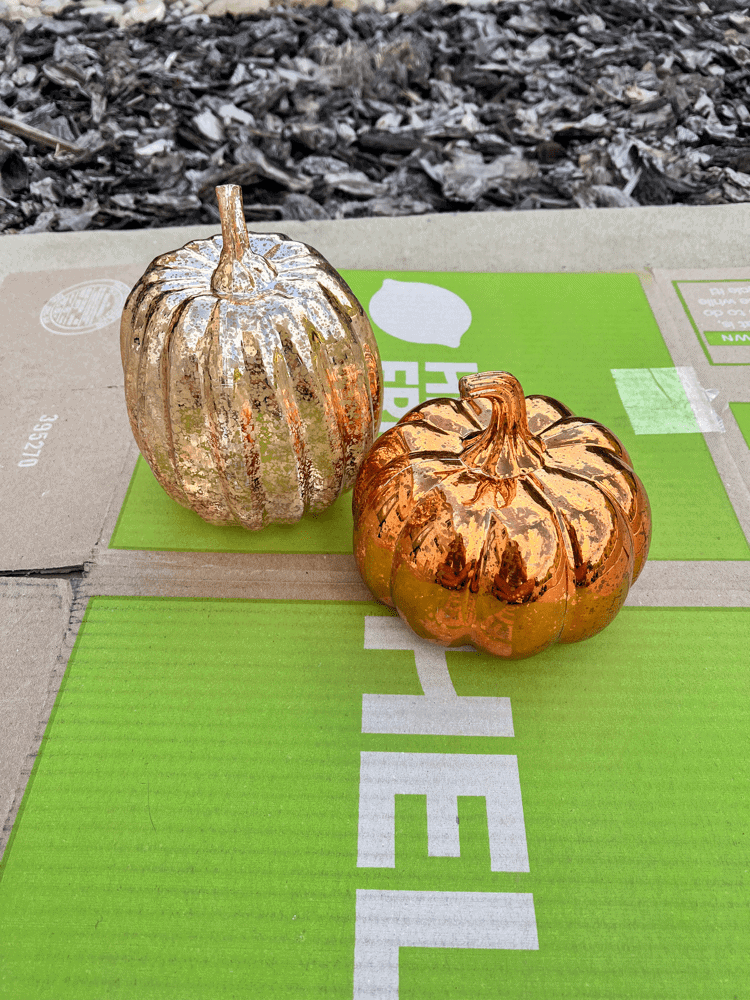
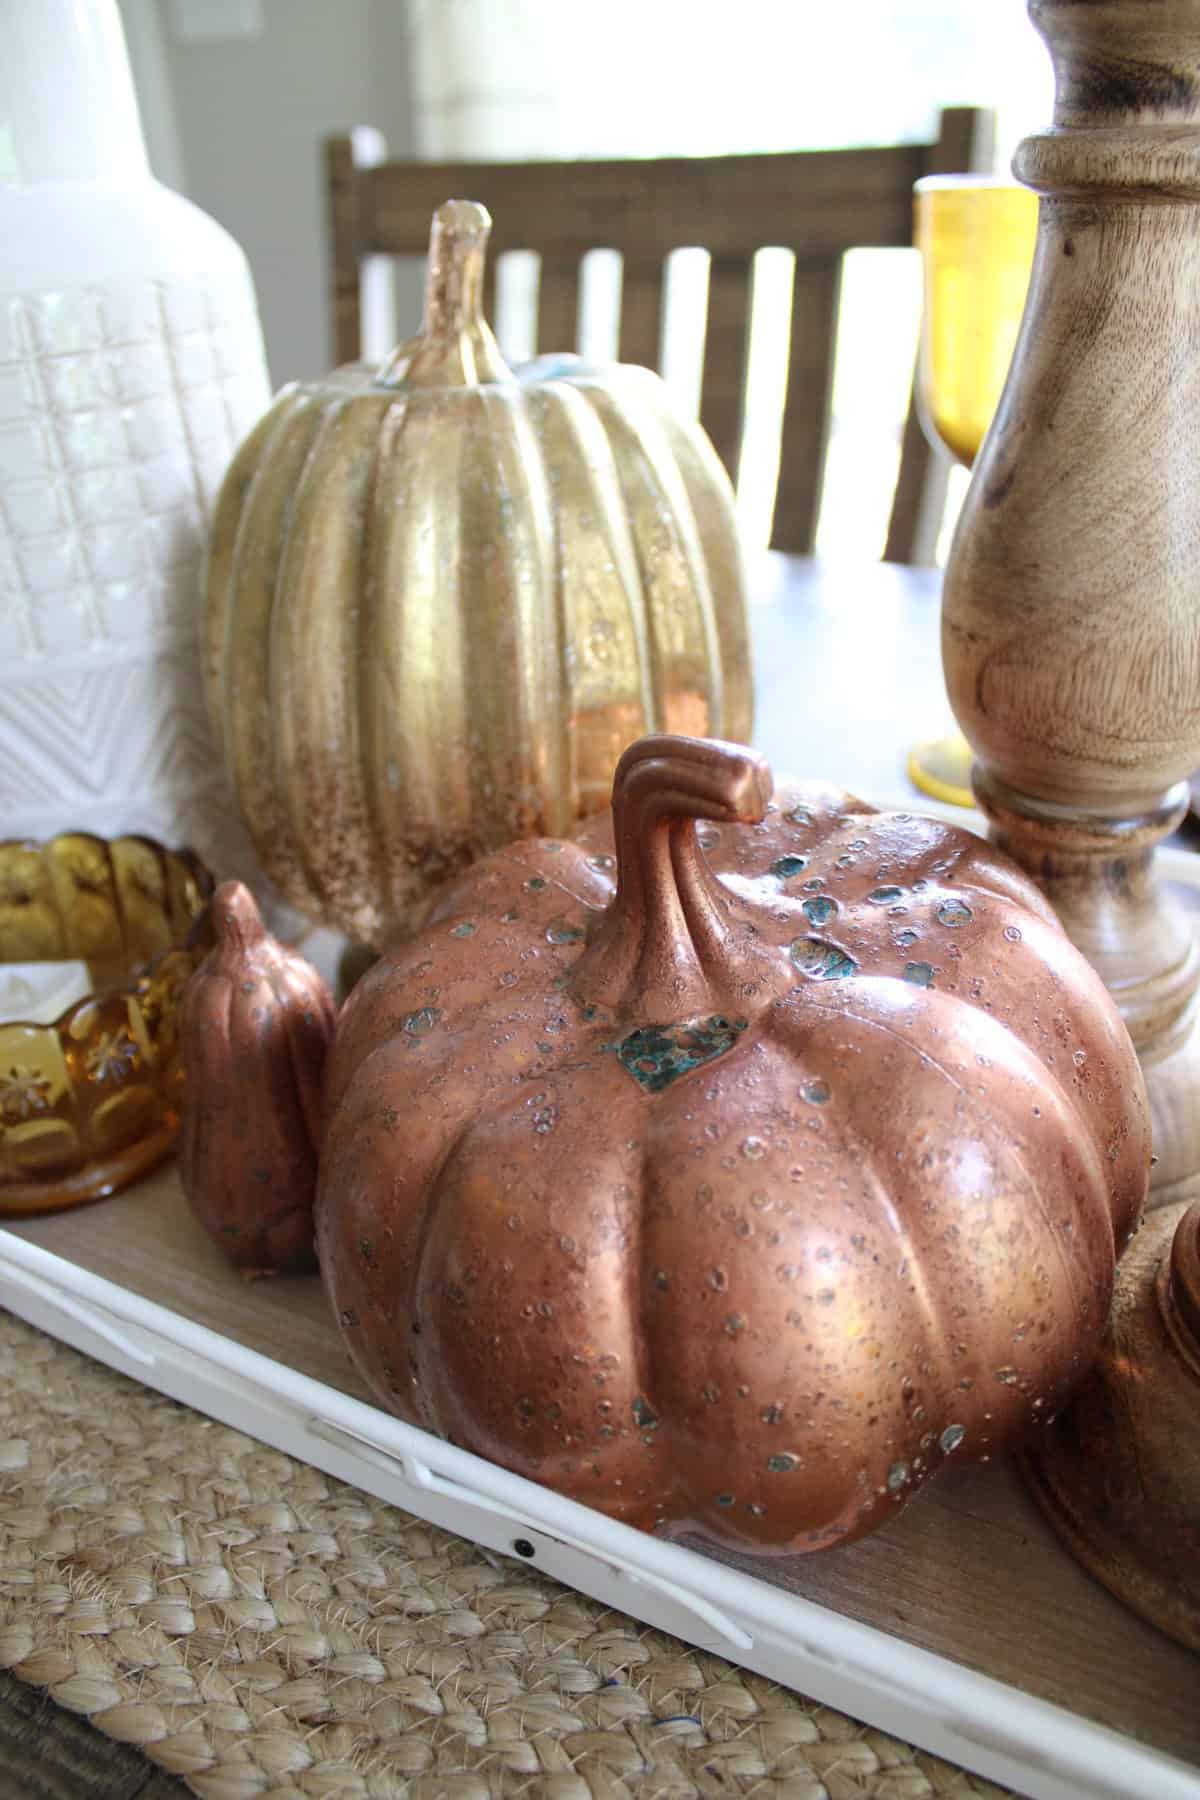
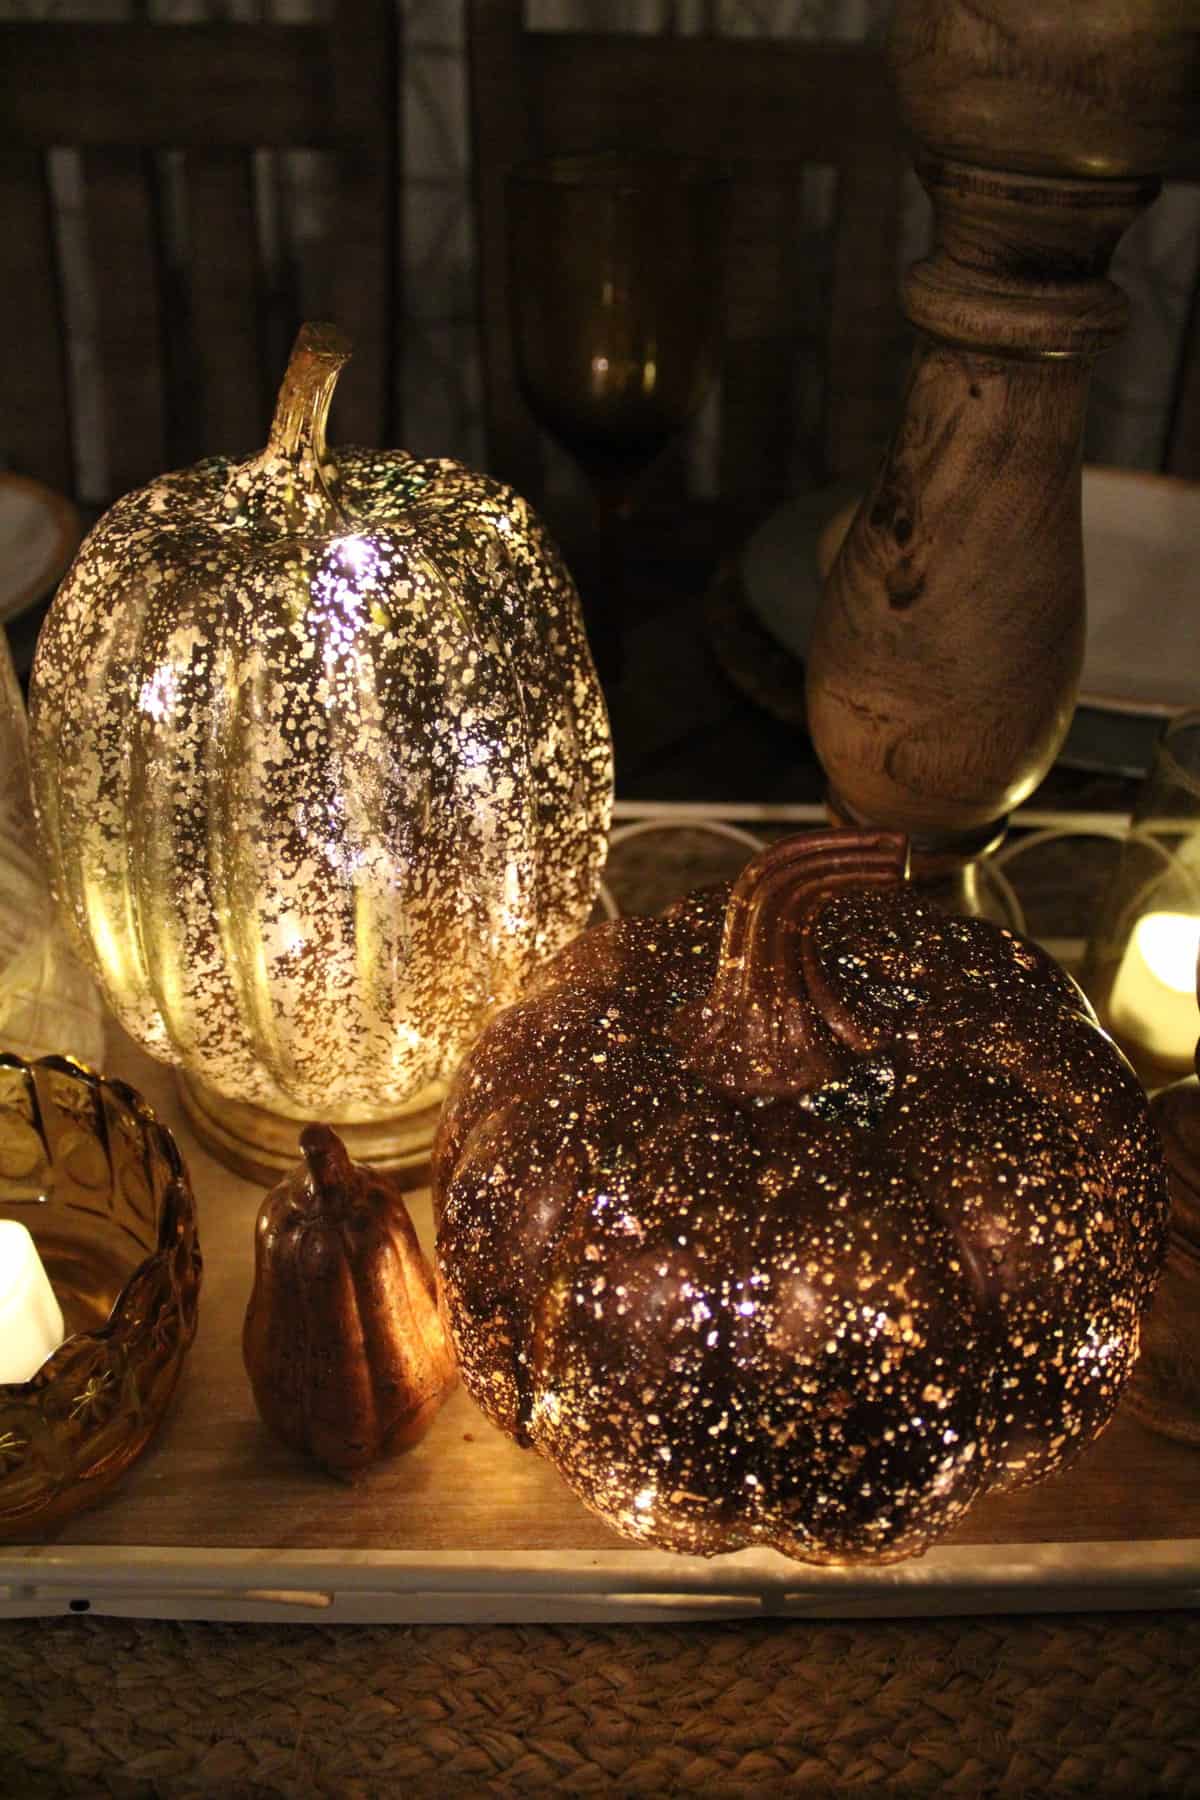
I love how unique and custom you can make these faux mercury glass pumpkins when you actually make them yourself instead of buying them!
I have more copper and gold tones in my house so I knew that would look better than silver when I went to go and decorate with them.
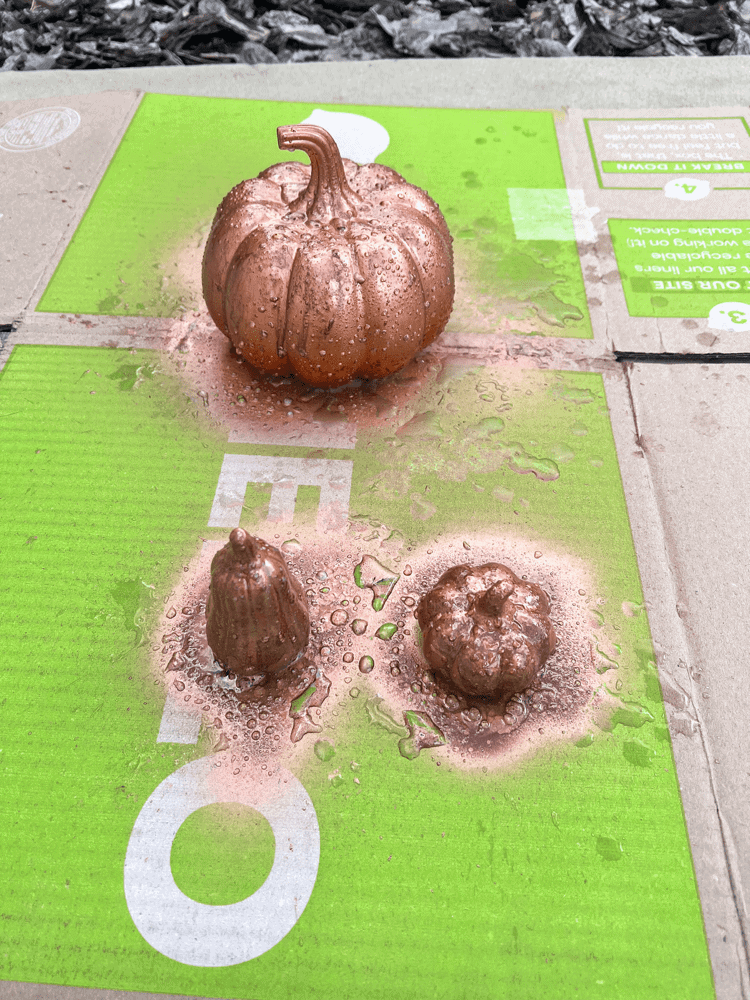
Spray the Pumpkins Again with Vinegar
The final step to these DIY mercury glass pumpkins is to spray them with vinegar again. And do it right after the spray paint. No reason again to let them dry in between.
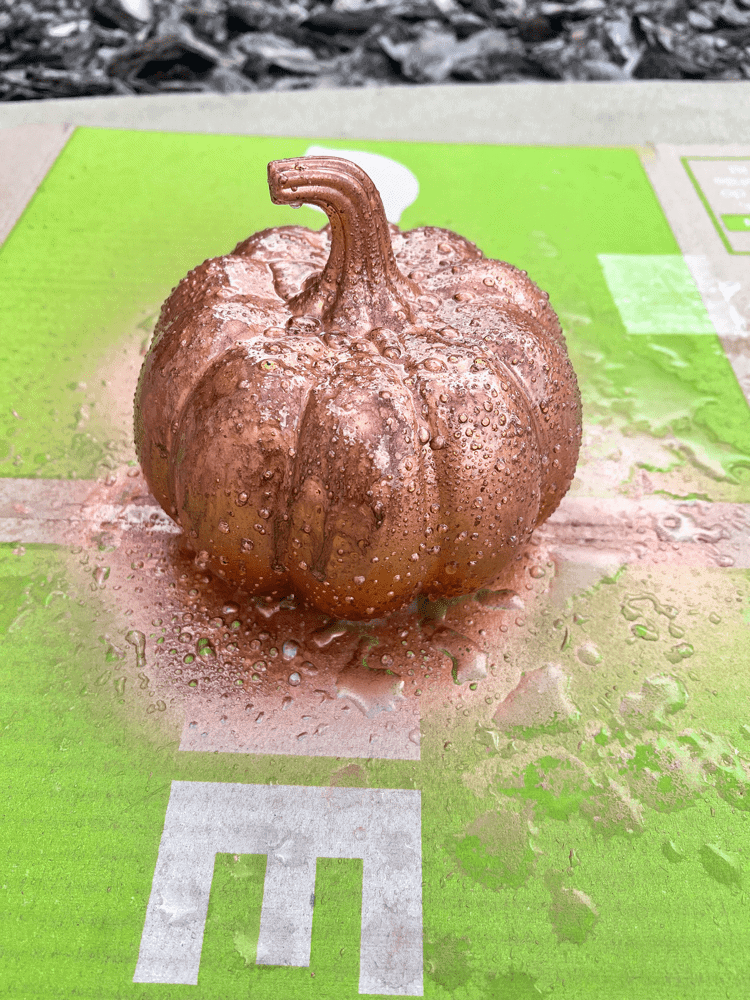
You want the paint to be a little wet when you spray the vinegar back onto it. That will give it the aged, mercury glass look.
After spraying them with vinegar for a second time, I let them dry overnight. Then, by the morning, I was ready to decorate with them!
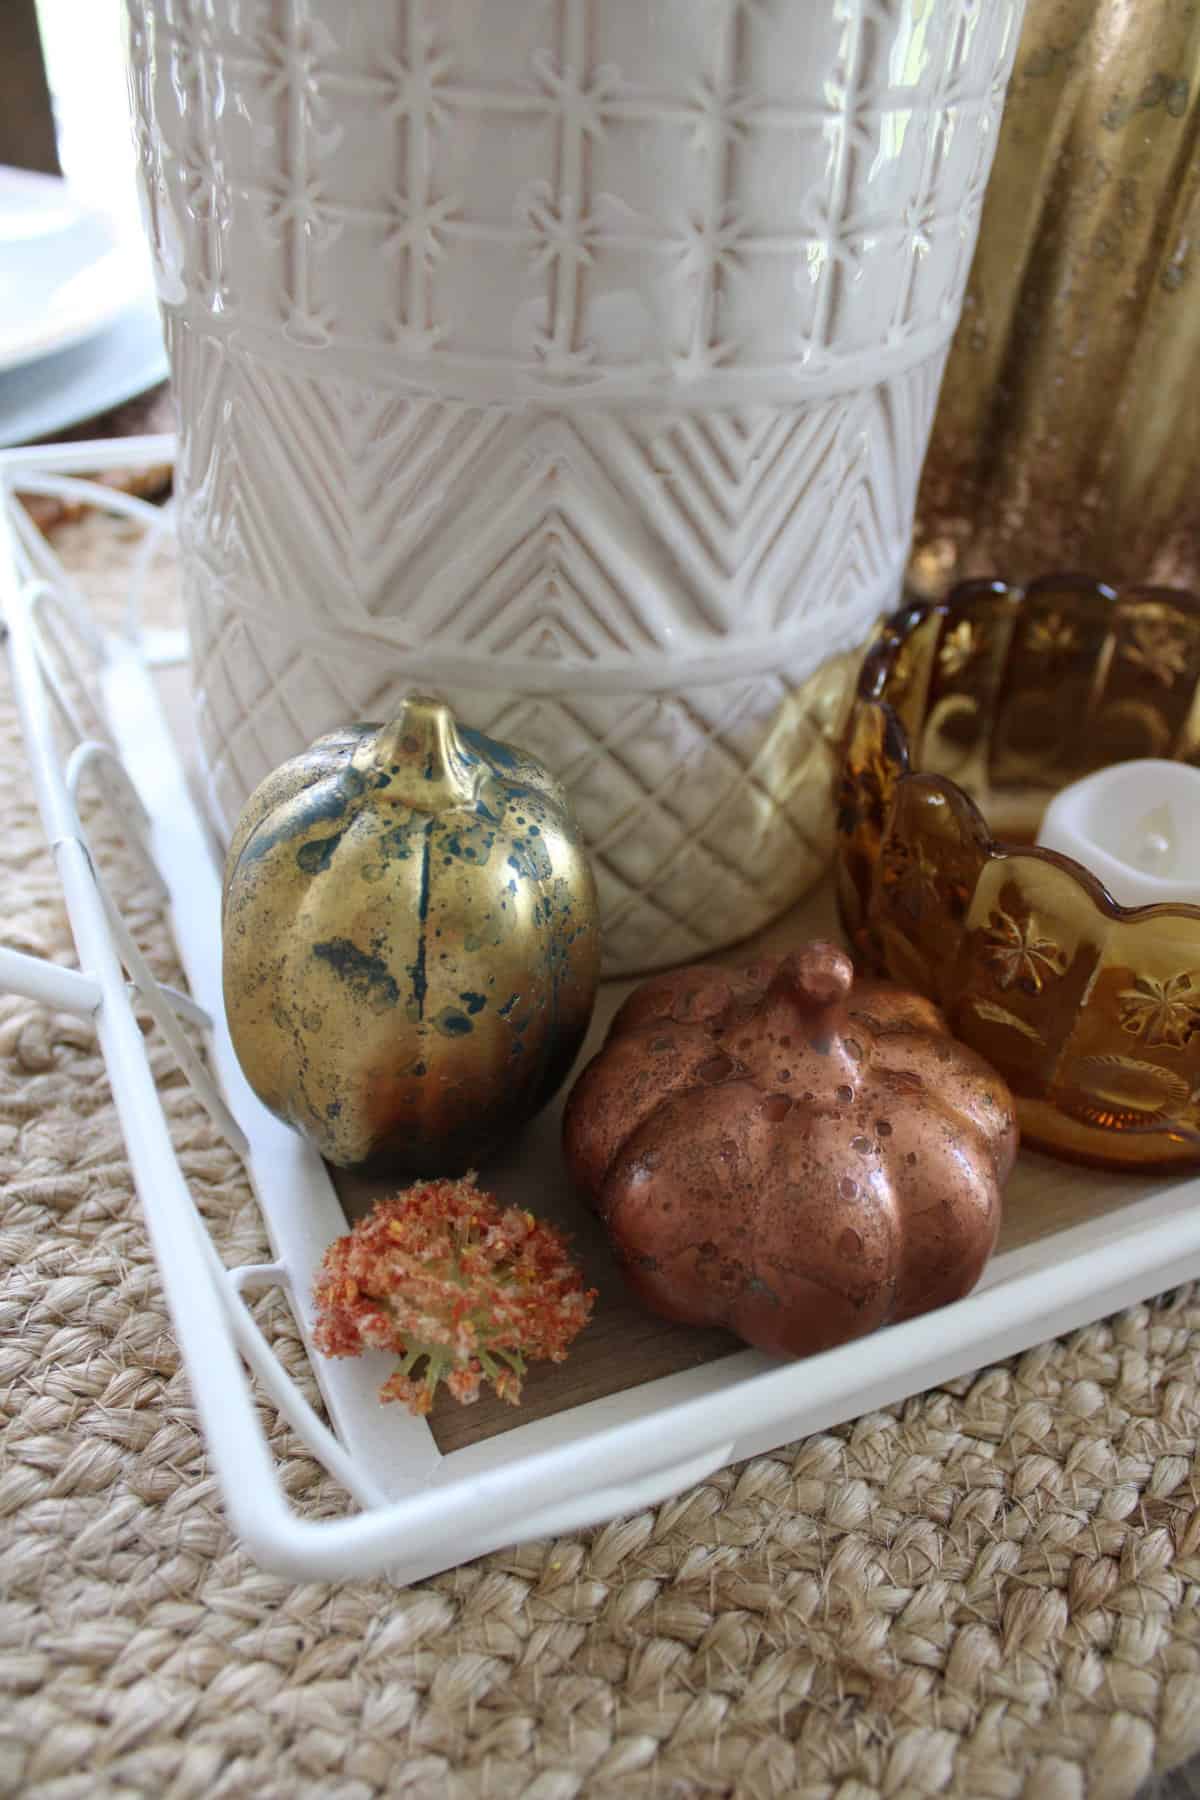
As I mentioned above, I tried this same process with the ceramic Target Dollar Spot pumpkins as well. And I am happy to report that it worked just the same with those too!
They don’t have as much of a mercury glass look to them like the Dollar Tree ones, but they still look aged and vintage, which I love. So I think you could really do this process on any kind of pumpkin and get away with it!
How to Decorate the Dollar Tree Pumpkins
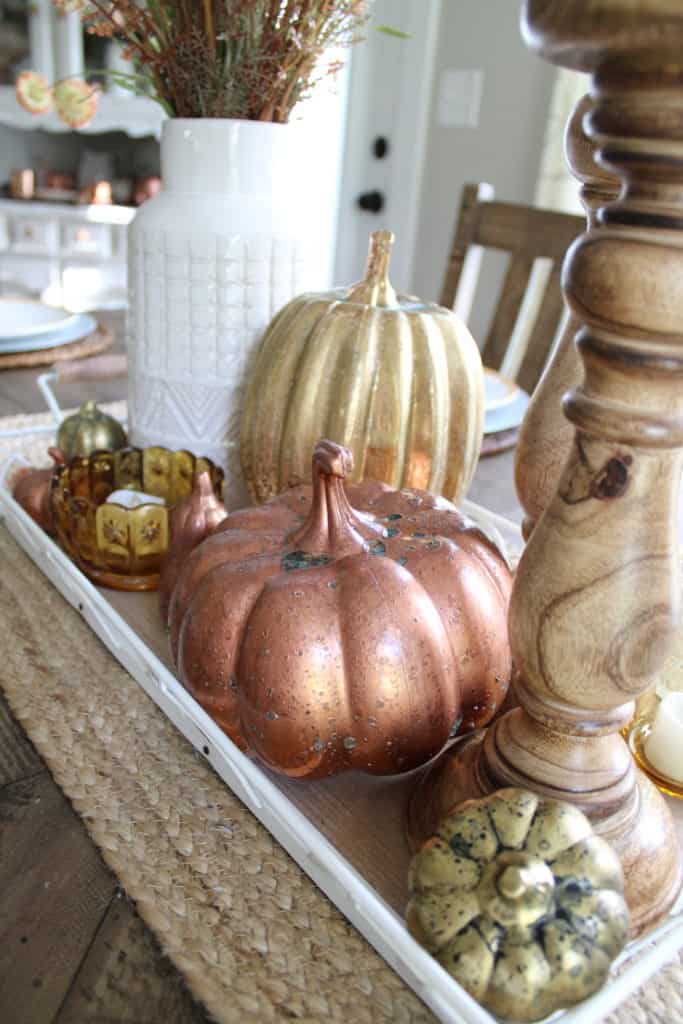
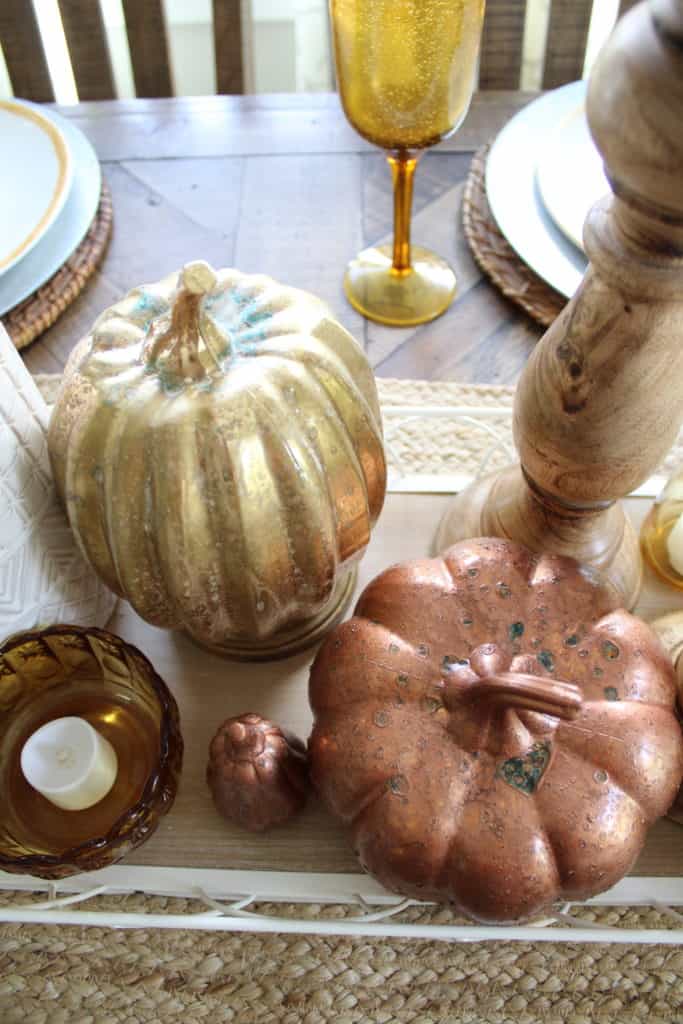
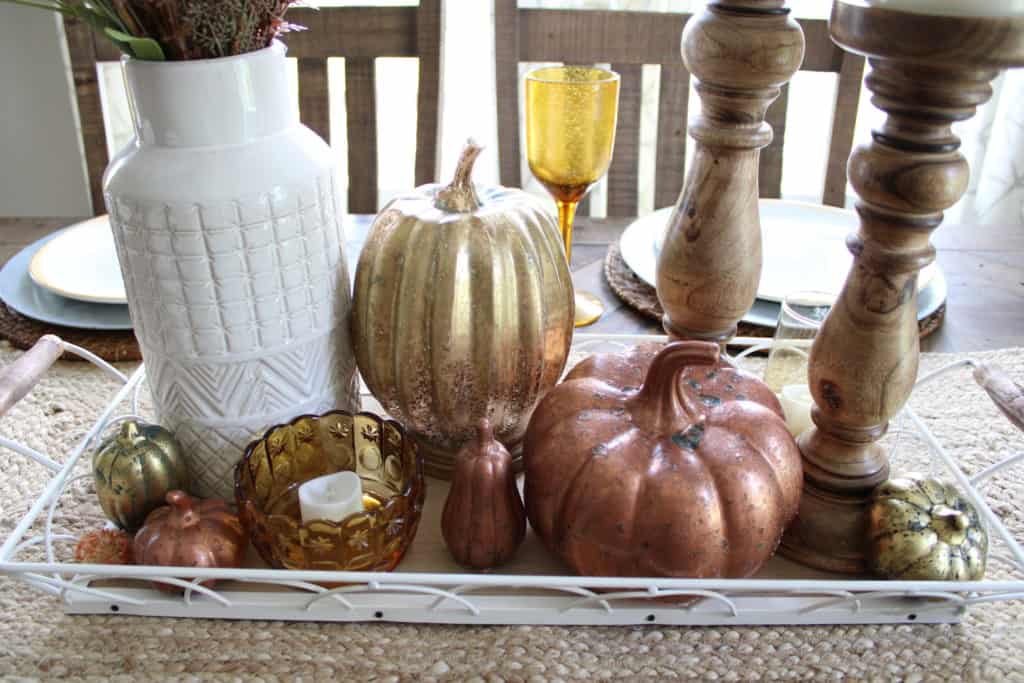
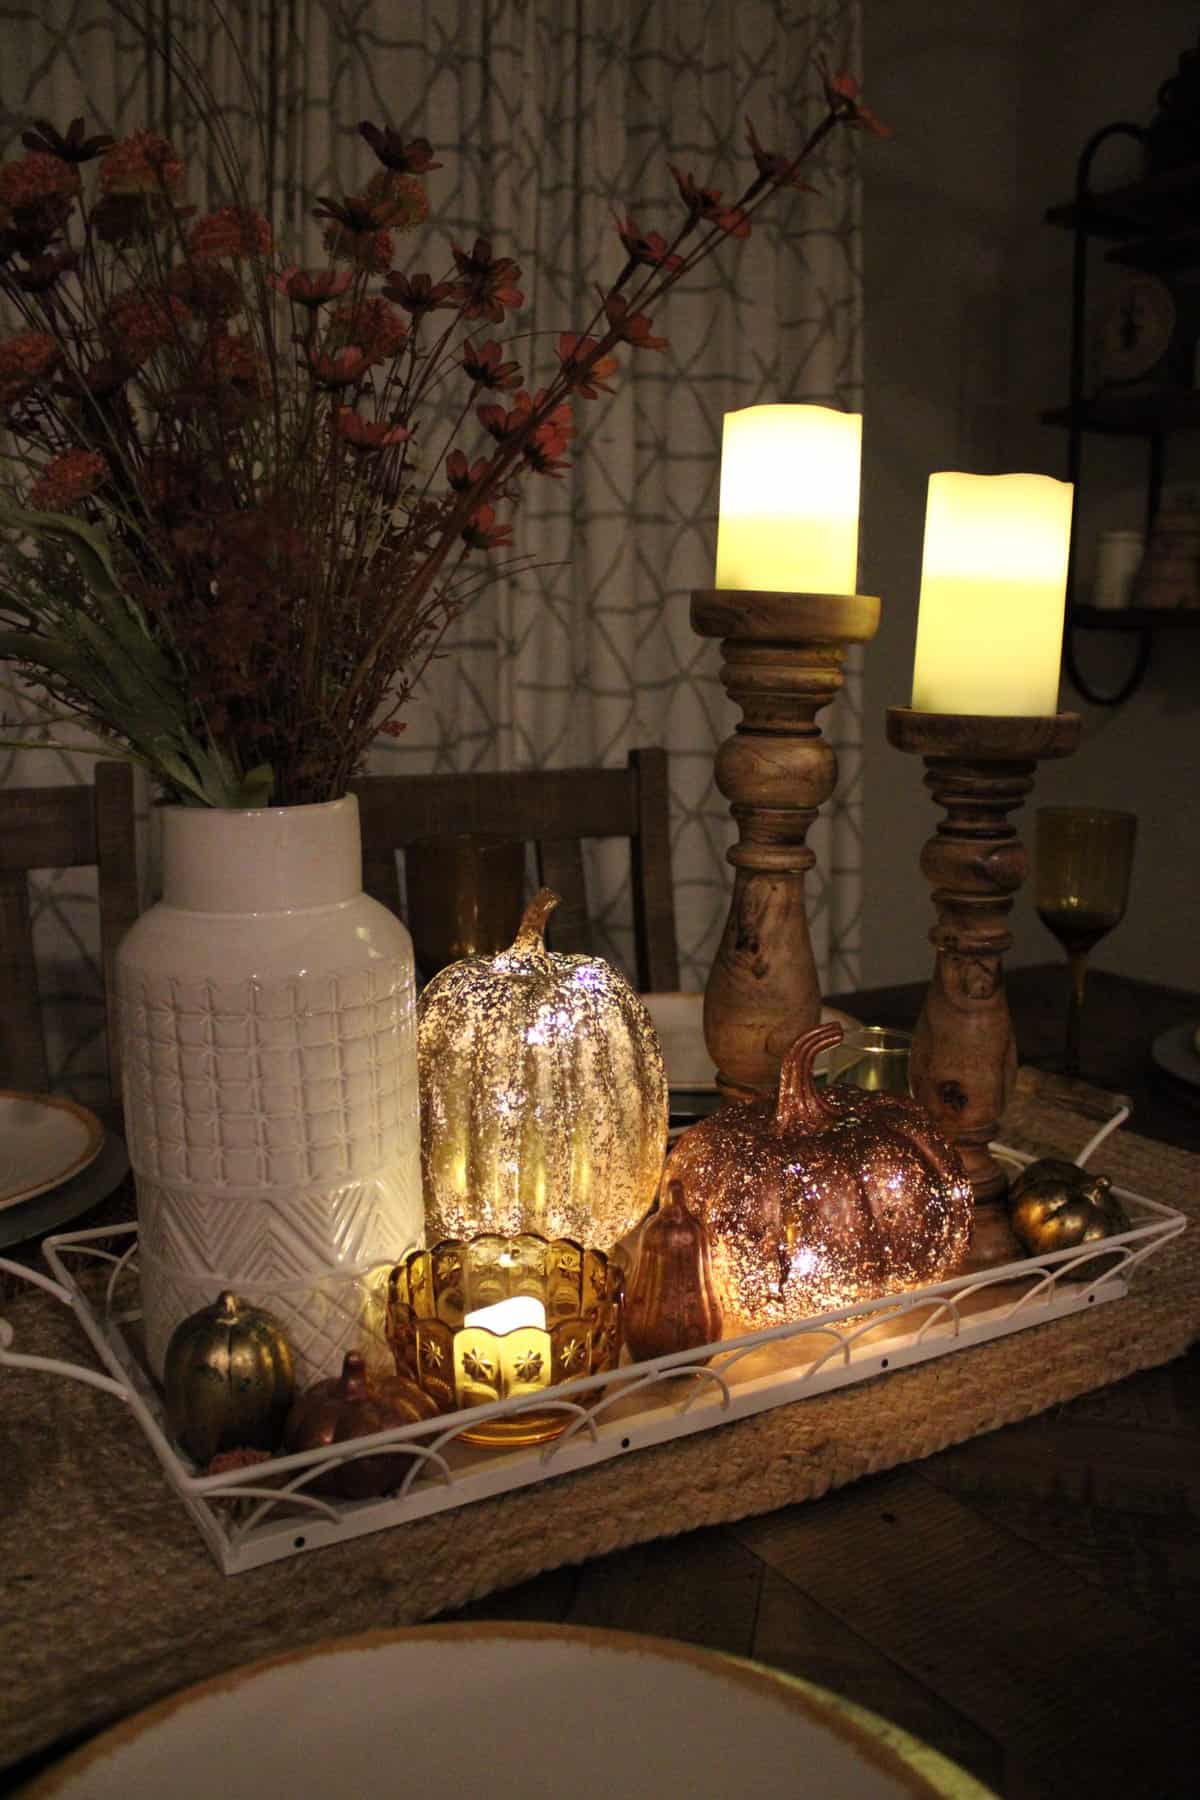
Once my pumpkins were finished, I decided to place them on my dining room table centerpiece. Since I have a lot of copper tones already in the dining room, they looked perfect there!
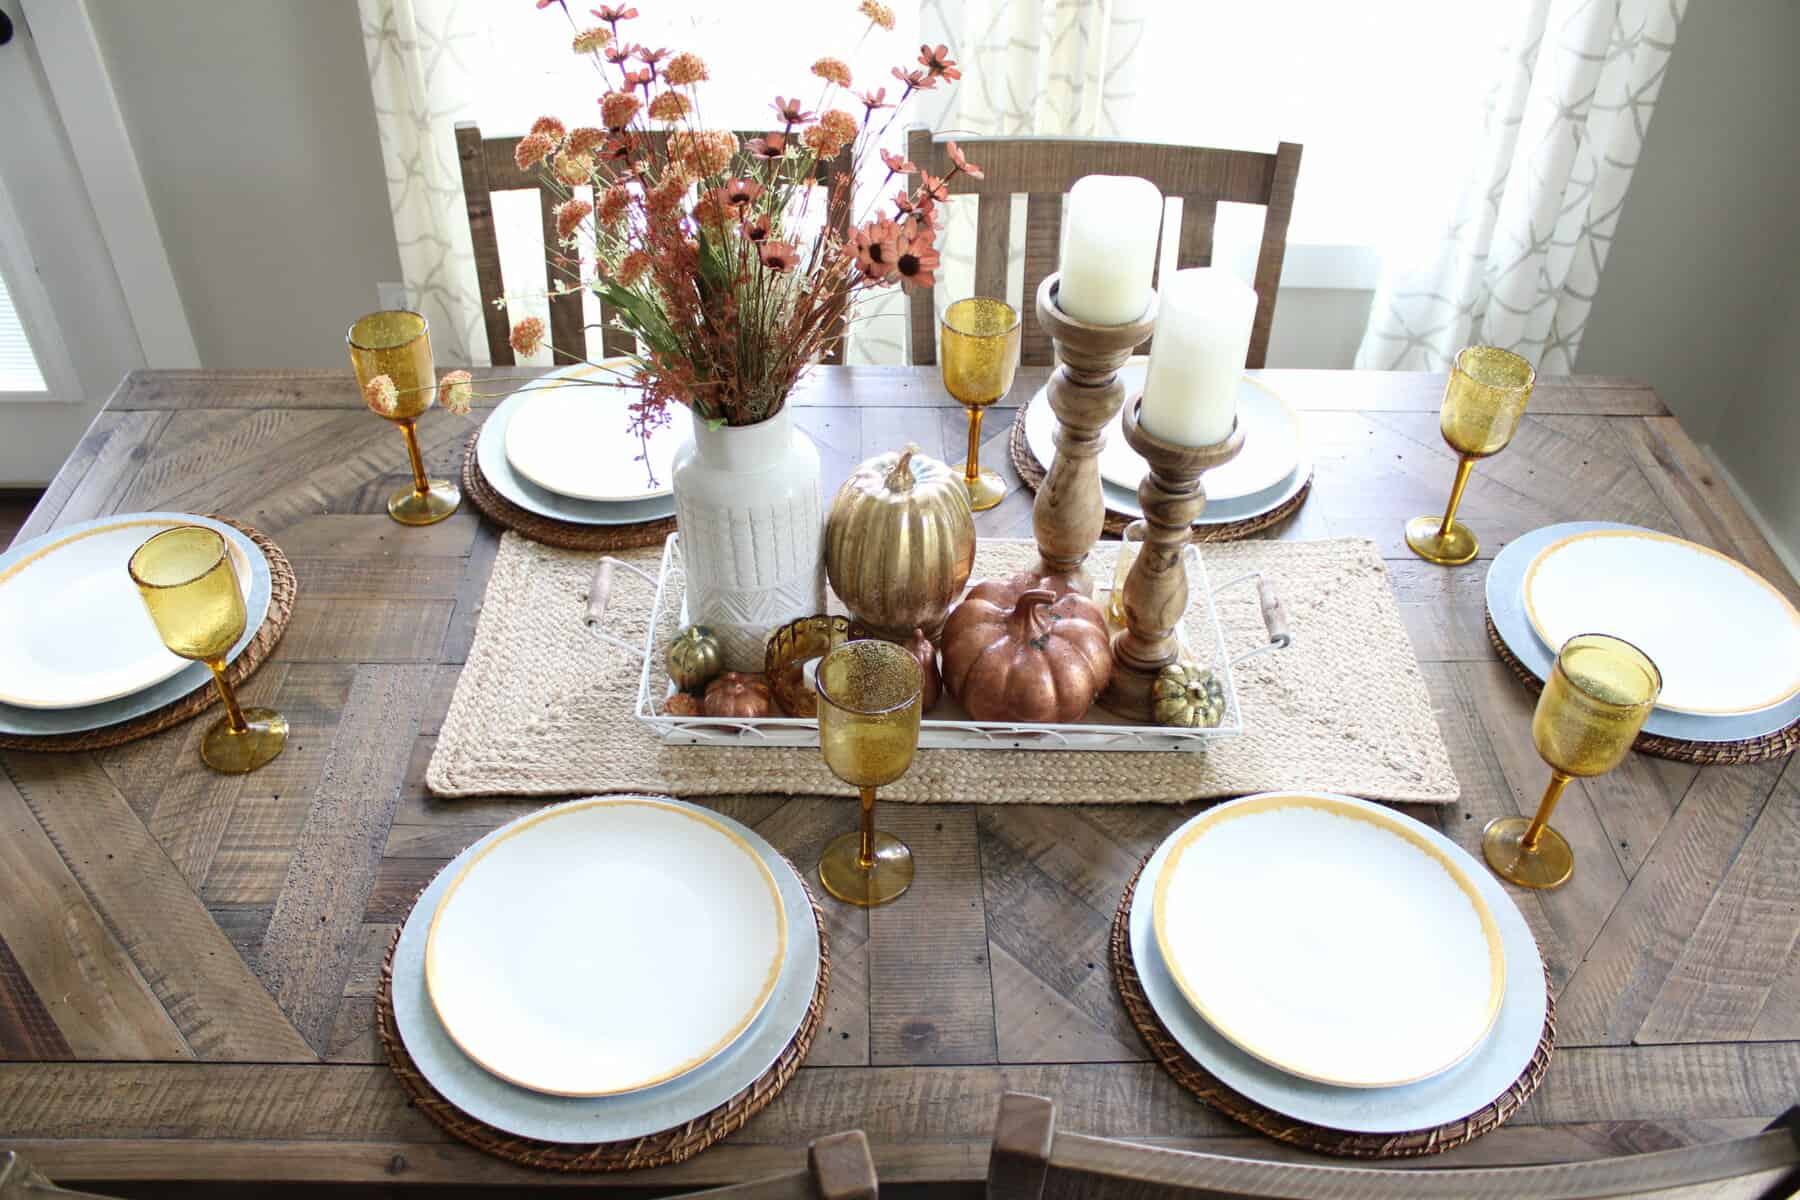
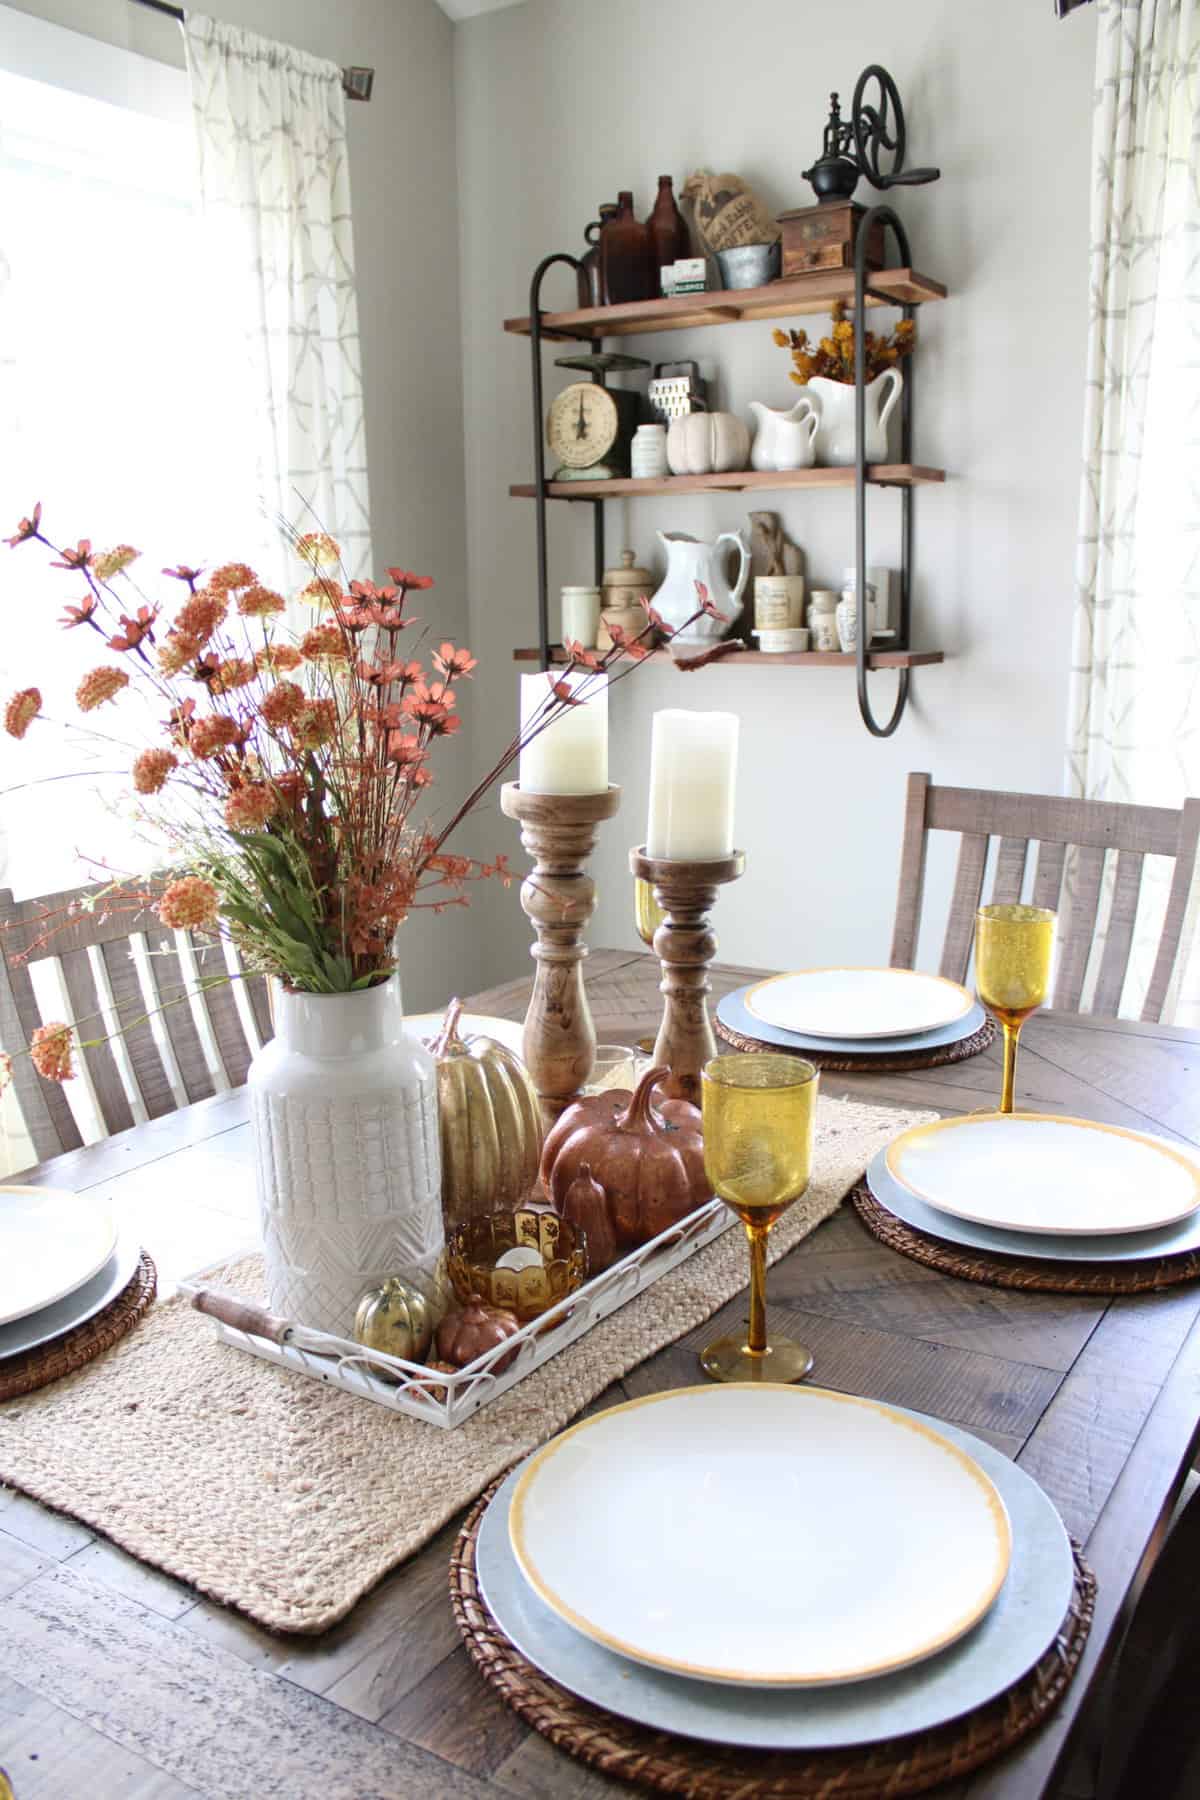
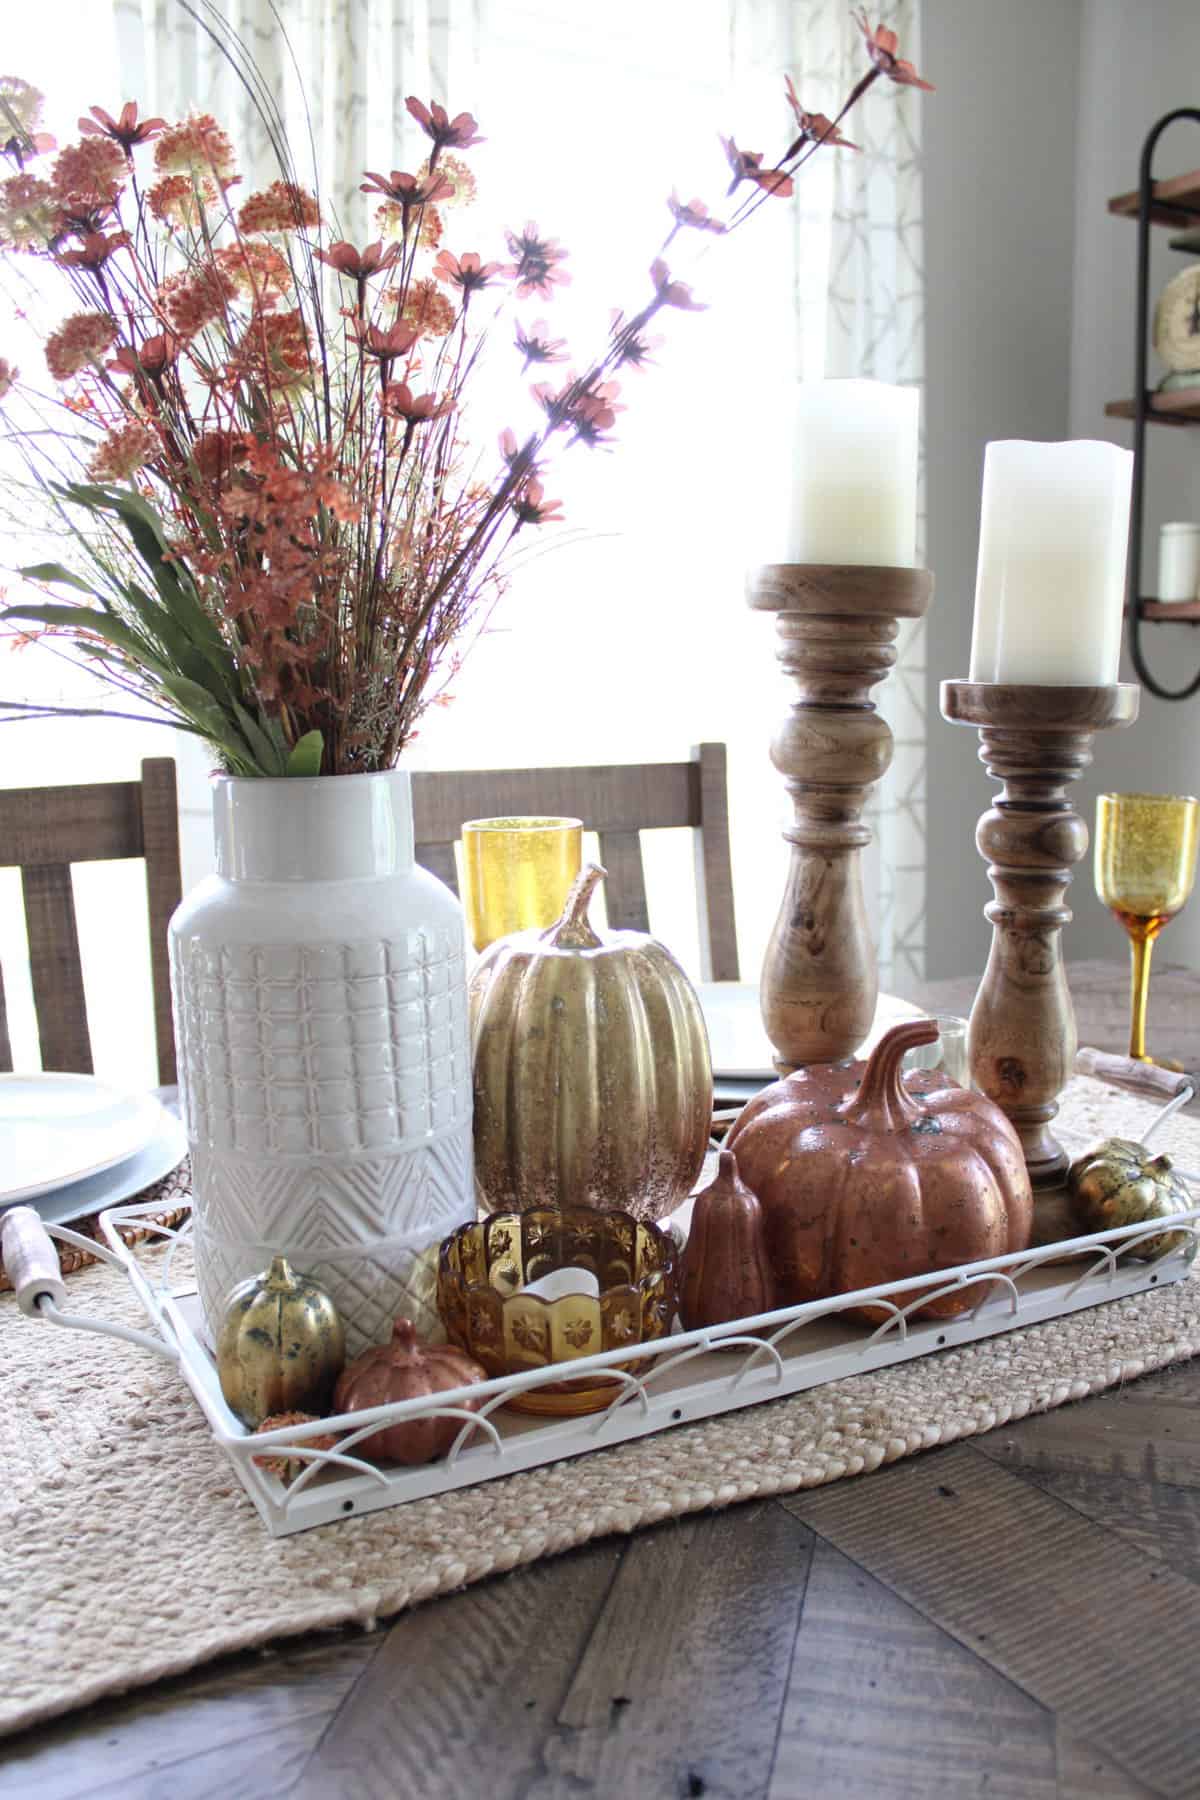
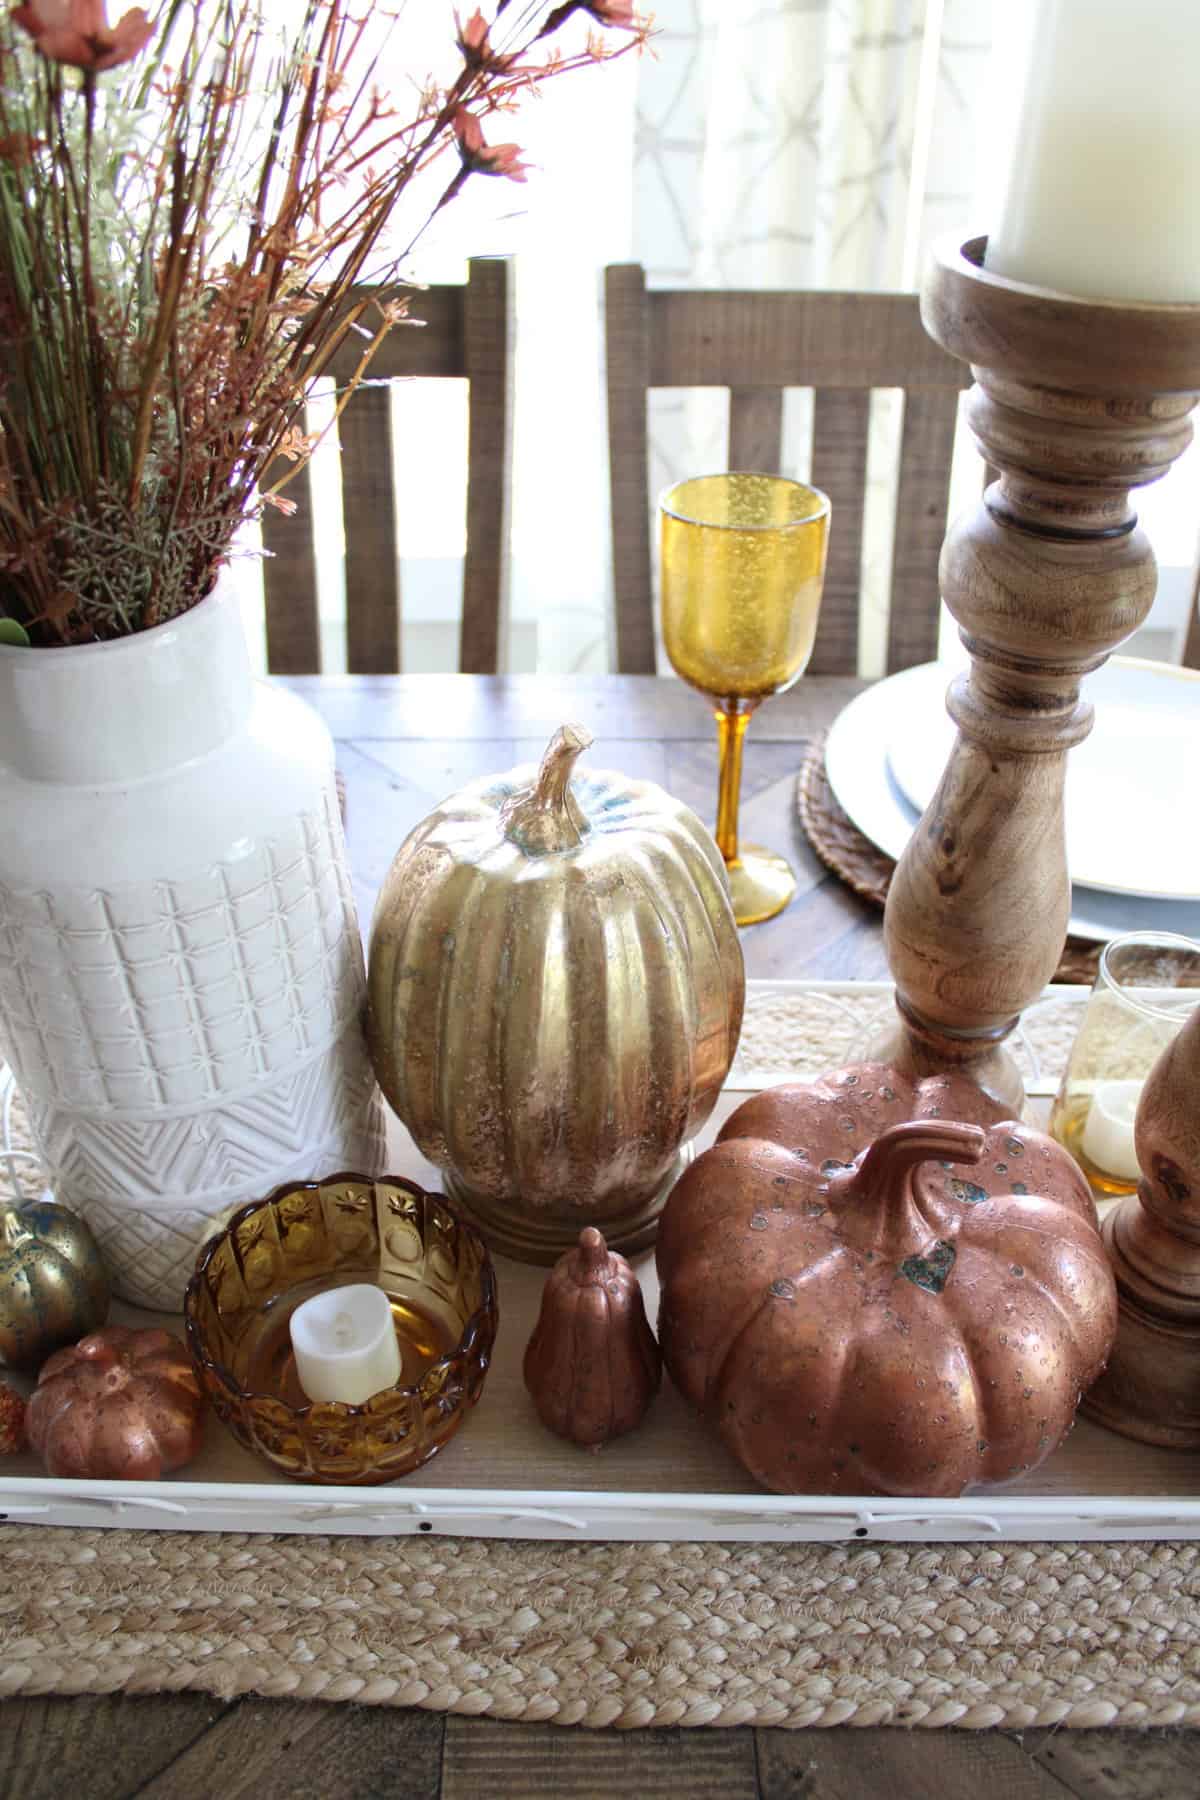
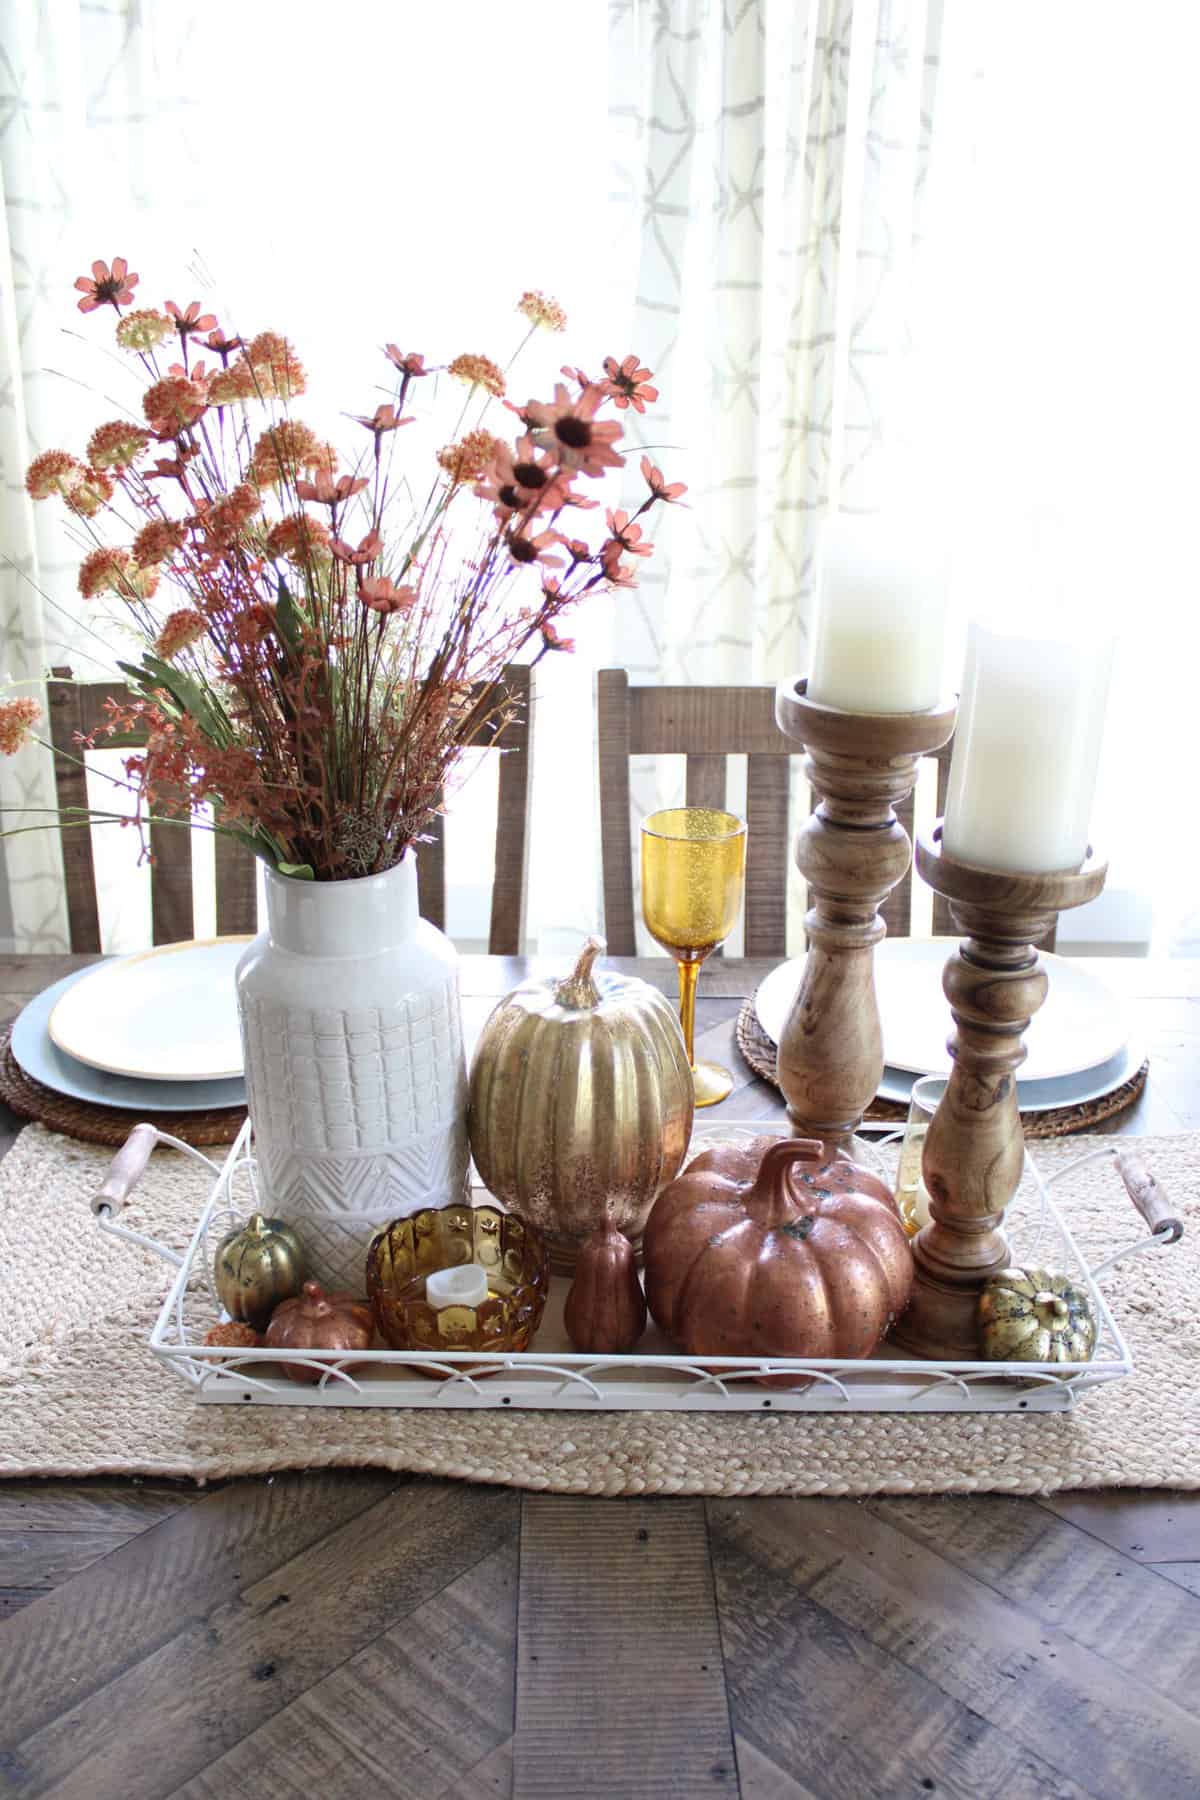

And, I also have a few battery operated candles on there, so these light up pumpkins fit in nicely with those. It definitely gives my dining room table a nice and cozy fall glow!
I am so happy with how easy this Dollar Tree pumpkin craft turned out to be and I hope y’all try these DIY mercury glass pumpkins out too sometime!
And if you’re looking for more easy pumpkin craft ideas, be sure to check out my DIY Painted Pumpkins, Pottery Barn Jack O’ Lantern Dupes, or my Easy Pumpkin Topiaries as well!
And be sure to follow me over on Pinterest and save this idea pin of my DIY Mercury Glass Pumpkins for easy future reference too!

Another lovely project to make fall a little more cozy! I’m a big fan of mercury glass and these turned out wonderful! I especially like them with the lights! Thanks for sharing this process Charity!
Thank you Jodie. I am so glad you enjoyed it!
This is a lovely creative idea, the gold and bronze metallic look really make them unique! x
Lucy | http://www.lucymary.co.uk
Thank you. I love the metallic look to them too!
I adore this idea to make your house look more autumnal! Such a good idea, and I might just have to have a go myself x
Thank you! You definitely should! It was such a fun and easy project to do!
These look stylish and that is a great use of vinegar to enhance art.
Thank you, I think so too!
These look great! I love how rustic they look now, and they definitely make a great centerpiece!
Thank you! I think they do as well!
These are beautiful! This would be fun to try with the older kids. Thanks for the inspiration 💕
No problem at all, you definitely should try it out too!
Wow! These look amazing! So creative too!
Thank you so much. I appreciate it
These look gorgeous! I have been thinking about getting some pumpkins for the Fall season. I love this DIY project! I am going to have to try it out for myself.
Thank you, you should definitely try it out. It was such a fun and easy DIY project to do!
Oo, love how easy these are to make! Now that I am at university and have a space of my own, I find myself looking at decor with new eyes. 🙂
Awe yay. It is so much fun to get some new decor to spruce up a space!
These are gorgeous. I’m definitely going to do these, I love them. Thanks for sharing. 🎃🎃
Awe yay! So glad you like them too! Let me know how yours turn out as well!
This is so creative and well done! will surely recreate this design this coming Halloween!
Yes, you definitely should! It is the perfect DIY for Halloween decor too!
These mercury glass pumpkins look super fun and easy. I live the glow from the one with a light inside. I’ll have to check out my local Dollar Tree to see what they have. Thanks for the idea!
Thank you, you definitely should! I love the glow too!
Such a fun, fall DIY project. I really enjoy your posts and love the detail and pictures to easily follow along.
Awe thank you so much! I am so glad you think so too!
Another beautiful project! I love these DIY mercury glass pumpkins! Thanks so much for sharing how to make them.
Thank you so much! I am so glad you enjoyed them too!
These look so perfect for the autumn, I need to try making these as I have a few pumpkins I could make these with! Great post
Mel
http://www.moonlightmel.co.uk
Thank you! You definitely should try it out. It’s a fun and easy DIY project for sure!
These are beautiful! I am going shopping tomorrow and plan to have some on my table by the weekend!
Awe yay! You will love how they turn out then!
I adore this project, I would like to share on my blog post tomorrow? are you ok with that?
Of course! I would love that! Thank you so much!
These pumpkins came out so cute. Great job! Thanks for sharing them on the Home Imagined link party.
Awe thank you so much! I appreciate it!