Stop throwing away your pretty candle jars! 🕯️ He Stop throwing away your pretty candle jars! 🕯️

Here’s the easiest hack for removing leftover candle wax from antique jars, mugs, and vintage vessels so you can reuse them! 🤍

I found this adorable antique candle from Antique Candle Co., and one of my favorite things about it is that once the candle is finished, you can repurpose the vintage vessel instead of throwing it away.

Here’s how I remove the leftover wax:

🕯️ Pour boiling water into the candle vessel
🕯️ Let it sit for several hours until the wax solidifies and floats to the top
🕯️ Scoop out the hardened wax (I save mine to use in my wax warmer!)
🕯️ Remove the leftover sticky wick with a little Goo Gone
🕯️ Wash the vessel thoroughly and you’re done!

Such an easy candle jar cleaning hack and the perfect way to upcycle antique jars, vintage candle vessels, and pretty containers into something you can actually use again! ♻️

Have you tried this candle wax removal hack before?!

Comment SHOP below to receive a DM with the link to this post on my LTK ⬇ https://liketk.it/6lGsH

#lifehacks #candlehack #vintagecandleholder #repurposing #fallcandles
Who knew cupcake liners could make homemade canned Who knew cupcake liners could make homemade canned goods look this cute?! 🍂🤎

If you’re looking for an easy fall DIY or a budget-friendly way to dress up your homemade canned goods, this is the cutest little hack! Simply place a cupcake liner over the lid before screwing on the ring, then finish it off with a printable label and a little twine or ribbon.

It’s the perfect way to turn homemade apple butter into a beautiful fall hostess gift, neighbor gift, teacher gift, or Thanksgiving gift in just a few minutes. Simple, inexpensive, and so much cuter than a plain mason jar!

Would you gift these to someone this fall? 🍎🍂

Save this idea for fall canning season and follow for more easy fall DIYs, cozy decorating ideas, and homemade gift inspiration! 

Comment SHOP below to receive a DM with the link to this post on my LTK ⬇ https://liketk.it/6lGwV

#fallhacks #kitchenhack #cannedgoods #applebutter #fallgifts
Fall is almost here, which means it’s officially a Fall is almost here, which means it’s officially apple orchard season! 🍎 One of my favorite fall traditions is picking fresh Honeycrisp apples straight from the orchard. There is just nothing better than a crisp, juicy apple on a cool autumn day!

I always stock up because I love freezing fresh apple slices to enjoy all year long. They’re perfect for making these easy Crockpot Cinnamon Apples whenever the craving hits! They’re soft, warm, full of cinnamon flavor, and make the perfect fall side dish, dessert, or sweet snack. Plus, this slow cooker apple recipe couldn’t be easier to make.

If you’re looking for cozy fall recipes, simple apple recipes, or an easy crockpot dessert, you have to try this one!

Comment “RECIPE” below and I’ll send it straight to you! 🍎🍂

#crockpotrecipes #cinnamonapple #cinnamonapples #fallbaking #fallrecipes
Y’all, I am SO tired of this 😩💔 I woke up this mor Y’all, I am SO tired of this 😩💔 I woke up this morning not feeling great, but like I always do, I tried to push through it. I was sitting at my laptop doing a little work when suddenly my hands started shaking so badly that I couldn’t control what I was doing. My HR spiked up to 180 and I threw up as well. And honestly? I’m frustrated, scared, and completely exhausted from not knowing WHY this is happening.

I finally got my MRI results back on Friday, and fortunately (but also unfortunately), they didn’t find anything major. And I’ll admit it… I bawled. 😭

Of course I don’t want something seriously wrong with me. But at the same time, I desperately want a diagnosis. I want answers. After dealing with unexplained symptoms for so long, getting “normal” test results can almost feel like another dead end.

My neurologist had mentioned the possibility of Chiari malformation, so I honestly thought that might finally explain some of my symptoms. Now that the MRI didn’t show that, I feel like I’m back at square one.

Because this isn’t normal. 😩

What am I supposed to do for work when my hands are shaking like this?! I was working as a dental hygienist, and can you imagine trying to clean someone’s teeth while your hands are trembling uncontrollably? It’s terrifying to even think about.
My short-term disability still hasn’t been approved either, so I’m sitting here wondering what I’m supposed to do next while my health and career feel completely uncertain.

I have another appointment with my doctor on Friday, so I’m trying to remind myself that this is just another step in the process. But it feels like it’s been nothing but waiting for appointments, waiting for tests, waiting for results… and still no answers.

This has truly been the hardest season of my life.

I’m trying so hard to trust God through all of this, even when I don’t understand what He’s doing. 🙏🏻 It’s just really hard when you don’t know what your future, your health, or even your career is going to look like.

So if you’ve been following along through this health journey, please keep praying that I finally get some answers. 🤍
If you’re part of the Abandoned Golf Wives Social If you’re part of the Abandoned Golf Wives Social Club, come join me! 😜 Because if he’s going to spend every weekend on the golf course, I’m at least going to have a cute outfit about it. 😂

When I saw this adorable shirt from Pink Lily, I HAD to have it immediately—especially because it pairs perfectly with my “he’s golfing” hat. ⛳️😂

At this point, I might as well make being a golf wife my entire personality, right?! 🤣

Tag your fellow golf wives who totally get it! 👇🏼

Comment SHOP below to receive a DM with the link to this post on my LTK ⬇ https://liketk.it/6lqMU

#golfhumor #husbandwifejokes #husbandwifehumor #golfing #golfjokes
When I spotted these plain little white ceramic gh When I spotted these plain little white ceramic ghosts at the Target Dollar Spot, I knew they had SO much potential! Instead of leaving them plain, I gave them a quick makeover and turned them into the cutest antiqued gold Halloween decor that looks way more expensive than it actually is! 🙌

Here’s how I did it:

👻 First, I sprayed the ceramic ghosts with black spray paint.
✨ Then I lightly layered metallic gold spray paint over the top. I didn’t want them super shiny—I was going for that aged, antique gold pottery look.
🖤 Finally, I used a little black acrylic paint to make their eyes stand out more.

And that’s it! Such an easy DIY Halloween decor makeover, and I think they turned out ADORABLE! 🥹

I love finding inexpensive Target Dollar Spot finds and giving them a high-end look with a little DIY magic.

Would you believe these started as plain white ghosts from Target?! 👻

Comment SHOP below to receive a DM with the link to this post on my LTK ⬇ https://liketk.it/6llsc

#potterybarndupe #targetdollarspot #targetdollarspotfinds #diyghost #ghosties
If pressing the “CLOSE DOOR” button the second I g If pressing the “CLOSE DOOR” button the second I get on the elevator so I can avoid small talk is wrong… I don’t want to be right. 😂🙈

I’m just THAT introverted. 🤣 My social battery has a daily limit, and sometimes I’ve already hit my maximum number of conversations before I even get to where I’m going. 😅

No offense… I just need to ride this elevator in peace and silence 🤣

Please tell me I’m not the only introvert who does this?! 👀

#introvertlife #introvertproblems #introverting #relatablehumor #relatablecontent
It’s officially been ONE FULL YEAR since my health It’s officially been ONE FULL YEAR since my health started spiraling. 💔

A year ago today, I was at work when my heart rate suddenly spiked so high that I became extremely dizzy and shaky and genuinely thought I was going to pass out. I went to the ER afterward just to be safe, and of course… everything looked “normal.” My EKG was normal. They could see that my heart rate had spiked, but they couldn’t tell me why.

Little did I know that one scary episode would turn into a daily battle with unexplained symptoms. Fast forward one year and I’m dealing with even worse symptoms, including frequent heart rate spikes, dizziness, shakiness/tremors, fatigue, and so much more. And the hardest part? I STILL DON’T HAVE ANSWERS.

I can’t even work anymore. I’ve spent months waiting for appointments, getting test after test, waiting for results, and hoping that this will finally be the thing that explains what’s happening… only to end up with more questions.

And honestly? I feel crazy sometimes. Not because I think this is all in my head, but because it’s incredibly hard to keep telling people how badly you feel when test after test doesn’t give you an answer. 😭

It’s been a really rough week emotionally, and I’m having a hard time dealing with all of this. I feel like I’m constantly taking one step forward and two steps back. How long am I going to have to wait before I finally have answers? How much longer until I can start feeling like myself and actually live my life again?

I’m so tired of waiting. I’m tired of being passed from appointment to appointment. I’m tired of having no real help in the meantime. And I’m tired of feeling like I have to fight so hard just to be heard. 💔 I’m trying so hard to let go, trust God, and believe that there’s a reason for all of this… but y’all, IS IT HARD. 😢

I’m praying that after this past year, I’m finally getting closer to some answers. Until then, I’m just taking it one day at a time. If you’re also living with unexplained symptoms, chronic illness, POTS symptoms, tremors, dizziness, heart rate spikes, or a long diagnostic journey, please know you’re not alone. ❤️Here’s to hoping year two looks very different from year one!
Don’t let those vacation seashells sit in a drawer Don’t let those vacation seashells sit in a drawer collecting dust! 🐚🤍 TURN THEM INTO WALL ART INSTEAD!

If you’re anything like me, you come home from every beach trip with a pocketful of seashells and absolutely no idea what to do with them. 😂 So I turned mine into this easy DIY seashell wall decor and I’m OBSESSED with how it turned out!

All you need is:
🐚 Seashells
🤍 A small canvas
🔥 Hot glue
🎨 White spray paint
🪵 Optional wood trim for a frame

I love that you can customize this with shells from your favorite beach trip, making it such a sweet way to preserve those vacation memories. And the neutral white + wood combination makes it work with almost any home decor style!

You could even make a whole gallery wall with shells from different beaches you’ve visited! 🥹🌊

Save this DIY for your next beach vacation! And if you have a stash of seashells at home, this is your sign to finally DO something with them. 😂🐚

I have the full step-by-step tutorial on the blog! Comment “SHELLS” and I’ll send you the link! 🤍

#seashell #seashelldecor #coastaldecor #seashellart #coastaldecorating
Apparently, this little Christmas decoration has b Apparently, this little Christmas decoration has been hanging out in here ALL YEAR and I just never noticed it. 🤣

Tell me I’m not the only one who does this?! I swear every time I switch out my seasonal home decor, I find at least ONE random piece from months ago that somehow survived the decor rotation. 😂

Fall decorating is officially underway over here, but apparently Christmas wanted one last cameo. 🎄😂

Please tell me I’m not alone! 👇🏼

#failvideos #failvideo #falldecorating #falldecor #relatablecontent
  • Home
  • Subscribe
  • About Me
  • The Blog
    • DIY
      • Turning a Builder Grade Home Into Something More
      • Outdoor
      • Home Improvement
      • Repurpose and Upcycling
      • Home Decor
        • Christmas
        • Everyday Decor
        • Fall
        • Spring
        • Summer
        • Winter
    • Recipes
      • What To Cook?
    • Travel
      • Traveling and Antiquing
      • Lifestyle
    • Whimsy Home Wednesday
  • Contact Me
  • Privacy Policy
    • Disclaimer
  • Home
  • Subscribe
  • About Me
  • The Blog
    • DIY
      • Turning a Builder Grade Home Into Something More
      • Outdoor
      • Home Improvement
      • Repurpose and Upcycling
      • Home Decor
        • Christmas
        • Everyday Decor
        • Fall
        • Spring
        • Summer
        • Winter
    • Recipes
      • What To Cook?
    • Travel
      • Traveling and Antiquing
      • Lifestyle
    • Whimsy Home Wednesday
  • Contact Me
  • Privacy Policy
    • Disclaimer

Mornings on Macedonia

DIY, Decor, & More

Repurpose and Upcycling · April 10, 2021

Easy Tray Refresh Project

A little while ago, I had some extra time off of work and I was itching to do a DIY project. But I didn’t want to spend a lot of money on something and I didn’t really have anything in mind. Then, I remembered I had an old wooden tray that I didn’t particularly care for that just sat in the cabinets. I also had some leftover paint and antiquing glaze so I figured why not. That’s what started this easy tray refresh project!

I gave this old tray some new life and now I am loving how it looks. It definitely goes better with my farmhouse style now. So I thought it would be fun to share exactly how I did it in case you have something similar you want to give a facelift to in your home as well!
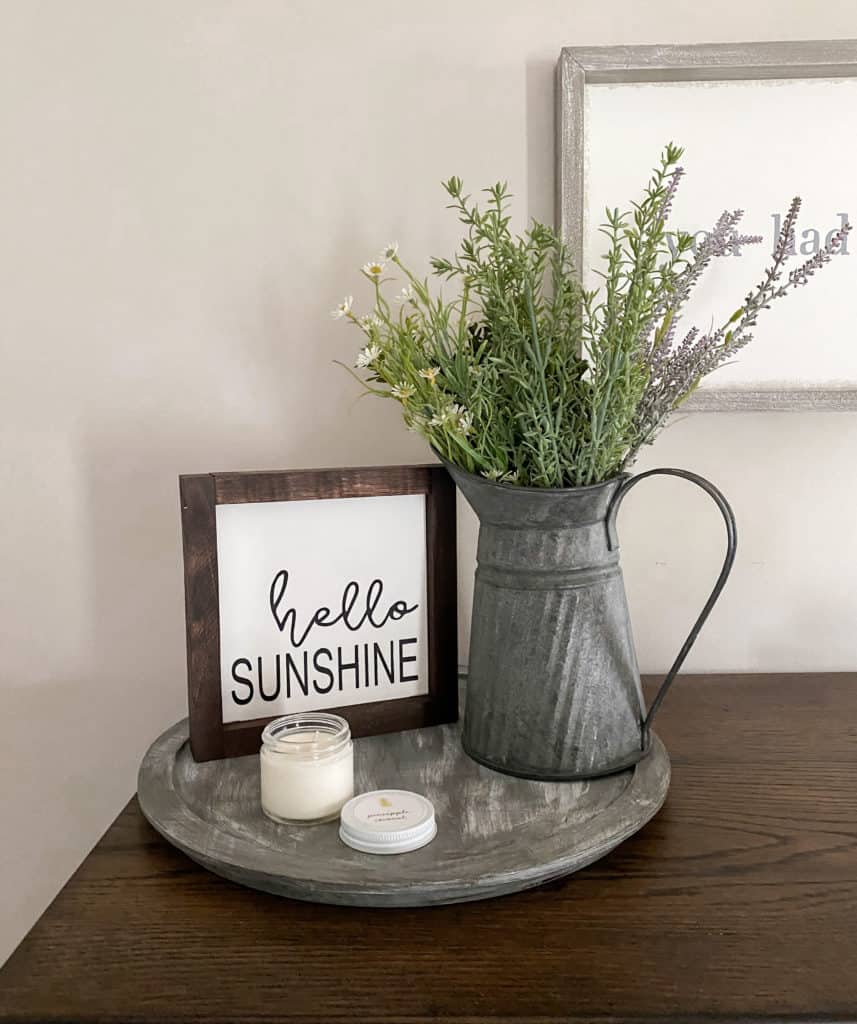
Tray Refresh
Look at the tray all finished! Plus, you always need to have a good candle on your tray too! I love using Antique Candle Co. and their small sample sizes for a tray like this!

This post contains affiliate links. Click here to read my disclosure policy.

Sand The Tray Down

The first thing that I did was sand the tray down a little bit so the paint would adhere better to it. I just used a piece of sandpaper and lightly sanded it down.

No need for the heavy duty electric sander for this project. I also sanded the bottom of the tray too because I wanted it painted as well to match the top.

After sanding it, I wiped it off with a microfiber cloth to get rid of any debris that was still leftover on the tray. This makes it all nice and smooth and ready for some paint!
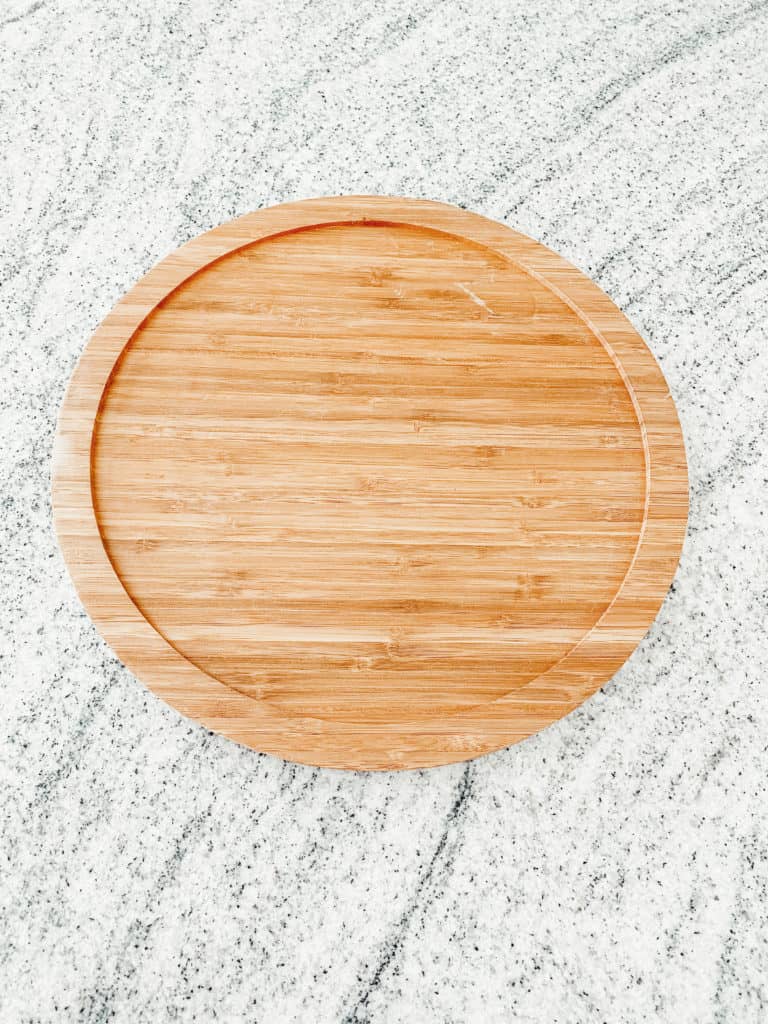
Wooden Tray
Here is what the tray looked like before. I’m also linking all the supplies I used for this project here below:

Start Painting The Tray

For this tray refresh project, I used Fusion Mineral Paint again. If you have been following me for awhile now, then you know I am a huge Fusion Mineral Paint fan.

Their paint goes on so well and so smooth and it’s perfect for a little project like this. I used the color Sacred Sage and if you remember that is the same color that I painted Toby’s room in too.
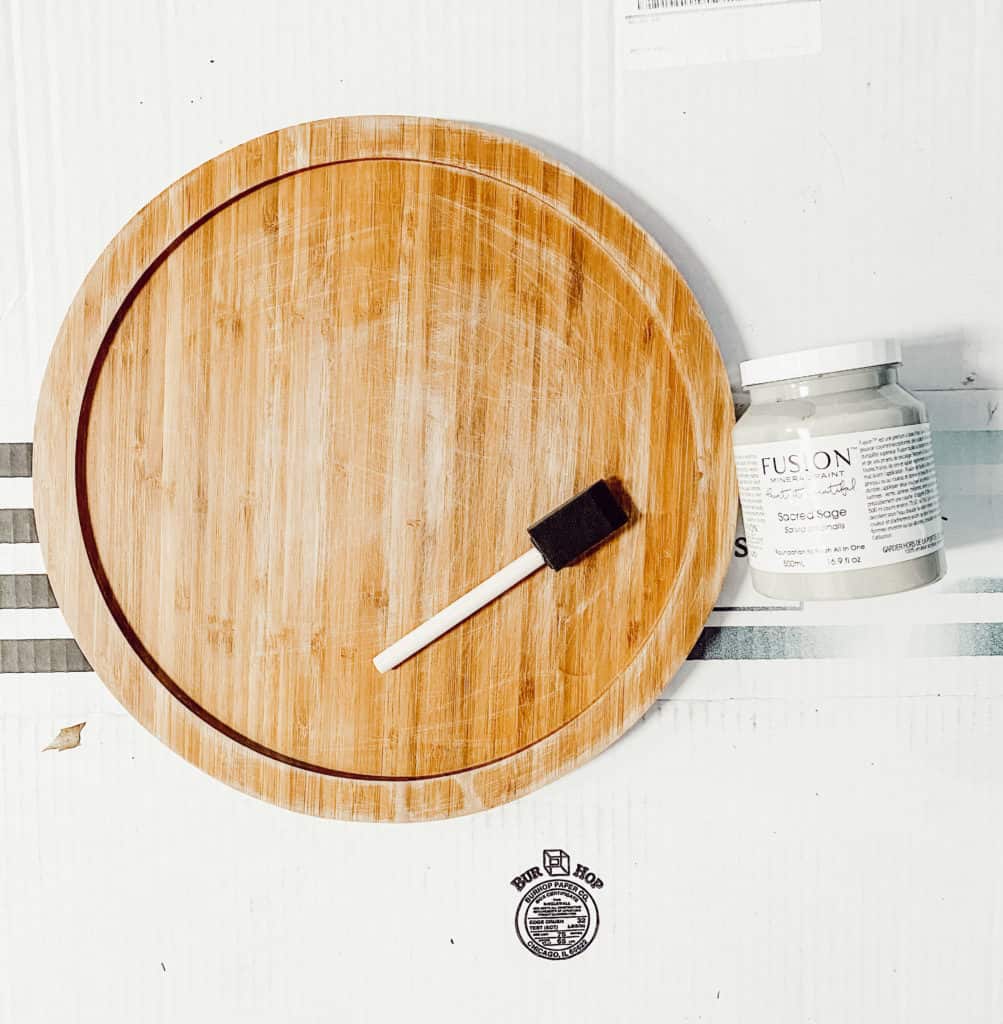
Ready to Paint Tray
Tray is all sanded and ready to be painted!

It took me a total of two coats and like I said above I had to do the front and the bottom of the tray. So I had to wait a little bit in between coats to let it dry.

But all in all, it wasn’t bad and this really was such an easy tray refresh project to do. Fusion Mineral Paint also dries pretty quickly so I didn’t have to worry about waiting too long.
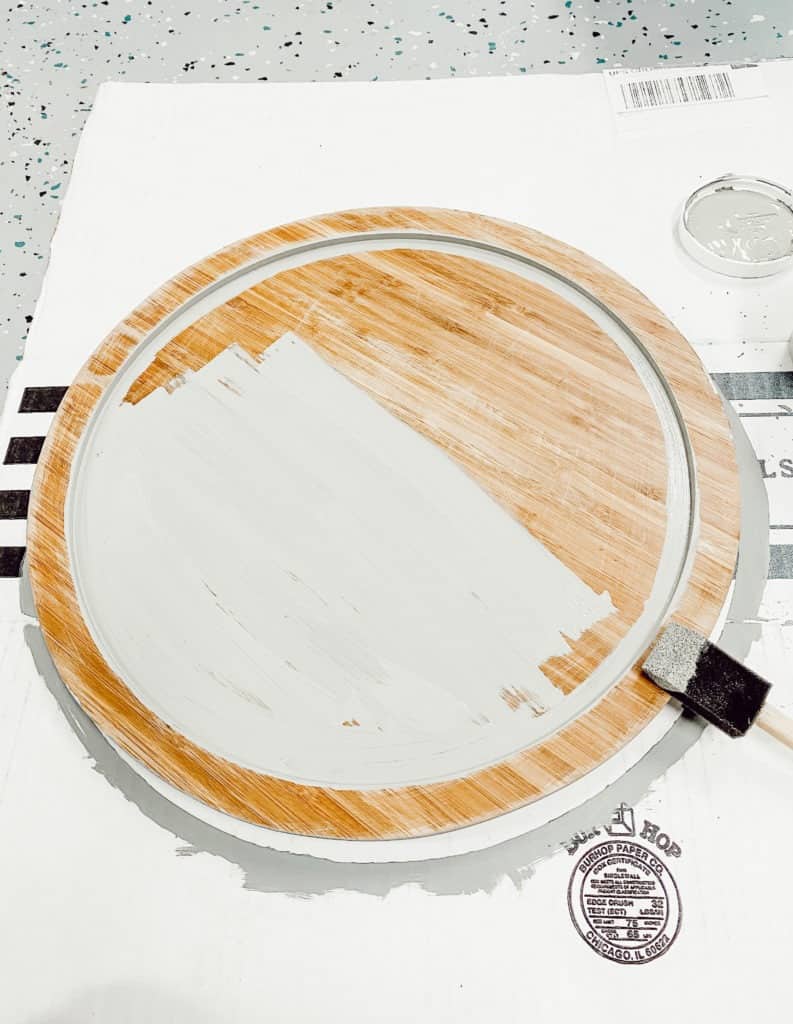
Painting Tray
In the process of painting the tray here.
Fusion Mineral Paint
Bottom of the tray complete!

Dry Brush the Tray

To add in some texture to the tray, I decided to do a dry brushing technique. I did this back when I painted my own pumpkins for fall too.

It’s pretty easy and simple. You just dip your dry paintbrush in some paint, get rid of the excess, and then very lightly brush it on top of whatever you are painting.

I used white paint since it would pop good against the gray color of the tray.
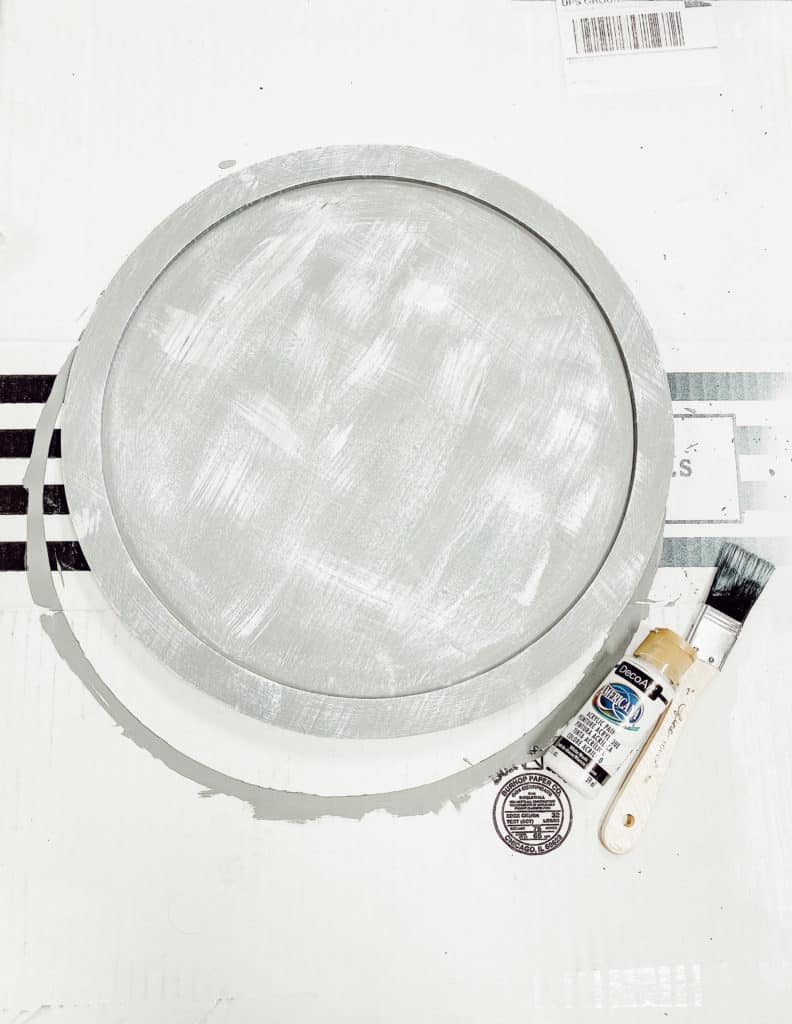
Dry Brushing the Tray
You can see here how I dry brushed the tray with the white paint easily.

Now, you can either stop here or continue on to my next step. If you like the way the tray looks just dry brushed, then by all means just leave it as is.

But, I wanted to add in a little more texture and dimension. So I decided to do a final step of adding in some antiquing glaze to the tray.

Available and now shipping the Spring 2021 Box!

Add Antiquing Glaze to Tray

I love using antiquing glaze. I have used it for several other projects in the past such as my gum ball machine refresh and mirror project.

This stuff is amazing and lasts forever. You just need a little bit to apply so it is awesome to keep on hand to reuse for project after project! I just apply a little bit to a rag and wipe it all over the tray.

And don’t worry if you apply too much and it is too dark. This stuff is vey forgiving and can be buffed off if need be.
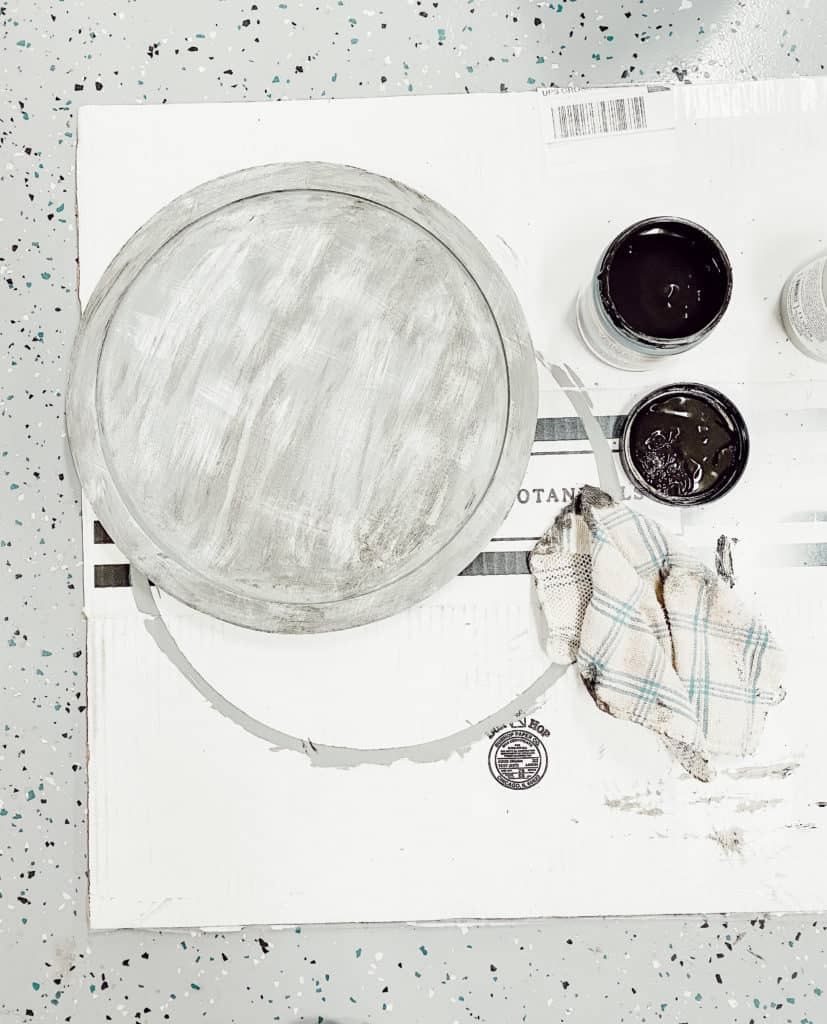
Add Antiquing Glaze to Tray
Here you can see the antiquing glaze and how it adds even more texture to the already dry brushed tray.

After applying the antiquing glaze to the tray, I just let it dry overnight. And then viola! It is done! Super easy and simple.

I didn’t apply a sealer or anything to it because I am just using it as decoration and placing it on a shelf. If you were to use it a lot more than that, you may want to add a sealer onto it too, but again that’s totally optional.

Conclusion

Well, I hope you guys enjoyed this easy tray refresh project! I enjoyed doing it and it soothed my creative soul for awhile.

I love being able to find things like this to do around the house that costs me no money! What about y’all? Do you enjoy doing simple and easy DIY projects like this?

I think I just love anything that has to do with painting. For me, it relaxes me and it a lot of fun to transform something old into something new!
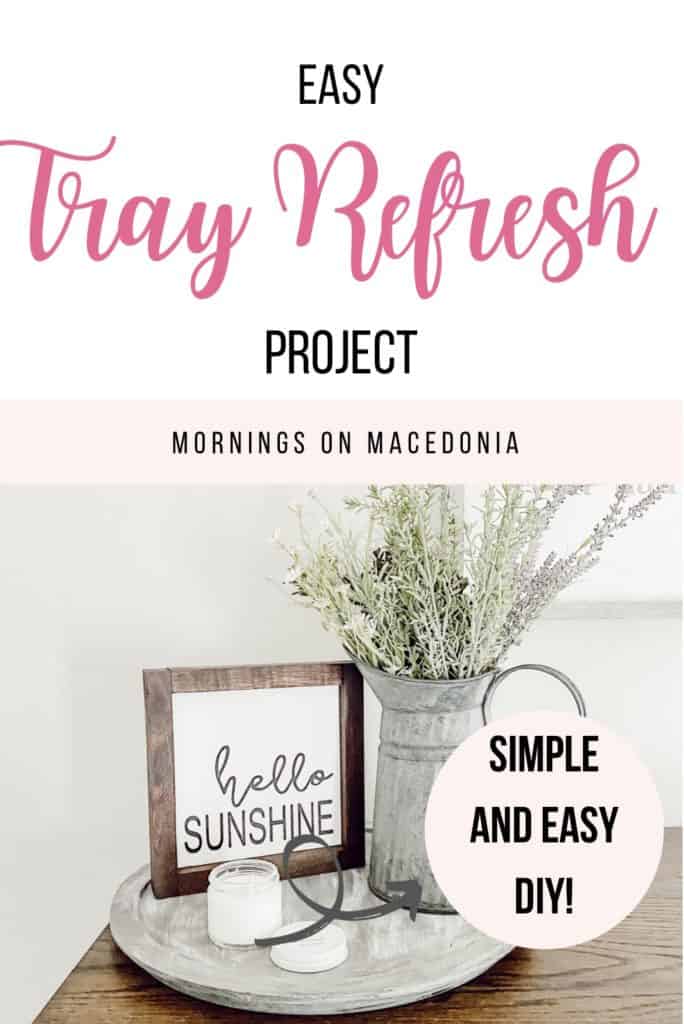
Easy Tray Refresh Project
Pin for later!

In: Repurpose and Upcycling · Tagged: DIY, Refresh, Tray

About Charity Gentry

I love Jesus, coffee, and home decor. I also love to cook and bake as well as read in my spare time! Follow along with me for all my latest DIY projects and ideas!

join the club

You’ll Also Love

Close Up of DIY Wooden RiserEasy and Simple DIY Wooden Risers
DIY Garden MarkersDIY Garden Markers
DIY Raised Garden BedsDIY Raised Garden Beds

Comments

  1. Tunrayo Adigun says

    April 10, 2021 at 2:03 pm

    It is so pretty, I wouldn’t have thought of revamping a tray like this

    Reply
    • Charity Gentry says

      April 11, 2021 at 2:56 pm

      Awe thank you so much. I am so glad you enjoyed it too!

      Reply
  2. Katie says

    April 10, 2021 at 2:46 pm

    I love how you coloured it! It’s so chic!

    Katie | katieemmabeauty.com

    Reply
  3. Tiffany McCullough - Metaphysical Mama says

    April 10, 2021 at 10:26 pm

    Wow! I can’t believe how great you made that tray look! You have a real gift! Thanks for sharing!

    Reply
    • Charity Gentry says

      April 11, 2021 at 2:57 pm

      Awe thank you so much! I am so glad you think so too!

      Reply
  4. Rosie Ireland says

    April 12, 2021 at 10:31 am

    You really do have such a skill of taking some ordinary and making it gorgeous!

    Rosie

    Reply
    • Charity Gentry says

      April 14, 2021 at 12:32 am

      Awe thank you so much Rosie. I really appreciate that sweet compliment!

      Reply
  5. Cristina Rosano says

    April 12, 2021 at 10:38 am

    This tray looks great! there is not one DIY project that you propose that I wouldn’t try! Just waiting to get some more space and then will come back to this and find something exciting to do! x

    Reply
    • Charity Gentry says

      April 14, 2021 at 12:33 am

      Awe thank you! So glad you think so too and I can’t wait to see what you do too when you get the space!

      Reply
  6. Lucy says

    April 12, 2021 at 10:41 am

    I love the revamped tray, what a brilliant idea! x

    Lucy | http://www.lucymary.co.uk

    Reply
    • Charity Gentry says

      April 14, 2021 at 12:35 am

      Thank you Lucy. So glad you think so!

      Reply
  7. Nyxie says

    April 12, 2021 at 11:35 am

    I love upcycling things! What a fabulous way to breathe life into an old tray.

    Reply
    • Charity Gentry says

      April 14, 2021 at 12:36 am

      Thank you! I love to upcycyle things as well.

      Reply
  8. Jenny in Neverland says

    April 12, 2021 at 12:49 pm

    I love the final result of this project! The style matches your interior items so well too 🙂 x

    Reply
    • Charity Gentry says

      April 14, 2021 at 12:38 am

      Thank you so much Jenny. I am so glad you think so too!

      Reply
  9. markstraveljournal says

    April 12, 2021 at 1:23 pm

    That’s a great simple project. And the finished project looks great. Thanks for sharing,

    Reply
    • Charity Gentry says

      April 14, 2021 at 12:41 am

      Thank you. I love a good simple project

      Reply
  10. Kelly Diane says

    April 12, 2021 at 1:57 pm

    You’ve done such a great job. It looks like it has come out of an expensive homewear boutique.

    Reply
    • Charity Gentry says

      April 14, 2021 at 12:42 am

      Awe thank you so much! That means a lot!

      Reply
  11. Eleanor Jones says

    April 12, 2021 at 1:58 pm

    I love how you always manage to make something beautiful for your home! Thank you for sharing this project idea x

    Reply
    • Charity Gentry says

      April 14, 2021 at 12:43 am

      Thank you! I am so glad you think so. I appreciate it

      Reply
  12. Kayleigh Zara says

    April 12, 2021 at 2:05 pm

    This is such a fun DIY – I love how easy and handy it is! I have a similar trinket tray for my keys so I’ll have to give this a go x

    Reply
    • Charity Gentry says

      April 14, 2021 at 12:44 am

      Thank you! You definitely should! It was so easy and simple to do!

      Reply
  13. Giulia says

    April 12, 2021 at 3:11 pm

    So cool! And it sounds easy as well, I might try this when I do my re-model. Thanks for sharing this neat idea and explaining how to do it.

    Giulia, tidbitsofcare.com

    Reply
    • Charity Gentry says

      April 14, 2021 at 12:44 am

      Thank you so much. You should definitely try it out if you get the chance to!

      Reply
  14. Jaya Avendel says

    April 12, 2021 at 10:41 pm

    I love both the original tray and the finished one. The finished tray fits in beautifully with your style of decor and complements the pitcher, candle, and contrast of the photo frame nicely. 🙂

    Reply
    • Charity Gentry says

      April 14, 2021 at 12:46 am

      Thank you. Yes, the finished one fits in much better with my home esthetic I think!

      Reply
  15. Mary Monique says

    April 13, 2021 at 5:57 am

    Wow, you’re super creative. Instantly stylish yet simple (and cheap). It matched with your home aesthetic as well which is a plus! Whenever I see this kind of stuff, I remember Bethany Mota for some reason haha. Thanks for sharing!

    http://www.lifebeginsattwenty.com

    Reply
  16. ThatUnknownBlogger says

    April 13, 2021 at 2:17 pm

    I absolutely love your styling! The end result is so amazing. I just love your “before and after” picture. Using simple things and making them pretty is a talent.

    Reply
  17. Jodie | That Happy Reader says

    April 13, 2021 at 2:34 pm

    You’ve created a beautiful tray Charity! I love how you always provide lots of instruction and photos along the way. Thanks for sharing.

    Reply
  18. lifestyleseason says

    April 13, 2021 at 5:43 pm

    Great post! Thank you for sharing this project! I love the end result and I like how easy it is to do! I want to do something like this!

    Reply
  19. Della Driscoll says

    April 13, 2021 at 8:25 pm

    I love your diy posts and this is the perfect room accesory!

    Reply
  20. Nic | Nic's Adventures & Bakes says

    April 19, 2021 at 3:43 pm

    Thanks for sharing, this looks a great idea to refresh things 🙂

    Reply
    • Charity Gentry says

      April 19, 2021 at 11:13 pm

      Thank you. I love to refresh things as well.

      Reply
  21. Merry Sari says

    April 22, 2021 at 10:44 am

    Love the finished tray! This is a great idea to refresh thing – thank you so much for sharing x

    Reply
    • Charity Gentry says

      April 23, 2021 at 8:36 pm

      Thank you! I am so glad you think so as well!

      Reply
  22. Leslie Nichole says

    April 22, 2021 at 1:36 pm

    The tray looks fantastic, you did a great job! I can’t wait to get a few projects done around thehouse. I don’t know where to start. Right now my boyfriend and I are remodeling a truck bed camper. It’s so much hard work but looking at it once little things are done, it is rewarding the see the results.

    Reply
    • Charity Gentry says

      April 23, 2021 at 8:37 pm

      Oh that sounds like a fun project! It is a lot of work, but definitely worth it when you see the final outcome!

      Reply
  23. Irene says

    April 22, 2021 at 5:13 pm

    That looks great! It’s been a while since I had the chance to paint anything, and I really miss it. I love all of the different techniques you used to get a look you wanted. The glaze really added a lot of depth.

    Reply
    • Charity Gentry says

      April 23, 2021 at 8:37 pm

      Thank you! Depth and texture was what I was going for!

      Reply
  24. Karalee Shotola says

    April 22, 2021 at 5:53 pm

    Wow that’s such a big difference between the before & after! I love the finished tray!

    Reply
    • Charity Gentry says

      April 23, 2021 at 8:37 pm

      Thank you my friend! I do too!

      Reply
  25. Sue Berk Koch says

    May 4, 2021 at 11:53 am

    How funny but I have the same tray! I was thinking about painting it but didn’t want a solid color. I’ll check out that glaze, thank you!

    –Sue
    http://www.susanberkkoch.com/blog

    Reply
    • Charity Gentry says

      May 5, 2021 at 11:17 pm

      That is so funny. Great minds think alike!

      Reply
  26. Alison says

    May 5, 2021 at 9:53 am

    Your tray looks so good! I love a good diy project and giving things new life with a coat of paint 🙂

    I’ve never used antiquing glaze before so that’s interesting to see and learn about. Thanks for sharing!

    Reply
    • Charity Gentry says

      May 5, 2021 at 11:17 pm

      Thank you! I love using an antiquing glaze. It really transforms the piece!

      Reply
  27. Morag says

    May 5, 2021 at 11:35 am

    This is such an impressive piece of DIY. The end result is really professional. But you have explained really clearly what steps you took if I decide I want to have a go.

    Reply
    • Charity Gentry says

      May 5, 2021 at 11:20 pm

      Thank you so much! I am so glad you think so!

      Reply
  28. Adam says

    May 5, 2021 at 1:16 pm

    Love what you’ve done with the tray. I really want to do something like this with some of my old stuff.

    Reply
    • Charity Gentry says

      May 5, 2021 at 11:26 pm

      You definitely should! I always love repurposing things!

      Reply
  29. A Capone Connection says

    May 5, 2021 at 10:57 pm

    Wow! That was a BIG difference from what the tray started out as. I love the finished product. There is something very satisfying about a DIY project. Thank you for sharing the steps so we can make one too.
    ~ Andrea | acaponeconnection.com

    Reply
    • Charity Gentry says

      May 5, 2021 at 11:26 pm

      Thank you so much! I love a good and satisfying DIY project too!

      Reply

Leave a Reply Cancel reply

Your email address will not be published. Required fields are marked *

Recipe Rating


Next Post >

DIY String Light Patio Refresh

Recent Posts

  • Easy 3-Ingredient Apple Cobbler with Sugar Cookie Dough
  • DIY Pottery Barn Dupe Ghosts: Easy Target Dollar Spot Halloween Decor
  • Easy Slow Cooker BBQ Chicken Recipe
  • Easy Cinnamon Apple Coffee Cake (Made with Fresh or Frozen Apples!)
  • DIY Oyster Shell Ghosts: An Easy Coastal Halloween Craft

Archives

Categories

  • About Me
  • Christmas
  • DIY
  • Everyday Decor
  • Fall
  • Home Improvement
  • Lifestyle
  • Outdoor
  • Recipes
  • Repurpose and Upcycling
  • Spring
  • Summer
  • The Blog
  • Travel
  • Uncategorized
  • Whimsy Home Wednesday
  • Winter

About Me

About Me

Follow along with me for all things home decor and modern farmhouse style! I also love sharing simple DIY projects and how to style and decorate every room of your house! Thanks for stopping by!


Shop My Home!

join the club

trending now

instagram

Follow @mornings_on_macedonia

Stop throwing away your pretty candle jars! 🕯️ He Stop throwing away your pretty candle jars! 🕯️

Here’s the easiest hack for removing leftover candle wax from antique jars, mugs, and vintage vessels so you can reuse them! 🤍

I found this adorable antique candle from Antique Candle Co., and one of my favorite things about it is that once the candle is finished, you can repurpose the vintage vessel instead of throwing it away.

Here’s how I remove the leftover wax:

🕯️ Pour boiling water into the candle vessel
🕯️ Let it sit for several hours until the wax solidifies and floats to the top
🕯️ Scoop out the hardened wax (I save mine to use in my wax warmer!)
🕯️ Remove the leftover sticky wick with a little Goo Gone
🕯️ Wash the vessel thoroughly and you’re done!

Such an easy candle jar cleaning hack and the perfect way to upcycle antique jars, vintage candle vessels, and pretty containers into something you can actually use again! ♻️

Have you tried this candle wax removal hack before?!

Comment SHOP below to receive a DM with the link to this post on my LTK ⬇ https://liketk.it/6lGsH

#lifehacks #candlehack #vintagecandleholder #repurposing #fallcandles
Who knew cupcake liners could make homemade canned Who knew cupcake liners could make homemade canned goods look this cute?! 🍂🤎

If you’re looking for an easy fall DIY or a budget-friendly way to dress up your homemade canned goods, this is the cutest little hack! Simply place a cupcake liner over the lid before screwing on the ring, then finish it off with a printable label and a little twine or ribbon.

It’s the perfect way to turn homemade apple butter into a beautiful fall hostess gift, neighbor gift, teacher gift, or Thanksgiving gift in just a few minutes. Simple, inexpensive, and so much cuter than a plain mason jar!

Would you gift these to someone this fall? 🍎🍂

Save this idea for fall canning season and follow for more easy fall DIYs, cozy decorating ideas, and homemade gift inspiration! 

Comment SHOP below to receive a DM with the link to this post on my LTK ⬇ https://liketk.it/6lGwV

#fallhacks #kitchenhack #cannedgoods #applebutter #fallgifts
Fall is almost here, which means it’s officially a Fall is almost here, which means it’s officially apple orchard season! 🍎 One of my favorite fall traditions is picking fresh Honeycrisp apples straight from the orchard. There is just nothing better than a crisp, juicy apple on a cool autumn day!

I always stock up because I love freezing fresh apple slices to enjoy all year long. They’re perfect for making these easy Crockpot Cinnamon Apples whenever the craving hits! They’re soft, warm, full of cinnamon flavor, and make the perfect fall side dish, dessert, or sweet snack. Plus, this slow cooker apple recipe couldn’t be easier to make.

If you’re looking for cozy fall recipes, simple apple recipes, or an easy crockpot dessert, you have to try this one!

Comment “RECIPE” below and I’ll send it straight to you! 🍎🍂

#crockpotrecipes #cinnamonapple #cinnamonapples #fallbaking #fallrecipes
Y’all, I am SO tired of this 😩💔 I woke up this mor Y’all, I am SO tired of this 😩💔 I woke up this morning not feeling great, but like I always do, I tried to push through it. I was sitting at my laptop doing a little work when suddenly my hands started shaking so badly that I couldn’t control what I was doing. My HR spiked up to 180 and I threw up as well. And honestly? I’m frustrated, scared, and completely exhausted from not knowing WHY this is happening.

I finally got my MRI results back on Friday, and fortunately (but also unfortunately), they didn’t find anything major. And I’ll admit it… I bawled. 😭

Of course I don’t want something seriously wrong with me. But at the same time, I desperately want a diagnosis. I want answers. After dealing with unexplained symptoms for so long, getting “normal” test results can almost feel like another dead end.

My neurologist had mentioned the possibility of Chiari malformation, so I honestly thought that might finally explain some of my symptoms. Now that the MRI didn’t show that, I feel like I’m back at square one.

Because this isn’t normal. 😩

What am I supposed to do for work when my hands are shaking like this?! I was working as a dental hygienist, and can you imagine trying to clean someone’s teeth while your hands are trembling uncontrollably? It’s terrifying to even think about.
My short-term disability still hasn’t been approved either, so I’m sitting here wondering what I’m supposed to do next while my health and career feel completely uncertain.

I have another appointment with my doctor on Friday, so I’m trying to remind myself that this is just another step in the process. But it feels like it’s been nothing but waiting for appointments, waiting for tests, waiting for results… and still no answers.

This has truly been the hardest season of my life.

I’m trying so hard to trust God through all of this, even when I don’t understand what He’s doing. 🙏🏻 It’s just really hard when you don’t know what your future, your health, or even your career is going to look like.

So if you’ve been following along through this health journey, please keep praying that I finally get some answers. 🤍
If you’re part of the Abandoned Golf Wives Social If you’re part of the Abandoned Golf Wives Social Club, come join me! 😜 Because if he’s going to spend every weekend on the golf course, I’m at least going to have a cute outfit about it. 😂

When I saw this adorable shirt from Pink Lily, I HAD to have it immediately—especially because it pairs perfectly with my “he’s golfing” hat. ⛳️😂

At this point, I might as well make being a golf wife my entire personality, right?! 🤣

Tag your fellow golf wives who totally get it! 👇🏼

Comment SHOP below to receive a DM with the link to this post on my LTK ⬇ https://liketk.it/6lqMU

#golfhumor #husbandwifejokes #husbandwifehumor #golfing #golfjokes
When I spotted these plain little white ceramic gh When I spotted these plain little white ceramic ghosts at the Target Dollar Spot, I knew they had SO much potential! Instead of leaving them plain, I gave them a quick makeover and turned them into the cutest antiqued gold Halloween decor that looks way more expensive than it actually is! 🙌

Here’s how I did it:

👻 First, I sprayed the ceramic ghosts with black spray paint.
✨ Then I lightly layered metallic gold spray paint over the top. I didn’t want them super shiny—I was going for that aged, antique gold pottery look.
🖤 Finally, I used a little black acrylic paint to make their eyes stand out more.

And that’s it! Such an easy DIY Halloween decor makeover, and I think they turned out ADORABLE! 🥹

I love finding inexpensive Target Dollar Spot finds and giving them a high-end look with a little DIY magic.

Would you believe these started as plain white ghosts from Target?! 👻

Comment SHOP below to receive a DM with the link to this post on my LTK ⬇ https://liketk.it/6llsc

#potterybarndupe #targetdollarspot #targetdollarspotfinds #diyghost #ghosties
If pressing the “CLOSE DOOR” button the second I g If pressing the “CLOSE DOOR” button the second I get on the elevator so I can avoid small talk is wrong… I don’t want to be right. 😂🙈

I’m just THAT introverted. 🤣 My social battery has a daily limit, and sometimes I’ve already hit my maximum number of conversations before I even get to where I’m going. 😅

No offense… I just need to ride this elevator in peace and silence 🤣

Please tell me I’m not the only introvert who does this?! 👀

#introvertlife #introvertproblems #introverting #relatablehumor #relatablecontent
It’s officially been ONE FULL YEAR since my health It’s officially been ONE FULL YEAR since my health started spiraling. 💔

A year ago today, I was at work when my heart rate suddenly spiked so high that I became extremely dizzy and shaky and genuinely thought I was going to pass out. I went to the ER afterward just to be safe, and of course… everything looked “normal.” My EKG was normal. They could see that my heart rate had spiked, but they couldn’t tell me why.

Little did I know that one scary episode would turn into a daily battle with unexplained symptoms. Fast forward one year and I’m dealing with even worse symptoms, including frequent heart rate spikes, dizziness, shakiness/tremors, fatigue, and so much more. And the hardest part? I STILL DON’T HAVE ANSWERS.

I can’t even work anymore. I’ve spent months waiting for appointments, getting test after test, waiting for results, and hoping that this will finally be the thing that explains what’s happening… only to end up with more questions.

And honestly? I feel crazy sometimes. Not because I think this is all in my head, but because it’s incredibly hard to keep telling people how badly you feel when test after test doesn’t give you an answer. 😭

It’s been a really rough week emotionally, and I’m having a hard time dealing with all of this. I feel like I’m constantly taking one step forward and two steps back. How long am I going to have to wait before I finally have answers? How much longer until I can start feeling like myself and actually live my life again?

I’m so tired of waiting. I’m tired of being passed from appointment to appointment. I’m tired of having no real help in the meantime. And I’m tired of feeling like I have to fight so hard just to be heard. 💔 I’m trying so hard to let go, trust God, and believe that there’s a reason for all of this… but y’all, IS IT HARD. 😢

I’m praying that after this past year, I’m finally getting closer to some answers. Until then, I’m just taking it one day at a time. If you’re also living with unexplained symptoms, chronic illness, POTS symptoms, tremors, dizziness, heart rate spikes, or a long diagnostic journey, please know you’re not alone. ❤️Here’s to hoping year two looks very different from year one!
Don’t let those vacation seashells sit in a drawer Don’t let those vacation seashells sit in a drawer collecting dust! 🐚🤍 TURN THEM INTO WALL ART INSTEAD!

If you’re anything like me, you come home from every beach trip with a pocketful of seashells and absolutely no idea what to do with them. 😂 So I turned mine into this easy DIY seashell wall decor and I’m OBSESSED with how it turned out!

All you need is:
🐚 Seashells
🤍 A small canvas
🔥 Hot glue
🎨 White spray paint
🪵 Optional wood trim for a frame

I love that you can customize this with shells from your favorite beach trip, making it such a sweet way to preserve those vacation memories. And the neutral white + wood combination makes it work with almost any home decor style!

You could even make a whole gallery wall with shells from different beaches you’ve visited! 🥹🌊

Save this DIY for your next beach vacation! And if you have a stash of seashells at home, this is your sign to finally DO something with them. 😂🐚

I have the full step-by-step tutorial on the blog! Comment “SHELLS” and I’ll send you the link! 🤍

#seashell #seashelldecor #coastaldecor #seashellart #coastaldecorating
Apparently, this little Christmas decoration has b Apparently, this little Christmas decoration has been hanging out in here ALL YEAR and I just never noticed it. 🤣

Tell me I’m not the only one who does this?! I swear every time I switch out my seasonal home decor, I find at least ONE random piece from months ago that somehow survived the decor rotation. 😂

Fall decorating is officially underway over here, but apparently Christmas wanted one last cameo. 🎄😂

Please tell me I’m not alone! 👇🏼

#failvideos #failvideo #falldecorating #falldecor #relatablecontent

Copyright © 2026 Mornings on Macedonia · Theme by 17th Avenue