Bless my poor husband’s heart because when he marr Bless my poor husband’s heart because when he married me, I don’t think he realized he was signing up for a lifetime of Christmas decorating chaos! 😂

But when you’re a Christmas-obsessed wife who believes EVERY single room in the house deserves its own Christmas tree, you have to start decorating early, right?! 🎅🏻

I mean, putting up multiple Christmas trees, hanging garland, and transforming our entire home into a cozy Christmas wonderland takes TIME! So obviously, October is a perfectly reasonable time to start decorating for Christmas. At least that’s what I keep telling him! 😜

Thankfully, after 10 years of marriage, he knows the drill and just goes along with all my crazy Christmas decorating ideas. He’s a keeper for sure! ❤️

Now PLEASE tell me I’m not the only one who starts decorating for Christmas in October?! 🎄🤣 And how many Christmas trees do you put up in your house?! 

Comment SHOP below to receive a DM with the link to this post on my LTK ⬇ https://liketk.it/6pAfP
#ad 🎃🐈‍⬛ Don’t throw away that empty cat litter ju #ad 🎃🐈‍⬛ Don’t throw away that empty cat litter jug… turn it into a Halloween boo basket for your cats instead! I’m partnering with @catspride today to put an empty Cat’s Pride litter jug to good use with the cutest little upcycling project. Since the jug was already the perfect Frankenstein green, I knew exactly what I wanted to make! 💚 After cleaning the empty jug thoroughly, we cut off the top to create a basket shape. Then I used my Cricut to add a Frankenstein face before filling it with some of Riley and Toby’s favorite cat treats and Halloween toys. And judging by Toby’s reaction to that catnip owl, I’d say this DIY cat boo basket was a success. 😹 And before the jug was transformed, Cat’s Pride made litter box duty a whole lot easier. I love the odor control and easy scooping, and Riley and Toby are always VERY interested when a fresh box of litter appears. 😂 So consider this your sign to save your next empty litter jug and get creative with it! And when it’s time to stock up on fresh litter, check out Cat’s Pride for your own feline crew. 🐾 Would you make a Halloween boo basket for your cats?! 🎃👇🏻
If you’re wondering what to do with all that lefto If you’re wondering what to do with all that leftover Halloween candy, these Leftover Halloween Candy Cookies are the answer! They combine two of my favorite things: candy AND cookies! So you really can’t go wrong. 🤣

Just chop up your favorite leftover chocolate candy bars, mix them into the cookie dough, and you’ve got the ultimate easy post-Halloween treat! Plus, every cookie is a little different depending on what candy you throw in. 🙌🏻

This is such a fun way to use up leftover Halloween candy instead of letting it sit around for the next six months. 😂

Want my Leftover Halloween Candy Cookies recipe? Comment “RECIPE” below and I’ll send it your way! 🍪
POV: You finally decide it’s time to tell your ado POV: You finally decide it’s time to tell your adopted daughter the truth about her biological mother… and she is NOT taking the news well. 😭🤣😹

Poor Riley! The look of absolute SHOCK on her face when she hears about her past! 🤣 I swear, the dramatic reactions of cats are just too funny sometimes!

But here’s a fun fact about our little rescue kitty! 🐈‍⬛ When we adopted Riley, my mom actually adopted her biological mama, Smoke! So technically, Riley’s mom lives with her grandma now. 🤣 Which means we can visit her anytime we want!

So don’t worry, Riley! We know exactly where you came from, and your mama is living her best life too! 😹❤️

Please tell me I’m not the only crazy cat mom who makes up dramatic storylines about her cats?! 🤣
🏈 SAVE THIS EASY GAME DAY APPETIZER! 🧀 Football s 🏈 SAVE THIS EASY GAME DAY APPETIZER! 🧀 
Football season is officially here, which means I’m all about the game day snacks! 🙌🏻 
And this easy Football Cheese Ball might just be the cutest addition to your next football party or tailgate! I’m partnering with @foodlion to create this simple, delicious football-shaped cheese ball using ingredients you can easily grab during your next grocery run. 
It’s creamy, cheesy, loaded with ranch and bacon, and perfect for serving with crackers and pretzels. 😍 Here’s what you’ll need: 
🏈 FOOTBALL CHEESE BALL: 
• 16 oz cream cheese (2 8-oz blocks), softened 
• 2 tbsp sour cream 
• 2 cups shredded cheddar cheese 
• 1 oz ranch seasoning (1 packet) 
• ¼ cup chopped green onions 
• ½ cup chopped bacon or bacon bits 
• 1 tsp hot sauce (optional) 
• 2 tsp Worcestershire sauce 
🏈 FOR THE COATING: 
• ⅓ cup chopped pecans 
• ½ cup chopped bacon 
• 2 tbsp chopped green onions 
• 2 slices white cheese for the football laces 
Mix all of the cheese ball ingredients together in the bowl of a stand mixer until combined. Spray a little cooking oil on your hands and shape the mixture into a football. Wrap it in plastic wrap and refrigerate for at least 8 hours. I made mine the night before so it was ready to go on game day! When you’re ready to serve, combine the pecans, bacon, and green onions in a shallow dish and roll the cheese ball in the mixture until completely coated. Cut thin strips from the white cheese to create the football laces, arrange everything on a serving tray with your favorite crackers and pretzels, and you have the CUTEST football party appetizer! 🏈🧀 
Food Lion makes it so easy and convenient to grab everything you need for a delicious game day spread without spending a fortune. #FoodLionPartner SAVE this football cheese ball recipe for your next tailgate or football watch party! 🏈 
And tell me below, are you making this for your next game day?! 👇🏻 #FallingforFoodLion #sponsored
If you love pecan pie, just WAIT until you try the If you love pecan pie, just WAIT until you try these easy homemade pecan pie bars! 🤤🥧🍁

I’m telling y’all, these might just be BETTER than traditional pecan pie! And that’s saying a lot because I absolutely love a good slice of pecan pie, especially during the holiday season! 🤣

These delicious pecan pie bars have a buttery shortbread crust topped with a rich, gooey, sweet pecan filling. Basically, all the flavors of a classic Southern pecan pie, but in an easy-to-make dessert bar! And trust me, once you try one, it’s hard to stop at just one! 😜

I’ve been making this recipe for years now, and it’s always one of my favorite Thanksgiving desserts to bring to the table! Plus, they’re perfect for Christmas parties, holiday gatherings, or anytime you’re craving a little sweet treat!

And the best part?! You can make these pecan pie bars ahead of time and even freeze them for later! Which is a lifesaver during the busy holiday baking season! 🙌🏻

So if you’re looking for an easy Thanksgiving dessert recipe that everyone will love, you NEED to add these to your holiday baking list this year!

Comment “RECIPE” below and I’ll send you my easy pecan pie bars recipe! 🥧
Forget checking under the bed for monsters because Forget checking under the bed for monsters because apparently we already have one living there! 🤣 Little Miss Charlie, our mischievous tuxedo cat, has officially claimed the space under our bed as her personal hiding spot. And the second someone walks by?! ATTACK MODE ACTIVATED! 🐈‍⬛

She takes her job as the resident under-the-bed monster VERY seriously, and honestly, her sneak attacks are hilarious! 😂 Who knew such a cute little kitty could be so terrifying?!

It’s a good thing she’s adorable because we apparently live with a tiny furry jump scare now! 😹

Please tell me we’re not the only ones with a cat who loves hiding under the bed and attacking unsuspecting ankles?! 🤣
#AD One of my favorite ways to start the day is si #AD One of my favorite ways to start the day is sipping coffee on our screened-in porch with my cats, and these adorable @tossware disposable hot cups make my little morning routine even cuter!

The second I saw this cat print, I knew I had to have it. 😹 I mean… cute coffee cups covered in cats?! They were basically made for me! They’re perfect for slow mornings at home, taking your coffee on the go, or just making your everyday coffee routine feel a little more fun.

And @tossware has SO many cute patterns and designs to choose from, so there’s something for every season and occasion!

Are you a morning coffee + cats person too?! ☕️🐾
You need to learn how to say NO in life. 👏🏼 When You need to learn how to say NO in life. 👏🏼

When someone asks, “Do you want one?” You say, “No… I want TWO.” 🤣

And that is especially true when it comes to Reese’s Pumpkins. 🎃🥜🍫

Seriously, WHY do the Reese’s Peanut Butter Pumpkins taste so much better than regular Reese’s Peanut Butter Cups?! There’s just something about that perfect chocolate-to-peanut-butter ratio that gets me every single Halloween. 😂

They are hands down my favorite Halloween candy, and honestly, I could probably eat my weight in them.

So if you offer me one Reese’s Pumpkin this spooky season, just save us both some time and hand me two. 😉🤣

Now I need to know: what’s the BEST Halloween candy of all time?! 👇🏼
  • Home
  • Subscribe
  • About Me
  • The Blog
    • DIY
      • Turning a Builder Grade Home Into Something More
      • Outdoor
      • Home Improvement
      • Repurpose and Upcycling
      • Home Decor
        • Christmas
        • Everyday Decor
        • Fall
        • Spring
        • Summer
        • Winter
    • Recipes
      • What To Cook?
    • Travel
      • Traveling and Antiquing
      • Lifestyle
    • Whimsy Home Wednesday
  • Contact Me
  • Privacy Policy
    • Disclaimer
  • Home
  • Subscribe
  • About Me
  • The Blog
    • DIY
      • Turning a Builder Grade Home Into Something More
      • Outdoor
      • Home Improvement
      • Repurpose and Upcycling
      • Home Decor
        • Christmas
        • Everyday Decor
        • Fall
        • Spring
        • Summer
        • Winter
    • Recipes
      • What To Cook?
    • Travel
      • Traveling and Antiquing
      • Lifestyle
    • Whimsy Home Wednesday
  • Contact Me
  • Privacy Policy
    • Disclaimer

Mornings on Macedonia

DIY, Decor, & More

Christmas · October 17, 2026

DIY Oyster Shell Christmas Ornaments 

Is it ever too early to start making Christmas crafts?! I think not! Especially when they’re as cute and easy as these DIY oyster shell Christmas ornaments! 🎄

Y’all know how much I love Christmas decorating, and I’m always looking for fun and affordable ways to create unique holiday decorations for our home. So today, I’m sharing how I made these beautiful handmade oyster shell ornaments using just a few simple supplies!

You may remember the DIY oyster shell ghosts I made for Halloween a few weeks ago. Well, I still had quite a few oyster shells leftover from that project, and I started wondering what else I could make with them.

And then it hit me… Christmas ornaments, of course!

Since I love decorating our Christmas trees with gold accents, I decided to create these pretty decoupage oyster shell ornaments using metallic gold spray paint and festive wrapping paper.

And let me tell you, they turned out even prettier than I imagined!

Not only are these DIY coastal Christmas ornaments super easy to make, but they’re also a beautiful way to incorporate a little coastal charm into your holiday decor. Plus, if you collected your oyster shells during a beach vacation like I did, they make such a special keepsake too!

So if you’re looking for an easy Christmas craft, a unique handmade ornament idea, or a fun way to repurpose leftover oyster shells, keep reading for my full step-by-step tutorial!
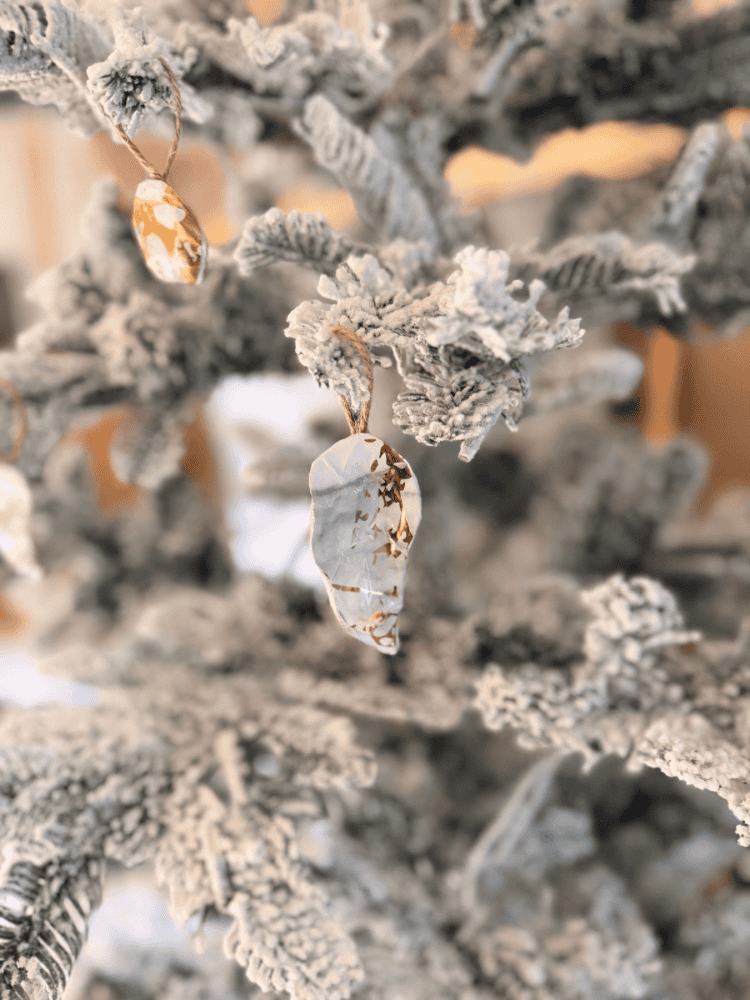
Oyster Shell Ornament

This post also contains affiliate links, which means I make a small commission off anything you purchase through here, at no additional cost to you. Please read my full privacy policy for more details.

Why You’ll Love These DIY Oyster Shell Christmas Ornaments

There are so many reasons why I love making my own Christmas ornaments, but these oyster shell ornaments might just be one of my favorite holiday crafts yet!

First of all, they’re incredibly easy to make. You don’t need any fancy crafting equipment or advanced DIY skills to create something beautiful.

And since oyster shells come in all different shapes and sizes, every ornament turns out a little different. Which I think makes them even more special!

Here are a few reasons why these handmade Christmas ornaments are worth trying:

  • They’re budget-friendly and require just a handful of supplies.
  • You can customize them with different wrapping paper patterns and paint colors.
  • They’re perfect for coastal, traditional, vintage, or neutral Christmas decorating styles.
  • They make thoughtful handmade Christmas gifts.
  • They’re a fun way to preserve memories from a beach vacation.
  • They’re an easy Christmas craft you can make ahead of the busy holiday season.

I also love that these ornaments look much more expensive than they actually are!

With the metallic gold finish and pretty Christmas wrapping paper, they have such an elegant, vintage-inspired look. And y’all know I’m all about that when it comes to Christmas decor!
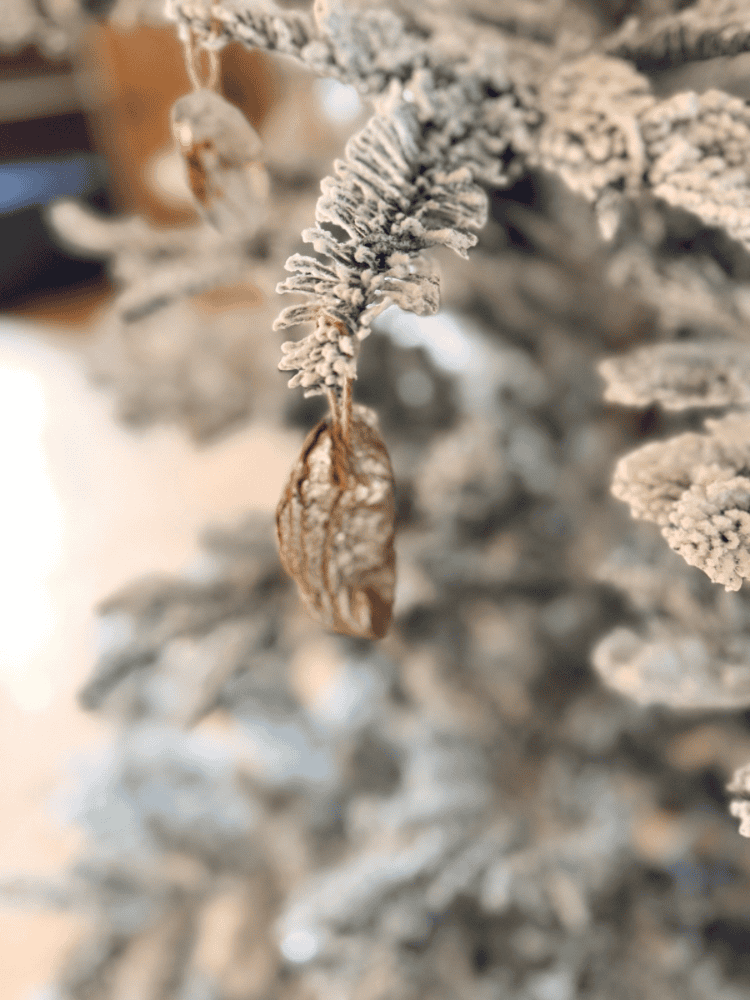
Finished DIY Oyster Shell Ornament

Materials Needed for DIY Oyster Shell Christmas Ornaments

Before getting started, you’ll need to gather a few simple crafting supplies.

Thankfully, I already had most of these materials on hand from previous DIY projects, which made this Christmas craft even more affordable!

Here’s everything I used:

  • Oyster shells (I brought a bunch home from our Myrtle Beach vacation this summer!)
  • White spray paint
  • Metallic gold spray paint
  • Christmas wrapping paper
  • Mod Podge
  • Paintbrush
  • Twine
  • Hot glue gun and glue sticks
  • Scissors

For my ornaments, I chose wrapping paper with beautiful white and gold details to coordinate with the rest of my Christmas decorations.

However, you can use whatever wrapping paper you love!

Traditional red and green patterns, vintage Christmas prints, blue and white designs, or even neutral botanical patterns would all look beautiful.

That’s one of my favorite things about this DIY project. You can completely customize the ornaments to match your own Christmas tree!
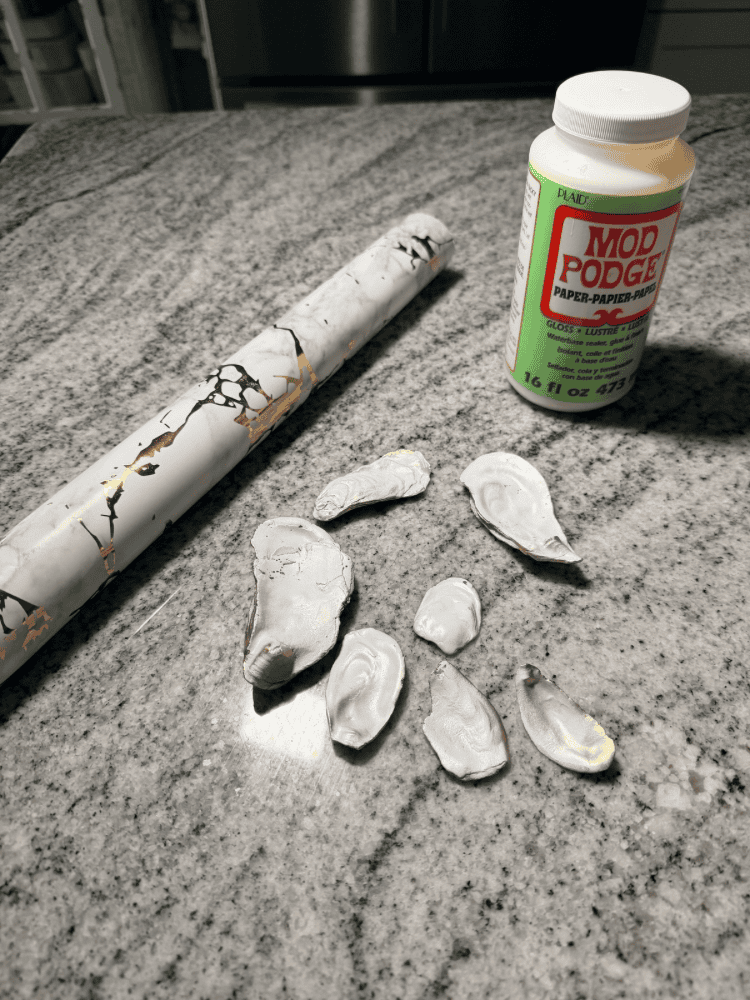
Supplies Needed For DIY Oyster Shell Ornaments

How to Make DIY Oyster Shell Christmas Ornaments

Now for the fun part!

These DIY decoupage oyster shell ornaments are surprisingly simple to make. And once you get the hang of the process, you can make several ornaments at once.

Here’s exactly how I made mine!

Step 1: Clean and Dry Your Oyster Shells

The first thing I did was thoroughly wash all my oyster shells.

Since I collected these during our summer trip to Myrtle Beach, I wanted to make sure there wasn’t any leftover sand, dirt, or debris on them before getting started.

I rinsed and cleaned each shell and then allowed them to dry completely.

This is an important step because you want the surface to be clean and dry before applying spray paint.

I also sorted through my shells to choose the ones I thought would make the prettiest Christmas ornaments.

I personally love using a variety of shapes and sizes because it gives the finished ornaments a more natural, handmade appearance!
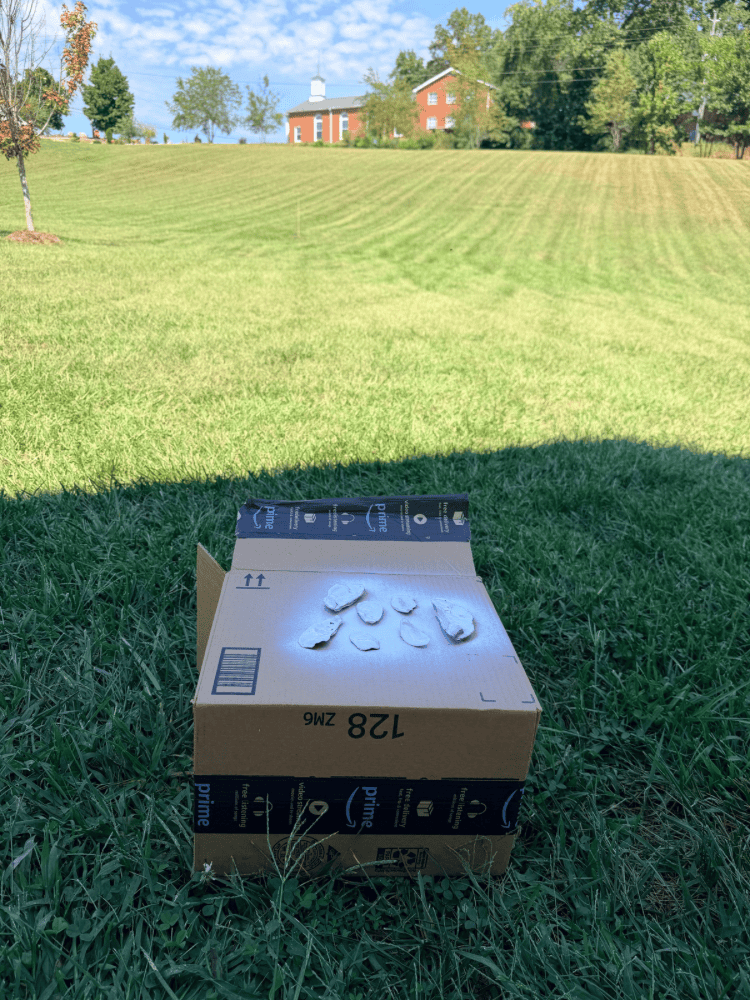
Spray Painting Oyster Shells

Step 2: Spray Paint the Oyster Shells

Once my oyster shells were completely dry, I took them outside to spray paint.

For the inside of each oyster shell, which is where I planned to apply the Christmas wrapping paper, I used white spray paint.

I wanted a nice, clean background underneath the paper so the pattern would show up beautifully.

Then, for the back of each oyster shell, I used metallic gold spray paint.

And y’all know how much I love gold Christmas decorations, so this was an easy choice for me!

The gold finish adds such a pretty, elegant touch to the ornaments and coordinates perfectly with the gold and white wrapping paper I chose.

I applied a couple of light coats of spray paint, allowing each coat to dry before applying the next.

Be sure to spray paint outdoors or in a properly ventilated area and follow the drying instructions on your paint can.

You could also use silver, champagne, white, or another color that coordinates with your Christmas tree.
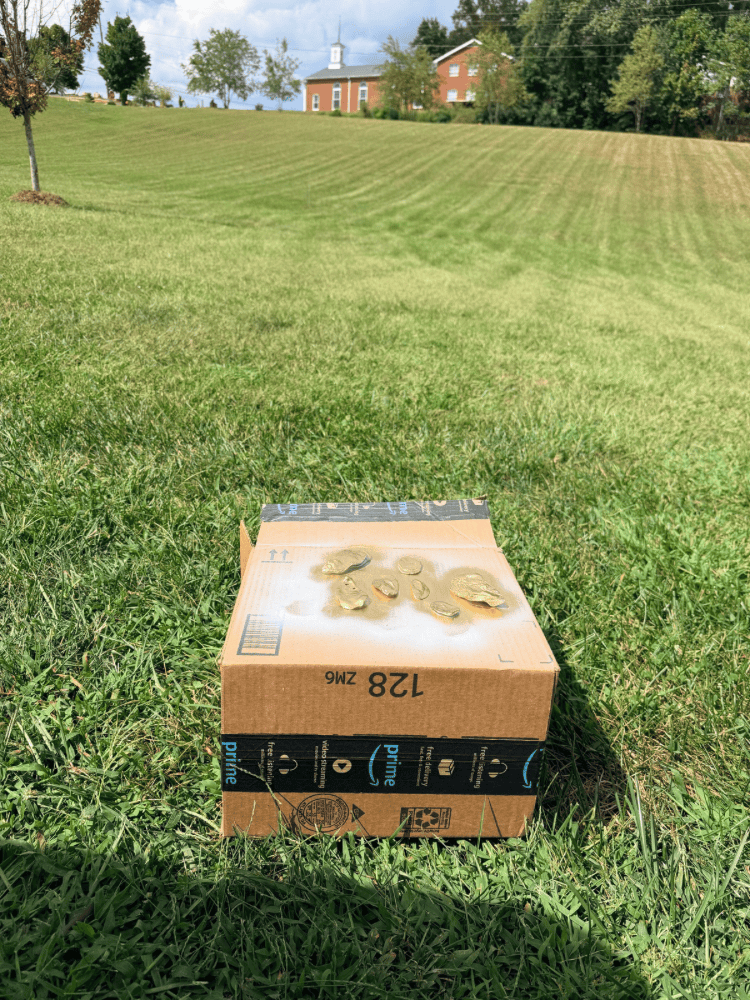
Painting Oyster Shells

Step 3: Trace and Cut Your Christmas Wrapping Paper

After the spray paint had completely dried, it was time to add the decorative wrapping paper!
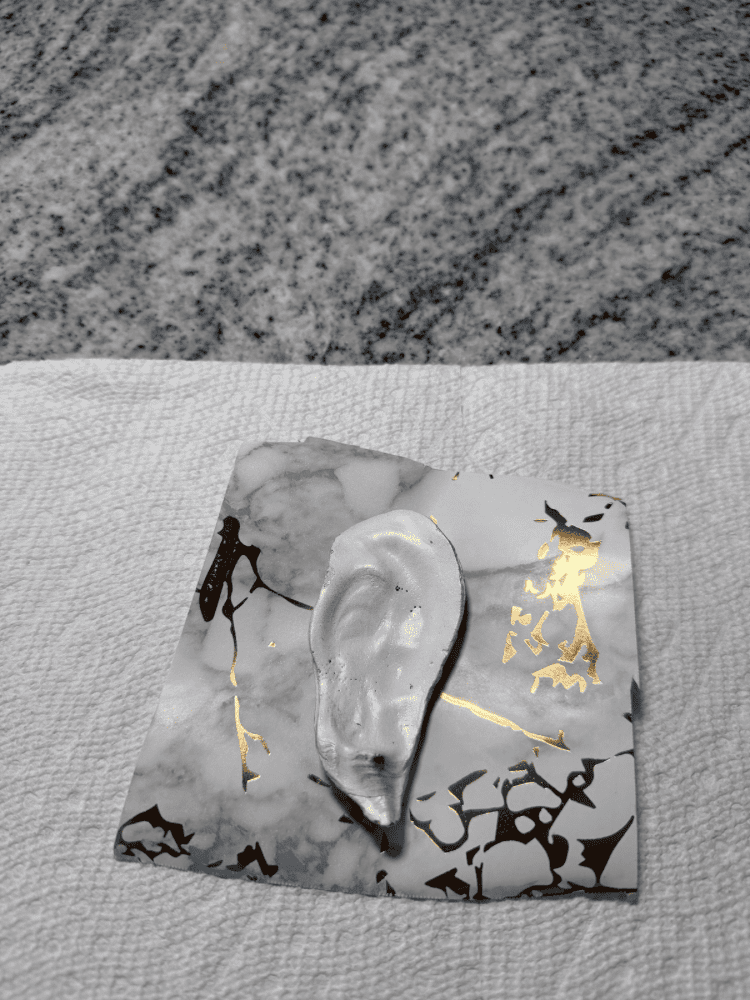
Adding Wrapping Paper to Shell

I placed each oyster shell onto my chosen wrapping paper and traced around its shape.
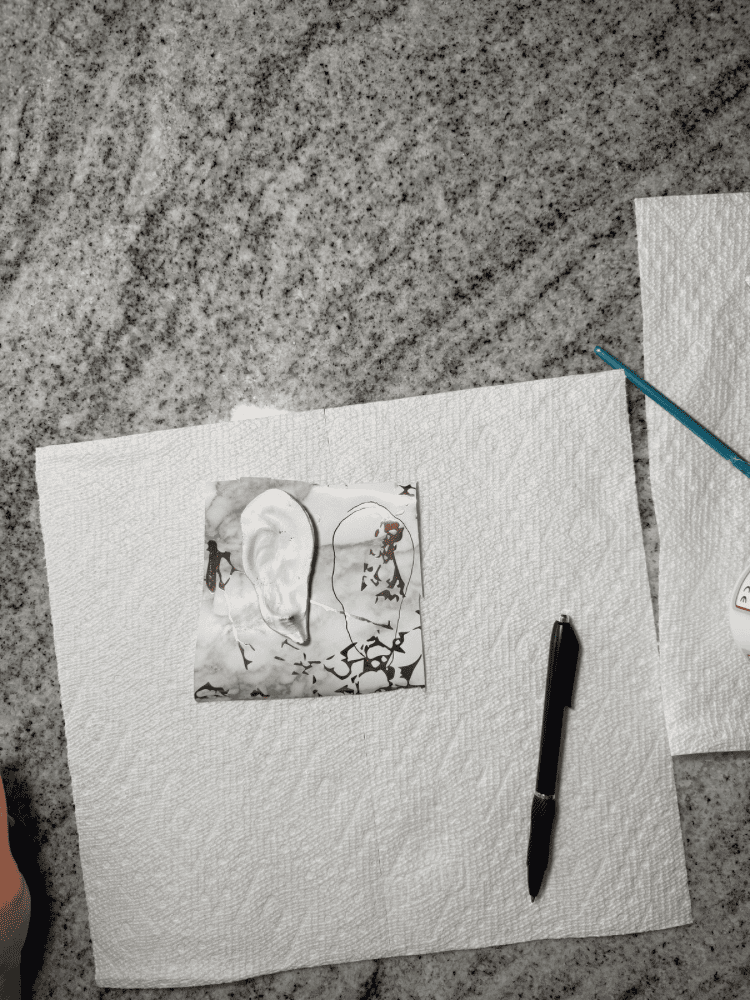
Tracing on Wrapping Paper

Then, using scissors, I carefully cut out the traced pieces.

Don’t worry if your wrapping paper pieces are a little too big at first!

You can always trim them down as needed to fit inside the oyster shells.
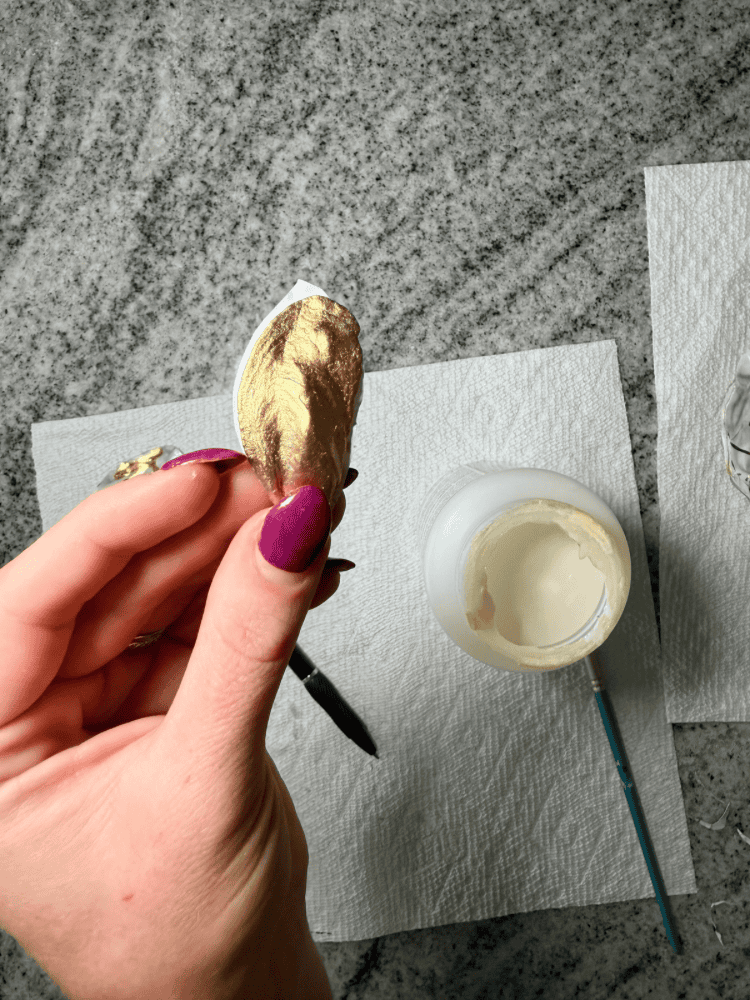
Making DIY Oyster Shell Christmas Ornaments

Since oyster shells aren’t perfectly shaped, you may need to make a few adjustments to get the paper to fit just right.

And that’s totally okay!

The goal is to cover the inside of the shell with your pretty Christmas pattern while still allowing some of the painted edges to show.
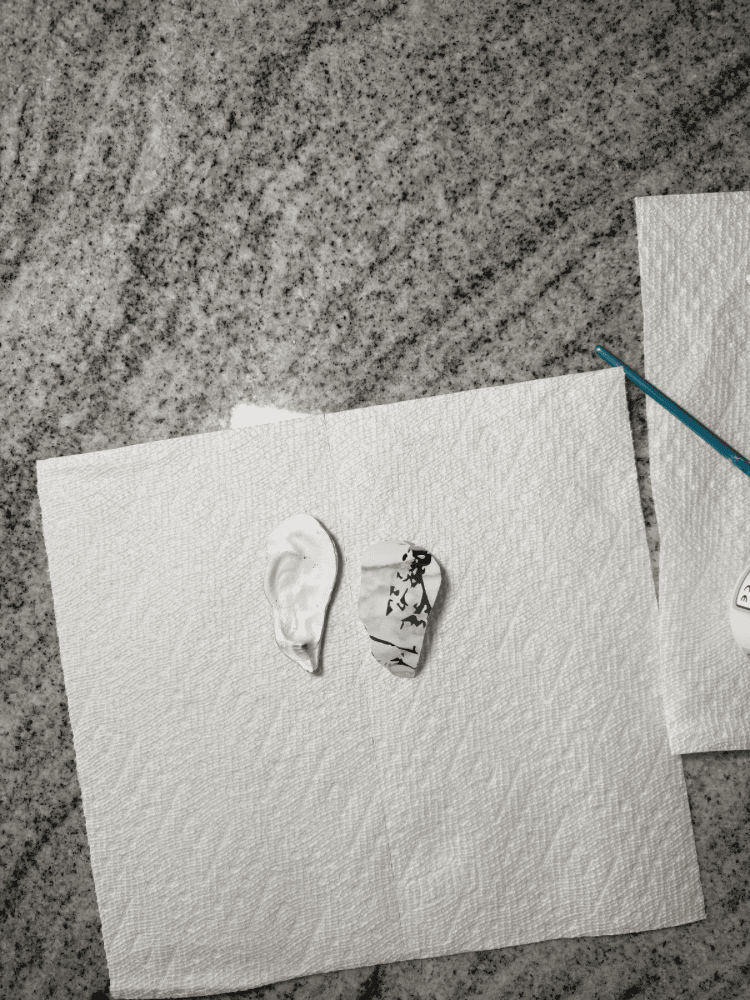
Adding Wrapping Paper

Step 4: Apply Mod Podge to the Oyster Shells

Next, I grabbed my Mod Podge and a paintbrush.

I applied a thin, even layer of Mod Podge to the inside of each oyster shell.

Then, I carefully placed my cut-out wrapping paper onto the shell, gently smoothing it into place.

Once the paper was positioned where I wanted it, I applied another thin layer of Mod Podge directly over the top.

This helps adhere the paper to the shell and gives the ornament a finished appearance.

Since oyster shells have a naturally curved and uneven surface, you may notice a few small wrinkles in the paper.

I wouldn’t stress too much about that!

I think the slightly imperfect look adds to the charm of these handmade Christmas ornaments.

After applying the Mod Podge, I set the shells aside and let them dry completely.
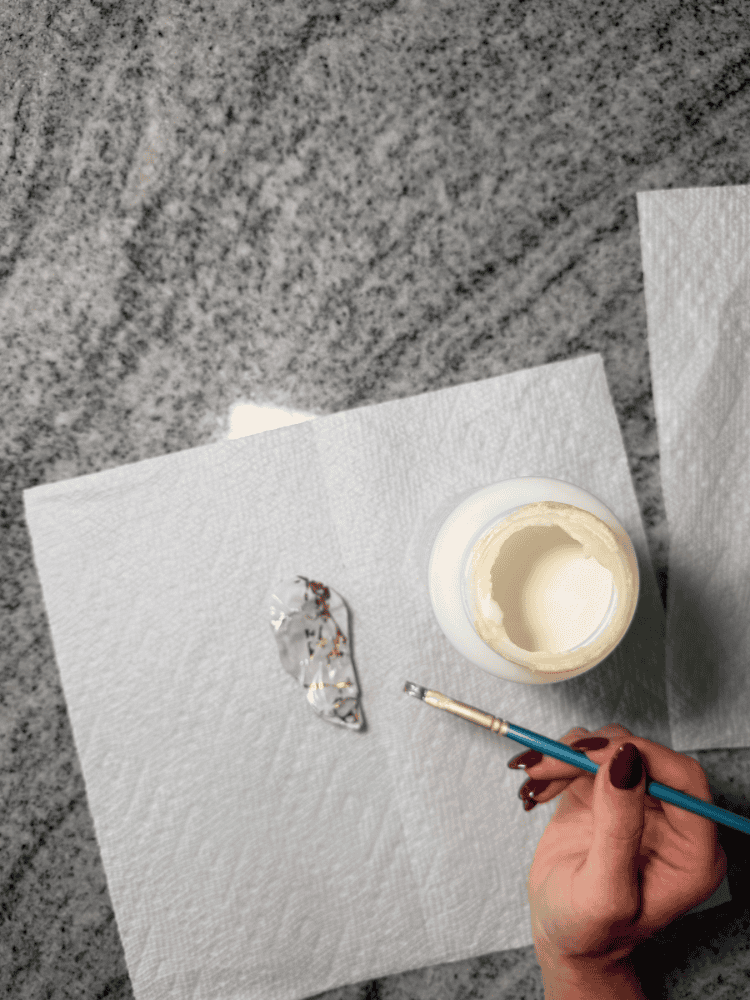
Adding Mod Podge

Step 5: Add Twine to Hang Your Ornaments

Once the Mod Podge had dried, it was time to turn the decorated oyster shells into actual Christmas ornaments!

For this step, I used a hot glue gun and some twine.

I cut a small piece of twine and folded it into a loop to create a hanger.

Then, I added a dollop of hot glue to the back of each oyster shell and secured the ends of the twine in place.

I made sure to position the twine near the top of the shell so the ornament would hang nicely on the Christmas tree.

After allowing the hot glue to cool and harden, my DIY oyster shell Christmas ornaments were officially finished!

And that’s it!

Seriously, how easy was that?!
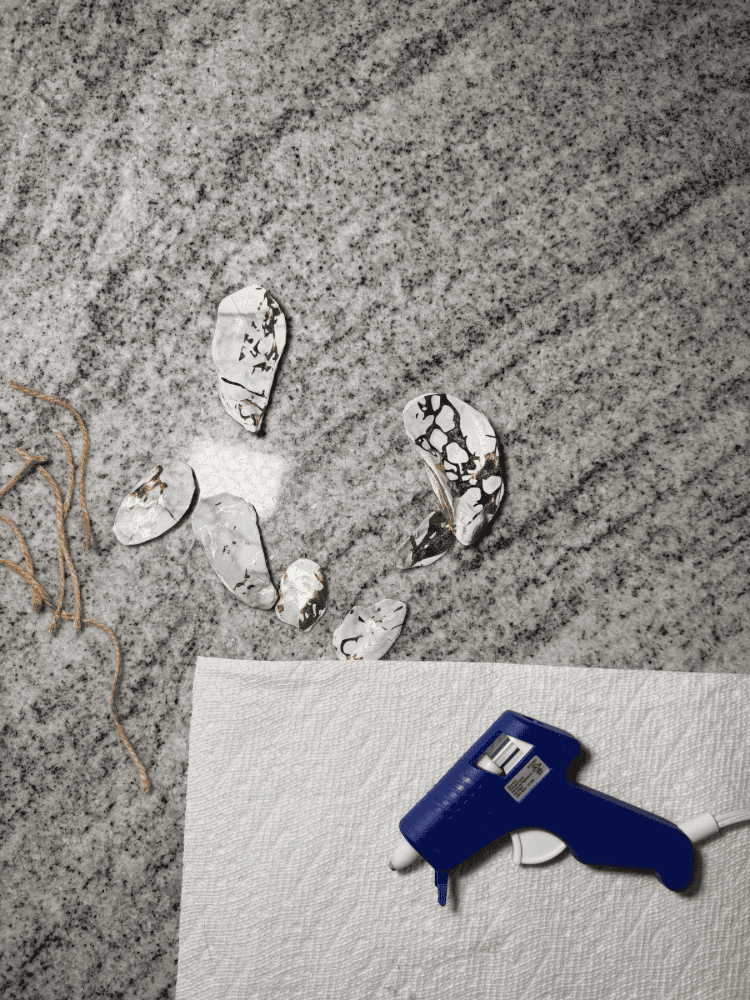
Adding Twine

Tips for Making Beautiful Decoupage Oyster Shell Ornaments

Although this is a pretty straightforward Christmas craft, I wanted to share a few tips to help your ornaments turn out beautifully.

Choose Wrapping Paper With Smaller Patterns

Since oyster shells are relatively small, I recommend choosing wrapping paper with smaller designs.

That way, you can actually see the Christmas pattern once the paper is cut to fit inside the shell.

I love using delicate gold details, vintage-inspired prints, and simple holiday patterns for projects like this.
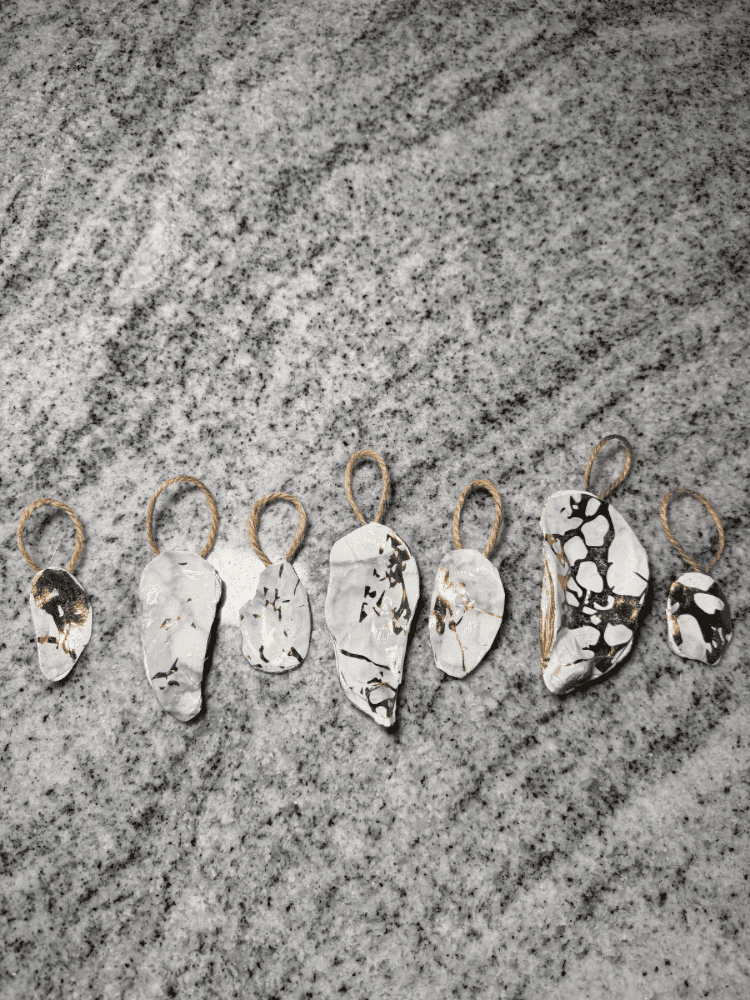
Finished DIY Oyster Shell Christmas Ornaments

Don’t Use Too Much Mod Podge

A little Mod Podge goes a long way!

I recommend applying thin layers instead of using too much at once.

This can help prevent the wrapping paper from becoming overly saturated or wrinkled.

Let Everything Dry Completely

I know it’s tempting to rush through a fun Christmas craft, especially when you’re excited to see the finished product!

But allowing the spray paint and Mod Podge to dry fully will make the process much easier.

Customize the Colors to Match Your Christmas Tree

One of the best things about making your own ornaments is being able to choose exactly how you want them to look.

I went with white and metallic gold because those colors coordinate with my Christmas decorations.

But these would also be gorgeous with blue and white chinoiserie-style wrapping paper, traditional Christmas colors, or even vintage Santa designs!

The possibilities really are endless!

How to Decorate With Oyster Shell Christmas Ornaments

Of course, the most obvious way to display these handmade oyster shell ornaments is by hanging them on your Christmas tree!

But there are several other fun ways you could incorporate them into your holiday decorations too.

For example, you could hang them from a Christmas garland draped across your mantel or staircase.

They would also look beautiful tied onto wrapped Christmas presents as a special handmade gift topper.

And if you’re planning a coastal Christmas theme, these would be such a pretty addition to a tree decorated with seashells, starfish, neutral ribbons, and other beach-inspired ornaments.

You could even make several matching oyster shell ornaments to give as gifts to friends and family!

I especially love the idea of gifting them to someone you traveled to the beach with.

It’s such a sweet way to remember a special vacation while also creating something beautiful for Christmas.
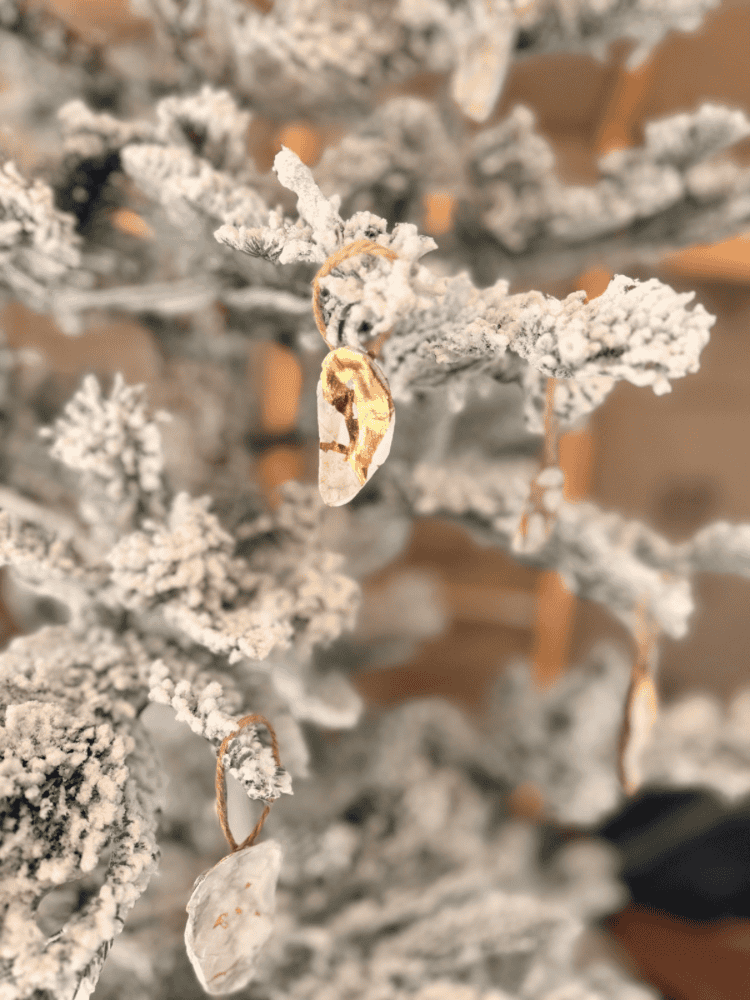
DIY Oyster Shell Ornament

Frequently Asked Questions About DIY Oyster Shell Ornaments

Can You Use Wrapping Paper to Decoupage Oyster Shells?

Yes! Wrapping paper works great for creating decoupage oyster shell ornaments.

Just keep in mind that some wrapping paper is thinner than others, so it’s best to use a light layer of Mod Podge and gently smooth the paper onto the shell.

Can You Use Napkins Instead of Wrapping Paper?

Absolutely! Decorative paper napkins are another popular option for decoupage crafts.

If you’re using printed napkins, separate the decorative top layer from the backing layers before applying it to your oyster shell.

What Kind of Paint Should You Use on Oyster Shells?

I used white and metallic gold spray paint for my ornaments.

However, you could also experiment with acrylic craft paint if you prefer to paint your oyster shells by hand.

Do You Have to Drill Holes in Oyster Shells to Make Ornaments?

Nope!

For this particular DIY oyster shell ornament tutorial, I simply attached a small loop of twine to the back of each shell using hot glue.

That means there’s no drilling required!

Can You Make These Oyster Shell Ornaments Ahead of Christmas?

Definitely!

In fact, I think this is the perfect Christmas craft to make early in the season.

Once everything is completely dry, you can carefully store the ornaments until you’re ready to decorate your Christmas tree.
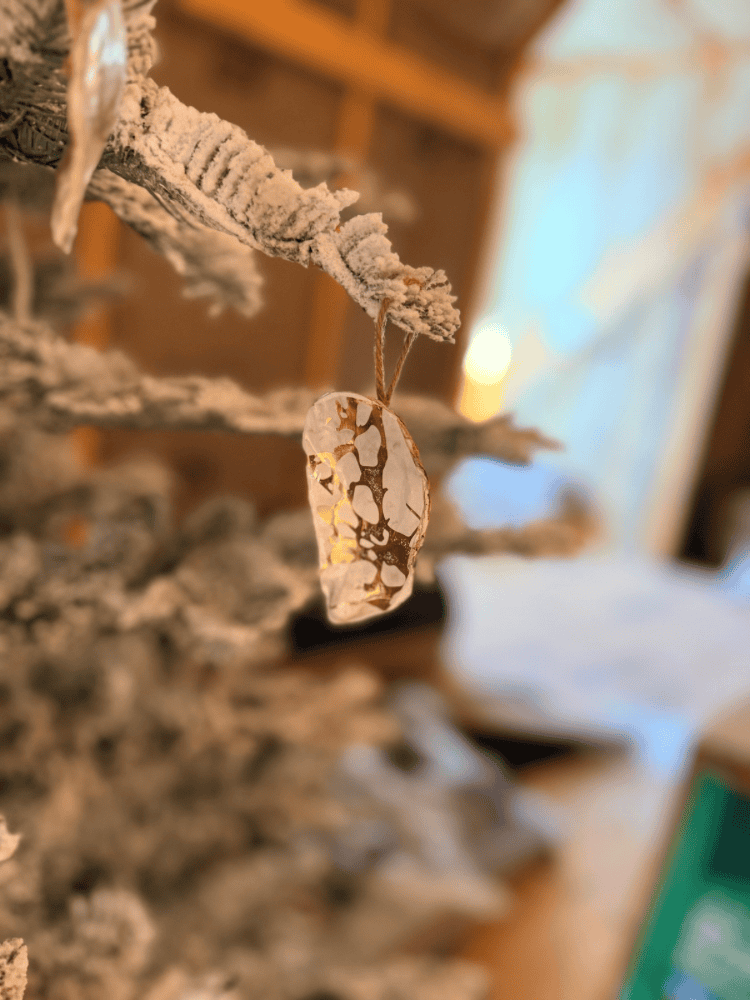
Oyster Shell Christmas Ornament

Enjoy Your Handmade Oyster Shell Christmas Ornaments!

I am absolutely in love with how these DIY oyster shell Christmas ornaments turned out!

Who knew that a handful of leftover oyster shells, some spray paint, and Christmas wrapping paper could create such beautiful holiday decorations?!

I especially love that these ornaments are completely customizable. You can use whatever colors and patterns you want to coordinate with your Christmas tree and personal decorating style.

And since my oyster shells came from our Myrtle Beach vacation, they also have a little sentimental value, which makes them even more special!

I think handmade Christmas ornaments are some of the sweetest decorations because they tell a story and bring back memories year after year.

Plus, this is such an easy and affordable Christmas craft that you could make several ornaments in one afternoon!

If you love coastal Christmas decorations, DIY holiday crafts, or creating unique ornaments for your tree, I definitely recommend giving this project a try.

And if you make these DIY oyster shell Christmas ornaments too, be sure to let me know how they turned out in the comments below!

I’d love to hear what colors and wrapping paper patterns you decided to use!

Happy Christmas crafting, y’all! 🎄🤍
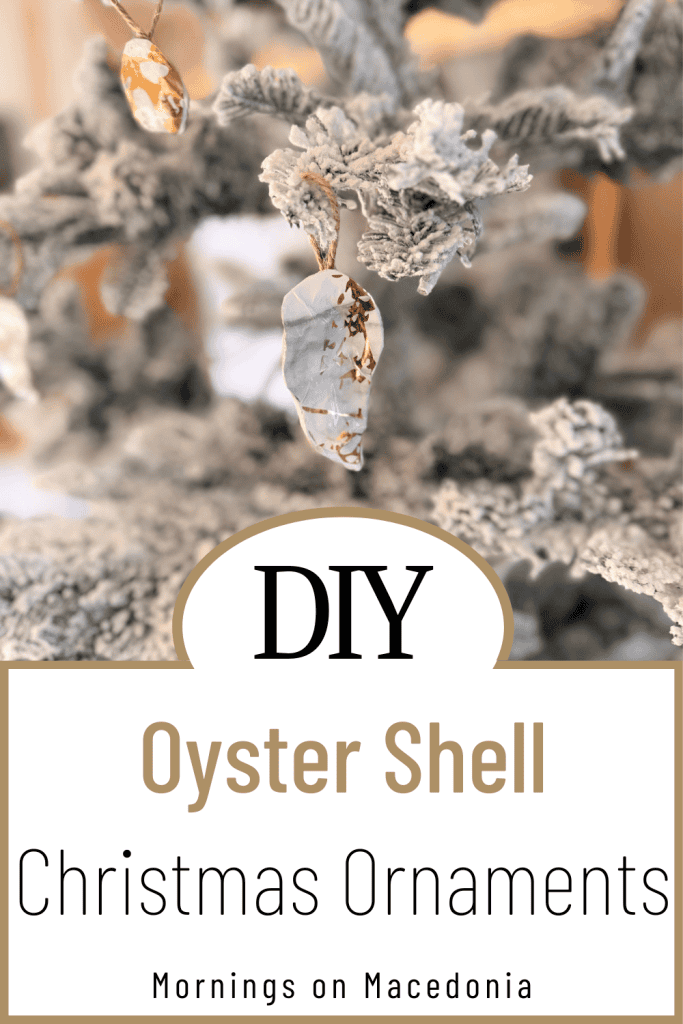
DIY Oyster Shell Christmas Ornament Pin
Pin for later!

Other DIY Christmas Ornament Ideas:

  • How to Make DIY Christmas Ornaments with a Cricut Machine
  • DIY Mercury Glass Ornaments
  • Salt Dough Ornaments
  • DIY Wood Bead Ornament

In: Christmas

About Charity Gentry

I love Jesus, coffee, and home decor. I also love to cook and bake as well as read in my spare time! Follow along with me for all my latest DIY projects and ideas!

join the club

You’ll Also Love

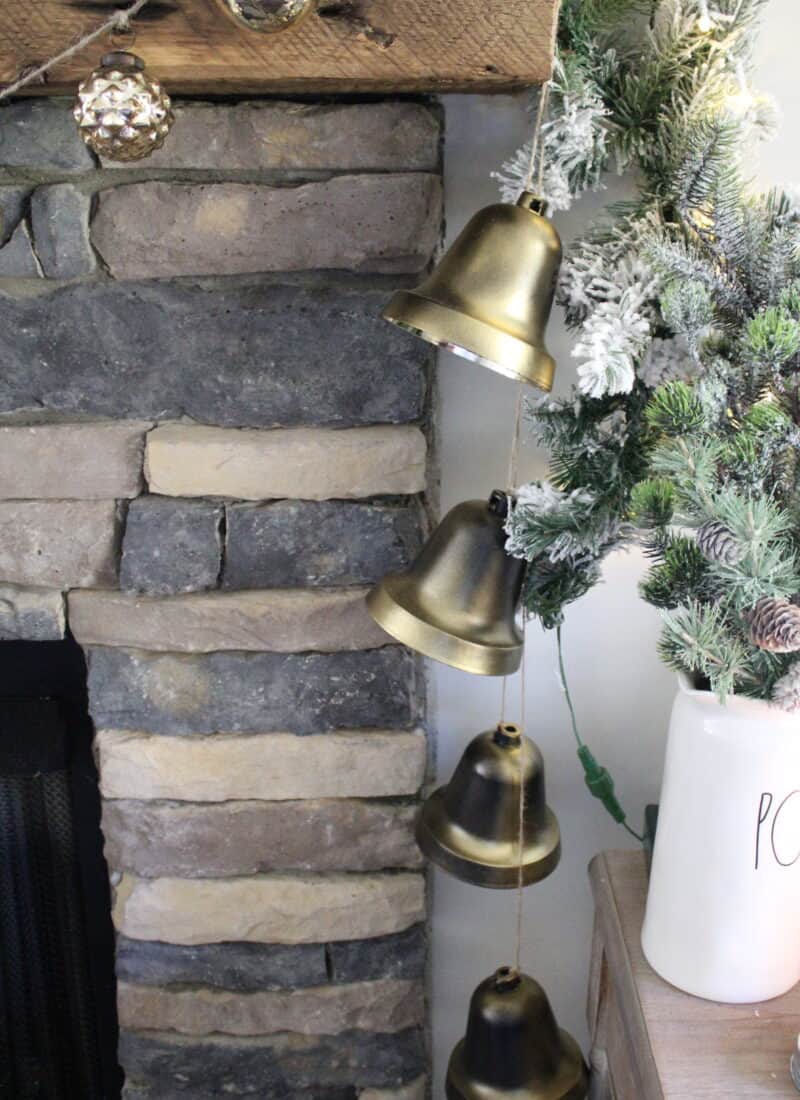
DIY Christmas BellsDIY Christmas Bells
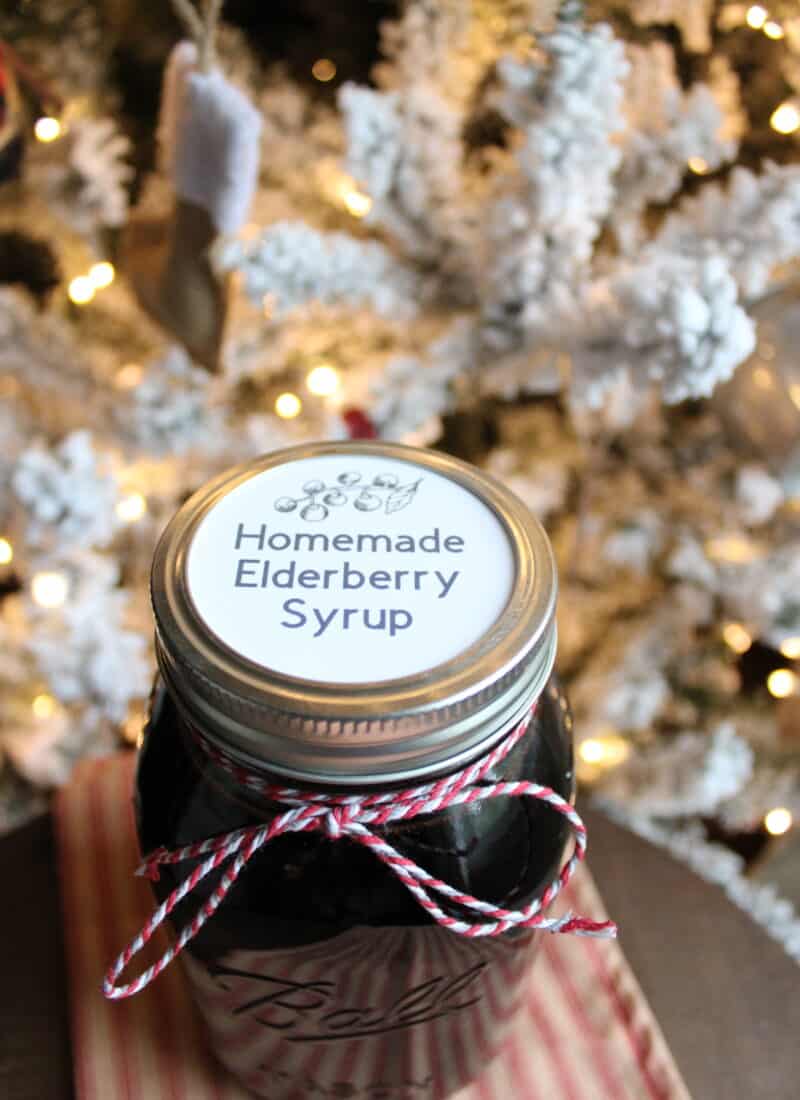
Homemade Elderberry Syrup Recipe25 Days of Christmas Crafts for the Whole Family
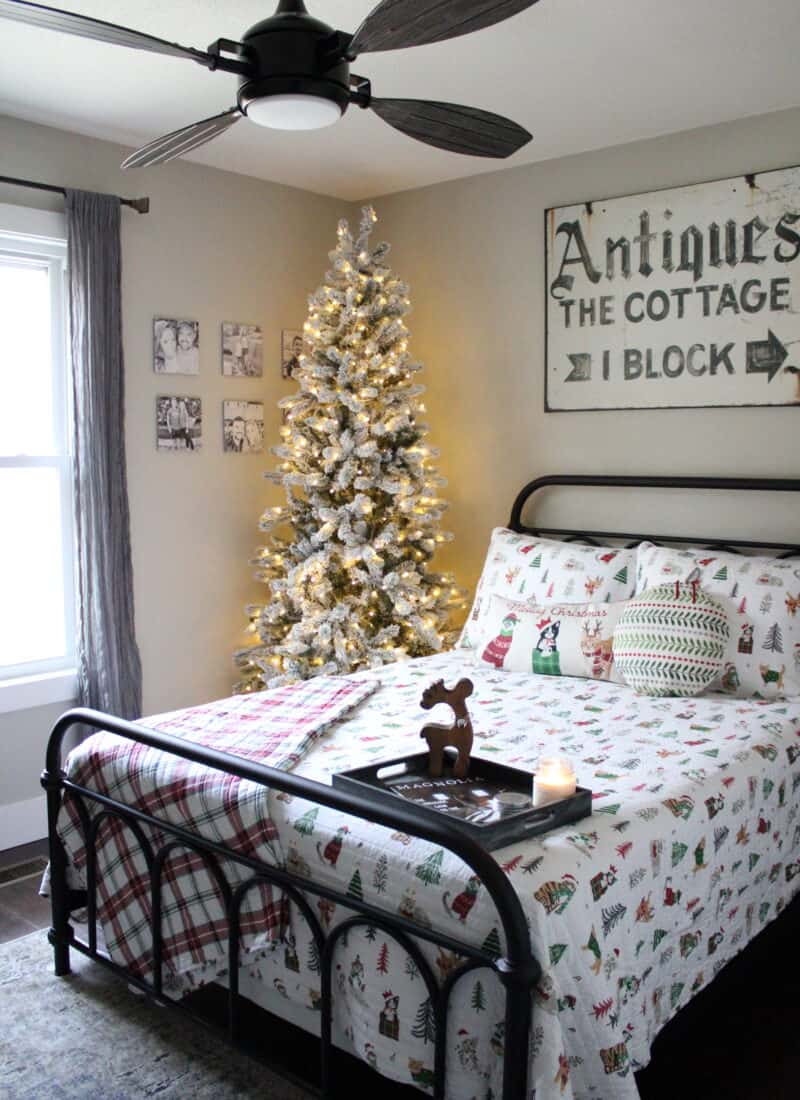
Flocked King of Christmas Tree in BedroomKing of Christmas

Leave a Reply Cancel reply

Your email address will not be published. Required fields are marked *

Recipe Rating


Next Post >

Easy Football Cheese Ball Recipe for Game Day

Recent Posts

  • DIY Oyster Shell Christmas Ornaments 
  • Easy Football Cheese Ball Recipe for Game Day
  • Easy Halloween Oreo Cookies
  • DIY Halloween Cat Statue: Easy Target Cat Makeover
  • DIY Golf Ball Pumpkins: Easy Golf-Themed Halloween Decor

Archives

Categories

  • About Me
  • Christmas
  • DIY
  • Everyday Decor
  • Fall
  • Home Improvement
  • Lifestyle
  • Outdoor
  • Recipes
  • Repurpose and Upcycling
  • Spring
  • Summer
  • The Blog
  • Travel
  • Uncategorized
  • Whimsy Home Wednesday
  • Winter

About Me

About Me

Follow along with me for all things home decor and modern farmhouse style! I also love sharing simple DIY projects and how to style and decorate every room of your house! Thanks for stopping by!


Shop My Home!

join the club

trending now

instagram

Follow @mornings_on_macedonia

Bless my poor husband’s heart because when he marr Bless my poor husband’s heart because when he married me, I don’t think he realized he was signing up for a lifetime of Christmas decorating chaos! 😂

But when you’re a Christmas-obsessed wife who believes EVERY single room in the house deserves its own Christmas tree, you have to start decorating early, right?! 🎅🏻

I mean, putting up multiple Christmas trees, hanging garland, and transforming our entire home into a cozy Christmas wonderland takes TIME! So obviously, October is a perfectly reasonable time to start decorating for Christmas. At least that’s what I keep telling him! 😜

Thankfully, after 10 years of marriage, he knows the drill and just goes along with all my crazy Christmas decorating ideas. He’s a keeper for sure! ❤️

Now PLEASE tell me I’m not the only one who starts decorating for Christmas in October?! 🎄🤣 And how many Christmas trees do you put up in your house?! 

Comment SHOP below to receive a DM with the link to this post on my LTK ⬇ https://liketk.it/6pAfP
#ad 🎃🐈‍⬛ Don’t throw away that empty cat litter ju #ad 🎃🐈‍⬛ Don’t throw away that empty cat litter jug… turn it into a Halloween boo basket for your cats instead! I’m partnering with @catspride today to put an empty Cat’s Pride litter jug to good use with the cutest little upcycling project. Since the jug was already the perfect Frankenstein green, I knew exactly what I wanted to make! 💚 After cleaning the empty jug thoroughly, we cut off the top to create a basket shape. Then I used my Cricut to add a Frankenstein face before filling it with some of Riley and Toby’s favorite cat treats and Halloween toys. And judging by Toby’s reaction to that catnip owl, I’d say this DIY cat boo basket was a success. 😹 And before the jug was transformed, Cat’s Pride made litter box duty a whole lot easier. I love the odor control and easy scooping, and Riley and Toby are always VERY interested when a fresh box of litter appears. 😂 So consider this your sign to save your next empty litter jug and get creative with it! And when it’s time to stock up on fresh litter, check out Cat’s Pride for your own feline crew. 🐾 Would you make a Halloween boo basket for your cats?! 🎃👇🏻
If you’re wondering what to do with all that lefto If you’re wondering what to do with all that leftover Halloween candy, these Leftover Halloween Candy Cookies are the answer! They combine two of my favorite things: candy AND cookies! So you really can’t go wrong. 🤣

Just chop up your favorite leftover chocolate candy bars, mix them into the cookie dough, and you’ve got the ultimate easy post-Halloween treat! Plus, every cookie is a little different depending on what candy you throw in. 🙌🏻

This is such a fun way to use up leftover Halloween candy instead of letting it sit around for the next six months. 😂

Want my Leftover Halloween Candy Cookies recipe? Comment “RECIPE” below and I’ll send it your way! 🍪
POV: You finally decide it’s time to tell your ado POV: You finally decide it’s time to tell your adopted daughter the truth about her biological mother… and she is NOT taking the news well. 😭🤣😹

Poor Riley! The look of absolute SHOCK on her face when she hears about her past! 🤣 I swear, the dramatic reactions of cats are just too funny sometimes!

But here’s a fun fact about our little rescue kitty! 🐈‍⬛ When we adopted Riley, my mom actually adopted her biological mama, Smoke! So technically, Riley’s mom lives with her grandma now. 🤣 Which means we can visit her anytime we want!

So don’t worry, Riley! We know exactly where you came from, and your mama is living her best life too! 😹❤️

Please tell me I’m not the only crazy cat mom who makes up dramatic storylines about her cats?! 🤣
🏈 SAVE THIS EASY GAME DAY APPETIZER! 🧀 Football s 🏈 SAVE THIS EASY GAME DAY APPETIZER! 🧀 
Football season is officially here, which means I’m all about the game day snacks! 🙌🏻 
And this easy Football Cheese Ball might just be the cutest addition to your next football party or tailgate! I’m partnering with @foodlion to create this simple, delicious football-shaped cheese ball using ingredients you can easily grab during your next grocery run. 
It’s creamy, cheesy, loaded with ranch and bacon, and perfect for serving with crackers and pretzels. 😍 Here’s what you’ll need: 
🏈 FOOTBALL CHEESE BALL: 
• 16 oz cream cheese (2 8-oz blocks), softened 
• 2 tbsp sour cream 
• 2 cups shredded cheddar cheese 
• 1 oz ranch seasoning (1 packet) 
• ¼ cup chopped green onions 
• ½ cup chopped bacon or bacon bits 
• 1 tsp hot sauce (optional) 
• 2 tsp Worcestershire sauce 
🏈 FOR THE COATING: 
• ⅓ cup chopped pecans 
• ½ cup chopped bacon 
• 2 tbsp chopped green onions 
• 2 slices white cheese for the football laces 
Mix all of the cheese ball ingredients together in the bowl of a stand mixer until combined. Spray a little cooking oil on your hands and shape the mixture into a football. Wrap it in plastic wrap and refrigerate for at least 8 hours. I made mine the night before so it was ready to go on game day! When you’re ready to serve, combine the pecans, bacon, and green onions in a shallow dish and roll the cheese ball in the mixture until completely coated. Cut thin strips from the white cheese to create the football laces, arrange everything on a serving tray with your favorite crackers and pretzels, and you have the CUTEST football party appetizer! 🏈🧀 
Food Lion makes it so easy and convenient to grab everything you need for a delicious game day spread without spending a fortune. #FoodLionPartner SAVE this football cheese ball recipe for your next tailgate or football watch party! 🏈 
And tell me below, are you making this for your next game day?! 👇🏻 #FallingforFoodLion #sponsored
If you love pecan pie, just WAIT until you try the If you love pecan pie, just WAIT until you try these easy homemade pecan pie bars! 🤤🥧🍁

I’m telling y’all, these might just be BETTER than traditional pecan pie! And that’s saying a lot because I absolutely love a good slice of pecan pie, especially during the holiday season! 🤣

These delicious pecan pie bars have a buttery shortbread crust topped with a rich, gooey, sweet pecan filling. Basically, all the flavors of a classic Southern pecan pie, but in an easy-to-make dessert bar! And trust me, once you try one, it’s hard to stop at just one! 😜

I’ve been making this recipe for years now, and it’s always one of my favorite Thanksgiving desserts to bring to the table! Plus, they’re perfect for Christmas parties, holiday gatherings, or anytime you’re craving a little sweet treat!

And the best part?! You can make these pecan pie bars ahead of time and even freeze them for later! Which is a lifesaver during the busy holiday baking season! 🙌🏻

So if you’re looking for an easy Thanksgiving dessert recipe that everyone will love, you NEED to add these to your holiday baking list this year!

Comment “RECIPE” below and I’ll send you my easy pecan pie bars recipe! 🥧
Forget checking under the bed for monsters because Forget checking under the bed for monsters because apparently we already have one living there! 🤣 Little Miss Charlie, our mischievous tuxedo cat, has officially claimed the space under our bed as her personal hiding spot. And the second someone walks by?! ATTACK MODE ACTIVATED! 🐈‍⬛

She takes her job as the resident under-the-bed monster VERY seriously, and honestly, her sneak attacks are hilarious! 😂 Who knew such a cute little kitty could be so terrifying?!

It’s a good thing she’s adorable because we apparently live with a tiny furry jump scare now! 😹

Please tell me we’re not the only ones with a cat who loves hiding under the bed and attacking unsuspecting ankles?! 🤣
#AD One of my favorite ways to start the day is si #AD One of my favorite ways to start the day is sipping coffee on our screened-in porch with my cats, and these adorable @tossware disposable hot cups make my little morning routine even cuter!

The second I saw this cat print, I knew I had to have it. 😹 I mean… cute coffee cups covered in cats?! They were basically made for me! They’re perfect for slow mornings at home, taking your coffee on the go, or just making your everyday coffee routine feel a little more fun.

And @tossware has SO many cute patterns and designs to choose from, so there’s something for every season and occasion!

Are you a morning coffee + cats person too?! ☕️🐾
You need to learn how to say NO in life. 👏🏼 When You need to learn how to say NO in life. 👏🏼

When someone asks, “Do you want one?” You say, “No… I want TWO.” 🤣

And that is especially true when it comes to Reese’s Pumpkins. 🎃🥜🍫

Seriously, WHY do the Reese’s Peanut Butter Pumpkins taste so much better than regular Reese’s Peanut Butter Cups?! There’s just something about that perfect chocolate-to-peanut-butter ratio that gets me every single Halloween. 😂

They are hands down my favorite Halloween candy, and honestly, I could probably eat my weight in them.

So if you offer me one Reese’s Pumpkin this spooky season, just save us both some time and hand me two. 😉🤣

Now I need to know: what’s the BEST Halloween candy of all time?! 👇🏼
I am absolutely LOVING these fall trees from Nearl I am absolutely LOVING these fall trees from Nearly Natural on @amazon 🙌🏻 Usually, I keep my olive trees in these baskets on each side of our bed until Christmas, when I swap them out for Christmas trees. But now I officially have trees for FALL too… and I’m obsessed. 😂🍁

They add the prettiest deep, rich fall colors to our bedroom and instantly make the whole space feel warmer and cozier. There’s just something about bringing those autumn tones into your bedroom that makes it feel like the ultimate cozy retreat!

I’m definitely adding these to my list of favorite fall bedroom decor finds. 🍂

Are you someone who decorates your bedroom for fall too, or do you keep the seasonal decor to the main areas of your home?!

Comment SHOP below to receive a DM with the link to this post on my LTK ⬇ https://liketk.it/6peVn
If you love Halloween decorations, historic homes, If you love Halloween decorations, historic homes, and all the cozy fall vibes, then you NEED to visit Charleston in October! 😍 

The beautiful historic houses all decked out for Halloween are seriously one of my favorite things to see. Charleston really knows how to do spooky season right!

One of my favorite things to do is simply stroll through the historic downtown streets and admire all the gorgeous homes and their festive fall decorations. 🧡

And honestly, fall is my FAVORITE time to visit Charleston, South Carolina! The weather is usually so much more enjoyable than the brutal summer heat. Although it was super rainy this weekend, I’ll take a little rain over that Southern heat and humidity ANY day! 🤣☔️

So consider this your sign to plan a fall getaway to Charleston! Between the Halloween decorations, charming historic streets, and beautiful architecture, it’s the perfect destination for an October weekend trip!

SAVE this post for your next Charleston trip! 📍 And tell me, would you rather visit Charleston in the fall or summer?!
BOO! 👻🍪 Looking for an easy Halloween treat that’s BOO! 👻🍪 Looking for an easy Halloween treat that’s almost too cute to eat?! These spooky Halloween Oreo cookies are just what you need! 

I absolutely LOVE making fun and festive desserts for Halloween, but sometimes I want something quick and easy without spending hours in the kitchen. And these adorable Halloween Oreos are perfect for that!

They’re such a fun Halloween party dessert, a cute addition to your spooky treat boards, or just a sweet little treat to enjoy while watching your favorite Halloween movies! Plus, they’re a fun Halloween activity to make with the kiddos too!

Who knew you could turn simple Oreo cookies into the cutest spooky treats?! 😍

👻 Want to make these easy Halloween Oreo cookies too? Comment “Recipe” below and I’ll send you the recipe!

Be sure to SAVE this post for your next Halloween party or spooky baking day!
Little Miss Riley is VERY particular when it comes Little Miss Riley is VERY particular when it comes to cat toys. I can buy her the cutest toy ever and she’ll look at me like, “And what exactly am I supposed to do with this?” 🤣

But cat scratching pads?! Those are her absolute FAVORITE. She’s just about worn her old one out, so when I spotted this adorable Halloween cat scratching pad at Target, obviously I had to bring it home for her. 🎃

After a few very thorough sniffs, an inspection, and some test scratches… we officially have Riley’s approval! 👏🏻😹

Honestly, I’m just glad I managed to buy something that passed her incredibly strict quality-control standards. 😂

Anyone else have a super picky cat?! What’s the ONE toy or cat product they actually love?
If you love ooey gooey desserts, you NEED to make If you love ooey gooey desserts, you NEED to make this Ooey Gooey Pumpkin Butter Cake this fall! 🎃🤤

Confession: I’m one of those people who would rather lick the batter or sneak some cookie dough than wait for the finished dessert. 🤣 And don’t come for me about the raw batter…I’ve been doing it my whole life and I’m still here 😜

Which is exactly why this pumpkin butter cake is one of my FAVORITE fall desserts. It’s fully baked, but the middle stays unbelievably soft, rich, and ooey gooey. 🙌🏻

You get a buttery yellow cake base topped with a creamy pumpkin layer that basically melts in your mouth. And add a big dollop of whipped cream on top?! CHEF’S KISS. 🤌🏻🎃

It’s easy to make, packed with cozy fall flavor, and would be the perfect pumpkin dessert for Halloween, Thanksgiving, or any fall gathering!

Want the recipe? Comment “RECIPE” below and I’ll send it your way! 👇🏻
POV: you let your tuxedo cat snuggle on you while POV: you let your tuxedo cat snuggle on you while wearing a dark colored sweat set… rookie mistake. 😹

Consider this my official reminder to NEVER wear burgundy while cuddling Charlie again. 😂 One snuggle session later and my entire outfit is covered in black and white cat hair.

And the craziest part?! We literally JUST brushed her yesterday. 😬 How does one fluffy little tuxedo cat have this much fur to give?!

Being a cat mom basically means accepting that cat hair is now an accessory, your lint roller is your best friend, and you’ll be doing laundry for the rest of your life. 🤣

Thankfully, Charlie is cute enough to get away with it… and clearly VERY unbothered by the fact that she completely ruined my outfit. 😹

Tuxedo cat parents… PLEASE tell me I’m not the only one constantly covered in cat hair?! 👇🏻

#tuxedocatsofinstagram #catmomproblems
10 YEARS. 🤍😭 Today is our 10 year wedding anniver 10 YEARS. 🤍😭

Today is our 10 year wedding anniversary, and I truly cannot believe an entire decade has already gone by. Somehow, it feels like we were just saying “I do,” and at the same time, I can’t imagine a version of my life without you in it.

Logan, you are my rock, my safe space, my biggest supporter, my constant encourager, and most importantly, my best friend. 🤍

This past year has probably been one of the hardest years we’ve walked through together. Between everything going on with my health, the uncertainty surrounding my job and my future, and all the unknowns we’ve had to navigate, life has looked a lot different than I ever imagined it would.

But through every hard day, every appointment, every disappointment, every fear, and every unknown, you have been right there beside me. You’ve supported me, encouraged me, taken care of me, made me laugh when I needed it most, and reminded me over and over again that I never have to go through any of it alone.

And I don’t think I’ll ever be able to fully put into words how much that means to me.

I’m so incredibly blessed that God gave me you. 🥹🤍 I would choose you over and over again in every lifetime.

Happy 10 year anniversary, Logan!! I love you more than you’ll ever know. Here’s to the next 10 years, and every single year after that. 🥂🤍

A whole decade down, forever to go. ♾️

Copyright © 2026 Mornings on Macedonia · Theme by 17th Avenue