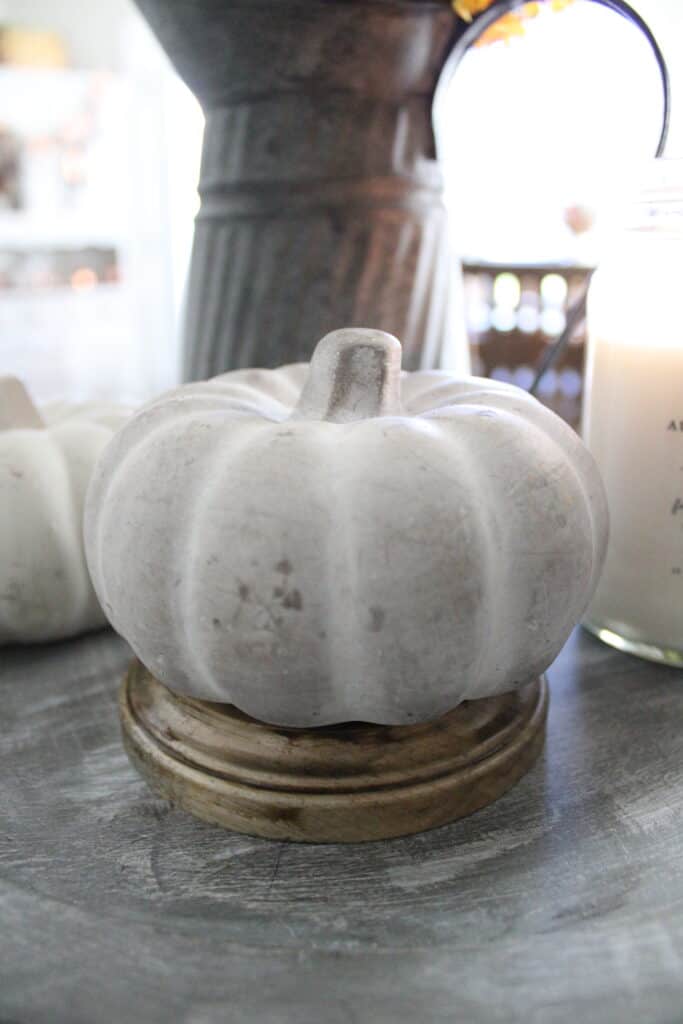
Are you ready for a stupid easy craft idea?? Then, check out these DIY wooden risers I made! Literally only took a few minutes and just a handful of supplies to create.
And so much cheaper to make them yourself instead of buying a few at the store. I always find that I am in need of little wooden risers to help elevate items on my open shelves.
But usually, I can’t ever find ones small enough or in the right color or in budget, etc. So I figured I could just make my own and go from there.
I found unfinished wooden risers on Amazon and just used a little wood stain and antiquing glaze and viola! I have some easy and simple wooden risers that I just did myself!
This post contains affiliate links. Click here to read my disclosure policy.
Materials Needed for Wooden Risers
- Unfinished Wooden Plaques
- Wood Stain (I used Fusion Mineral’s Gel Stain Top Coat in Black)
- Paint Brush
- Antiquing Glaze (Again, I used Fusion Mineral’s Antiquing Glaze too)
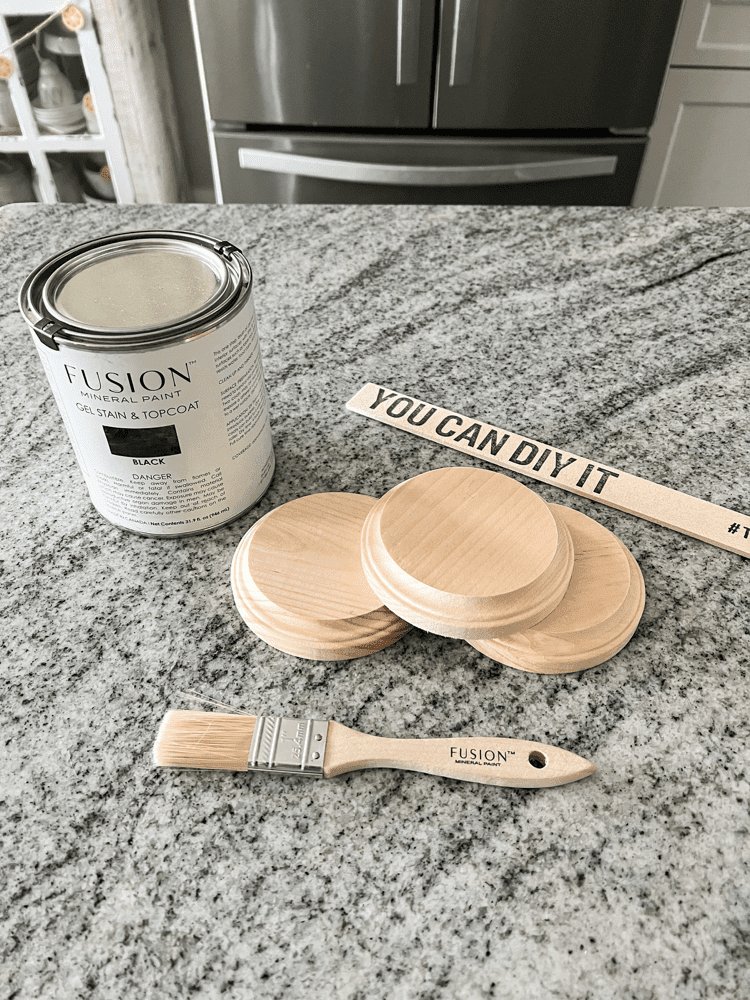
As you can see from the list above, this DIY project requires very little materials to create. So you can easily grab them and start getting to work quickly!
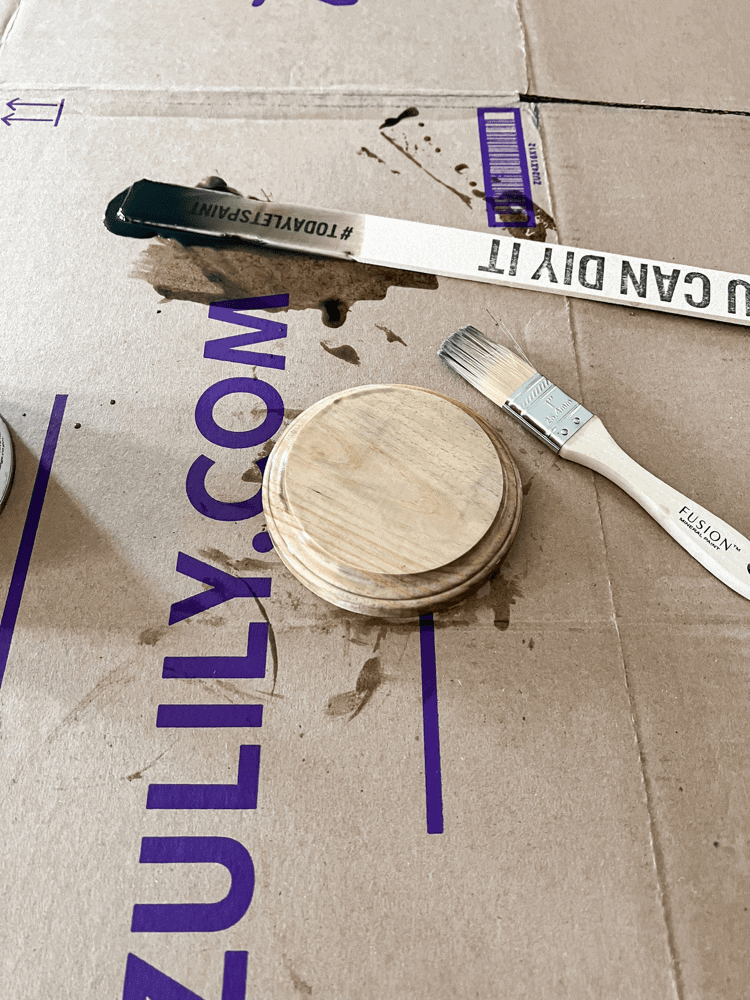
Add Wood Stain to Risers
The first step to this little project is to just add wood stain to the risers. As I mentioned above, I used Fusion Mineral’s Gel Stain Top Coat in Black, but you could use whatever wood stain you want to here.
With the specific wood stain I was using, it said to use a paintbrush to apply it. So I had one of those handy as well. But some may say to apply with a sponge or damp rag so be sure to read the application directions on your wood stain throughly.
I did about two coats of the wood stain on the risers and let them dry completely each time before adding a new coat. If you remember, I also used this specific wood stain for my DIY Fall Cutting Board project as well that I made a few weeks ago.
Add Antiquing Glaze to the Risers
After adding the wood stain, I wasn’t 100% happy with the final color. I wanted to add a little more texture and dimension to it. So I decided to add in some antiquing glaze to do the job!
Depending on the color of wood stain you use, this step may or may not be necessary. But honestly, I just love using antiquing glaze for most of my DIY projects. Like my Jack O’ Lanterns I did a few weeks ago.
I just love how it adds in a little extra “oomf” to whatever you are making. Again, I used Fusion Mineral’s Antiquing Glaze here, but any kind would probably do just fine too. Y’all just know I am a huge Fusion Mineral Paint geek over here!
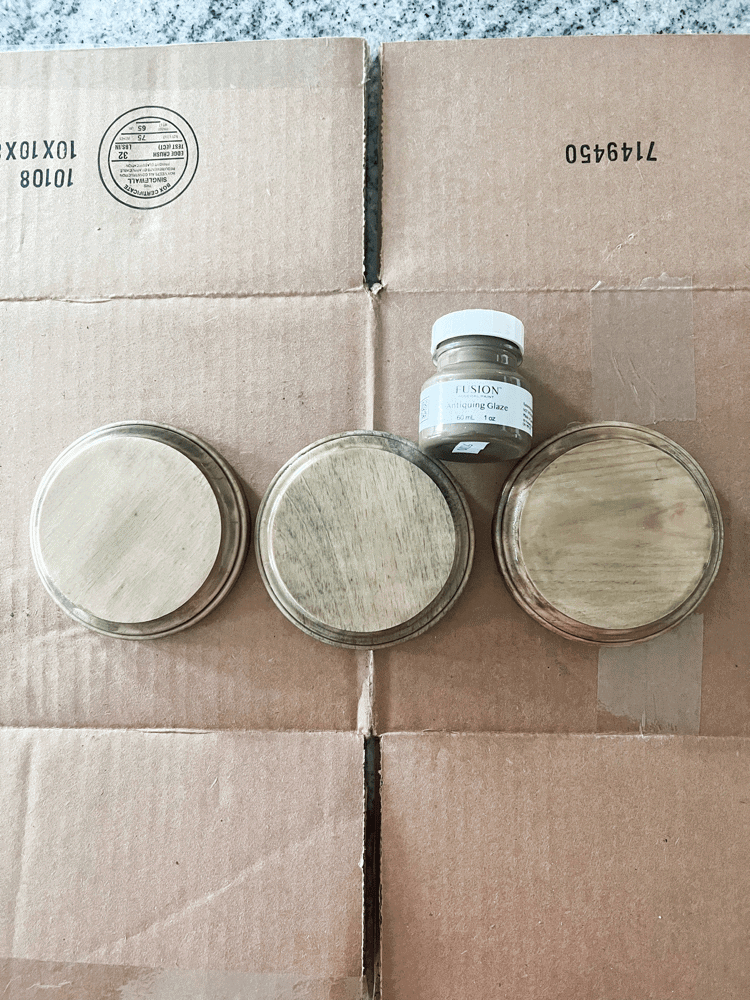
I applied the glaze with a damp rag and then let it set for a few hours to dry. And that’s it! That was the very last step to these DIY wooden risers.
How do you think they turned out?! I told you they were stupid easy! Didn’t take much time or energy to complete at all! And now, I can use them season after season too.
I can elevate some pumpkins on them now, and then some Christmas trees on them in a few months too! I love being able to repurpose my DIY projects too just like that.
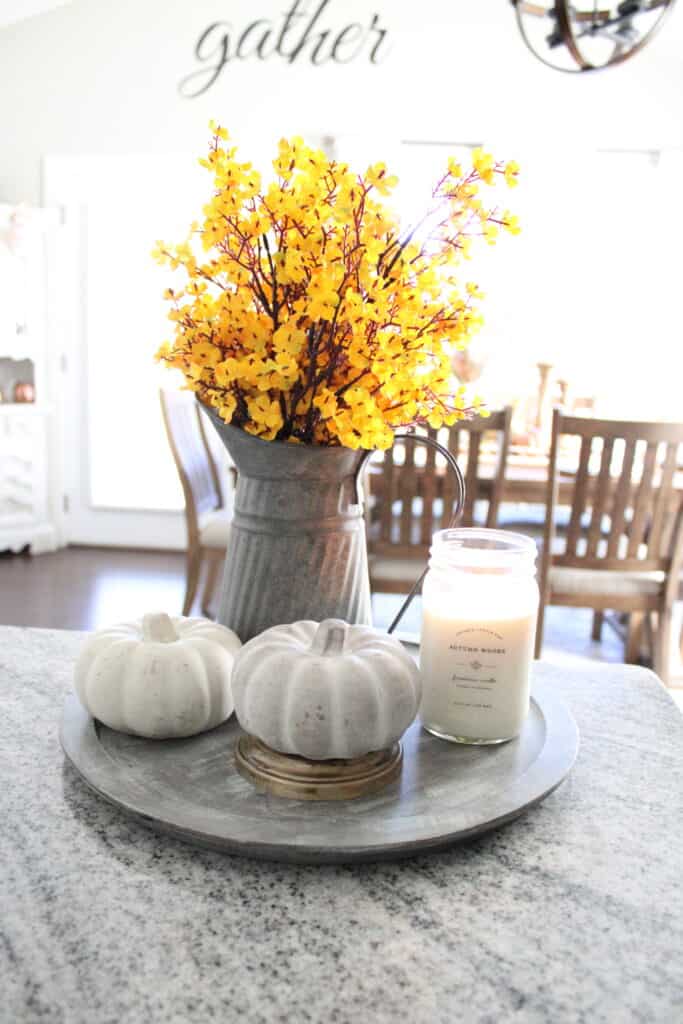
Let me know what you think and if you try this simple DIY project out for yourself too. I always get messages asking for easy craft ideas, and you really can’t beat this one!

I love the finished look of these risers Charity! I love the way they look with your pumpkins.
Thank you so much! I love the way they look with the pumpkins too!
Ooh these look so cool – I love the effect you achieved with them! Love that you can use them for different seasons/events too. Thank you so much for sharing x
Thank you! I love that they are multipurpose too!
These risers look brilliant and are a lovely idea! x
Lucy | http://www.lucymary.co.uk
Awe thank you Lucy. I am so glad you think so too!
They look great and thank you for the tips. I’ll have to find a nice home to try these tips of yours. But maybe I can surprise some friends with them. I love the simplicity of it. Thanks
No problem at all! Yes, they would make great homemade gifts too! That’s a great idea actually!
These look really great; I love how they turned out and would love to give them a try!
Thank you, you definitely should! It was a fun and easy little DIY project to do!
Great idea! I’m always looking around for something (usually a book) to add height to decor items. These wooden risers would work perfectly! Pinning now because I need to make some! Thanks for the inspiration! Blessings, Donna
Awe yay! I am so glad you found some inspiration from this post too!
What a great way to add a little extra pizzazz to fall decor! These would look amazing under a candle too. 🙂
Yes, they would be a perfect candle riser as well! Great idea!
I love the simplicity of this project. Thank you for the step by step instructions
No problem at all! Glad you enjoyed it too!
I love this idea, especially that it is so easy to do, and yet the finished wooden rise is so versatile as it can be used in many ways. This is something I should think of doing!
Thank you, you definitely should! It is so easy to do!
This looks cool, I miss doing DIY and decoration. I would love to try something this weekend. Thank you for sharing this tutorial.
Thank you, you definitely should try it since it is super easy to do!
What a great easy project that can add a little something to various decorative displays around the house. The final product looks great.
Thank you so much! I really appreciate it!
Super easy and risers came out so cute. I can always use a couple of those around my house.
Thank you! I think so too!