Is your garden overflowing with summer squash? If Is your garden overflowing with summer squash? If you’ve got more squash than you know what to do with, this simple food preservation hack is a game changer!

Instead of letting your fresh garden harvest go to waste, freeze your summer squash so you can enjoy it all year long.

Here’s how:
🌿Slice or dice your squash.
🌿Spread the pieces in a single layer on a parchment-lined baking sheet.
🌿Flash freeze for 1–2 hours.
🌿Transfer to a freezer-safe bag, remove as much air as possible, and store in the freezer for 10–12 months.

The best part? You can cook it straight from frozen—no thawing required! It’s one of my favorite gardening hacks for preserving fresh vegetables and making the most of every harvest.

Whether you’re growing a backyard vegetable garden or just picked up extra squash at the farmers market, this easy freezer tip will help reduce food waste and make meal prep so much easier.

Have you ever tried freezing summer squash before, or is this a new gardening tip for you? Let me know below! 👇🏻 

#gardenhack #gardenhacks #kitchenhack #freezerfriendly #kitchenhacks
If you’re looking for the best restaurants in Myrt If you’re looking for the best restaurants in Myrtle Beach (aka Dirty Myrtle 🤣🌴), I’ve got you covered! One thing you absolutely have to do while you’re here is eat all the fresh seafood… and yes, I may or may not have ordered Chilean sea bass THREE times this week because it was just that good. 😂🐟

Our #1 favorite restaurant in North Myrtle Beach is @theoysterrock. We loved it so much we went back twice during this trip! If you’re craving fresh seafood, amazing waterfront views, and one of the best meals at the beach, this place is a must.

For a more casual beachfront dinner, @bummzbeachcafe is another one of our go-to spots. Great food, ocean views, and the perfect laid-back beach vibes.

If you’re planning a Myrtle Beach vacation and wondering where to eat in Myrtle Beach, I’ve put together my full list of favorite restaurants and hidden gems!

🍤 Comment “FOOD” below, and I’ll send you my complete Myrtle Beach restaurant guide!

#myrtlebeachrestaurants #myrtlebeachfood #dirtymyrtle #beachfrontrestaurant
How adorable are these DIY oyster shell ghosts?! 👻 How adorable are these DIY oyster shell ghosts?! 👻🐚

When we were at Myrtle Beach last week, I spent way too much time searching for seashells… and ended up finding a pile of old oyster shells. Instead of leaving them behind, I had the idea to turn them into the cutest little Halloween ghosts!

I honestly can’t get over how adorable they turned out. They’re such an easy Halloween DIY, they’re budget-friendly, and they’re the perfect way to turn beach treasures into coastal Halloween decor. If you love spooky season with a beachy twist, you have to try this oyster shell craft!

Want the full tutorial and supply list? Comment “GHOST” below and I’ll send everything your way! 👻🤍

Save this for your Halloween crafting list and tag a friend who would love these little ghosties!

#oystershell #oystershellart #oystershells #diyhalloween #ghosties
POV: You want Pottery Barn fall decor… but your bu POV: You want Pottery Barn fall decor… but your budget says Dollar Tree DIY. 🤭🍂

If you love the look of high-end fall home decor but don’t love the price tags, this easy Dollar Tree fall DIY is for you! I transformed inexpensive Dollar Tree pumpkins into gorgeous DIY mercury glass pumpkins that look like they came straight from a luxury home decor store.

This is one of my favorite budget-friendly fall decorating ideas because it’s quick, affordable, and gives you that cozy, designer look for just a few dollars. No one will ever guess these started as Dollar Tree finds! 😉

🧡 Save this DIY for your fall decorating inspiration.
🍁 Share it with a friend who loves decorating on a budget.
🧡 Would you put these on your mantel, dining table, or entryway?

#dollartreedupes #potterybarndupe #diydollartree #dollartreediy #mercuryglassdecor
I almost didn’t post this. After sharing all of ou I almost didn’t post this. After sharing all of our beach vacation content last week, it probably looked like we had the perfect trip. Smiles, sunsets, seafood, beach days, and we truly did make some amazing memories.
But social media rarely shows everything. What you didn’t see was my heart pounding every time I carried my beach bag down to the sand. Feeling so dizzy and nauseous that I had to run back to the condo just to throw up. Watching my heart rate skyrocket and my Apple Watch constantly sending high heart rate notifications, even while I was just sitting at dinner or relaxing on the couch. Imagine how high it gets when I’m actually doing something. You didn’t see my hands shaking so badly that putting on my makeup became a challenge.
Or the hours spent on the phone with doctors, insurance companies, and specialists trying to get referrals approved, MRIs scheduled, and answers that still haven’t come. After weeks of waiting, I finally got my brain, spine, and lower back MRIs scheduled, but they’re not until August 18. So now comes even more waiting and hoping for answers. 🙃
You didn’t see me checking my suitcase over and over, terrified I’d forget an important medication or something I might need while we were away.
And when we finally made it home? I ended up with what seemed like an allergic reaction, my right eye swelled shut, burned, and watered nonstop, my nose couldn’t decide if it wanted to be stuffed up or run like a faucet, and I topped it all off with a pounding migraine. This is the reality of living with an invisible illness.
You learn how to smile through the symptoms. You push through when you can. You rest when you have to. And you become really good at making things look “normal” even when your body is fighting you every step of the way. So if you’ve ever looked at someone’s vacation photos and thought they must have it all together, this is your reminder that you never know what someone is carrying behind the scenes.
And to my sweet hubby, thank you for giving me grace, slowing down when I need to, carrying the things I can’t, and reminding me that making memories together is what matters most ♥️
Remember those viral Pottery Barn-inspired jack-o’ Remember those viral Pottery Barn-inspired jack-o’-lanterns everyone wanted a few Halloweens ago? 🎃 I couldn’t justify the price, so I made my own… and they’ve been my favorite DIY Halloween decorations ever since!

They’re so easy to make, budget-friendly, and honestly look just as cozy on a porch, fireplace mantel, or front steps. If you’re looking for high-end Halloween decor on a budget, this DIY is for you!

Comment “PUMPKIN” below and I’ll send you the full step-by-step tutorial so you can make your own before Halloween! 🧡🎃
#potterybarndupe #diyhalloween #diyhalloweendecorations #jackolanterns #jackolantern
Leaving the beach is always the hardest part of an Leaving the beach is always the hardest part of any beach vacation. As much as I’ve loved every minute of soaking up the sun, watching the waves, and making memories, I’m officially ready to head home.

Mostly because I can’t wait to see my little fur babies! 🐈💕 I’m counting down the minutes until I can cuddle them on the couch and unwind after an amazing week away.

Vacations are wonderful, but there’s just something special about walking back through your own front door. 🏡✨

So tell me… are you the type who wishes vacation could last forever, or do you always end up a little homesick and ready to get back home?

Comment SHOP below to receive a DM with the link to this post on my LTK ⬇ https://liketk.it/6jPNU

#vacationover #backtothegrind #backhomeagain #byebeach #beachvacay
There’s just something about the warm glow of cand There’s just something about the warm glow of candlelight, a cool autumn breeze, and relaxing on the porch with a mug of hot apple cider that makes my heart so happy. Fall is hands-down my favorite season, and I am so ready for all the cozy fall vibes.

This summer has been so hot, humid, and rainy that it feels like every weekend gets rained out. 😂 So if anyone’s ready for crisp air, sweaters, fall porch decor, pumpkin candles, and peaceful evenings outside… it’s me!

Who’s already counting down the days until autumn arrives? 🍁 Tell me your favorite thing about fall in the comments! 👇🏻

#falltablescape #falldecorations #cozyfall #cozyfallvibes #fallhomedecor
Is anyone else’s robot vacuum constantly getting l Is anyone else’s robot vacuum constantly getting lost or dying in the most random places? 😂 Mine literally only had to move TWO more feet to reach its charging dock, but instead it just gave up. Like… buddy, you were so close! 🤣

I also find it trapped under beds, cabinets, and furniture more often than I find it actually cleaning the house. At this point, I spend more time searching for my robot vacuum than I would if I just grabbed the regular vacuum myself. 😂

I know robot vacuums are supposed to make cleaning easier, but sometimes they create their own little adventures instead. Please tell me I’m not the only one! Does your robot vacuum have a mind of its own too, or is mine just extra dramatic? 🤣 

#roboticvacuum #roboticvacuumcleaner #robovac #sharkvacuum #relatablecontent
Christmas in July is almost over, so I had to snea Christmas in July is almost over, so I had to sneak in one more little dose of holiday magic! 🎄✨ I seriously can’t believe July is already coming to an end.

After spending the entire week at the beach in Myrtle Beach, I can confidently say…I’m officially ready for fall weather, cozy sweaters, pumpkin everything, and then it’s straight into Christmas decorating mode! 🧡🎃➡️🎄 This heat has me dreaming of crisp mornings, twinkling lights, baking Christmas cookies, and all the cozy vibes.

I know I’m probably rushing the seasons a little, but if you’re a fellow cozy season lover, you get it. 😂

So tell me…are you soaking up every second of summer, or are you counting down the days until fall and Christmas like I am? 🍂🎅👇🏻

#christmasinjuly #christmasinjuly🎄 #christmasinspiration #christmasinspo #somewhereinmymemory
If you’re looking for easy DIY Halloween decor, th If you’re looking for easy DIY Halloween decor, these spooky cute ghost plant markers are the perfect project! 👻🖤

I made these using my @glowforge machine, and I can’t get over how adorable they turned out! Once they were cut, all they needed was a quick coat of white spray paint, and they were ready to decorate my fall planters.

I can’t wait to stick them in my mums this autumn! They’re such a fun way to add a little spooky charm to your fall porch decor, outdoor planters, or even your garden. Plus, they’re so simple to make!

Who else is already counting down the days until it’s time to decorate for Halloween? 🎃👻
#diyhalloween #diyhalloweendecorations #diyhalloweendecor #summerween #glowforge
  • Home
  • Subscribe
  • About Me
  • The Blog
    • DIY
      • Turning a Builder Grade Home Into Something More
      • Outdoor
      • Home Improvement
      • Repurpose and Upcycling
      • Home Decor
        • Christmas
        • Everyday Decor
        • Fall
        • Spring
        • Summer
        • Winter
    • Recipes
      • What To Cook?
    • Travel
      • Traveling and Antiquing
      • Lifestyle
    • Whimsy Home Wednesday
  • Contact Me
  • Privacy Policy
    • Disclaimer
  • Home
  • Subscribe
  • About Me
  • The Blog
    • DIY
      • Turning a Builder Grade Home Into Something More
      • Outdoor
      • Home Improvement
      • Repurpose and Upcycling
      • Home Decor
        • Christmas
        • Everyday Decor
        • Fall
        • Spring
        • Summer
        • Winter
    • Recipes
      • What To Cook?
    • Travel
      • Traveling and Antiquing
      • Lifestyle
    • Whimsy Home Wednesday
  • Contact Me
  • Privacy Policy
    • Disclaimer

Mornings on Macedonia

DIY, Decor, & More

Home Improvement · February 25, 2021

DIY Shiplap Wall

I am so excited to share with y’all the first of a mini series of blog posts! I will be sharing them throughout the next few weeks. I am a crazy cat mom and we have decided to re-do Toby’s room downstairs! Yes, my Toby has his own room!

It’s just a little room underneath the stairs. Instead of having our contractor close that space up, we decided it would be good for storage. We asked him to leave it open and include a door there. This was done even before we got Toby. So when we got him, we always just placed his litter box there.

We didn’t really think too much about the room ever since. But, I thought this would be a good space to practice some of our bigger DIY projects. For example, doing a DIY shiplap wall here.
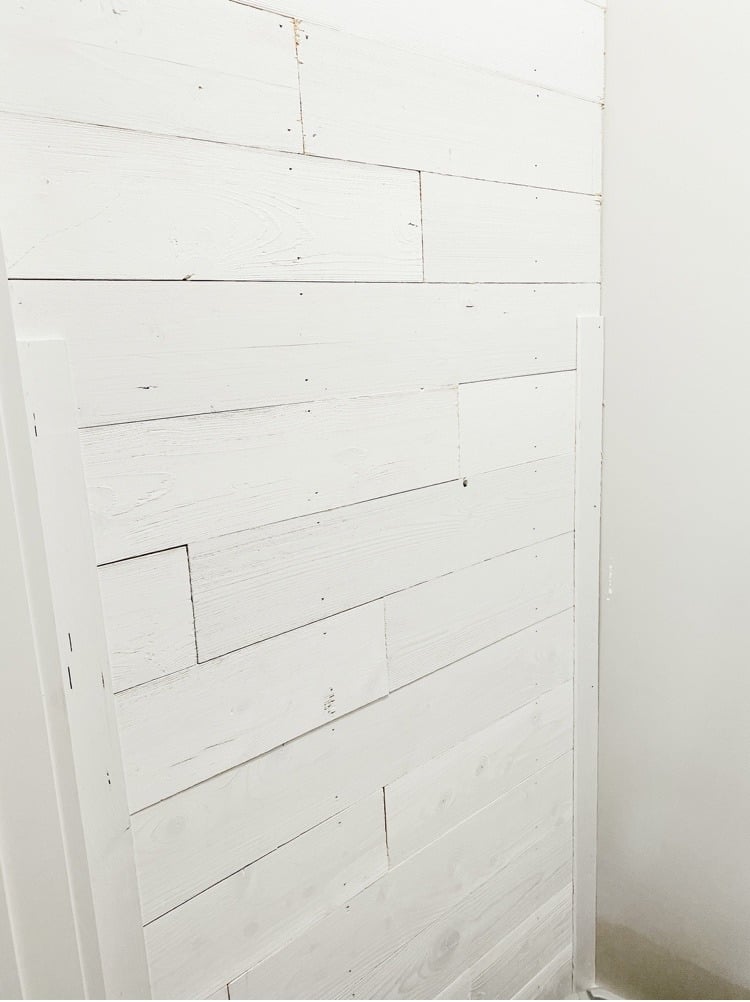
DIY Shiplap Wall
Look at all that pretty shiplap!

This way, if we mess up, we can easily hide the space! This was actually apart of my Valentine’s Day present from my sweet hubby.

I have been begging him to do some kind of DIY shiplap wall downstairs so this was a perfect compromise. And I am so happy to report that it actually went very well and wasn’t too hard to do!

We aren’t just doing shiplap either, we will be doing a number of different things in here too. That’s why I thought I would break it up into different posts so I could over everything in more detail about each step.

And that way I won’t have just one really, really long blog post about it.
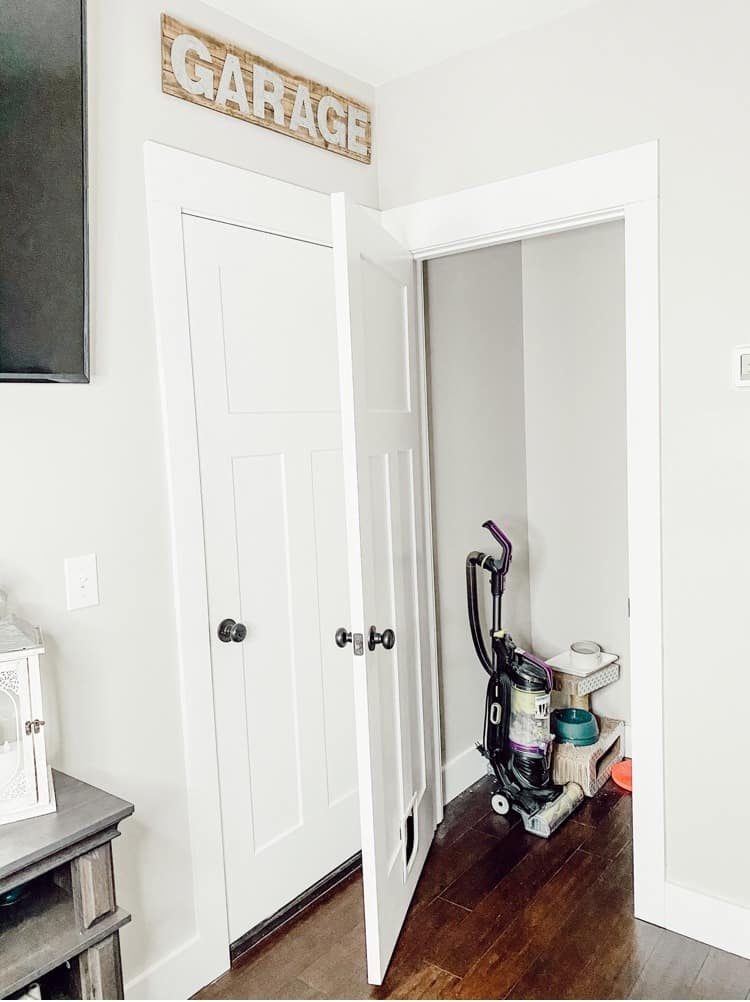
The Before
Here is what the space looked like before. Just a mess and not very pretty!

This post contains affiliate links. Click here to read my disclosure policy.

Materials Needed for DIY Shiplap Wall:

  • Actual Shiplap, or wall planks (we used wall planks because it was much easier and cheaper)
  • Nail Gun
  • Saw
  • Stud Finder
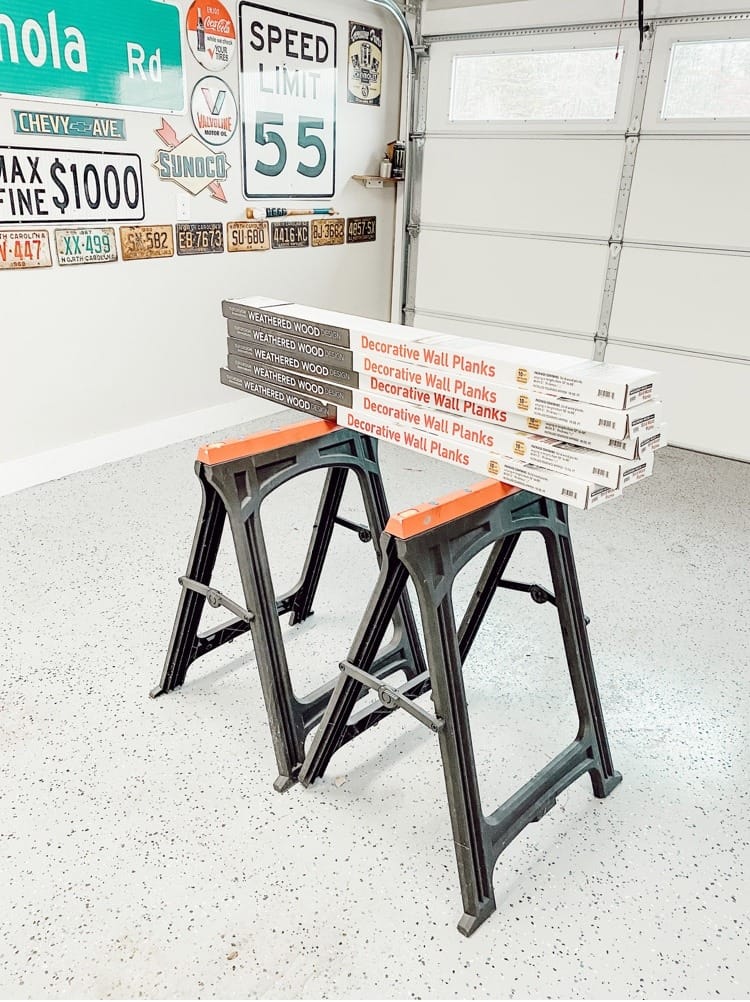
Wall Planks for Shiplap Wall
Here is what the wall planks looked like in the original packaging. I will link some similar planks below for you too!

Find the Studs in the Wall

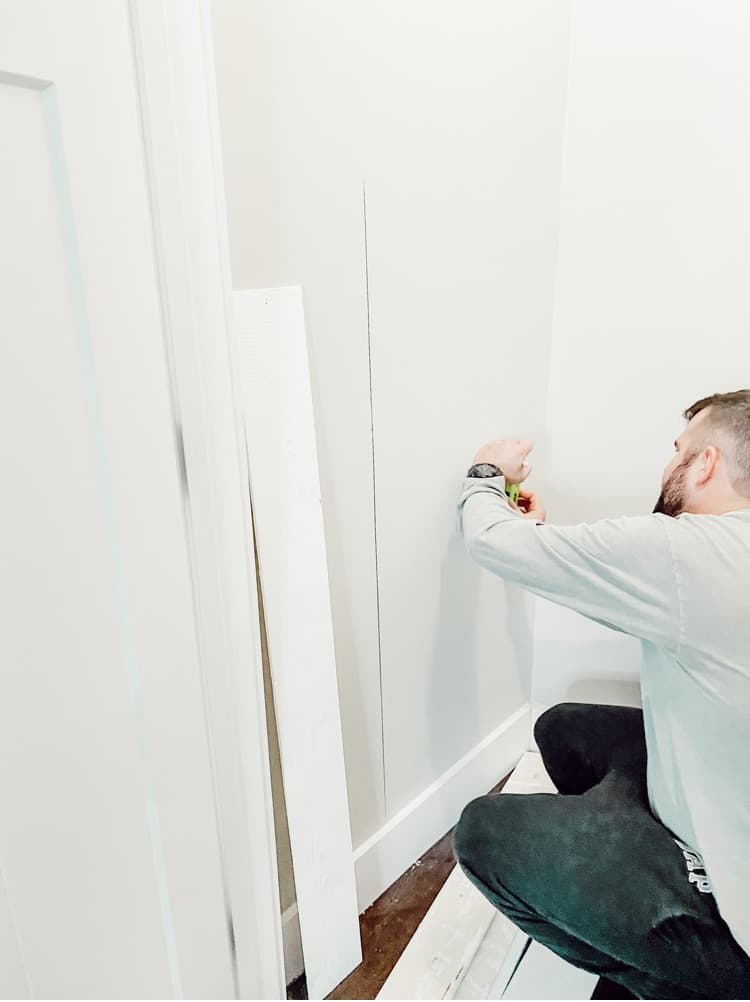
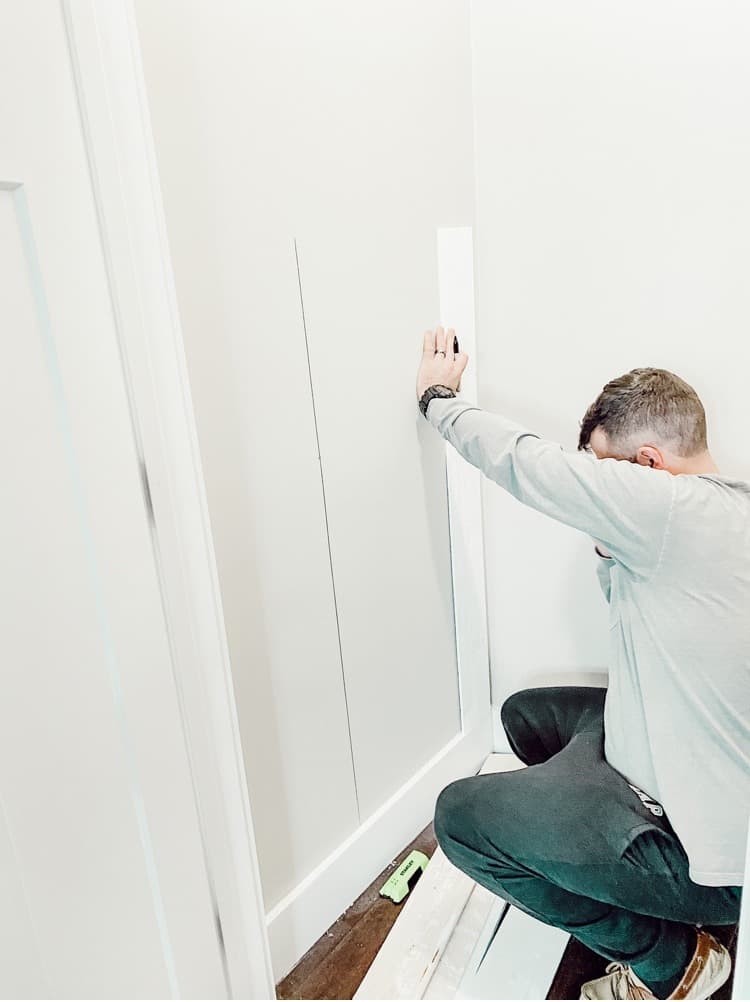
The first step in this project is to find all the studs in the wall you are going to shiplap. My hubby used his stud finder and then when he located where the studs were, he drew a line with a sharpie up the wall.

This way he can know exactly where to insert the nails with the nail gun. The planks will be more supported if you attach them straight to a stud in the wall.

Also, drawing a line on the wall isn’t a big deal because we are going to be shiplapping right over it so you won’t see it at all.
Finding the studs
Finding where the studs are.
Finding Studs in the Wall
Drawing the lines on the wall.

Cut the Shiplap

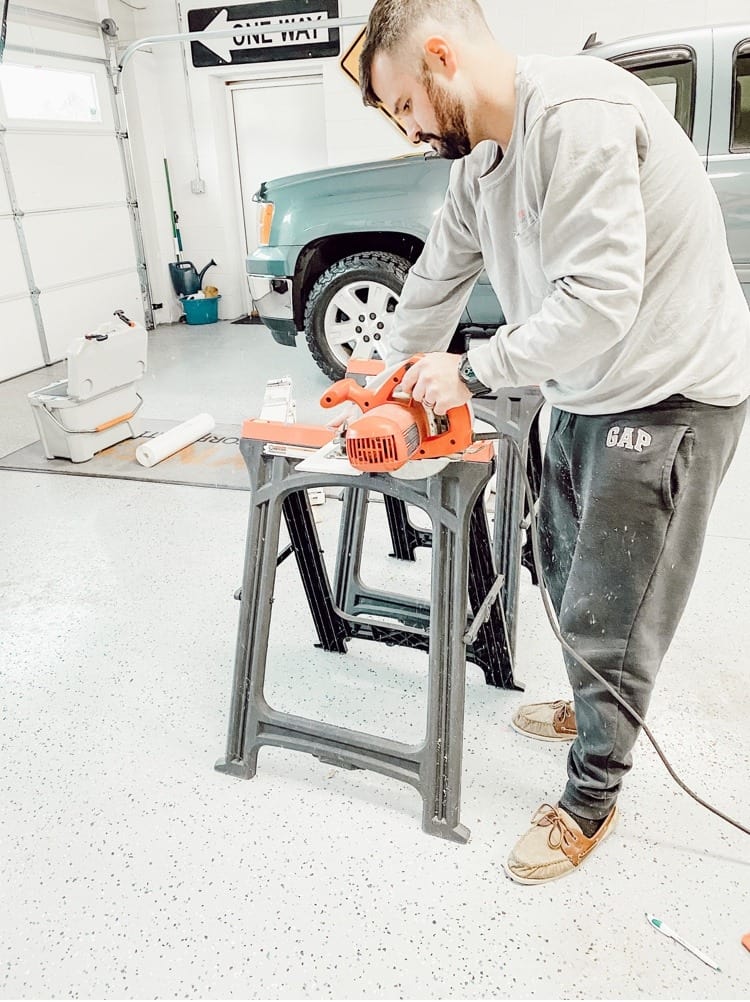
Now once you know where the studs are, you can start cutting the wall planks. But of course be sure to measure your wall first to make sure you have enough material.

This wall is extremely small, about 8′ by 3′. This was definitely a great wall to practice on because we are wanting to do more shiplap in the future on bigger walls downstairs.

To attach them to the wall, we just kind of did long and short pieces here and there. It gives it texture and dimension and makes the wall planks look more like real shiplap.

My hubby did mainly all of this himself and just kind of judged how the pieces should fit together. So you can basically just eyeball it and do what looks good to you.
Cutting the wood planks
Cutting the wood planks and getting them ready to attach to the wall!

Attach the Wood Planks to the Wall

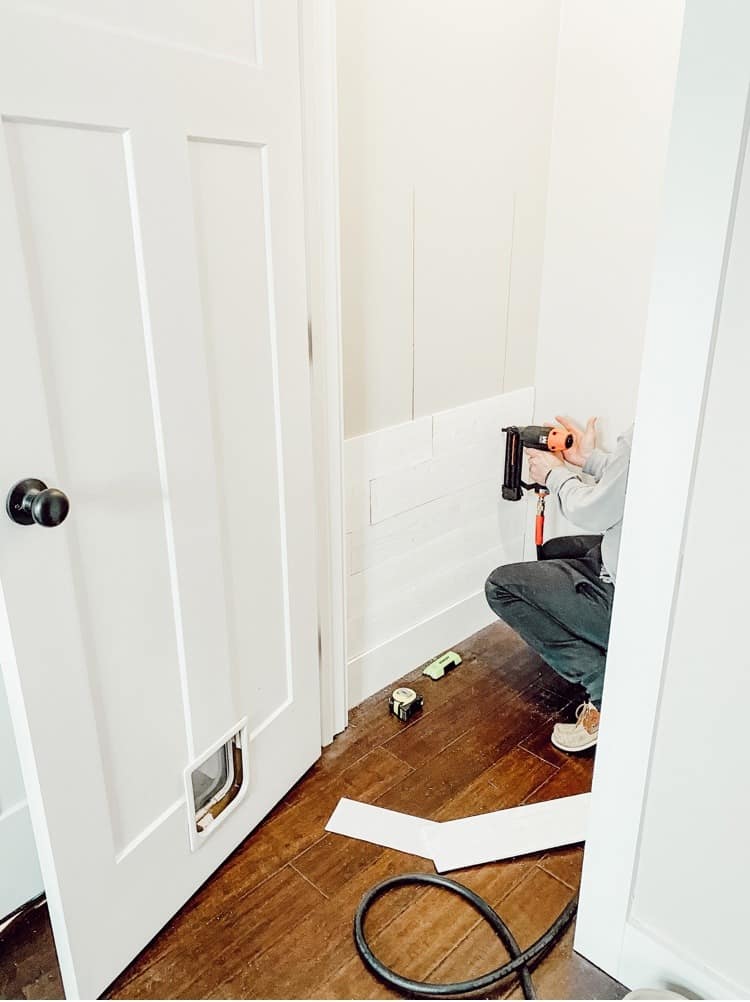
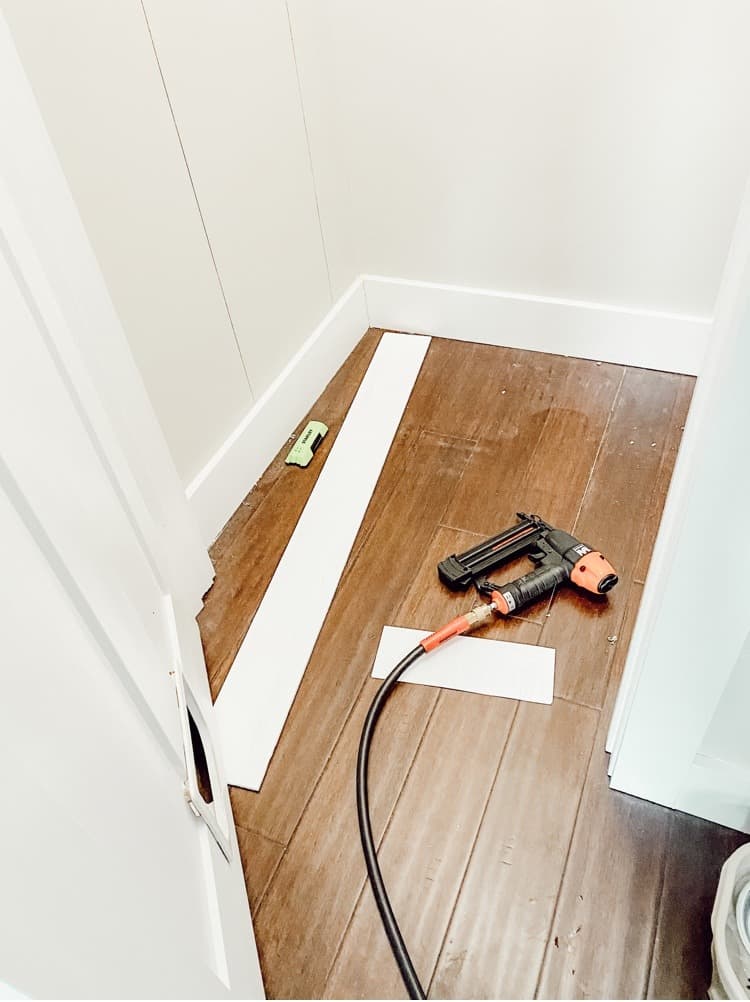
Once you have everything cut and sized, you are ready to attach them to the DIY shiplap wall! We didn’t have a nail gun so we ordered a cheap one off of Amazon.

And y’all that thing works perfectly! The best part is, it was only $35 as well.

So really all in all, this project wasn’t too expensive even though we needed to purchase more supplies for it. Obviously though if we were doing a bigger wall we would have needed many more wall planks.
Getting Ready to attach wood planks to the wall
Here is the nail gun we used. I will link the same one below:

The only downside to this particular nail gun is that it is not cordless. But hey, for $35, you can’t really complain too much.

We were both very satisfied with it and it worked like a charm!
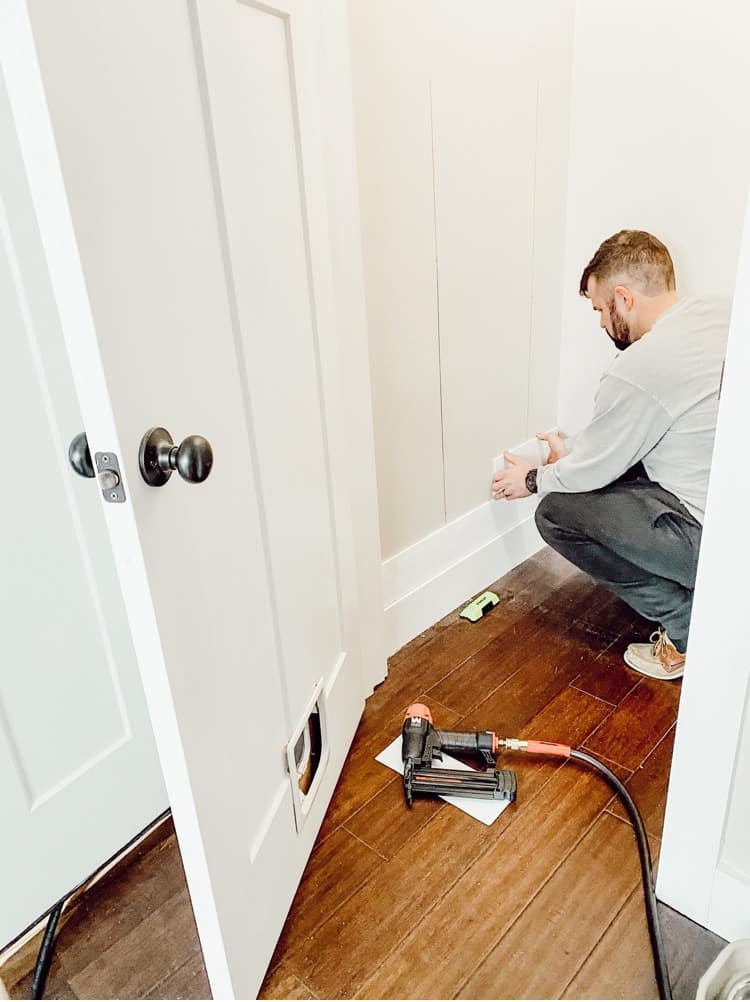
Attaching Wall Planks
Starting the Shiplap!
Wall Planks on Shiplap Wall
Look how pretty it looks so far!

Add Trim to the Shiplap Wall

Once you are all done shiplapping, then you can add some trim around the wall. This gives it a more polished look. Now you can buy actual pieces of trim for this part or the project or be thrifty like us.

We had some leftover wood planks so we just measured how wide the trim should be and then used the saw to cut the trim pieces out.

It turned out just fine and saved us a little bit of money doing it that way instead. We also went back and caulked around the trim to give it a more finished look.

Conclusion

This part of the project was actually really easy and simple to do! I enjoyed it and I love the way it turned out! If you want to do a DIY shiplap wall too, then I highly recommend it.

This was a baby step for us moving onto bigger DIY projects. As you know, I like to keep things simple and easy around here (like just up cycling some furniture) so I haven’t done too many big projects like wall treatments.

The next step in this journey is all about our first time doing wallpaper in this room too. And let me tell you, that was not as easy! It was much harder than anticipated so be sure to stay tuned for my next blog post about it.

I will be giving you all the tips and tricks that we learned along the way!
How To Make Your Own Shiplap Wall For Your Home
Pin for later!

In: Home Improvement · Tagged: DIY, shiplap, shiplap wall

About Charity Gentry

I love Jesus, coffee, and home decor. I also love to cook and bake as well as read in my spare time! Follow along with me for all my latest DIY projects and ideas!

join the club

You’ll Also Love

Close Up of DIY Wooden RiserEasy and Simple DIY Wooden Risers
DIY Garden MarkersDIY Garden Markers
DIY Raised Garden BedsDIY Raised Garden Beds

Comments

  1. Jenny in Neverland says

    February 25, 2021 at 10:55 am

    Oh my gosh I love that! It’s such a beautiful effect and gives such a great accent to the wall. I think when I get my own place, I’d want a feature like that somewhere in the house! x

    Reply
    • Charity Gentry says

      February 25, 2021 at 2:55 pm

      Yes you definitely should. It’s so much fun to do and adds in so much character to the space!

      Reply
  2. BR says

    February 25, 2021 at 11:06 am

    This is beautiful, I love how lovely and clear it is
    Thanks for sharing
    https://uncuaderno4cero.wordpress.com/

    Reply
    • Charity Gentry says

      February 25, 2021 at 2:55 pm

      Thank you so much. So glad you enjoyed it too.

      Reply
  3. Rebecca says

    February 25, 2021 at 11:17 am

    I love shiplap! It looks so good in that little space. It really opens it up. I’d love to do a little room for my dogs when I have my own place too.

    Reply
    • Charity Gentry says

      February 25, 2021 at 3:02 pm

      Yes that would be so fun to do for dogs too!

      Reply
  4. Kelly Diane says

    February 25, 2021 at 11:58 am

    This looks so simple yet so effective. I love that Toby has his own room.

    Reply
    • Charity Gentry says

      February 25, 2021 at 2:57 pm

      Thank you! I do too. He is very spoiled 😹

      Reply
  5. Lucy says

    February 25, 2021 at 2:04 pm

    What a brilliant and creative idea this is! This looks so lovely on your wall x

    Lucy | http://www.lucymary.co.uk

    Reply
    • Charity Gentry says

      February 25, 2021 at 2:58 pm

      Thank you so much Lucy. I really appreciate it!

      Reply
  6. Jodie | That Happy Reader says

    February 25, 2021 at 2:19 pm

    How exciting that you’re getting your wished for project done! I’ll be following this series. Thanks for sharing.

    Reply
    • Charity Gentry says

      February 25, 2021 at 3:02 pm

      Yes I am so excited! And thank you so much my friend!

      Reply
  7. Fransic Verso says

    February 25, 2021 at 5:15 pm

    That’s cute Toby has a room and it looks nice. We have a storage room as well under the stair. Might make it for the dog if I get one later. Thank you for sharing!

    Reply
    • Charity Gentry says

      February 26, 2021 at 1:45 am

      Thank you, yes its a great space for a pet room for sure!

      Reply
  8. Della Driscoll says

    February 25, 2021 at 11:32 pm

    I love your DIY posts, they’re always so authentic and unique! This final wall design looks so fab xx

    Reply
    • Charity Gentry says

      February 26, 2021 at 1:47 am

      Awe thank you so much my friend. I am so glad you think so!

      Reply
  9. Kalin says

    February 26, 2021 at 11:59 am

    Shiplap is so visually appealing! You made it seem so easy and like such a fun DIY project!

    Reply
    • Charity Gentry says

      February 26, 2021 at 8:27 pm

      Thank you so much. I love the way shiplap looks too!

      Reply
  10. markstraveljournal says

    February 26, 2021 at 12:32 pm

    That wall looks so nice and simple to do. A classic diy project. Thanks for sharing,

    Reply
    • Charity Gentry says

      February 26, 2021 at 8:29 pm

      Thank you so much. It was very simple and easy and I am so happy with the finished results!

      Reply
  11. Naomi Rowan says

    February 26, 2021 at 1:23 pm

    I love this! It’s so great to have a place like this to practise, and it looks so cute and nautical! Well done!

    Reply
    • Charity Gentry says

      February 26, 2021 at 10:36 pm

      Thank you so much. It was a great place to practice and now I have more confidence to do it somewhere else!

      Reply
  12. Maria says

    February 26, 2021 at 1:29 pm

    Who doesn’t love a shiplap wall? Your wall looks awesome!!! Thanks so much for the tutorial. I’m sure the cat likes it too:)

    Reply
    • Charity Gentry says

      February 26, 2021 at 10:39 pm

      Lol he sure does! Thank you so much, I am loving it so far too!

      Reply
  13. Cristina Rosano says

    February 26, 2021 at 2:29 pm

    Wow, this is such a great idea to brighten up space! I Will keep this in mind whenever I will get a house, I really love how it looks and can’t wait to see more about this space! I am sure Toby will be impressed with the upgrades x

    Reply
    • Charity Gentry says

      February 26, 2021 at 10:39 pm

      Thank you so much! Toby is pretty happy with it so far lol

      Reply
  14. Jaya Avendel says

    February 26, 2021 at 9:17 pm

    Oo, the shiplap adds a lovely texture to the wall and catches the eye without the use of different paint colors or even wall art. I love how classy it looks and how easy your DIY is to follow. Character in a closet makes a home feel like home. 🙂
    Thanks for sharing!

    Reply
    • Charity Gentry says

      February 26, 2021 at 10:40 pm

      Thank you so much! I love it too and it really does bring so much character in here!

      Reply
  15. Karalee Shotola says

    February 27, 2021 at 4:49 pm

    I love how the shiplap wall turned out! Toby is lucky to have his own little room with a pretty wall haha

    Reply
    • Charity Gentry says

      February 28, 2021 at 12:34 pm

      Thank you! he really is although I don’t think he cares too much lol

      Reply
  16. Kayleigh Zara says

    February 27, 2021 at 8:35 pm

    I genuinely love the effect that this gives the wall, I’d love to have shiplap in my kitchen or in my corridors. Thankyou for sharing x

    Reply
    • Charity Gentry says

      February 28, 2021 at 12:34 pm

      Thank you so much! Shiplap does give off an amazing effect once it’s done!

      Reply
  17. Amanda says

    February 28, 2021 at 1:21 pm

    Makes such a difference!! I love it! Thanks for sharing with us the steps. I’d love to do one in my house.

    Reply
    • Charity Gentry says

      February 28, 2021 at 7:48 pm

      Thank you so much! You definitely should! It was so easy and I love the outcome of it!

      Reply
  18. lifestyleseason says

    February 28, 2021 at 1:56 pm

    Lovely post! I love how you are sharing the whole process of this DIY! Looking forward to seeing what it looks like at the end! Thank you for sharing!

    Reply
    • Charity Gentry says

      February 28, 2021 at 7:49 pm

      Thank you so much! I can’t wait to share the whole room when it’s finished! It’s almost there!

      Reply
    • Charity Gentry says

      February 28, 2021 at 7:49 pm

      Thank you so much! I can’t wait to share the whole room when it’s finished! It’s almost there.

      Reply
  19. Rachael says

    February 28, 2021 at 3:34 pm

    Love a DIY post – it looks fab!!

    Reply
    • Charity Gentry says

      February 28, 2021 at 7:51 pm

      Thank you! I love a good DIY too!

      Reply
  20. experience addict says

    March 1, 2021 at 11:37 am

    Great post, thanks for sharing!!

    Reply
    • Charity Gentry says

      March 2, 2021 at 11:38 am

      Thank you so much

      Reply
  21. Rosie Ireland says

    March 1, 2021 at 1:08 pm

    I absolutely love your home and interior posts. I am a lover of distressed wood at home and it’s the main theme for my wedding this summer!

    Rosie

    Reply
    • Charity Gentry says

      March 2, 2021 at 11:39 am

      Thank you so much. And that will look so lovely at your wedding then! Congratulations!

      Reply
  22. Stephanie says

    March 1, 2021 at 2:42 pm

    What a creative way to experiment with a bigger DIY project: using a smaller, more hidden space as the trial run! Now you know you can do it, plus your kitty has a very stylish little home base. Best of both worlds, am I right?

    Reply
    • Charity Gentry says

      March 2, 2021 at 11:33 am

      I know right?! I definitely feel more confident doing it on a bigger wall now! Thanks so much!

      Reply
  23. Baby Boomer Super Saver says

    March 1, 2021 at 8:14 pm

    What a great idea to practice decorating and remodeling techniques in a spare space! The final result of your shiplap wall definitely goes with your beautiful rustic/county theme decor. I love your style and everything you’ve done to your home!

    Reply
    • Charity Gentry says

      March 2, 2021 at 11:37 am

      Awe thank you so much. I really appreciate it and I’m so happy with how it turned out as well!

      Reply
  24. Heidi Bruaw says

    March 2, 2021 at 5:54 am

    First of all, I love that Toby has his own room! Cats are seriously the best. The wall looks great, too. I like the idea of starting with a small space to practice with a new technique so that you know what it will take to do a bigger space. 🙂

    Reply
    • Charity Gentry says

      March 2, 2021 at 11:35 am

      Thank you so much! Cats really are the best! And yes now I have more confidence to move onto a bigger and more challenging wall!

      Reply
    • Charity Gentry says

      March 2, 2021 at 11:36 am

      I know right?! Cats really are the best for sure!

      Reply
  25. Eleanor Jones says

    March 2, 2021 at 11:57 am

    Wow this gives the wall such a lovely look, and it looks like it was an interesting process to make as well!

    Reply
    • Charity Gentry says

      March 3, 2021 at 12:16 am

      Thank you so much. It was fun to do for sure.

      Reply
  26. PRIYANKA JOSHI says

    March 2, 2021 at 1:59 pm

    The wall looks lovely. Thanks for sharing a detailed post on it.

    Reply
    • Charity Gentry says

      March 3, 2021 at 12:18 am

      Thank you, so glad you enjoyed it

      Reply
  27. Britt K says

    March 2, 2021 at 2:08 pm

    I always love seeing people creating a space like this. We have a coat closet that has been converted to a ‘kitty bathroom’ for our two with their litterbox in it. Not only does it keep the litterbox tucked away where people don’t have to see it (and keep the smell contained when they stink it up a little), but it also keeps everything tucked away from our dogs lol! I know that our boy Indiana would happily help clean the litterbox each day if we gave him the opportunity to.

    Reply
    • Charity Gentry says

      March 3, 2021 at 12:20 am

      I know right?! It’s so nice to have his litter box hidden out of sight and keep the smell down for sure!

      Reply
  28. Brooke Ressell says

    March 2, 2021 at 2:44 pm

    You both did a nice job on it. It looks great. And it’s hilarious that you did it in your cat’s litter closet. My cat is not so lucky.

    Reply
    • Charity Gentry says

      March 3, 2021 at 12:24 am

      Lol thank you. This is what happens when you don’t have kids!

      Reply
  29. Nic | Nic's Adventures & Bakes says

    March 2, 2021 at 4:43 pm

    Thanks for sharing your wall, it looks lovely 🙂

    Reply
    • Charity Gentry says

      March 3, 2021 at 12:15 am

      Thank you. So glad you think so.

      Reply
  30. Tamra says

    March 3, 2021 at 12:52 am

    This is beautiful! I love your idea! I definitely want to try to make a shiplap wall, since I like the look so much.

    Reply
    • Charity Gentry says

      March 4, 2021 at 12:10 am

      Thank you! You definitely should! It was well worth it!

      Reply
  31. Nyxie says

    April 2, 2021 at 12:28 pm

    I love this so much! It’s certainly something I’d love to see in my kitchen or even my office!

    Reply
    • Charity Gentry says

      April 3, 2021 at 12:46 am

      Thank you so much. I am so glad you enjoy it too!

      Reply

Leave a Reply Cancel reply

Your email address will not be published. Required fields are marked *

Recipe Rating


Next Post >

How To Style an Easter Coffee Bar

Recent Posts

  • DIY Oyster Shell Ghosts: An Easy Coastal Halloween Craft
  • My Endometriosis Journey: Symptoms, Diagnosis, Excision Surgery, Recovery, and Life After Surgery
  • Crockpot Spaghetti Sauce Recipe (Freezer Friendly & Easy Slow Cooker Dinner)
  • Best Things To Do In Hilton Head Island: A First Timer’s Travel Guide
  • Best Places To Eat In Hilton Head Island (Must-Try Restaurants for Foodies)

Archives

Categories

  • About Me
  • Christmas
  • DIY
  • Everyday Decor
  • Fall
  • Home Improvement
  • Lifestyle
  • Outdoor
  • Recipes
  • Repurpose and Upcycling
  • Spring
  • Summer
  • The Blog
  • Travel
  • Uncategorized
  • Whimsy Home Wednesday
  • Winter

About Me

About Me

Follow along with me for all things home decor and modern farmhouse style! I also love sharing simple DIY projects and how to style and decorate every room of your house! Thanks for stopping by!


Shop My Home!

join the club

trending now

instagram

Follow @mornings_on_macedonia

Is your garden overflowing with summer squash? If Is your garden overflowing with summer squash? If you’ve got more squash than you know what to do with, this simple food preservation hack is a game changer!

Instead of letting your fresh garden harvest go to waste, freeze your summer squash so you can enjoy it all year long.

Here’s how:
🌿Slice or dice your squash.
🌿Spread the pieces in a single layer on a parchment-lined baking sheet.
🌿Flash freeze for 1–2 hours.
🌿Transfer to a freezer-safe bag, remove as much air as possible, and store in the freezer for 10–12 months.

The best part? You can cook it straight from frozen—no thawing required! It’s one of my favorite gardening hacks for preserving fresh vegetables and making the most of every harvest.

Whether you’re growing a backyard vegetable garden or just picked up extra squash at the farmers market, this easy freezer tip will help reduce food waste and make meal prep so much easier.

Have you ever tried freezing summer squash before, or is this a new gardening tip for you? Let me know below! 👇🏻 

#gardenhack #gardenhacks #kitchenhack #freezerfriendly #kitchenhacks
If you’re looking for the best restaurants in Myrt If you’re looking for the best restaurants in Myrtle Beach (aka Dirty Myrtle 🤣🌴), I’ve got you covered! One thing you absolutely have to do while you’re here is eat all the fresh seafood… and yes, I may or may not have ordered Chilean sea bass THREE times this week because it was just that good. 😂🐟

Our #1 favorite restaurant in North Myrtle Beach is @theoysterrock. We loved it so much we went back twice during this trip! If you’re craving fresh seafood, amazing waterfront views, and one of the best meals at the beach, this place is a must.

For a more casual beachfront dinner, @bummzbeachcafe is another one of our go-to spots. Great food, ocean views, and the perfect laid-back beach vibes.

If you’re planning a Myrtle Beach vacation and wondering where to eat in Myrtle Beach, I’ve put together my full list of favorite restaurants and hidden gems!

🍤 Comment “FOOD” below, and I’ll send you my complete Myrtle Beach restaurant guide!

#myrtlebeachrestaurants #myrtlebeachfood #dirtymyrtle #beachfrontrestaurant
How adorable are these DIY oyster shell ghosts?! 👻 How adorable are these DIY oyster shell ghosts?! 👻🐚

When we were at Myrtle Beach last week, I spent way too much time searching for seashells… and ended up finding a pile of old oyster shells. Instead of leaving them behind, I had the idea to turn them into the cutest little Halloween ghosts!

I honestly can’t get over how adorable they turned out. They’re such an easy Halloween DIY, they’re budget-friendly, and they’re the perfect way to turn beach treasures into coastal Halloween decor. If you love spooky season with a beachy twist, you have to try this oyster shell craft!

Want the full tutorial and supply list? Comment “GHOST” below and I’ll send everything your way! 👻🤍

Save this for your Halloween crafting list and tag a friend who would love these little ghosties!

#oystershell #oystershellart #oystershells #diyhalloween #ghosties
POV: You want Pottery Barn fall decor… but your bu POV: You want Pottery Barn fall decor… but your budget says Dollar Tree DIY. 🤭🍂

If you love the look of high-end fall home decor but don’t love the price tags, this easy Dollar Tree fall DIY is for you! I transformed inexpensive Dollar Tree pumpkins into gorgeous DIY mercury glass pumpkins that look like they came straight from a luxury home decor store.

This is one of my favorite budget-friendly fall decorating ideas because it’s quick, affordable, and gives you that cozy, designer look for just a few dollars. No one will ever guess these started as Dollar Tree finds! 😉

🧡 Save this DIY for your fall decorating inspiration.
🍁 Share it with a friend who loves decorating on a budget.
🧡 Would you put these on your mantel, dining table, or entryway?

#dollartreedupes #potterybarndupe #diydollartree #dollartreediy #mercuryglassdecor
I almost didn’t post this. After sharing all of ou I almost didn’t post this. After sharing all of our beach vacation content last week, it probably looked like we had the perfect trip. Smiles, sunsets, seafood, beach days, and we truly did make some amazing memories.
But social media rarely shows everything. What you didn’t see was my heart pounding every time I carried my beach bag down to the sand. Feeling so dizzy and nauseous that I had to run back to the condo just to throw up. Watching my heart rate skyrocket and my Apple Watch constantly sending high heart rate notifications, even while I was just sitting at dinner or relaxing on the couch. Imagine how high it gets when I’m actually doing something. You didn’t see my hands shaking so badly that putting on my makeup became a challenge.
Or the hours spent on the phone with doctors, insurance companies, and specialists trying to get referrals approved, MRIs scheduled, and answers that still haven’t come. After weeks of waiting, I finally got my brain, spine, and lower back MRIs scheduled, but they’re not until August 18. So now comes even more waiting and hoping for answers. 🙃
You didn’t see me checking my suitcase over and over, terrified I’d forget an important medication or something I might need while we were away.
And when we finally made it home? I ended up with what seemed like an allergic reaction, my right eye swelled shut, burned, and watered nonstop, my nose couldn’t decide if it wanted to be stuffed up or run like a faucet, and I topped it all off with a pounding migraine. This is the reality of living with an invisible illness.
You learn how to smile through the symptoms. You push through when you can. You rest when you have to. And you become really good at making things look “normal” even when your body is fighting you every step of the way. So if you’ve ever looked at someone’s vacation photos and thought they must have it all together, this is your reminder that you never know what someone is carrying behind the scenes.
And to my sweet hubby, thank you for giving me grace, slowing down when I need to, carrying the things I can’t, and reminding me that making memories together is what matters most ♥️
Remember those viral Pottery Barn-inspired jack-o’ Remember those viral Pottery Barn-inspired jack-o’-lanterns everyone wanted a few Halloweens ago? 🎃 I couldn’t justify the price, so I made my own… and they’ve been my favorite DIY Halloween decorations ever since!

They’re so easy to make, budget-friendly, and honestly look just as cozy on a porch, fireplace mantel, or front steps. If you’re looking for high-end Halloween decor on a budget, this DIY is for you!

Comment “PUMPKIN” below and I’ll send you the full step-by-step tutorial so you can make your own before Halloween! 🧡🎃
#potterybarndupe #diyhalloween #diyhalloweendecorations #jackolanterns #jackolantern
Leaving the beach is always the hardest part of an Leaving the beach is always the hardest part of any beach vacation. As much as I’ve loved every minute of soaking up the sun, watching the waves, and making memories, I’m officially ready to head home.

Mostly because I can’t wait to see my little fur babies! 🐈💕 I’m counting down the minutes until I can cuddle them on the couch and unwind after an amazing week away.

Vacations are wonderful, but there’s just something special about walking back through your own front door. 🏡✨

So tell me… are you the type who wishes vacation could last forever, or do you always end up a little homesick and ready to get back home?

Comment SHOP below to receive a DM with the link to this post on my LTK ⬇ https://liketk.it/6jPNU

#vacationover #backtothegrind #backhomeagain #byebeach #beachvacay
There’s just something about the warm glow of cand There’s just something about the warm glow of candlelight, a cool autumn breeze, and relaxing on the porch with a mug of hot apple cider that makes my heart so happy. Fall is hands-down my favorite season, and I am so ready for all the cozy fall vibes.

This summer has been so hot, humid, and rainy that it feels like every weekend gets rained out. 😂 So if anyone’s ready for crisp air, sweaters, fall porch decor, pumpkin candles, and peaceful evenings outside… it’s me!

Who’s already counting down the days until autumn arrives? 🍁 Tell me your favorite thing about fall in the comments! 👇🏻

#falltablescape #falldecorations #cozyfall #cozyfallvibes #fallhomedecor
Is anyone else’s robot vacuum constantly getting l Is anyone else’s robot vacuum constantly getting lost or dying in the most random places? 😂 Mine literally only had to move TWO more feet to reach its charging dock, but instead it just gave up. Like… buddy, you were so close! 🤣

I also find it trapped under beds, cabinets, and furniture more often than I find it actually cleaning the house. At this point, I spend more time searching for my robot vacuum than I would if I just grabbed the regular vacuum myself. 😂

I know robot vacuums are supposed to make cleaning easier, but sometimes they create their own little adventures instead. Please tell me I’m not the only one! Does your robot vacuum have a mind of its own too, or is mine just extra dramatic? 🤣 

#roboticvacuum #roboticvacuumcleaner #robovac #sharkvacuum #relatablecontent
Christmas in July is almost over, so I had to snea Christmas in July is almost over, so I had to sneak in one more little dose of holiday magic! 🎄✨ I seriously can’t believe July is already coming to an end.

After spending the entire week at the beach in Myrtle Beach, I can confidently say…I’m officially ready for fall weather, cozy sweaters, pumpkin everything, and then it’s straight into Christmas decorating mode! 🧡🎃➡️🎄 This heat has me dreaming of crisp mornings, twinkling lights, baking Christmas cookies, and all the cozy vibes.

I know I’m probably rushing the seasons a little, but if you’re a fellow cozy season lover, you get it. 😂

So tell me…are you soaking up every second of summer, or are you counting down the days until fall and Christmas like I am? 🍂🎅👇🏻

#christmasinjuly #christmasinjuly🎄 #christmasinspiration #christmasinspo #somewhereinmymemory
If you’re looking for easy DIY Halloween decor, th If you’re looking for easy DIY Halloween decor, these spooky cute ghost plant markers are the perfect project! 👻🖤

I made these using my @glowforge machine, and I can’t get over how adorable they turned out! Once they were cut, all they needed was a quick coat of white spray paint, and they were ready to decorate my fall planters.

I can’t wait to stick them in my mums this autumn! They’re such a fun way to add a little spooky charm to your fall porch decor, outdoor planters, or even your garden. Plus, they’re so simple to make!

Who else is already counting down the days until it’s time to decorate for Halloween? 🎃👻
#diyhalloween #diyhalloweendecorations #diyhalloweendecor #summerween #glowforge

Copyright © 2026 Mornings on Macedonia · Theme by 17th Avenue