If y’all have been around here long enough, then you know I love to wrap gifts. I have shared how to wrap gifts in a farmhouse style as well as how to wrap gifts in a vintage style before. So this holiday season, I thought I would step up my game with some DIY Christmas gift tags!
Especially since I got my amazing Glowforge Aura machine this year, I knew I could come up with something pretty cool. And these Christmas gift tags actually came out of a happy accident. When I was making my DIY stocking tags earlier, I made a few tags that were too small for the names.
So since I had these extra blank wooden tags, I wanted to repurpose them into something. Hence, where I came up with this DIY project idea! And I am so happy with how it all turned out. I will think it gives my Christmas gifts an extra pop!
So be sure to keep on reading to see just how you too can make these amazing Christmas gift tags yourself. Hopefully, you will be inspired to make your own handmade gift tags too!
This post also contains affiliate links, which means I make a small commission off anything you purchase through here, at no additional cost to you. Please read my full disclosure policy for more details.
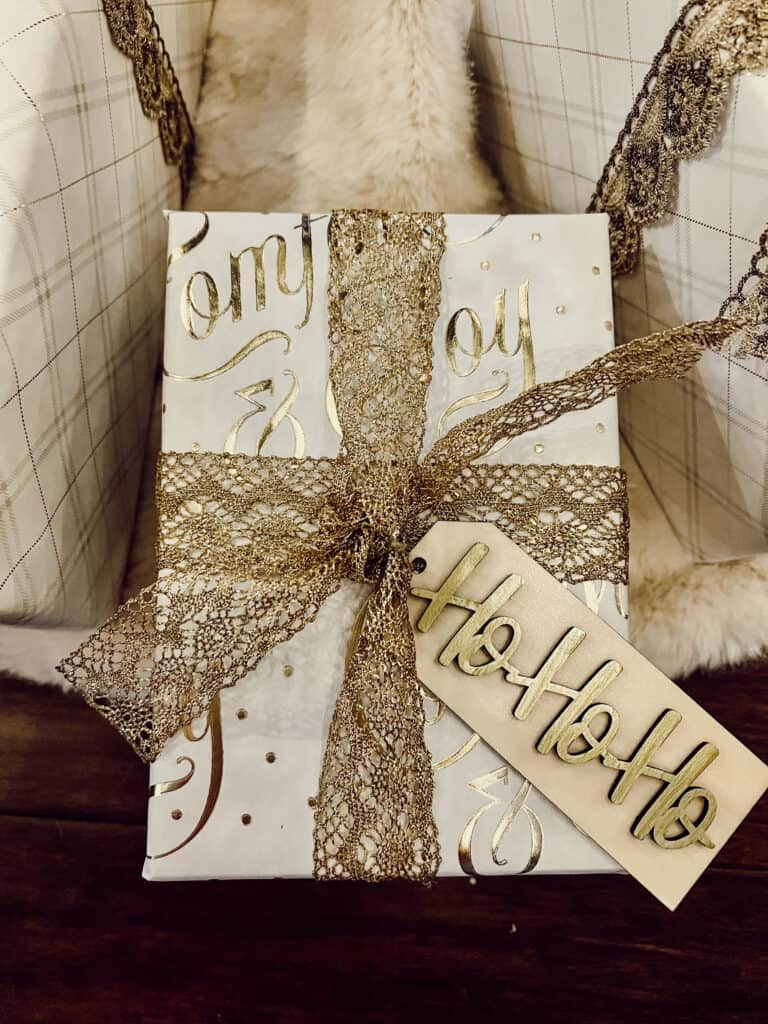
Materials Needed for DIY Christmas Gift Tags
- Glowforge Aura Machine
- Proofgrade Wood (I used Light Maple Plywood for this project)
- Masking Tape
- Acrylic Paint Pens
- B-7000 Glue
- Twine
Like I said above, I used my Glowforge Aura machine to create the wooden tags. I found a free template of gift tags on my Glowforge premium software and just went with that. You can find a free pattern like I did, or just create your own as well. Do whatever you want to do to get the creative juices flowing!
Another thing I loved using for this project and will be a staple from now on in my crafting supplies, are these acrylic paint pens (I’ll link them below). These are so much easier to use rather than actually painting with a paintbrush.
Especially if you’re working with such a small piece like this. Definitely recommend this pack, and it comes with so many different colors! Which means I can use it over and over again! Not just for the Christmas season, but anytime!
How To Make Gift Tags
Make sure when you are printing the actual gift tag out, that there is a hole punch on it. That way you can easily attach it to the gift you are wrapping! Once you have the basic tag printed out and ready to go, you can now add a personal touch to them.

I decided to be extra and use my Glowforge again to engrave on the back of the tags. Instead of actually handwriting “To” and “From”, I figured the machine could just do the work for me! Yes, I mean this is super extra and you could totally just handwrite it, but why not go all out with these DIY tags?!

If you are engraving, you want to make sure you do that before adding anything else onto the front of the tag. That way it lays flat in the machine and it can engrave it properly. I also just left the masking on the other side of the tag, since I knew I wanted to engrave it as well.
Once engraved, you can remove all the masking and start to add embellishments on the front! As you can see I printed out “Merry Christmas” and “Ho Ho Ho” as my embellishments. But, you could also print our Christmas trees, Santa Claus, candy canes, etc.

Basically anything you want to have on the front of your tag! You can do intricate designs or keep it simple. And this is where the paint pens come in handy!
To keep with my Christmas decor theme, I decided to paint my little gift tag embellishments in a pretty gold color. Then, I let them dry completely before moving onto the next step!
Crafting The Gift Tags
Once you have your tags engraved and your embellishments printed out and painted, you can now craft the tag altogether. I like to make sure that all my holiday gifts are already wrapped in gift wrap and ready to go as well.
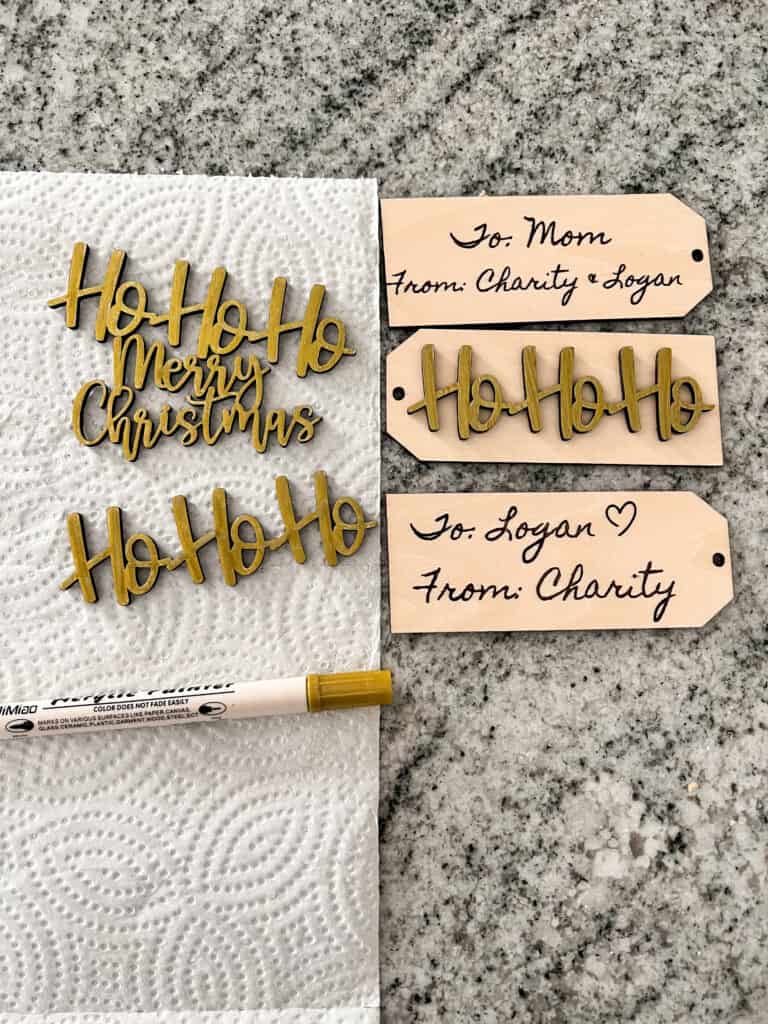
But, you can move at whatever pace works for you! If you want to just do one step at a time, that’s totally fine too. I just try to streamline the process as much as I can! To make the gift tag, flip your embellishment over and apply some glue around the design. My favorite glue to use is B-7000.
If you’ve seen my other Glowforge DIY posts, then you know that you have a little wiggle room when it comes to this glue.
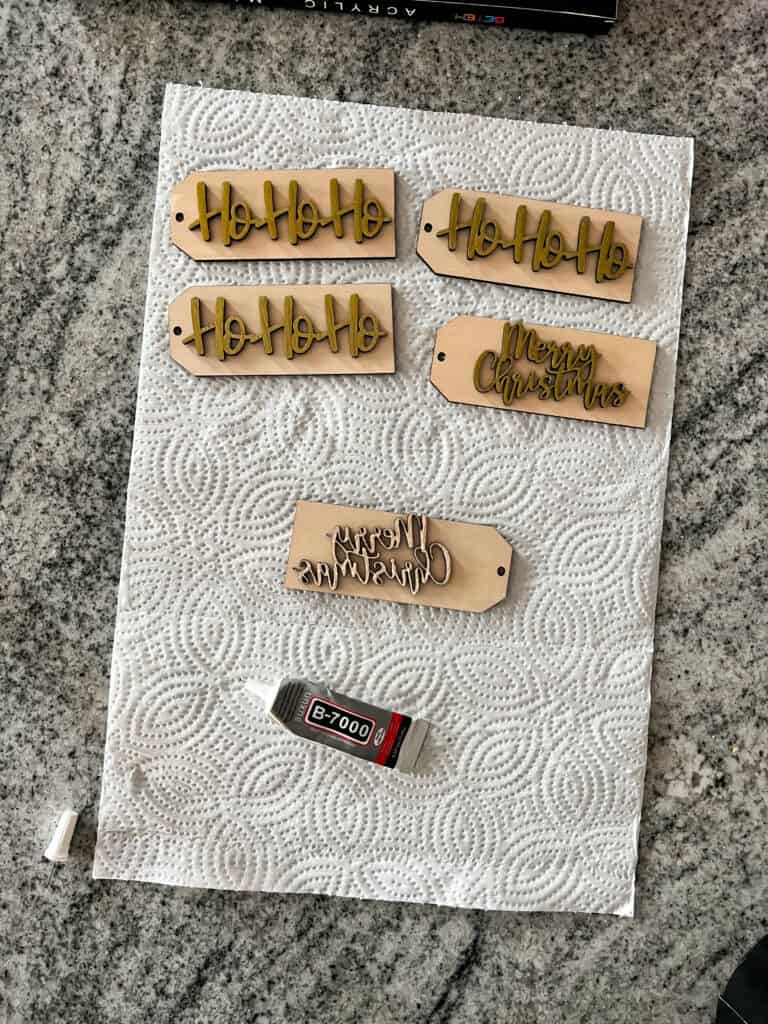
It doesn’t automatically set up, which is nice in case you mess up and need to move it. But, if you don’t have that on hand, you could also just use hot glue or something similar to that as well.
Let the tag dry for a little bit before you start attaching it to your holiday presents! You don’t want it to move around on you when you are trying to attach it. The last step is, once it is dry, you can just use a little twine to attach it to your gift.

I like to wrap my gifts in wrapping paper first, and then use a fancy ribbon to tie a bow around the package. Then, I attach the twine to the ribbon and cut off the excess so you can really see it. And that way, it looks like perfect, flat gift tags on your Christmas presents!
Enjoy Your DIY Gift Tags
Like I said, I had so much fun making these pretty gift tags! And even though it is a lot of effort, I think it is totally worth it when you see all the pretty presents lined up under the tree. And I hope you are inspired to make your own gift tags this year too.
They don’t even need to be this complicated either. I’ve made them before where you just take some white cardstock tags and place a Christmas stamp on top and that’s it! You could also just use some pretty scrapbook paper or anything else like that to create more simple gift tags. There are so many gift tag ideas out there that you could use!
Basically, I just love making my own DIY gift tags because I think the sticker ones just don’t do the presents justice! And especially if I am taking all this extra time to wrap presents and make them pretty, I want the gift tags to match too!
And the best part is I can reuse all these tags for next year too! That way, I don’t have to recreate them over and over, I can just grab them after the gift is opened, and store them away in my Christmas bins for next season! I hope you enjoyed this post on how to create a homemade gift tag, and I also hope you all have a very Merry Christmas my friends!






Leave a Reply