
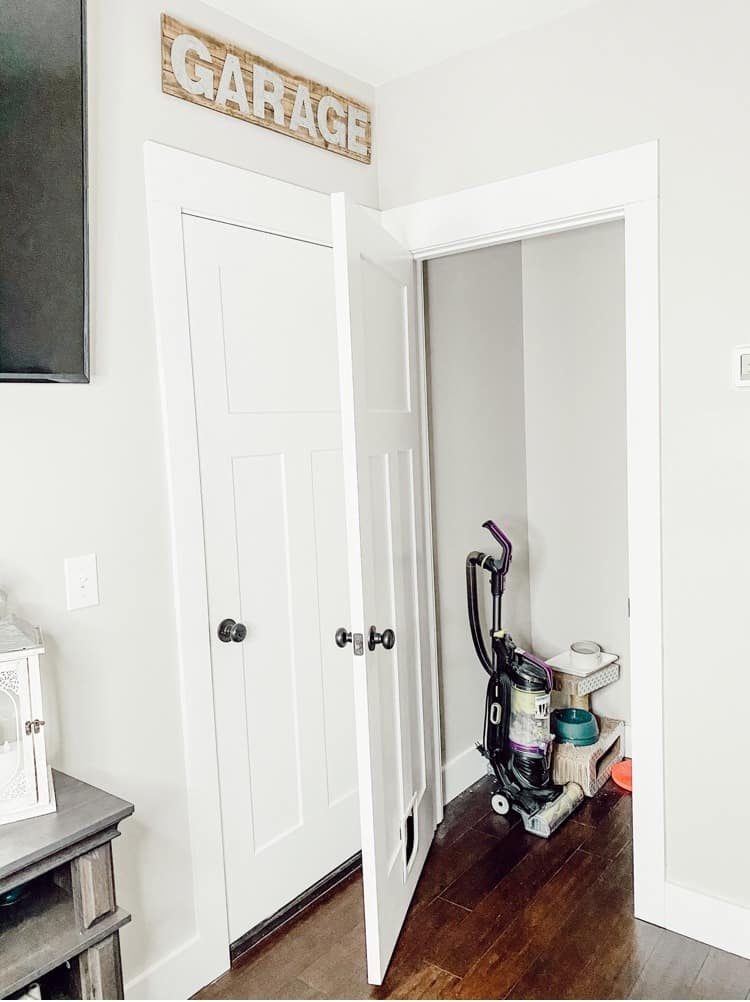
I am so excited to share with y’all the first of a mini series of blog posts! I will be sharing them throughout the next few weeks. I am a crazy cat mom and we have decided to re-do Toby’s room downstairs! Yes, my Toby has his own room!
It’s just a little room underneath the stairs. Instead of having our contractor close that space up, we decided it would be good for storage. We asked him to leave it open and include a door there. This was done even before we got Toby. So when we got him, we always just placed his litter box there.
We didn’t really think too much about the room ever since. But, I thought this would be a good space to practice some of our bigger DIY projects. For example, doing a DIY shiplap wall here.
This way, if we mess up, we can easily hide the space! This was actually apart of my Valentine’s Day present from my sweet hubby.
I have been begging him to do some kind of DIY shiplap wall downstairs so this was a perfect compromise. And I am so happy to report that it actually went very well and wasn’t too hard to do!
We aren’t just doing shiplap either, we will be doing a number of different things in here too. That’s why I thought I would break it up into different posts so I could over everything in more detail about each step.
And that way I won’t have just one really, really long blog post about it.
This post contains affiliate links. Click here to read my disclosure policy.
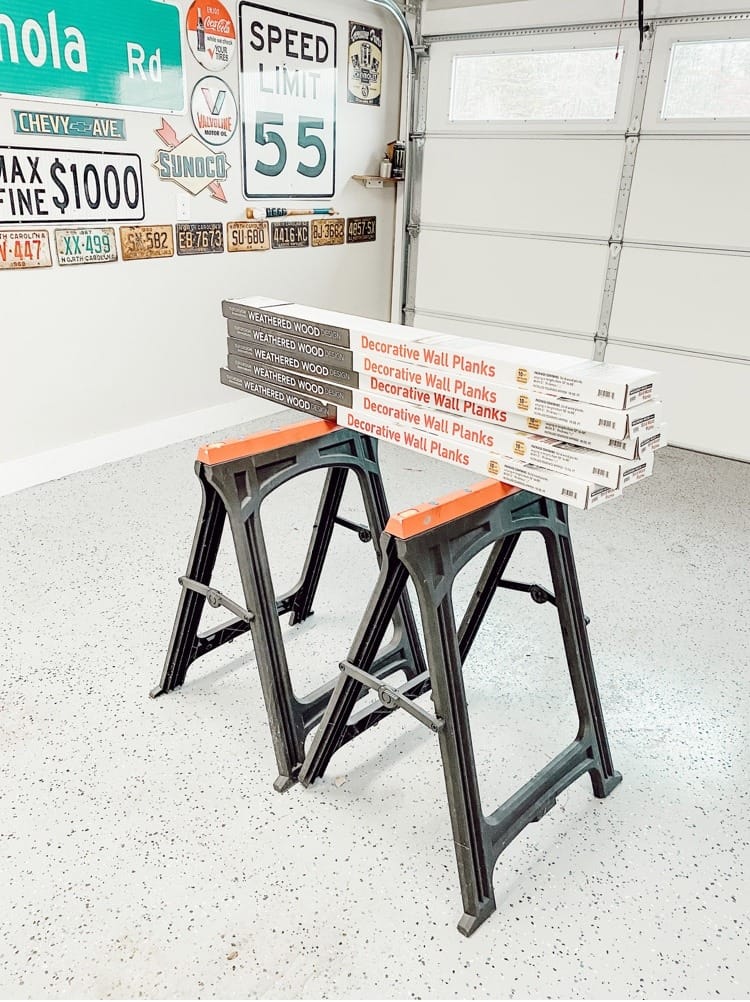
Materials Needed for DIY Shiplap Wall:
- Actual Shiplap, or wall planks (we used wall planks because it was much easier and cheaper)
- Nail Gun
- Saw
- Stud Finder

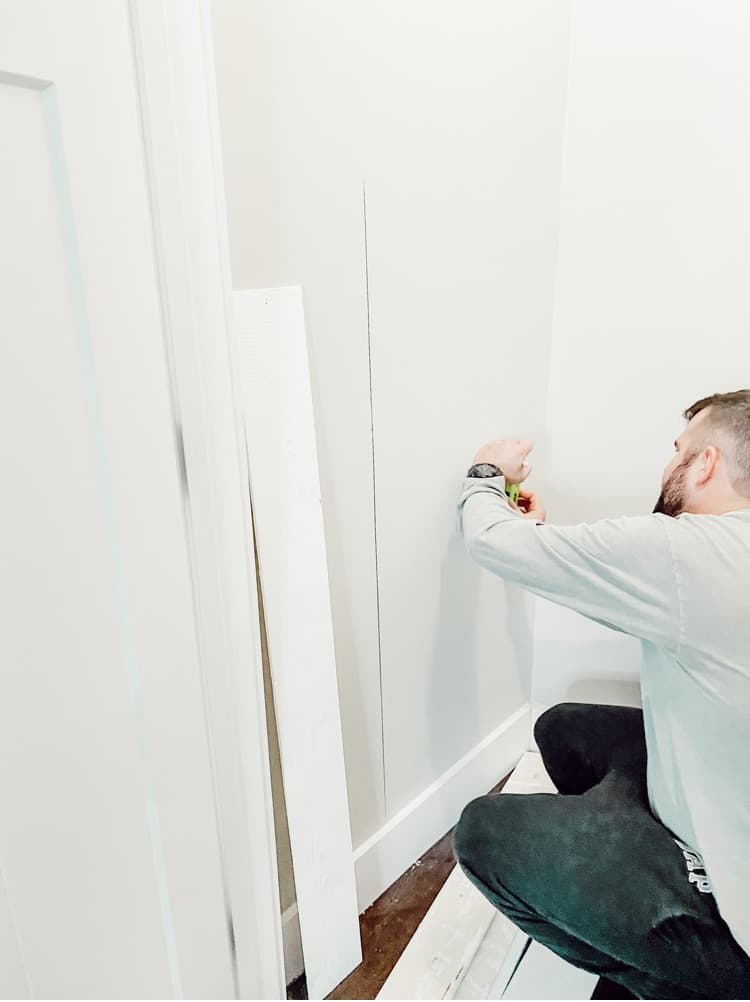
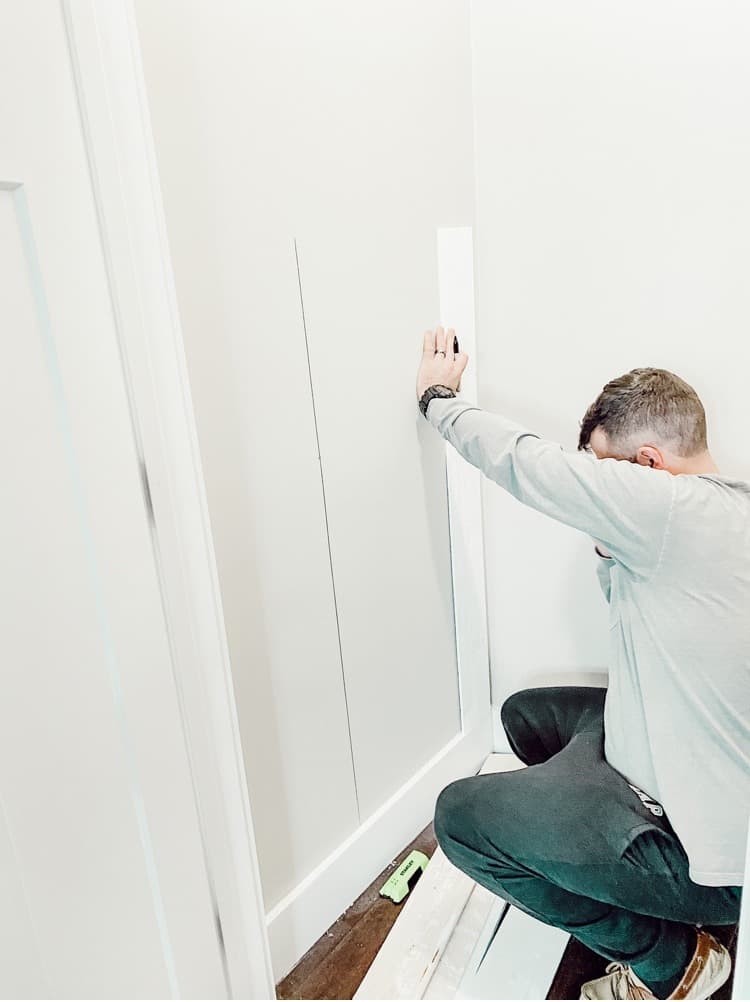
Find the Studs in the Wall
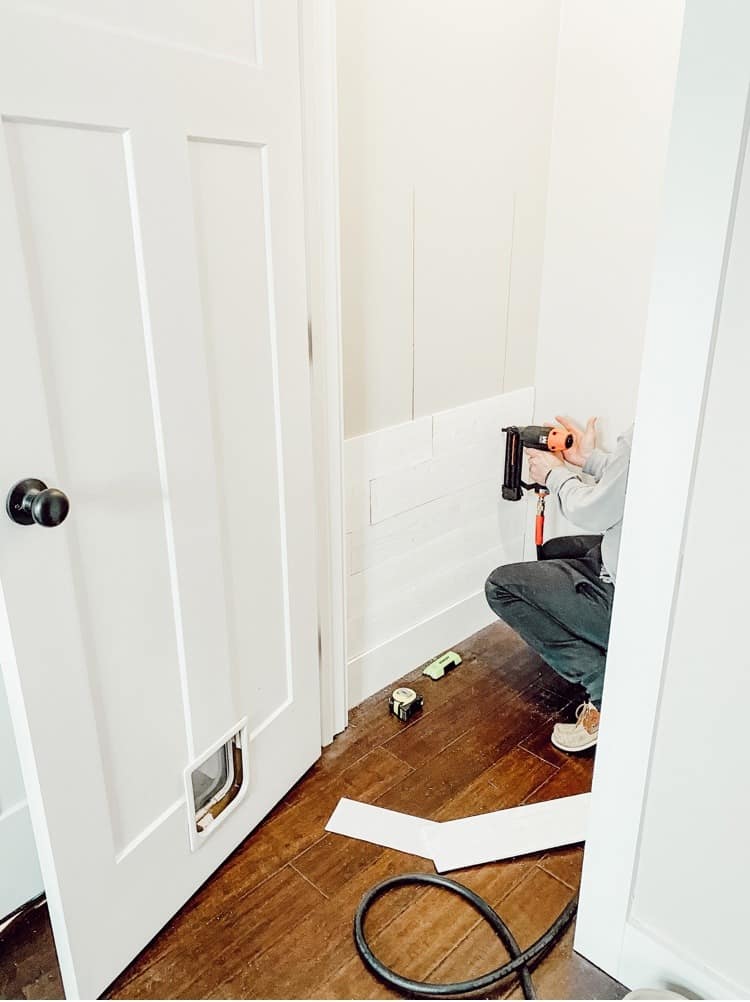
The first step in this project is to find all the studs in the wall you are going to shiplap. My hubby used his stud finder and then when he located where the studs were, he drew a line with a sharpie up the wall.
This way he can know exactly where to insert the nails with the nail gun. The planks will be more supported if you attach them straight to a stud in the wall.
Also, drawing a line on the wall isn’t a big deal because we are going to be shiplapping right over it so you won’t see it at all.
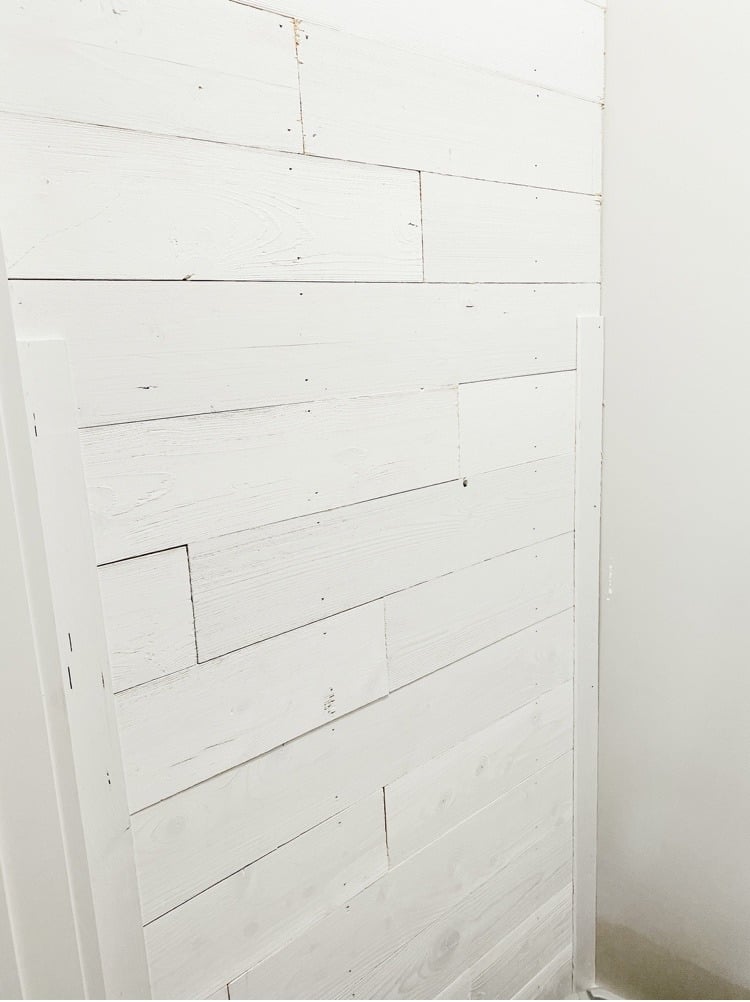
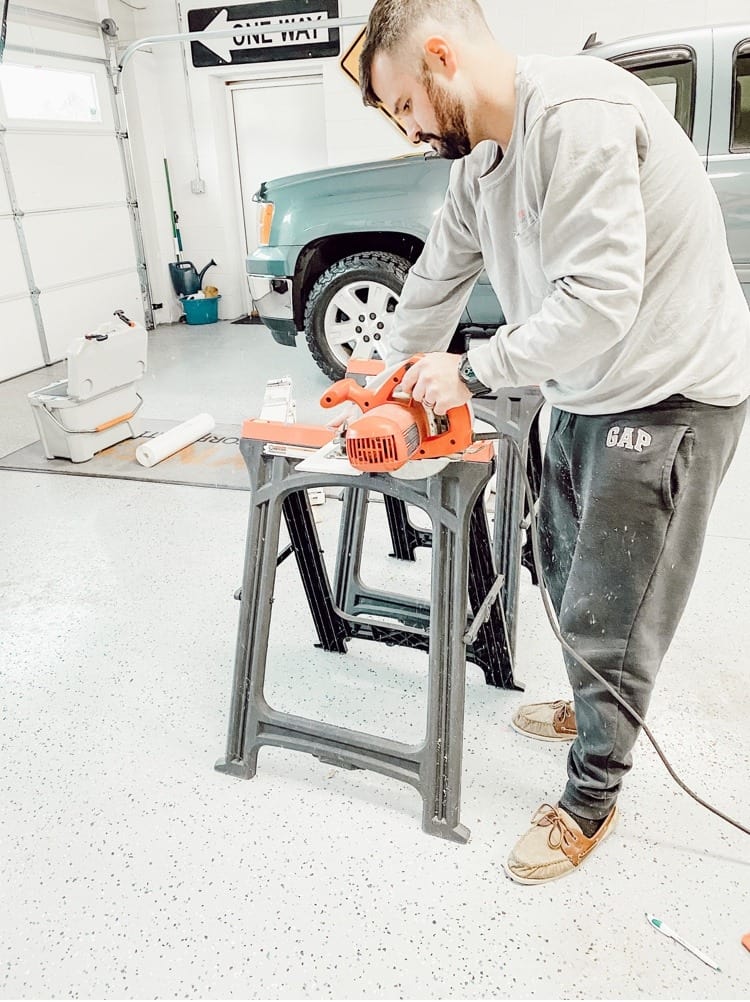
Cut the Shiplap
Now once you know where the studs are, you can start cutting the wall planks. But of course be sure to measure your wall first to make sure you have enough material.
This wall is extremely small, about 8′ by 3′. This was definitely a great wall to practice on because we are wanting to do more shiplap in the future on bigger walls downstairs.
To attach them to the wall, we just kind of did long and short pieces here and there. It gives it texture and dimension and makes the wall planks look more like real shiplap.
My hubby did mainly all of this himself and just kind of judged how the pieces should fit together. So you can basically just eyeball it and do what looks good to you.
Attach the Wood Planks to the Wall
Once you have everything cut and sized, you are ready to attach them to the DIY shiplap wall! We didn’t have a nail gun so we ordered a cheap one off of Amazon.
And y’all that thing works perfectly! The best part is, it was only $35 as well.
So really all in all, this project wasn’t too expensive even though we needed to purchase more supplies for it. Obviously though if we were doing a bigger wall we would have needed many more wall planks.
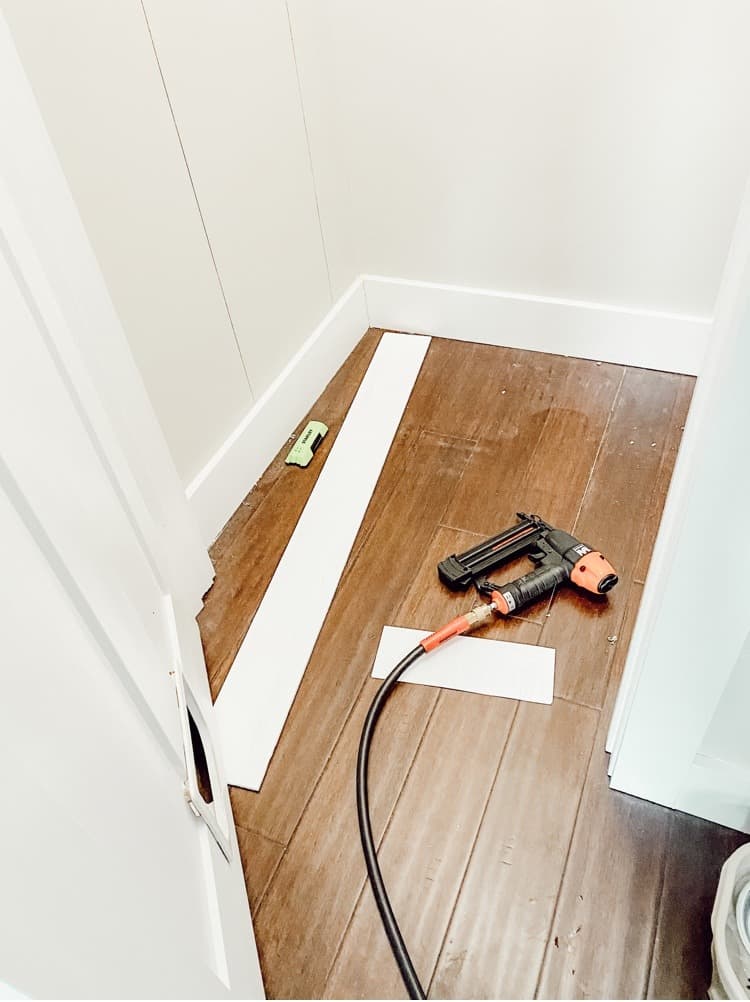
The only downside to this particular nail gun is that it is not cordless. But hey, for $35, you can’t really complain too much.
We were both very satisfied with it and it worked like a charm!
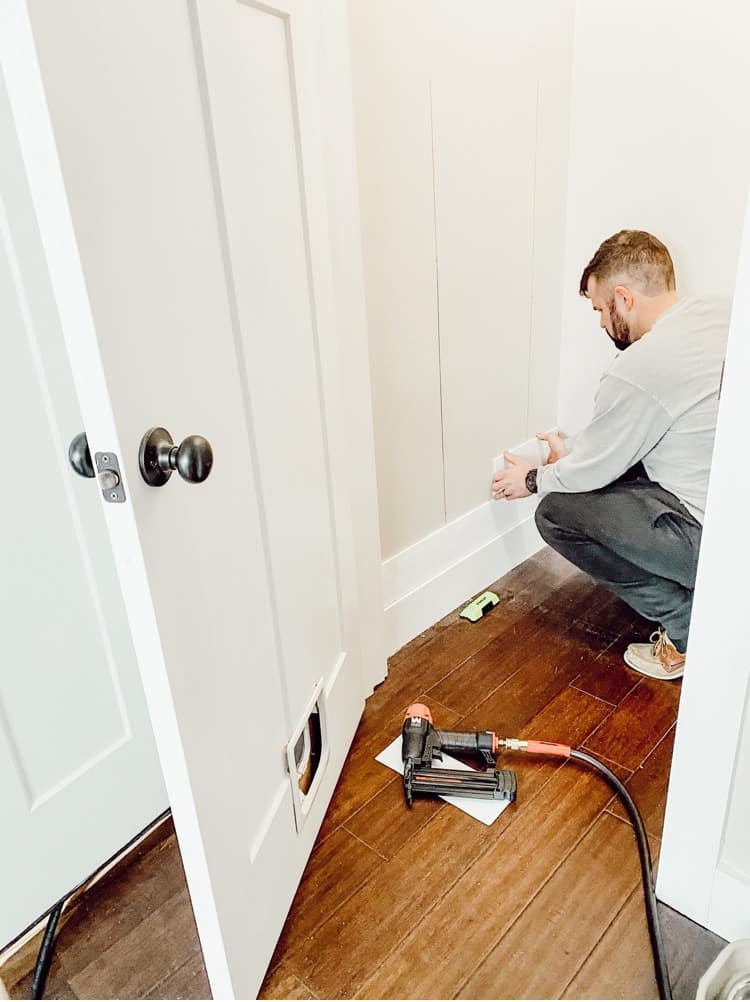
Add Trim to the Shiplap Wall
Once you are all done shiplapping, then you can add some trim around the wall. This gives it a more polished look. Now you can buy actual pieces of trim for this part or the project or be thrifty like us.
We had some leftover wood planks so we just measured how wide the trim should be and then used the saw to cut the trim pieces out.
It turned out just fine and saved us a little bit of money doing it that way instead. We also went back and caulked around the trim to give it a more finished look.

Conclusion
This part of the project was actually really easy and simple to do! I enjoyed it and I love the way it turned out! If you want to do a DIY shiplap wall too, then I highly recommend it.
This was a baby step for us moving onto bigger DIY projects. As you know, I like to keep things simple and easy around here (like just up cycling some furniture) so I haven’t done too many big projects like wall treatments.
The next step in this journey is all about our first time doing wallpaper in this room too. And let me tell you, that was not as easy! It was much harder than anticipated so be sure to stay tuned for my next blog post about it.
I will be giving you all the tips and tricks that we learned along the way!

Oh my gosh I love that! It’s such a beautiful effect and gives such a great accent to the wall. I think when I get my own place, I’d want a feature like that somewhere in the house! x
Yes you definitely should. It’s so much fun to do and adds in so much character to the space!
This is beautiful, I love how lovely and clear it is
Thanks for sharing
https://uncuaderno4cero.wordpress.com/
Thank you so much. So glad you enjoyed it too.
I love shiplap! It looks so good in that little space. It really opens it up. I’d love to do a little room for my dogs when I have my own place too.
Yes that would be so fun to do for dogs too!
This looks so simple yet so effective. I love that Toby has his own room.
Thank you! I do too. He is very spoiled 😹
What a brilliant and creative idea this is! This looks so lovely on your wall x
Lucy | http://www.lucymary.co.uk
Thank you so much Lucy. I really appreciate it!
How exciting that you’re getting your wished for project done! I’ll be following this series. Thanks for sharing.
Yes I am so excited! And thank you so much my friend!
That’s cute Toby has a room and it looks nice. We have a storage room as well under the stair. Might make it for the dog if I get one later. Thank you for sharing!
Thank you, yes its a great space for a pet room for sure!
I love your DIY posts, they’re always so authentic and unique! This final wall design looks so fab xx
Awe thank you so much my friend. I am so glad you think so!
Shiplap is so visually appealing! You made it seem so easy and like such a fun DIY project!
Thank you so much. I love the way shiplap looks too!
That wall looks so nice and simple to do. A classic diy project. Thanks for sharing,
Thank you so much. It was very simple and easy and I am so happy with the finished results!
I love this! It’s so great to have a place like this to practise, and it looks so cute and nautical! Well done!
Thank you so much. It was a great place to practice and now I have more confidence to do it somewhere else!
Who doesn’t love a shiplap wall? Your wall looks awesome!!! Thanks so much for the tutorial. I’m sure the cat likes it too:)
Lol he sure does! Thank you so much, I am loving it so far too!
Wow, this is such a great idea to brighten up space! I Will keep this in mind whenever I will get a house, I really love how it looks and can’t wait to see more about this space! I am sure Toby will be impressed with the upgrades x
Thank you so much! Toby is pretty happy with it so far lol
Oo, the shiplap adds a lovely texture to the wall and catches the eye without the use of different paint colors or even wall art. I love how classy it looks and how easy your DIY is to follow. Character in a closet makes a home feel like home. 🙂
Thanks for sharing!
Thank you so much! I love it too and it really does bring so much character in here!
I love how the shiplap wall turned out! Toby is lucky to have his own little room with a pretty wall haha
Thank you! he really is although I don’t think he cares too much lol
I genuinely love the effect that this gives the wall, I’d love to have shiplap in my kitchen or in my corridors. Thankyou for sharing x
Thank you so much! Shiplap does give off an amazing effect once it’s done!
Makes such a difference!! I love it! Thanks for sharing with us the steps. I’d love to do one in my house.
Thank you so much! You definitely should! It was so easy and I love the outcome of it!
Lovely post! I love how you are sharing the whole process of this DIY! Looking forward to seeing what it looks like at the end! Thank you for sharing!
Thank you so much! I can’t wait to share the whole room when it’s finished! It’s almost there!
Thank you so much! I can’t wait to share the whole room when it’s finished! It’s almost there.
Love a DIY post – it looks fab!!
Thank you! I love a good DIY too!
Great post, thanks for sharing!!
Thank you so much
I absolutely love your home and interior posts. I am a lover of distressed wood at home and it’s the main theme for my wedding this summer!
Rosie
Thank you so much. And that will look so lovely at your wedding then! Congratulations!
What a creative way to experiment with a bigger DIY project: using a smaller, more hidden space as the trial run! Now you know you can do it, plus your kitty has a very stylish little home base. Best of both worlds, am I right?
I know right?! I definitely feel more confident doing it on a bigger wall now! Thanks so much!
What a great idea to practice decorating and remodeling techniques in a spare space! The final result of your shiplap wall definitely goes with your beautiful rustic/county theme decor. I love your style and everything you’ve done to your home!
Awe thank you so much. I really appreciate it and I’m so happy with how it turned out as well!
First of all, I love that Toby has his own room! Cats are seriously the best. The wall looks great, too. I like the idea of starting with a small space to practice with a new technique so that you know what it will take to do a bigger space. 🙂
Thank you so much! Cats really are the best! And yes now I have more confidence to move onto a bigger and more challenging wall!
I know right?! Cats really are the best for sure!
Wow this gives the wall such a lovely look, and it looks like it was an interesting process to make as well!
Thank you so much. It was fun to do for sure.
The wall looks lovely. Thanks for sharing a detailed post on it.
Thank you, so glad you enjoyed it
I always love seeing people creating a space like this. We have a coat closet that has been converted to a ‘kitty bathroom’ for our two with their litterbox in it. Not only does it keep the litterbox tucked away where people don’t have to see it (and keep the smell contained when they stink it up a little), but it also keeps everything tucked away from our dogs lol! I know that our boy Indiana would happily help clean the litterbox each day if we gave him the opportunity to.
I know right?! It’s so nice to have his litter box hidden out of sight and keep the smell down for sure!
You both did a nice job on it. It looks great. And it’s hilarious that you did it in your cat’s litter closet. My cat is not so lucky.
Lol thank you. This is what happens when you don’t have kids!
Thanks for sharing your wall, it looks lovely 🙂
Thank you. So glad you think so.
This is beautiful! I love your idea! I definitely want to try to make a shiplap wall, since I like the look so much.
Thank you! You definitely should! It was well worth it!
I love this so much! It’s certainly something I’d love to see in my kitchen or even my office!
Thank you so much. I am so glad you enjoy it too!