
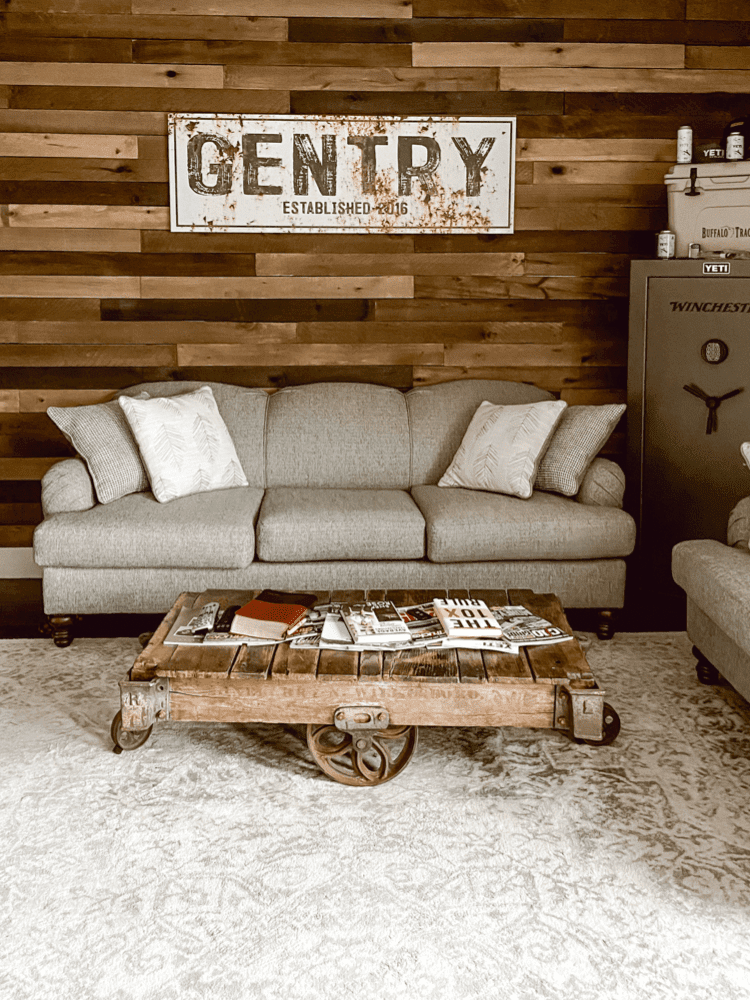
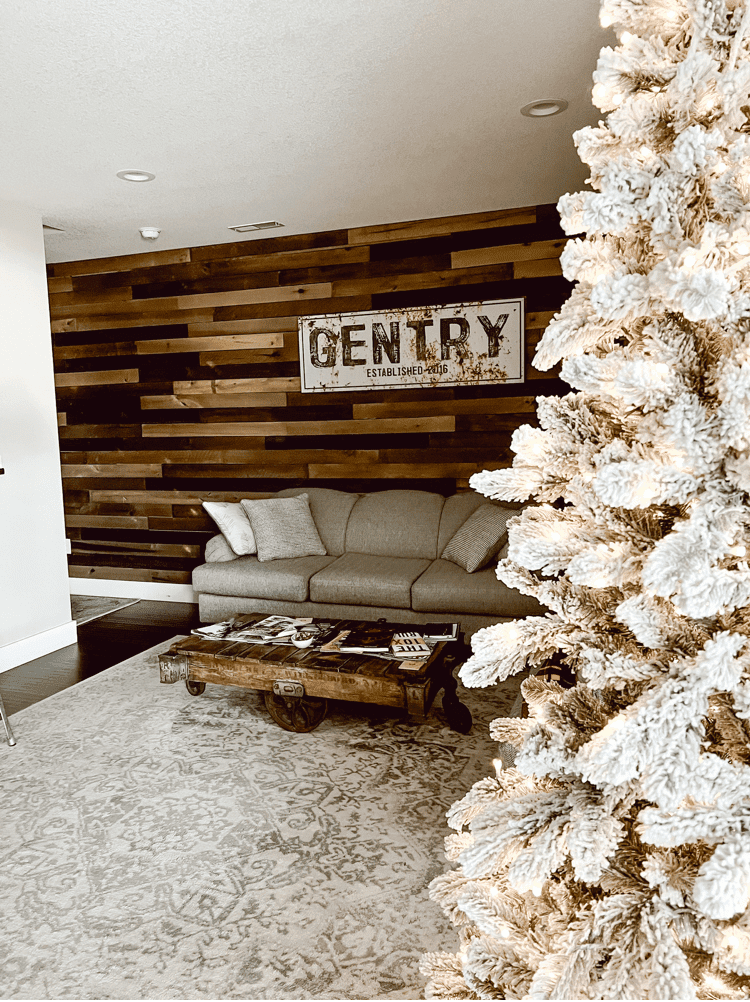
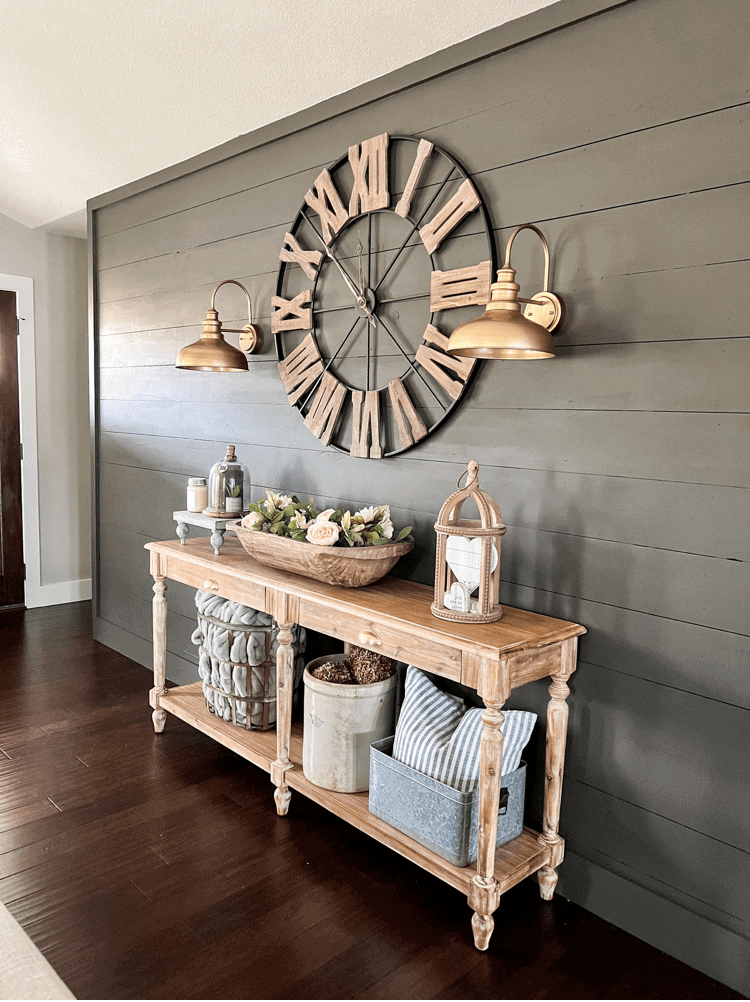
If you’ve been around here for awhile, then you know that we created a DIY shiplap wall for Toby’s Cat Room a few months ago. That was just to dip our toes into the DIY world. And since we got a small taste of it and loved it, we decided to go big or go home! So that’s why we partnered with Weaber Lumber to create a beautiful, rustic shiplap wall downstairs in our game room.
This wall was much larger than the first wall we attempted shiplap on, but I am so glad we went for it and tried it out. Because the end results look fantastic!

This post contains affiliate links. Click here to read my disclosure policy. I was also gifted the lumber for this project courtesy of Weaber Lumber. But all opinions are my own.
Materials Needed for DIY Shiplap Wall
- Weaber Lumber Hardwood Boards (We used the weathered color, but they have plenty of other options available as well).
- Nail Gun
- Lots of Nails
- Stud Finder
- Black Paint
- Circular Saw
First Steps For DIY Shiplap Wall
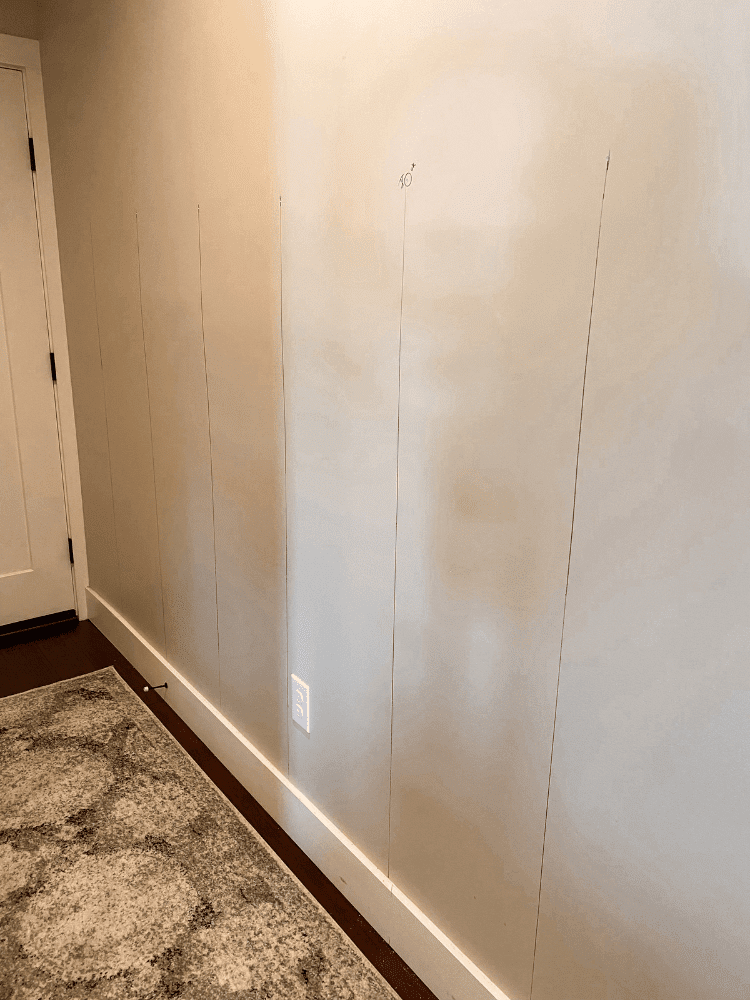
The first thing we did was use a stud finder to locate all the studs in the wall. At first my husband just marked a little line where each stud was.
Then, he went back and drew a line down the whole wall so he could see as he went up with the shiplap boards where to nail them in.
He just used a sharpie for this and the boards will cover it up so you won’t see that at the end.

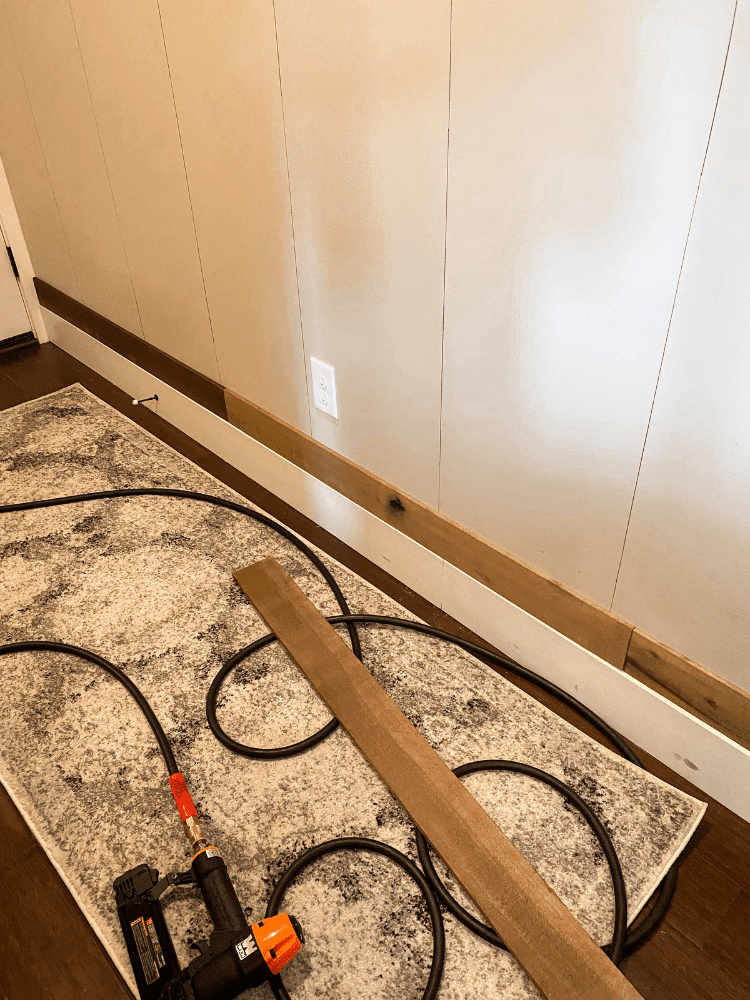
Attach the Shiplap Boards to the Wall
Once you have figured out where your studs are, you can now attach the boards to the wall. We used our nail gun and be sure you have plenty of nails readily available for this project.
We did have to take a break in the middle of it and head to our local Lowe’s Home Improvement store to grab more.
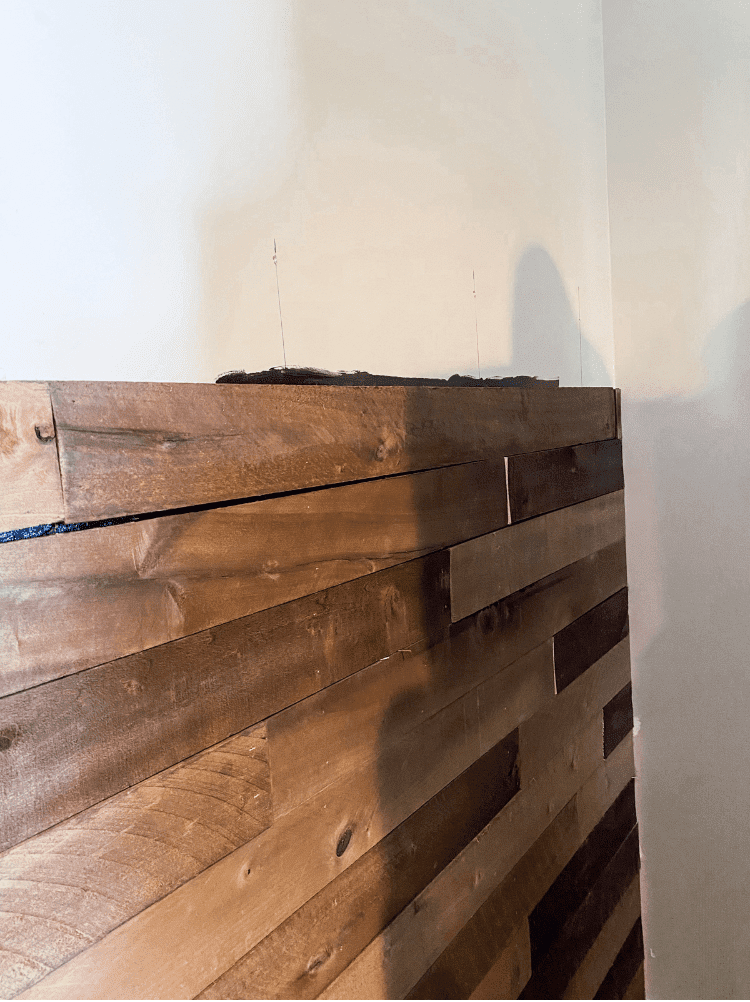
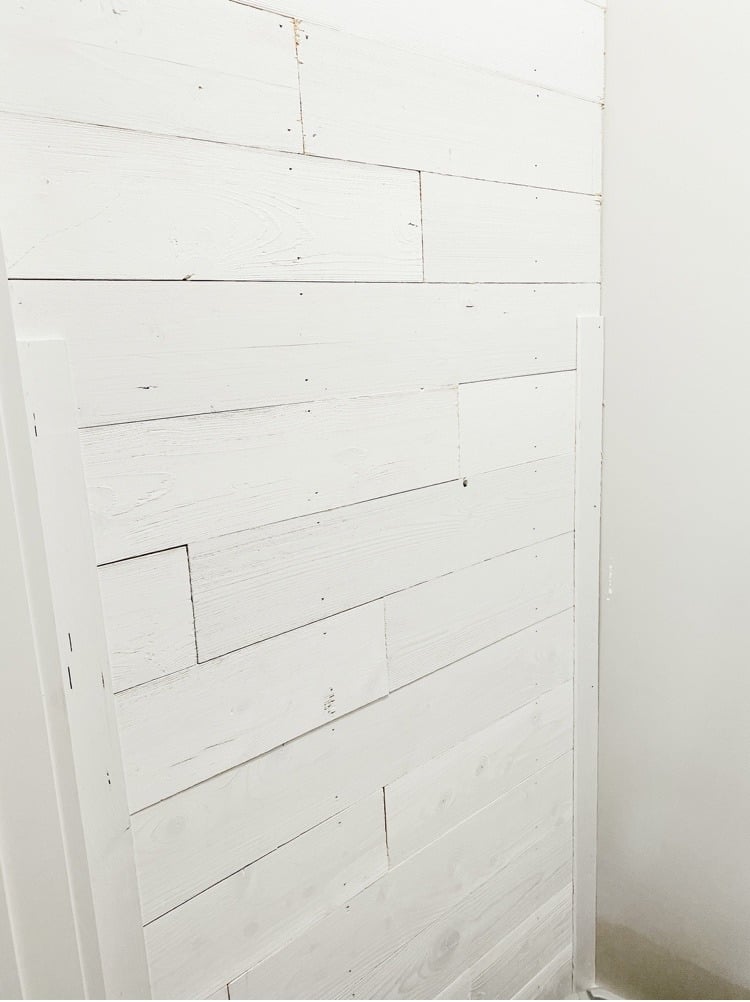
This type of wood is meant to look rustic so you will notice as you go along that not everything lines up perfectly even. This kinda drove my OCD self crazy.
But I had to just remember that we wanted a rustic and vintage look down here. And these boards are just that! I love how it ended up looking when we were done.
Tips and Tricks for DIY Shiplap Wall
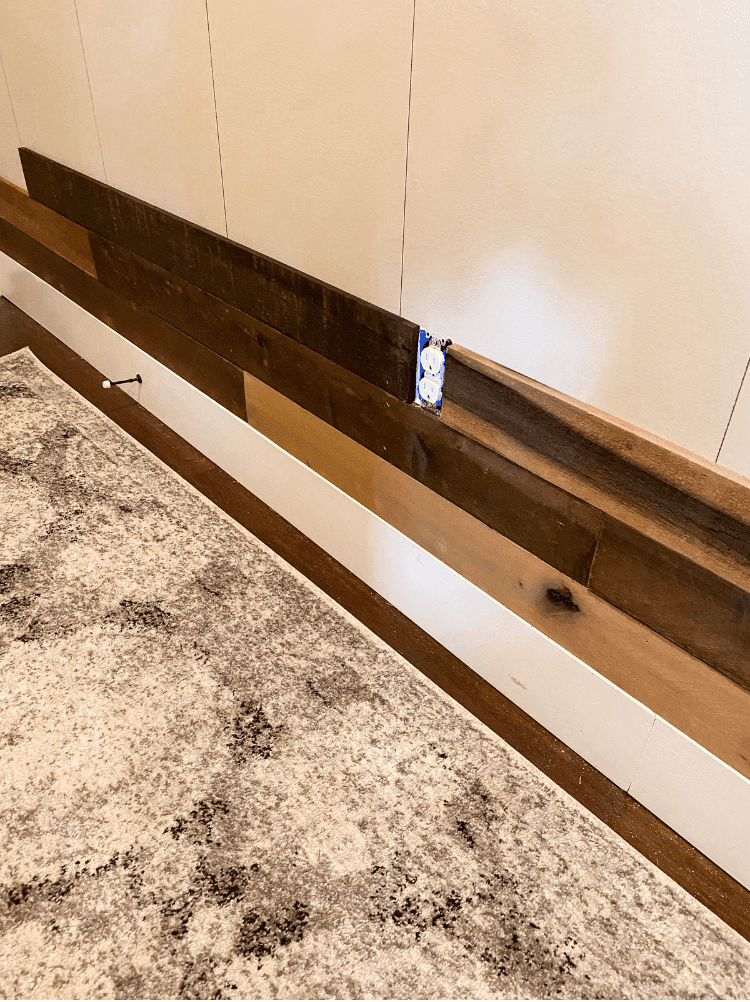
So as I was stating above about the boards being a tad uneven, you may notice that there are slight gaps in between each board when you nail them in.
Weaber recommends to paint your entire wall black before you get started to avoid seeing the sheetrock in between the boards.
However, I got so excited to start the project that I didn’t even read that on the box! So our solution was to just paint as we go.
Because we had already nailed down several rows of boards before we noticed the gaping and we didn’t want to have to start completely over.
My husband would just hold the boards up before we nailed them in. And that way we would determine whether or not a light gap would be present between them.
If there was, I would simply go through and paint a thick, black line above the previous board. Then, we would nail the other one in. This may sound like a tedious project, but it really wasn’t.
This process went by fairly quickly and we got this DIY Shiplap Wall done in just one day. If your walls are already a darker color, you may not even need to do this step.
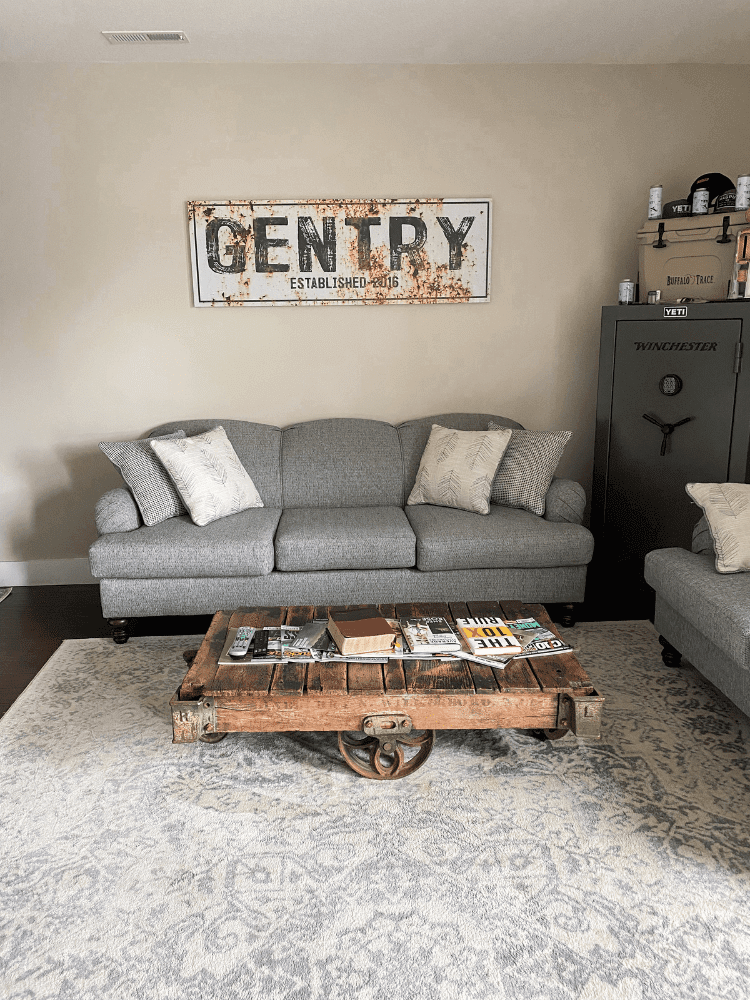
But as you can see, our walls are light. So it was definitely noticeable when you would see gaps in between the wood.

Final Thoughts About Weaber Lumber
Overall, I am highly impressed with this product. The boards got delivered extremely fast and it was super easy to figure out how much we needed to order before starting.
They have an estimator on their website and you can put in the dimensions of your wall. It will tell you just how much you need. This includes extras in case there are a few boards too warped to use.
Our wall is 22’L by 9’H and it recommended that we would need 21 units to finish this space.
We ended up have 6 units left over. So really we could have been more picky about which boards to nail in.

We did notice that some of them were a tad bit warped, but we just worked with it. We were afraid that we would not have enough to complete it.
Which in reality, we had plenty and could have changed a few boards out. But all in all, this was such a fun DIY project to do.
And now we want to do the entire downstairs game room in this shiplap! Fingers crossed we can get more lumber soon.
If we do, I will of course show you guys the outcome. We are super excited for our plans for this space and this is just one of the many ideas we have for down here.
So be sure to keep checking back for some more DIY projects we have up our sleeves for this space here soon!
Learn more about how to turn your builder grade home into something more here too!

The before to after shot has me blown away by just how AMAZING the wall looks! I love that you went for mixed colors in the shiplap wall and that it ties together the room beautifully by adding a warm feeling to the space.
Thanks for sharing!
Thank you so much. I love the weathered mix of colors too!
This is my favourite DIY of yours overall! I am so into this vibe for my home and you’ve made it look easy!
Rosie
Awe thank you so much Rosie! That made my day!
This looks so cool and really simple to create a change in your home! What you selected looks great. Thank you for sharing your experience.
Lauren – bournemouthgirl
Thank you so much Lauren. I appreciate it. I am very happy with how it turned out!
Oh wow!!!!!!! This is an awesome DIY. I should share this post with my parents. Thank you for sharing.
Thank you. So glad you enjoyed it too!
Thank you for sharing this gorgeous DIY recommendation! This looks like it’s created a lovely change in your beautiful home x
Thank you! It sure was a lovely change!
I’m absolutely in love with how this shiplap wall turned out. The natural wood is beautiful and the way it brings warmth into the entire space is so gorgeous! You did an amazing job!
Thank you so much Stephanie. I really appreciate it!
I bought a sign like that on Etsy. I like the tutorial you give on how to do this, how fun. Thank you! =)
~Michelle
https://michellescrazybusylife.net
Thank you so much. Glad you liked it
I actually learned what shiplap is from your blog! I absolutely LOVE this so much – I’d love to do something like this in my future home!
Awe thanks so much Jenny! I love shiplap! It’s my favorite trend of farmhouse decor!
The before and after is incredible, I love the shiplap! x
Lucy | http://www.lucymary.co.uk
Awe thanks Lucy. I do too!
Another beautiful project! The wood really gives a cozy feeling to your room. Thanks for sharing.
Thank you. I think it does too!
This looks absolutely amazing! I love the different shades and the overall cosy feel it gives to the room – I’d love to make a shiplap wall of my own someday. Thanks for sharing x
Thank you, you definitely should. It really transforms the space!
We are doing this in our house too! Using old fence boards as reclaimed wood, but the previous owner already created one wall like that. Yours looks amazing! Here’s ours if you’re curious: https://dinkumtribe.com/out-with-formal-trim-in-with-reclaimed-wood/
Oh wow! How cool! Yours looks amazing too!
The overall effect of this is grand and gives a cool ambience to the room.
Thank you so much! I appreciate it!
Wow! I love the way your DIY shiplap wall turned out. What a nice partnership between you and the lumber company showcasing your talent and their product. Thanks for sharing your process. I would have never thought about painting the wall black. Well done!
Awe thank you so much Lisa. I am so glad you think so too. It really did turn out to be amazing!
This DIY Shiplap Wall with weaber lumber is amazing! I’m super not handy but I love the steps you provided and the various tips and tricks. Thanks for this great post.
Awe thank you. I am so glad you enjoyed it as well!
I love your tips and tricks on how to make a DIY shiplap wall! It looks wonderful. Thanks for sharing your experience.
Thank you so much. I am very pleased with how it turned out as well!