
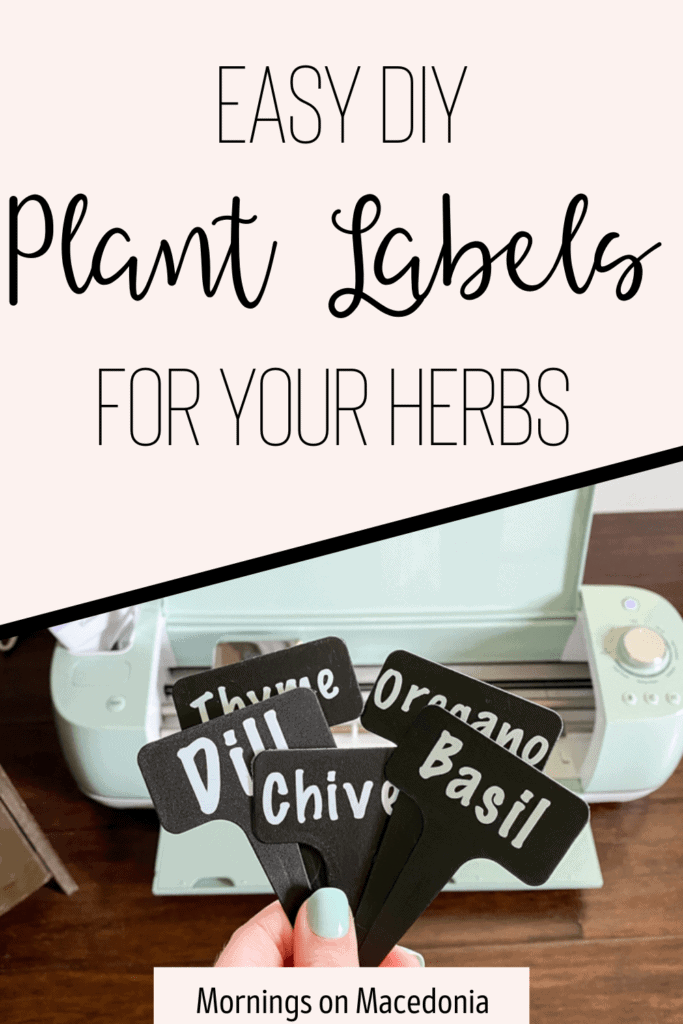
If y’all remember, I did a cute DIY Herb Garden last spring. I loved it so much I decided to do it again this year! But, I wanted to make some cute plant labels for it so I would remember where exactly I planted everything. So that gave me an idea to create these easy DIY plant labels!
They turned out so cute and I am so happy with how they look in my little herb garden. Keep on reading to see all the materials you will need and how to do this easy project!
AD This post contains affiliate links. Click here to read my disclosure policy. I was also gifted this Cricut Explore Air 2 Machine and some materials. All opinions about this product are my own.
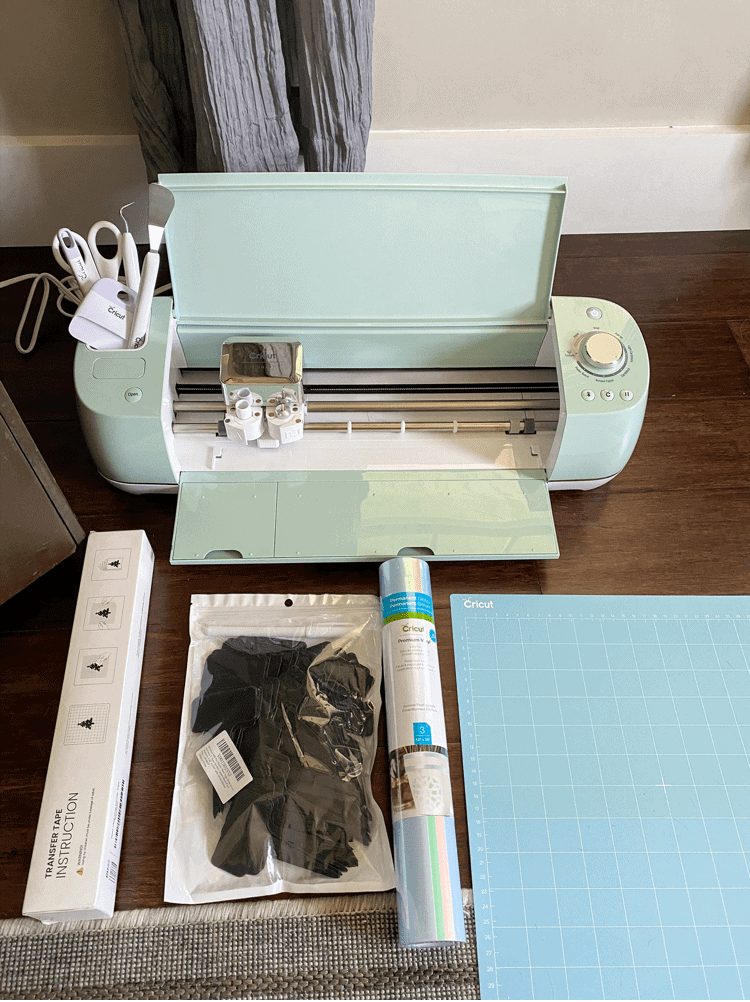
Materials Needed for Plant Labels:
- A Cricut Machine (I have the Explore Air 2)
- Standard Grip Machine Mat
- Vinyl
- Transfer Tape
- Plant Markers

Start Designing Your Plant Labels
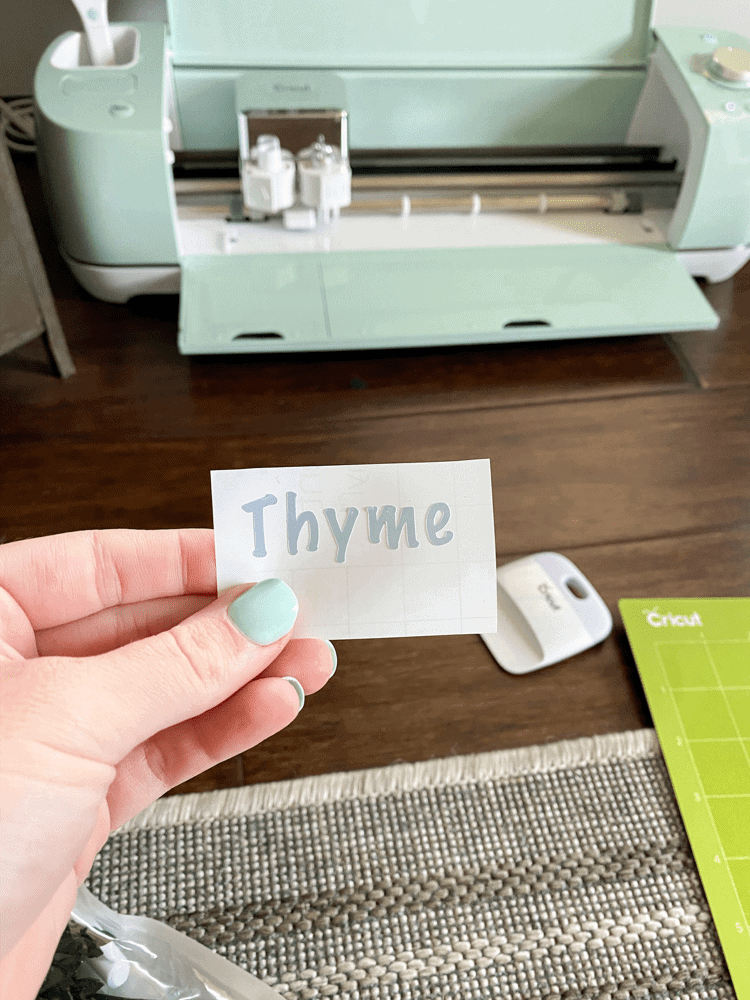
Once you have all the materials needed, you can start designing! I just opened up my Cricut Design Space and did a new project.
Then I just used the “Marker Felt” text and started typing up all the different herbs that I had already planted. I was sure to get the measurements of my plant markers first.
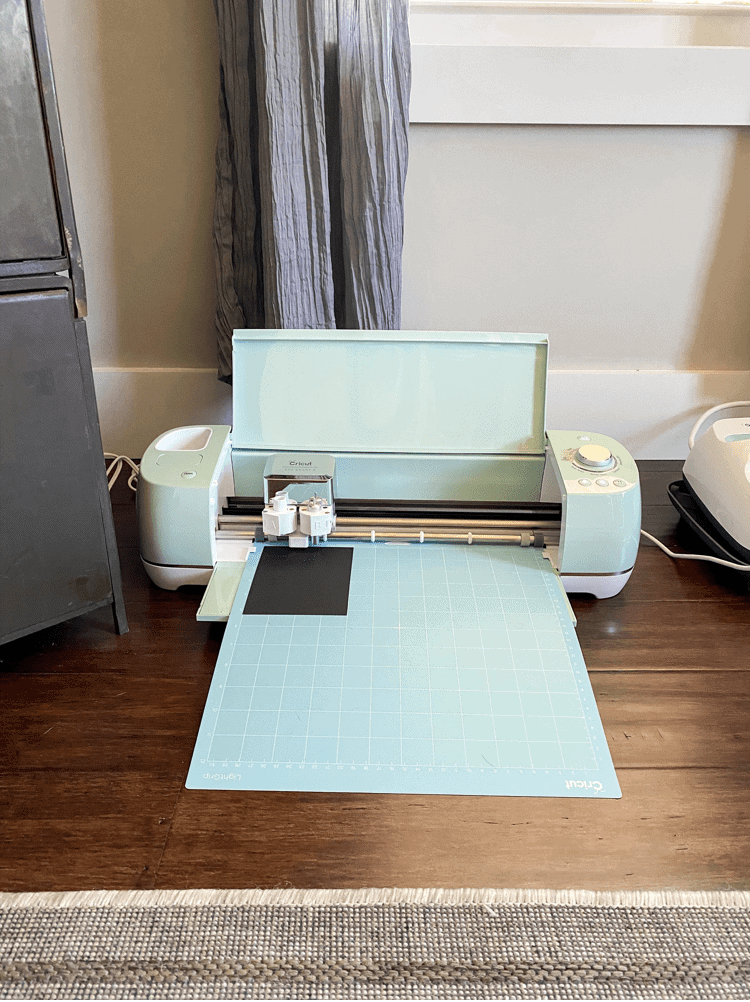
That way I knew how large I could make the labels. After I had it all typed up, I was ready to print them out. Be sure to choose the “Vinyl” option on your Cricut machine before printing.
I also used the standard grip machine mat with the vinyl as well.
Here’s a little tip too- If you aren’t sure about cutting your vinyl out just yet, then cut it out with cardstock first to see how it does!
This was my very first time using my Cricut machine so I wanted to be sure I knew what I was doing before cutting into my vinyl.
That’s why I decided to play around with some cardstock first. I’m glad I did that because it gave me more of a feel for the machine and how everything works on it too.
Also, if you’re unsure of the size, this is a great way to see if it will fit first before printing out the vinyl.
Place Your Plant Labels on the Markers
Now that you got them all designed and ready to go, now is the time to print them out and place them on the plant markers.
This part may seem intimidating to you if you haven’t ever used vinyl or a Cricut machine before. But I am here to tell you that the process went by very quickly and easily once I knew what I was doing.
I think just like with all things, it just takes practice!
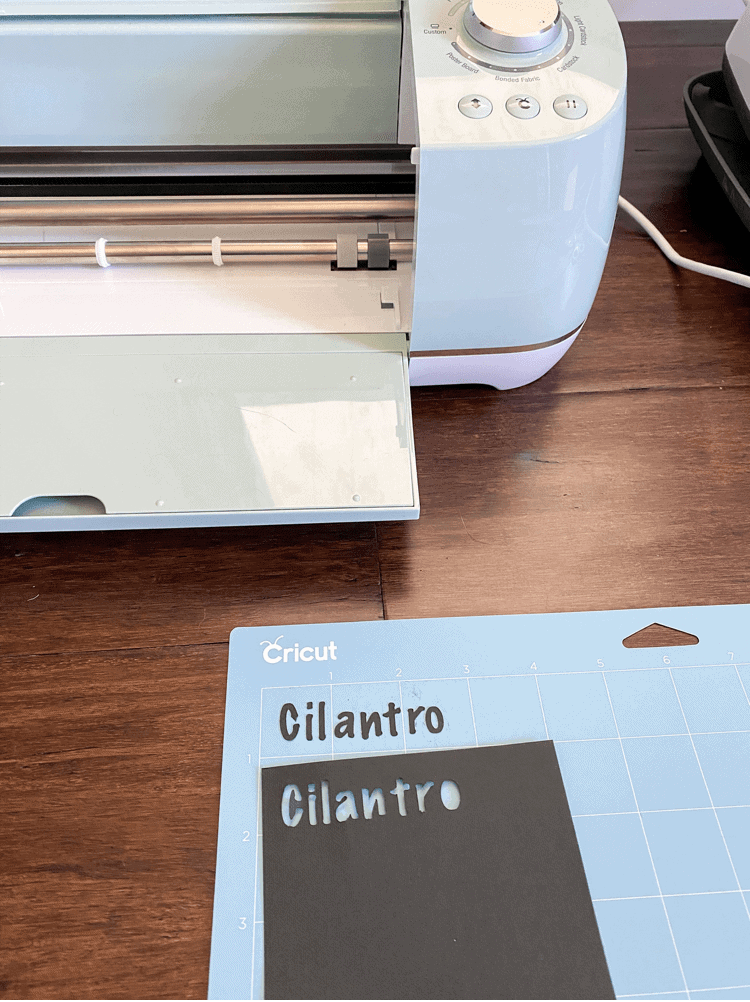
The first thing you need to do after printing out your vinyl label is use the Cricut weeder tool to remove the excess vinyl.
This was the trickiest part for me because I wasn’t used to doing it. But, after doing it on a few other labels, I quickly got the hang of it and then the process started to go much easier from there.
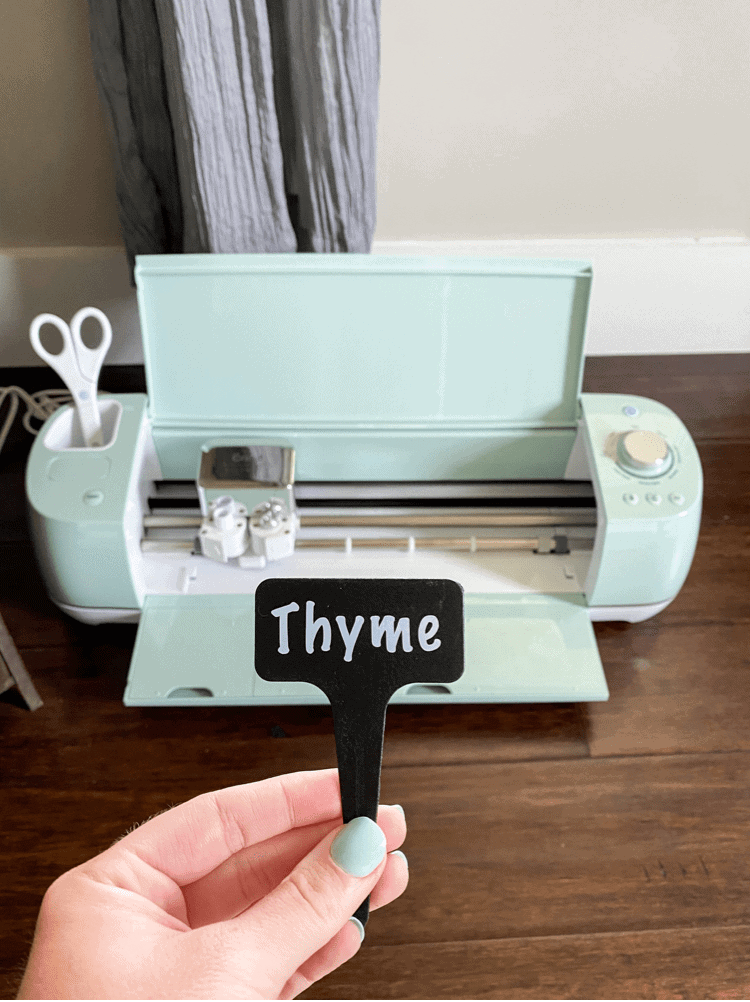
After you weed out the excess vinyl, your label should look like mine pictured above, with just the letters on the backing.
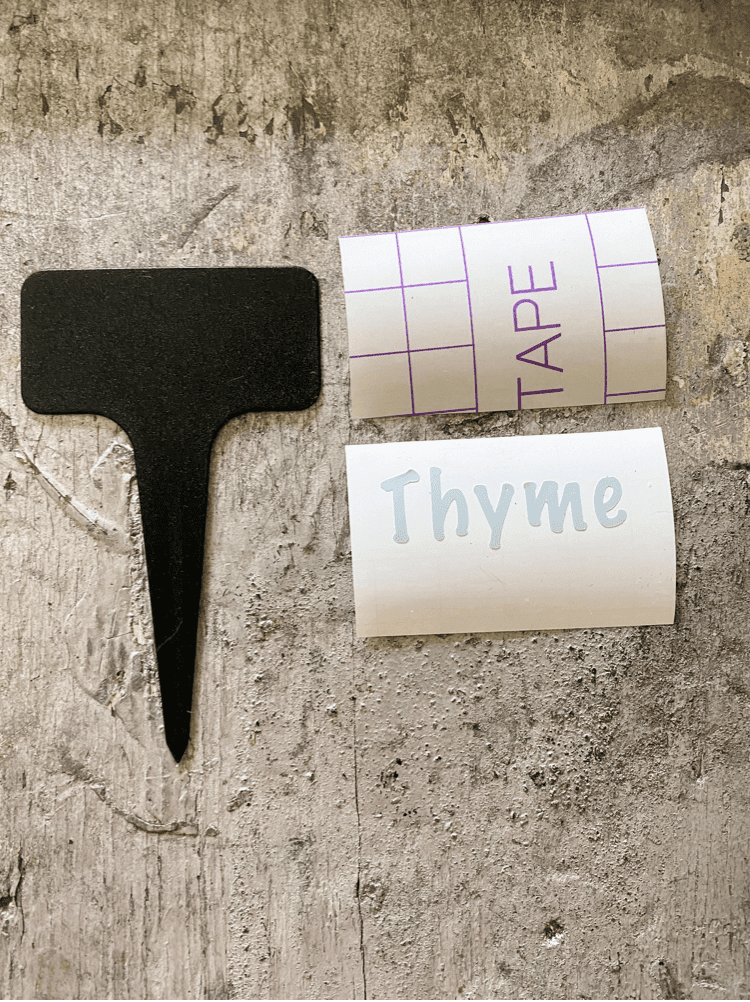
After you have your vinyl ready, now you need to cut off the same sized piece of transfer tape.
Then you will place the transfer tape right on top of the vinyl letters.
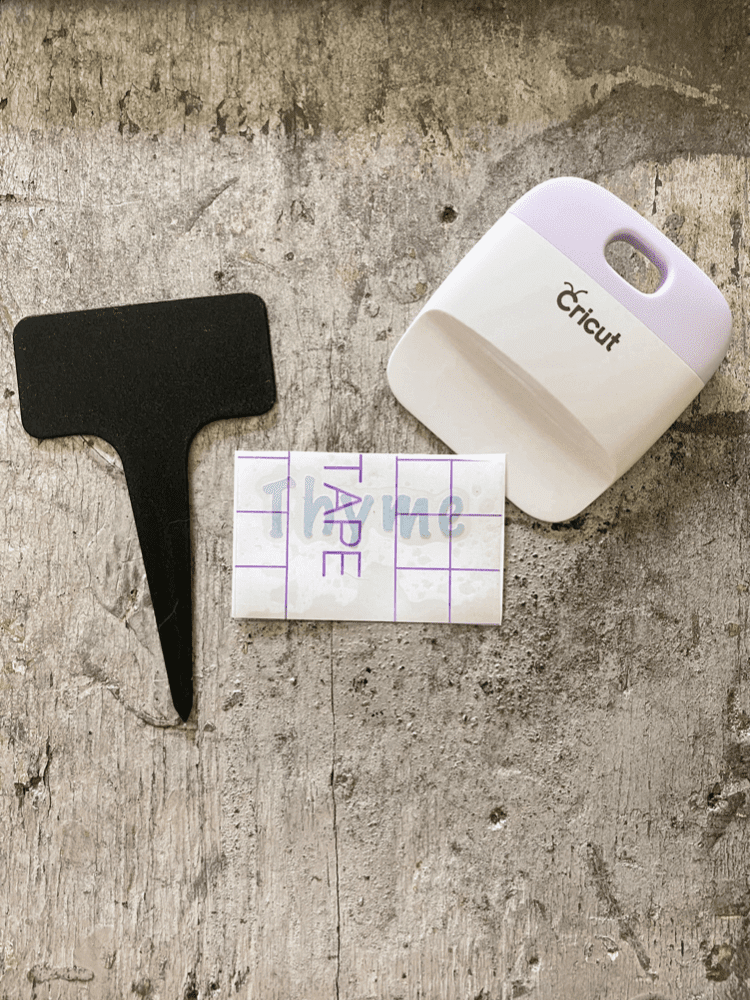
Then, you just need to use the Cricut Scraper tool to smooth over the transfer tape.
This ensures it has a good grip on all the letters.
If you do not have the scraper tool, a credit card could work for this part as well.
Now you can peel the transfer tape off the vinyl backing and the letters should come right up off on the transfer tape!
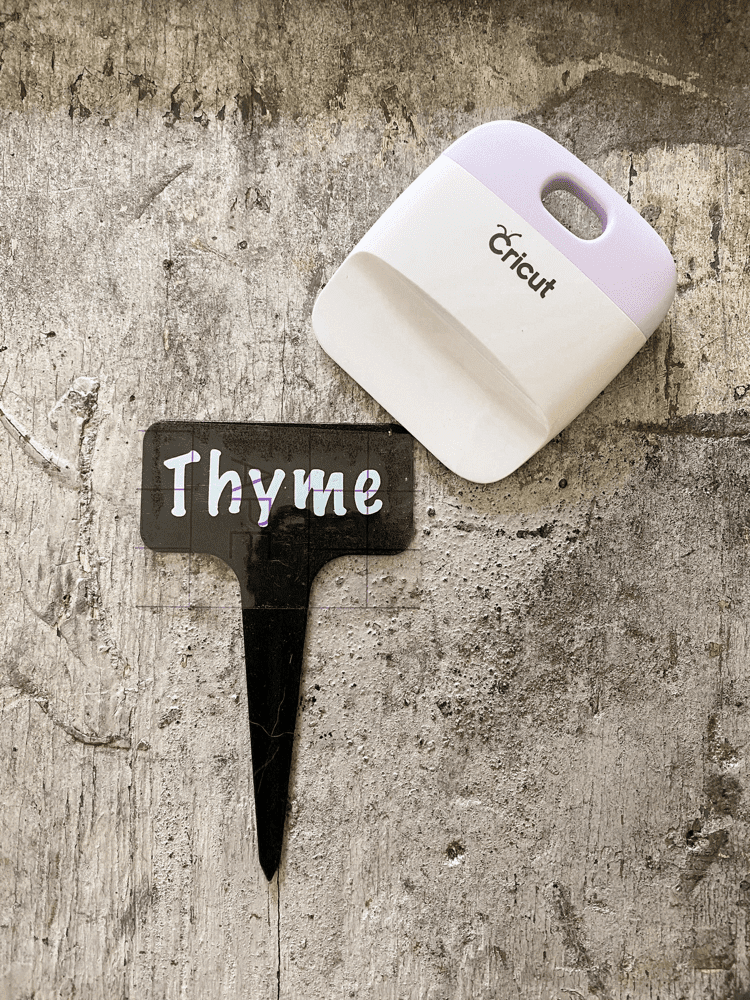
Then, using the tape, place it right on your plant marker. And again, use the scraper tool to vigorously smooth over the vinyl.
You really want to use a lot of pressure here to make sure the vinyl adheres to the plant marker. After smoothing it, you can then carefully peel off the transfer tape.
I did this very slowly and at an angle. Sometimes, some of the letters would start to come off with the tape.
When that happened, I would just place the tape back down and use the scraper tool again to get it to sick better. As long as you go slow during this process, it will turn out just fine!
Finishing the Plant Labels
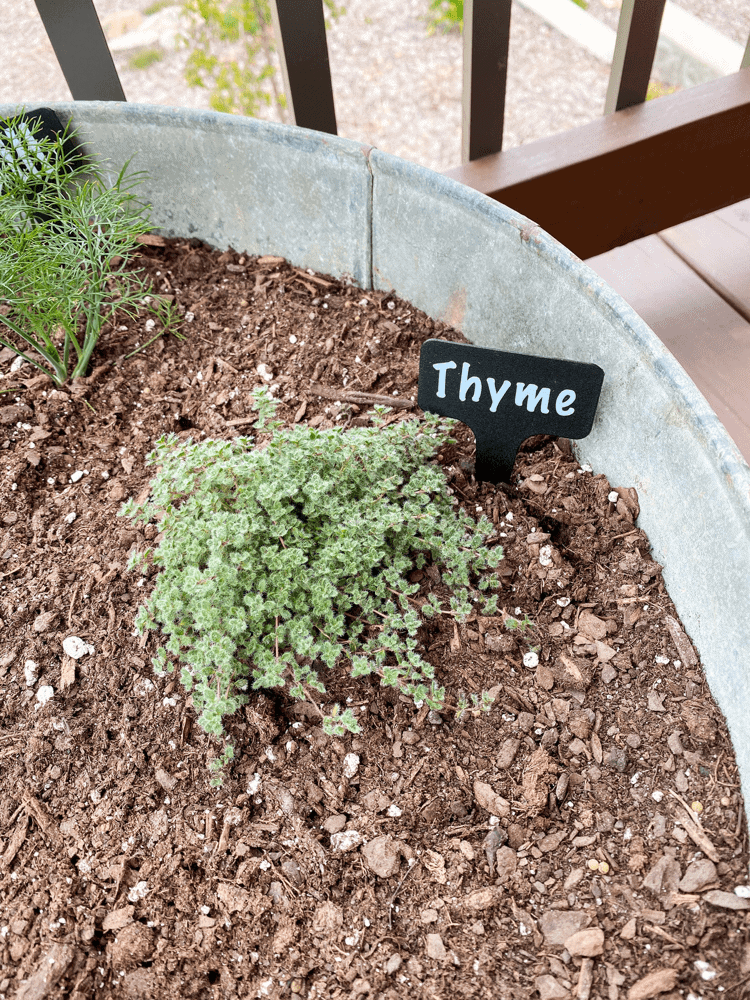
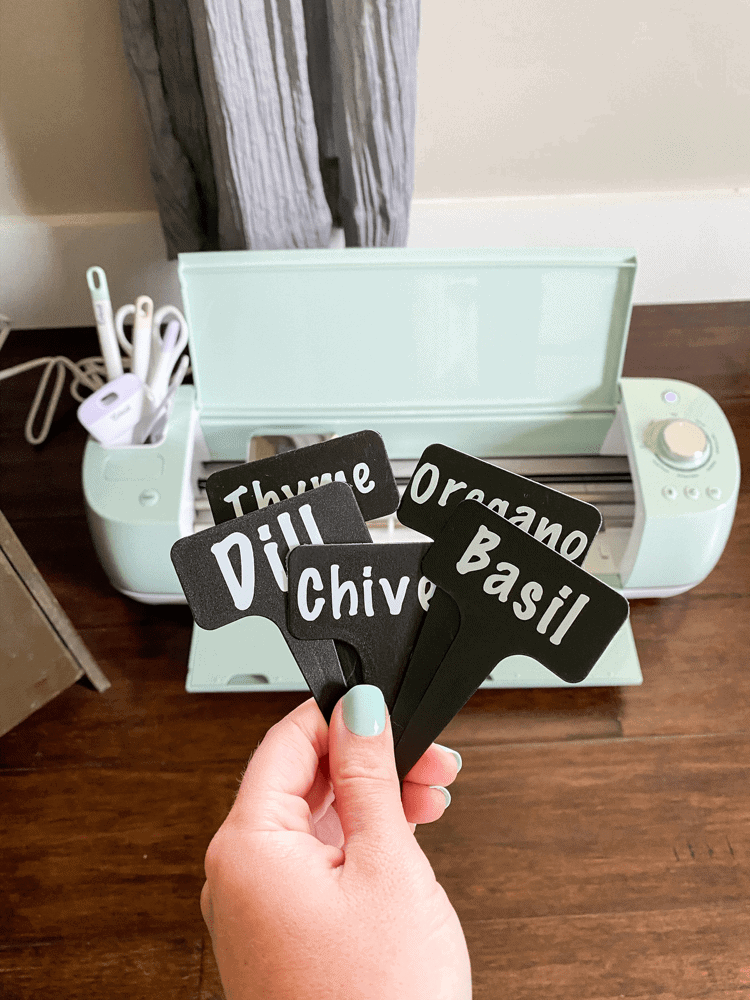
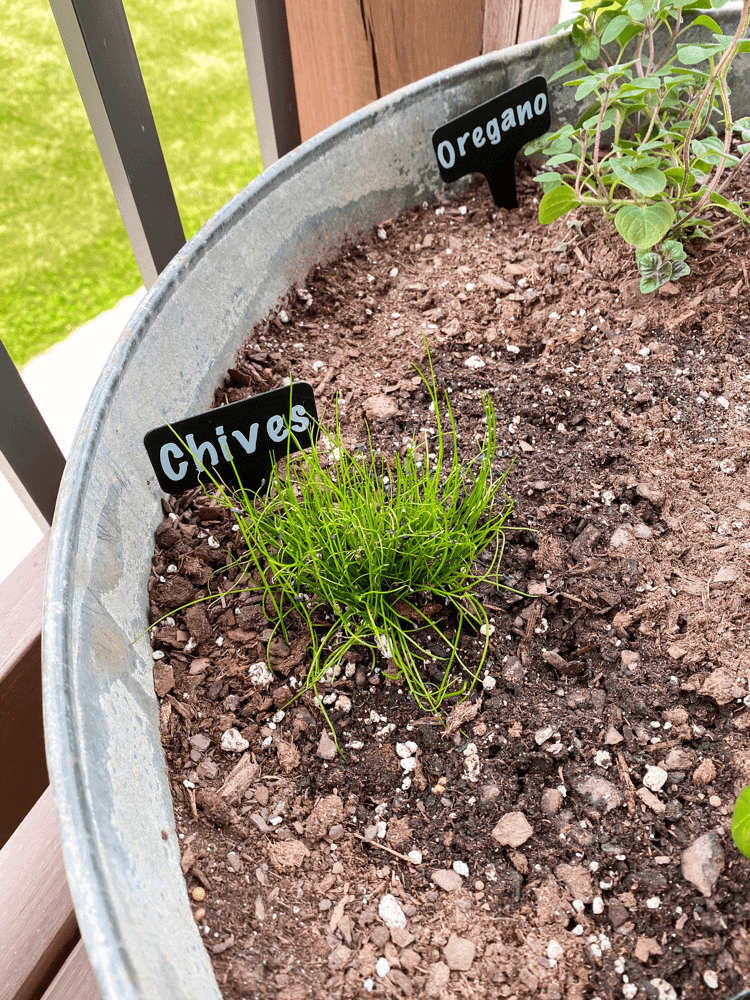
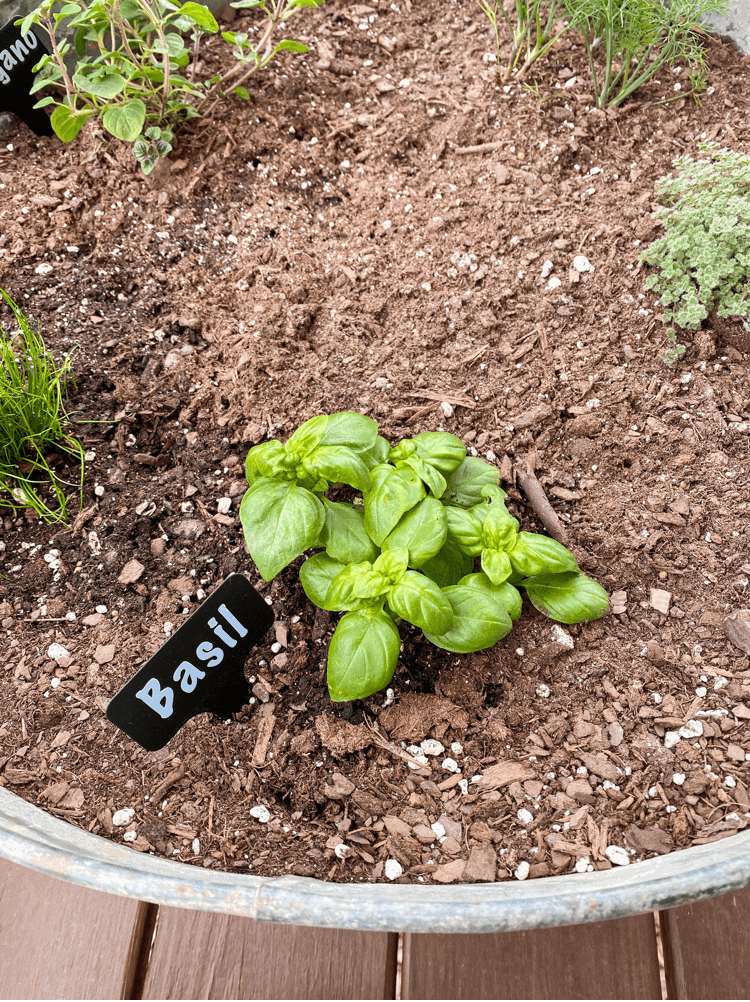
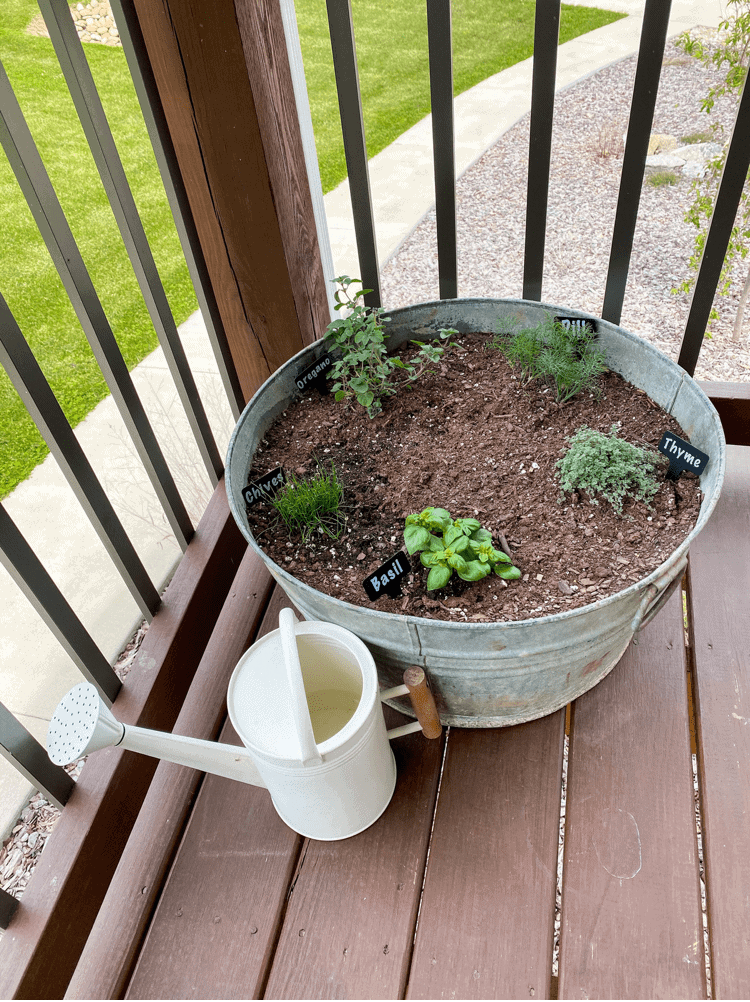
So I just repeated the whole process listed above for all my herbs. I made the following: Thyme, Mint, Oregano, Chives, Basil, Chives, and Dill.
You can easily personalize or change this to whatever herbs or plants you have on hand. I even ended up printing out some vegetable markers the same way too for a friend of mine.
I love how you can customize this for whatever you have on hand!
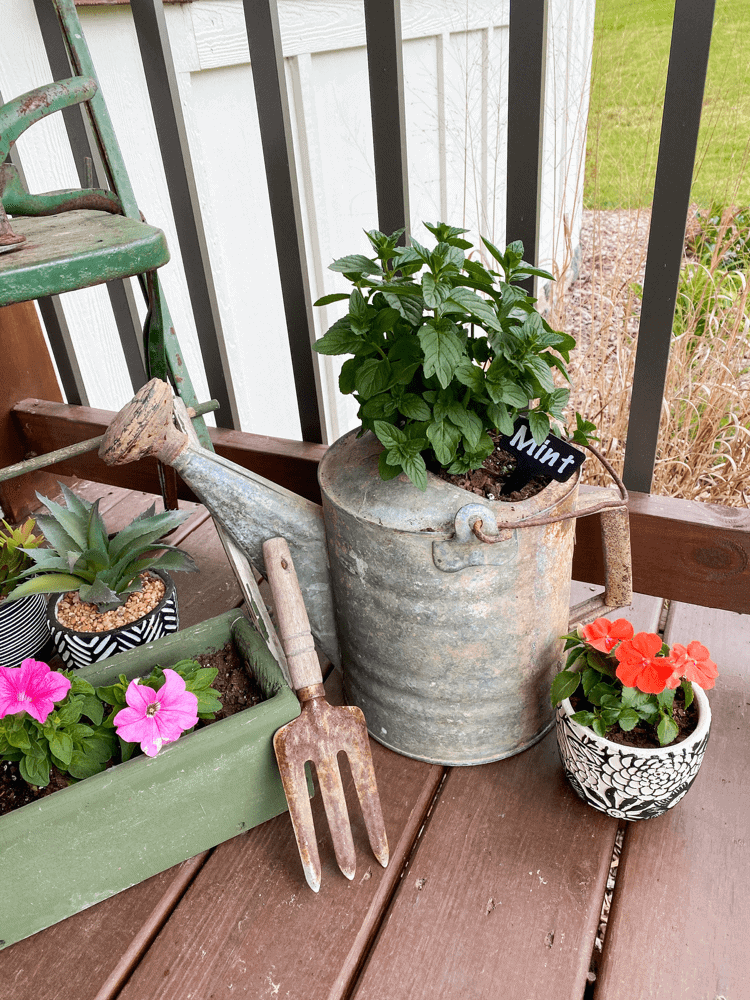
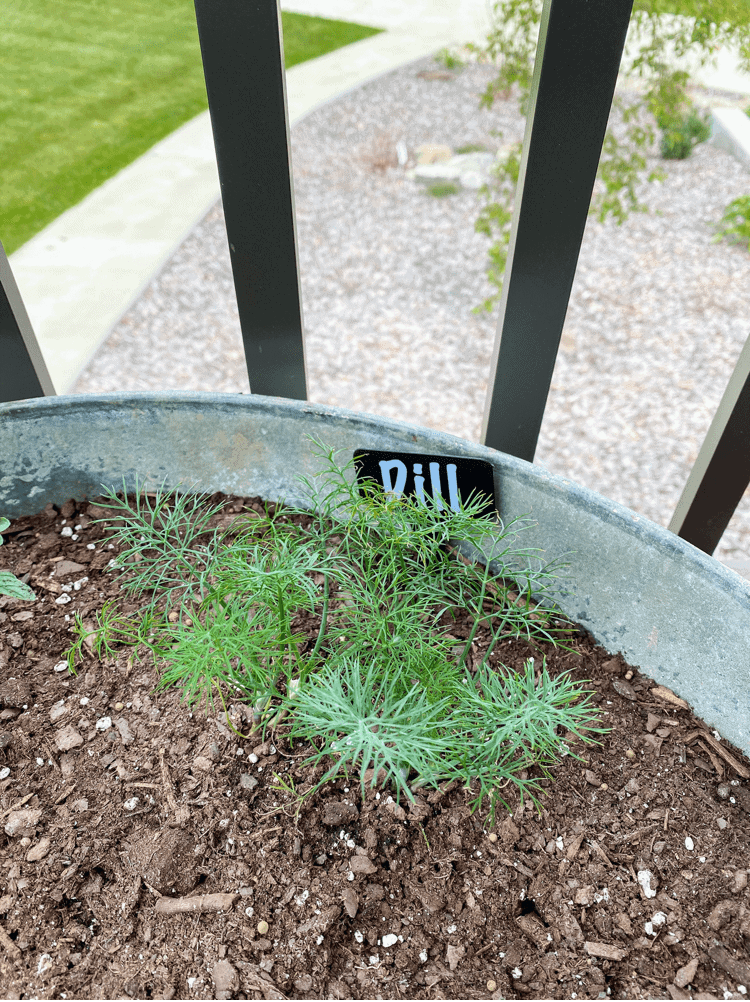
Once I had them all printed out, it was time to add them into my herb garden. Most of my herbs are all planted in a big antique container.
But I do have a few planted separately because some herbs don’t grow well with others. Like mint and rosemary for example need to be planted by themselves, otherwise they will take over the whole garden!

Well I hope you enjoyed this easy project of DIY plant labels. As you can see, they turned out so cute and they are the perfect little addition to an herb garden!
Thanks to my Cricut machine, they were a breeze to do and I am looking forward to many more projects where I can use my machine as well.
Be on the lookout because now after my first experience, I am craving more! So I have plenty more easy DIY project ideas to share with you all coming up!

This is such a great and fun project! I have been eyeing a circuit machine for a bit, so it might be a great self-present around Christmas! Can’t wait to see more DIY projects with it x
You definitely should treat yourself and get one! I can’t wait to share more projects with it. I have a lot of ideas swirling around in my head right now lol
oh wow this is awesome. I love the font you chose. I love labelling everything!
Rosie
Thank you so much! I am loving the font too. It is super cute!
These are far too cute, I love them! So creative and simple to do xx
Thank you so much. I love simple and creative projects like this!
It’s amazing what a Cricut can do. Love these!
I do too! The Cricut machines are amazing! Perfect for a DIYer like myself!
This is a good DIY. Very vintage and cute. I love it. Thank you for sharing.
Thank you. I am so glad you think so!
Awh these are cute and so easy to make as well! I’d love to start growing herbs and things so I’d have to look into creating these types of labels so I know which is which!
Yes! I love using fresh herbs when cooking. It really elevates your dish for sure!
Aw these are so pretty, I love the idea of customising your plants 🙂 thank you for sharing x
Thank you so much. I love being able to customize everything too!
These are so whimsical and pretty! I love how you’re demonstrating you use of the cricut – I can’t wait to see how you use it in the future! Thanks for sharing this project.
Thank you so much Jodie! I can’t wait to share more. I already have a few ideas swirling around in my brain! lol
Pretty cool stuff, you have going on here! I’m sure this was much more rewarding than walking into your garden store and picking up the labels.
Yes! It definitely was. I like being able to customize it exactly the way I want to.
I love these! I think I may have to invest in a circuit machine sometime in the near future. Your do so many cute projects with yours. Thanks for sharing another awesome project!!
Yes! I think it’s worth it for sure. I have already made a lot of cool stuff with it so far and I haven’t even had it long!
Oh wow, these are so cute! I love your font choice and I think I definitely need to get a vinyl! Thanks for sharing.
Thank you! You definitely should! I have been loving it so far!
Aww, these are so stylish and attractive and easy to make! I love the big lettering you have chosen too. We use plant labels mostly to mark rows in our starter seedling trays, but putting them out around smaller plants to keep track of what is what is not a bad idea either.
Thanks for sharing!
Thank you! I am so glad you think so too. I love the lettering as well.
These are great! I definitely want to make some labels for the garden. Will have to figure out something without using a cricut.
Thank you so much. Hopefully you can come up with an alternative then.
I absolutely love the look of these DIY plant labels, I want to grow plants, herbs etc just so I can make these! x
Lucy | http://www.lucymary.co.uk
I know right?! They were so much fun to make!
This is such a cool DIY project! I have been acting lazy and just buying stuff like these from the market but your post just inspired me to be more creative and just make my own.
Yes! You should definitely try to make your own too!
This looks like fun! I love the fonts, looks so stylish. Well done
Thank you so much! So glad you think so too!
I’ve always wondered how people make these! I can’t wait to try this myself, thanks so much for sharing x
Thank you! It was an easy process to make them once I figured it all out!
I love this post!! I am needing a new summer project and this is a great idea for DIY plants, I love the font too!
Thank you so much! This is the perfect summer project then!
Wow! I love all of your posts, they are so inspiring!
xoxo Olivia | https://www.oliviaandbeauty.com
Thank you so much. I appreciate that.
These are so cute! And how easy with the Cricut machine too
Cora | https://www.teapartyprincess.co.uk/
Thank you! The Cricut machine makes it so easy!
These are so darn cute!! Definitely going to give them a try!
Thank you! You definitely should!
These are way cuter than the hand-written popsicle sticks I have in mine right now. Great idea!
Awe thanks so much. I appreciate it!
Great DIY! Thank you for sharing this! They look so cute and nice! Labels like these would look nice in my garden to label all of the different plants!
Thank you. They would definitely look nice in your garden too!
wow! these look so amazing in your plants. your aesthetic is one of the best.
Thank you so much. I really appreciate that!
So artsy and fun to create! My cousin has many plants so this is a great gift to do for her. Thanks for sharing!
http://www.lifebeginsattwenty.com
Thank you so much! That would be a good gift idea!
Oh my goodness, Charity! These are adorable!! I love how they turned out. My husband and I have a small plant nursery and making tags can be time-consuming. Plus, the labels need to be durable. I’ve been currently using a waterproof white pen on the same black labels that you chose. Your design is so much nicer. 🙂 You’re right – these make the perfect gift for friends and family as well.
I was excited to read about your experience with the Cricut as well. More than once I’ve considered trying one out but haven’t gone through with the purchase. They seem to be so versatile? That’s what intrigues me the most.
Thanks for another fun DIY! I love reading your posts. Lots of love to you & yours! Congratulations on being gifted these amazing products. What a blessing! ♥
Awe thank you! It was a blessing for sure to be gifted this amazing product! I have been loving it so far and it is so versatile. You can do so much with Cricut machines!
These plant labels are so cute! I’ve been seeing a lot of cool stuff that can be made with a Cricut machine & now I want one haha
Thank you! You can do a lot with a Cricut! You should get one!