
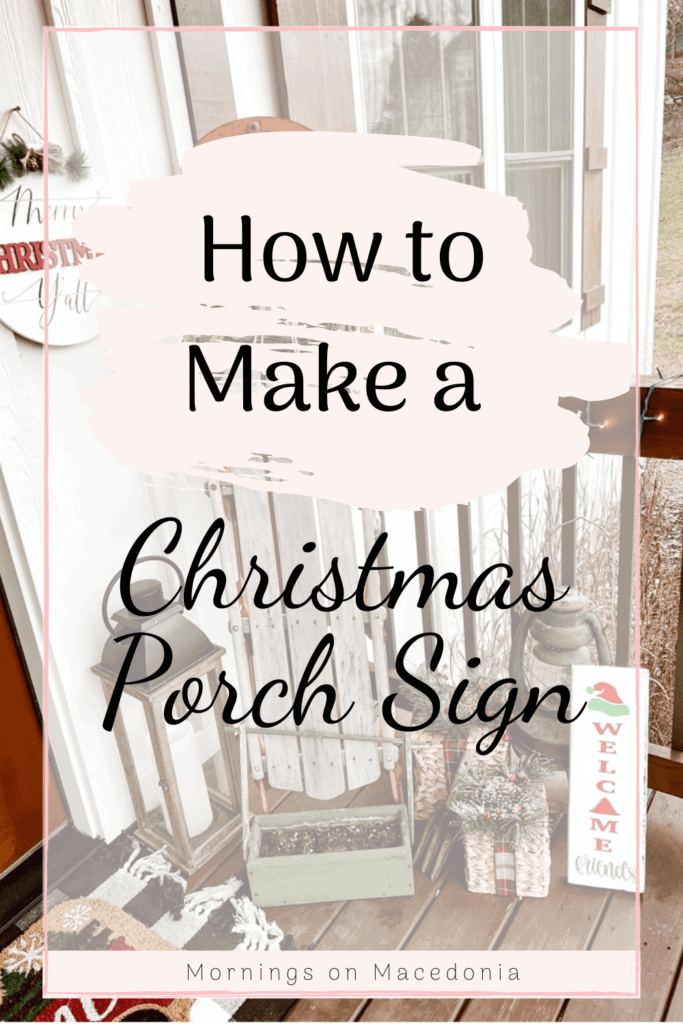
Today I thought it would be fun to show y’all how I made my double sided DIY Christmas sign thanks again to my Cricut machine. If you’ve been around here long enough, then you know I am a tad bit obsessed with my Cricut.
I have used it for so many projects and I love how easy and user friendly it is. If you’ve ever considered getting a Cricut, you definitely should!
I have really gotten my money’s worth out of it already with all the easy and fun projects I have been doing with it so far!
This post contains affiliate links. Click here to read my disclosure policy.
Materials Needed for DIY Christmas Sign
- Scrap piece of wood
- Cricut Machine (I used my Explore Air 2 machine)
- Paint
- Sandpaper, optional
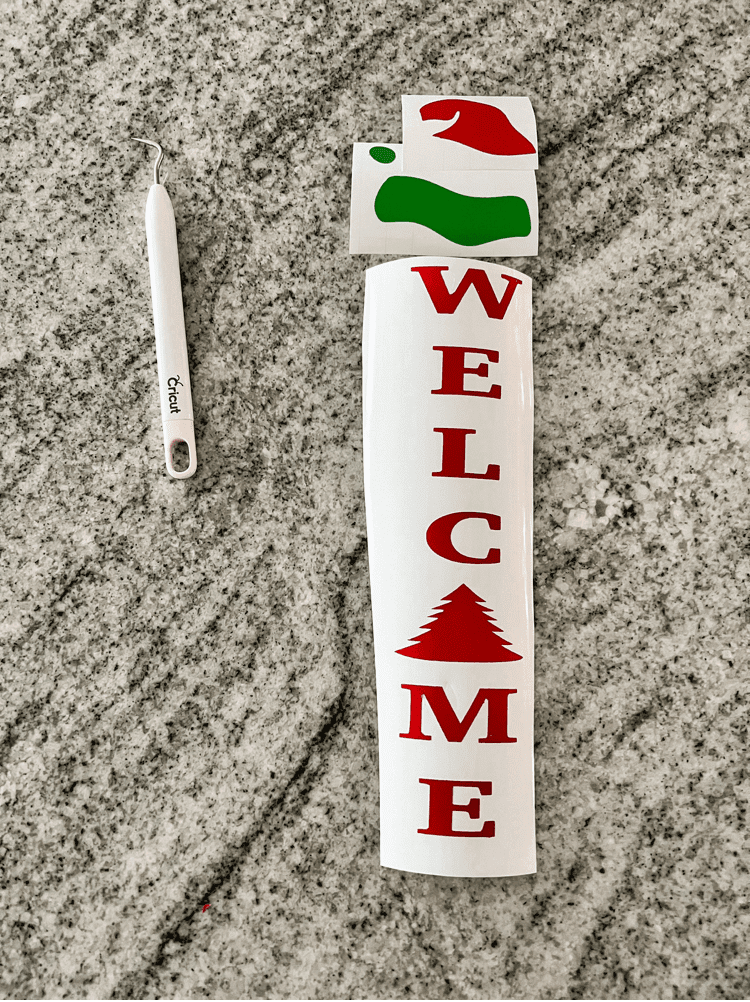
- Cricut vinyl (I used red glitter, green glitter, and black)
- Cricut transfer tape
Design Your Sign on Cricut Design Space
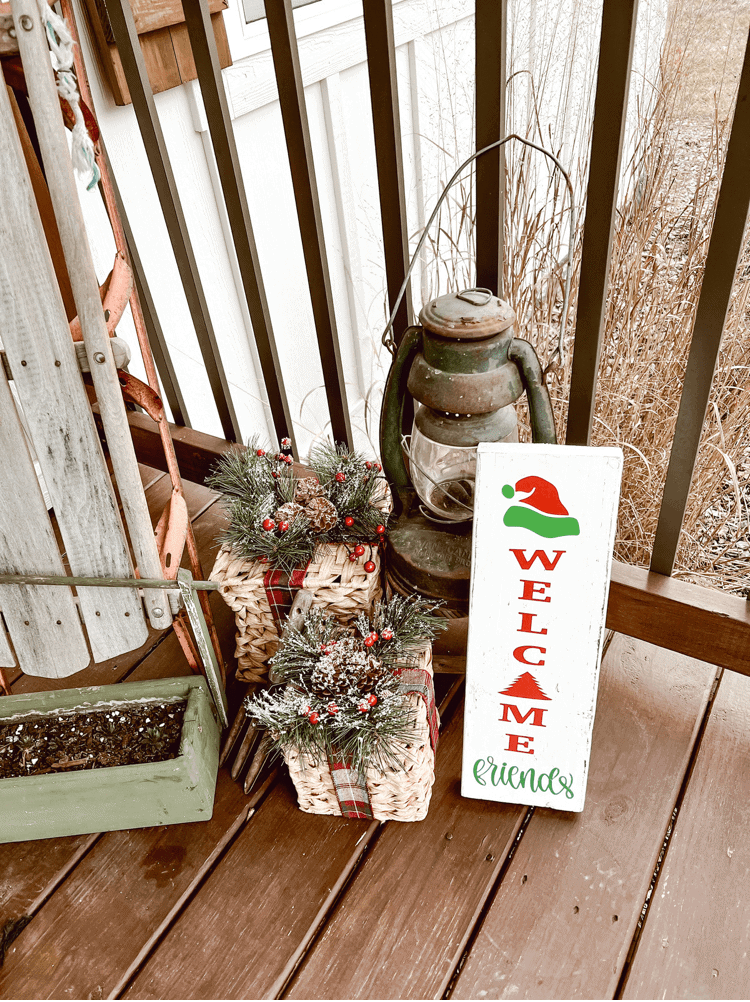
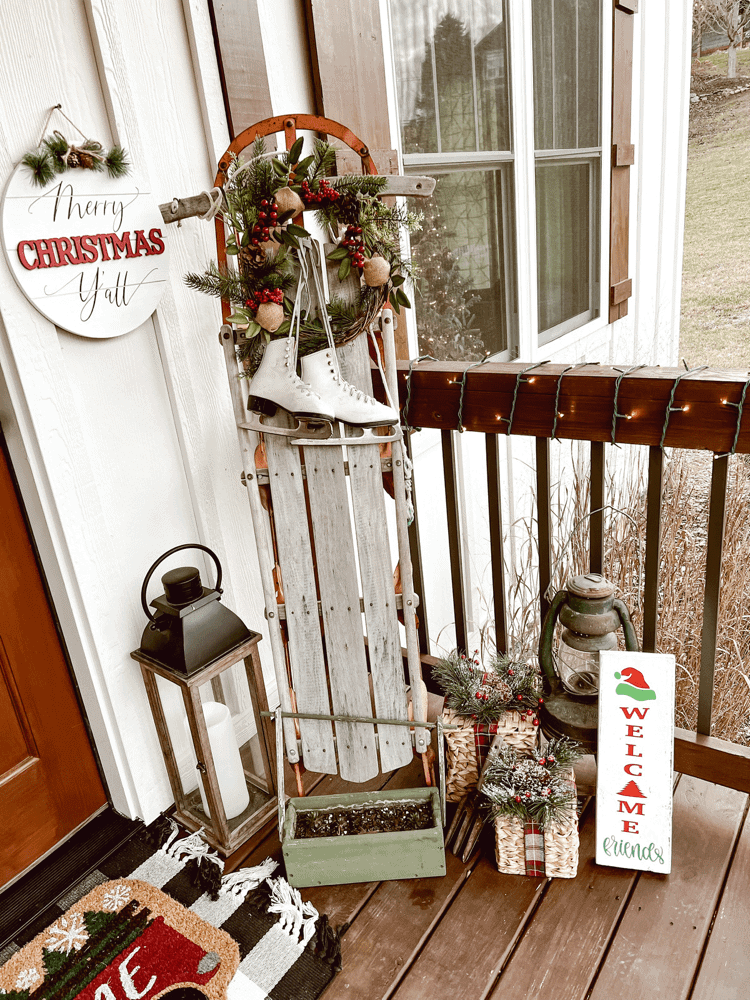
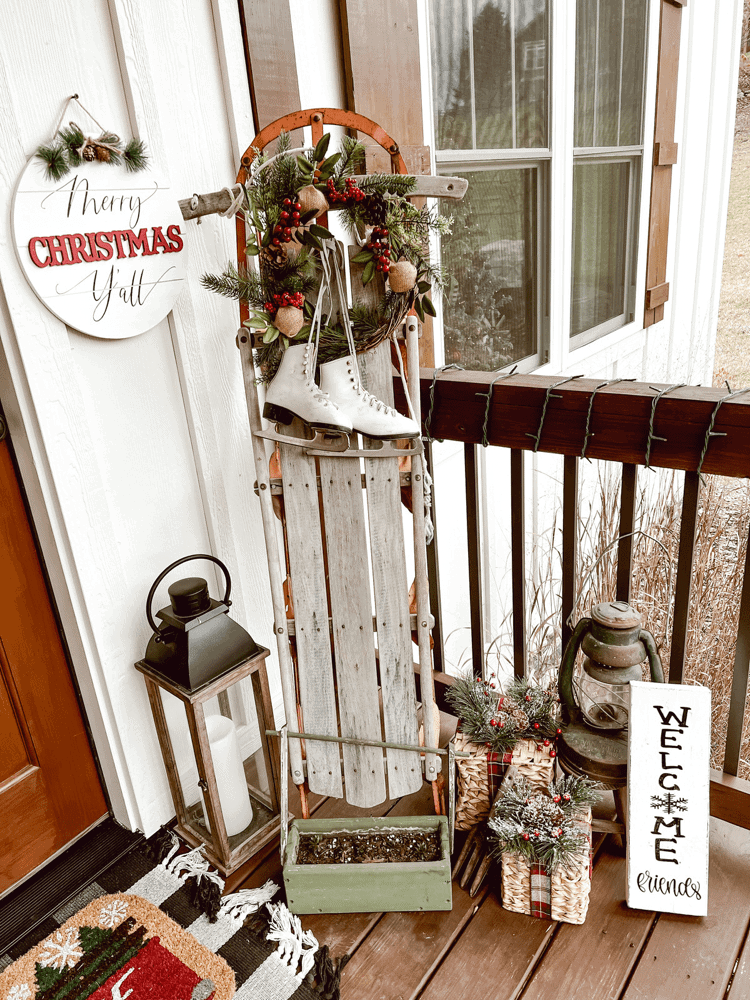
I wanted to do a fun little version of a porch welcome sign. I didn’t have a piece of wood large enough to do a real big one, but I think the size of it turned out to be super cute.
To get a welcome design, just type in “Christmas Welcome” on Cricut’s Design Space and choose a few styles you like. You can then print it out on whatever color of vinyl you want.
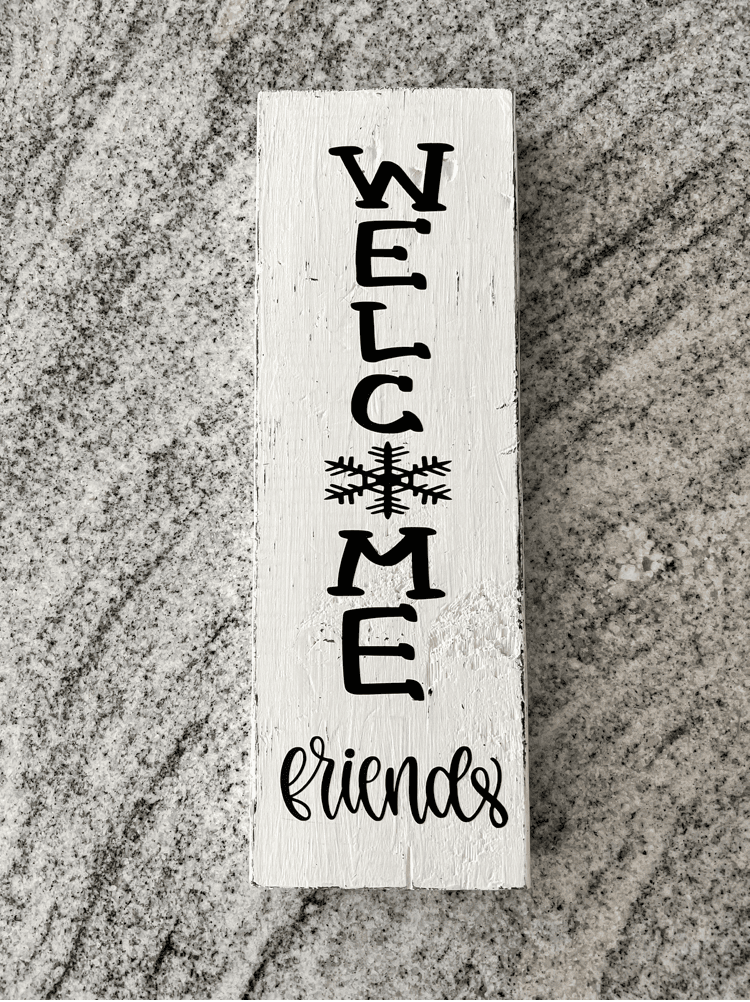
I choose to do two different welcome signs because I wanted one to be super festive. And then the other side to be just simple and winter related. That way I could leave it out after Christmas as well.

To make the sign, I just had a few scrap pieces of wood leftover from another project. So I simply just grabbed a size I liked and then painted it.
I first painted it black, and then went over it with white. After painting it, I distressed it with a little bit of sandpaper.
A lot of my porch decor is vintage and distressed so I wanted it to go along with everything else. This is very similar to how I made my DIY Vintage Fall Market Signs a few months back too.

Apply the Vinyl to Your Sign
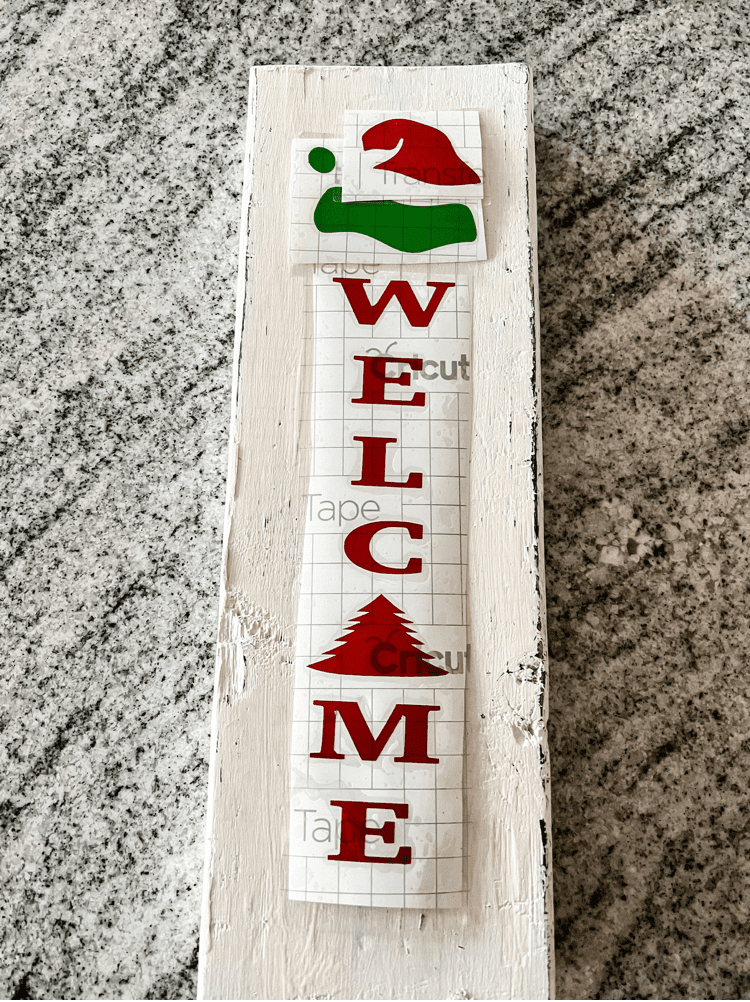
After printing out the design, you will need to remove the excess vinyl. I use a Cricut weeder tool to do this easily. Then, you need to use some transfer tape to stick on top of your vinyl design.
To make sure it sticks very well, you also need to use the scraper tool to do so. Then, carefully and slowly peel back the vinyl backing.
Make sure the vinyl is sticking completely on the transfer tape before fully pulling off the backing.
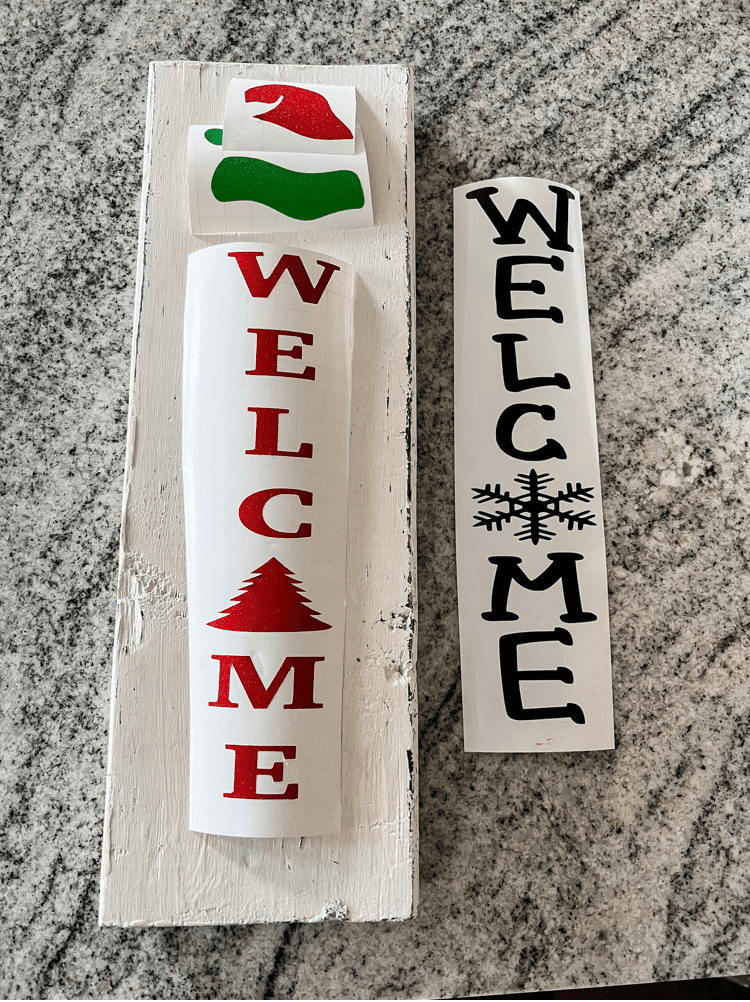
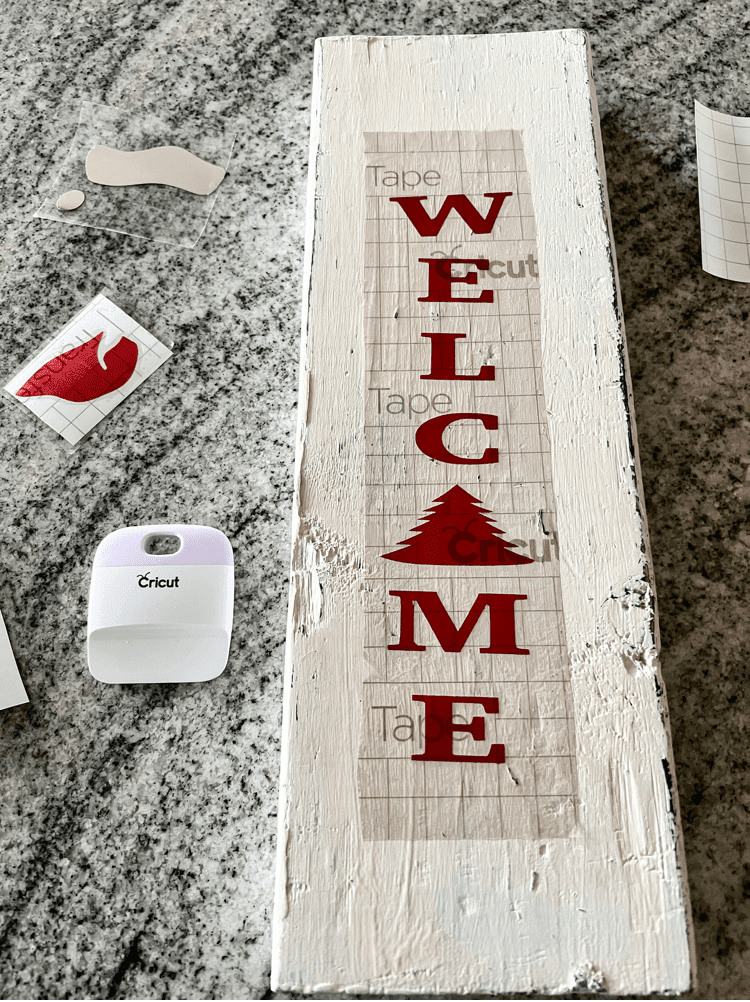
I noticed that using glossy vinyl is much easier in this process than using glitter.
The glitter vinyl is very pretty, but you definitely need to go pretty slow and adhere it very well with the scraper tool before peeling it off.
Otherwise, it doesn’t stick very well to the transfer tape.
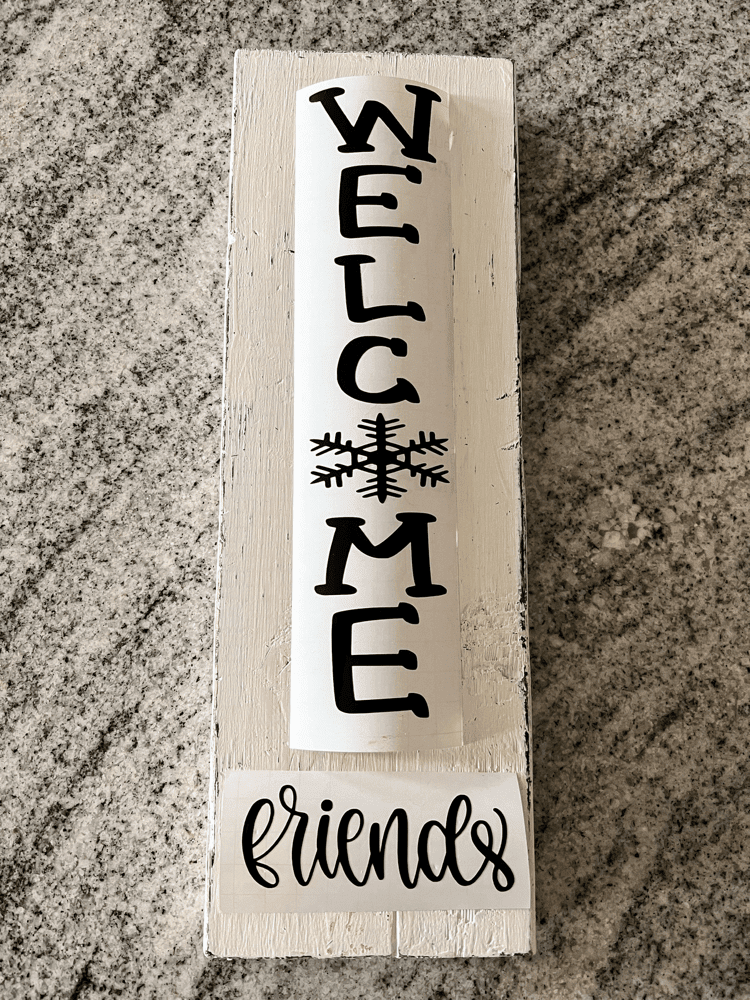

Once you have it all transferred on the tape, then you need to transfer the vinyl to your sign as well. To do this, you simply repeat the same process using the scraper tool.
And then, slowly and carefully lift up the transfer tape from the wood sign.

Styling Your Christmas Sign
Like I said above, I knew I wanted this sign to be on our porch. And I think it adds just the perfect, festive touch. I think the red and green glitter on it looks perfect with all my other porch decor.
Also, I think the other side I did will be perfect come after Christmas too. It’s nice and neutral and it does have that cute snowflake in it. So I think it will be great to display all winter long as well.

Well, I hope you enjoyed this little tutorial on how I created this cute DIY Christmas sign. It was super easy and fun to create. Which side you like better!?
Let me know below and tell me if you have any questions about using the Cricut or the whole process. I would love to help you out!
And, be sure to check out all my other projects I have created this year using my Cricut machine as well:
- How to Make a T-Shirt Using Cricut’s Infusible Ink
- DIY Ice Cream Labels
- DIY Vintage Advertising Jar
- Easy DIY Plant Labels
- Easy Wind Chime Refresh
- DIY Cozy Lounge Shirt


This DIY Christmas sign is cute and I love how easy it is to make! x
Lucy | http://www.lucymary.co.uk
Thanks Lucy. It was nice and easy to make for sure!
I love little Christmas decorations, especially ones that are unique and not just tree baubles. Thanks for sharing x
Thank you. I am so glad you enjoyed it!
This is an easy to make beautiful Christmas sign perfect to place by the front and/or on the porch. Thank you for sharing! ☺️
Pastor Natalie
Letstakeamoment.com
Thank you. So glad you think so too.
What a great and simple project. DIY is always better and shows that you care, IMO. Thanks for sharing,
Thank you. I think the same thing about DIY projects too!
These are so cute! I really need to invest in a Cricut. I keep finding so many adorable ideas and have to beg my mom to let me use hers all the time!
Yes you do! I love using my Cricut. I use it all the time!
This is such a cute Christmas sign. I would love to make my own. It looks so easy to make.
Thank you. It sure was very easy to make!
This is such a cute idea — and relatively simple (I could definitely do this)! Thanks for the holiday decor inspiration!
Thank you! I am always happy to provide holiday decor inspo since it is my very favorite!
This is a very beautiful Christmas idea. It looks fantastic and it is quite easy to DIY.
Thank you for sharing this!
Awe thank you so much. It was so easy and simple to make!
Another beautiful project Charity! I love that you’ve created 2 sides to the sign and as you said you could use the one side all winter long. Thank you for sharing this project!
Thank you! I wanted to create something that would last me a few seasons rather than just Christmas!
I love the festive colors you use for the letters and the clever tree design you worked in as well! It is great to be obsessed with something that helps you turn out such lovely, useful items again and again. 🙂
Thank you so much. I definitely am obsessed with my Cricut. I love how easy it is to use!
Ah so cute! This sign is perfect. I love how it has the two sides so you can flip it around when you want to!
Thank you! I am loving the fact that it is double sided too!
I love your Christmas sign! So cool that you have made it yourself 🙂 x
Thank you. I love making things myself!
this is a super cute craft! and it seems easy to make. 🙂
Thank you. It was super simple to make!
Love this! what a cute idea and it looks so nice on the porch. Thanks for sharing this!
Thank you. I am so glad you think so as well.
What a cute sign. Clear instructions and cheap to make.
Thank you. I am so glad you think so as well.