
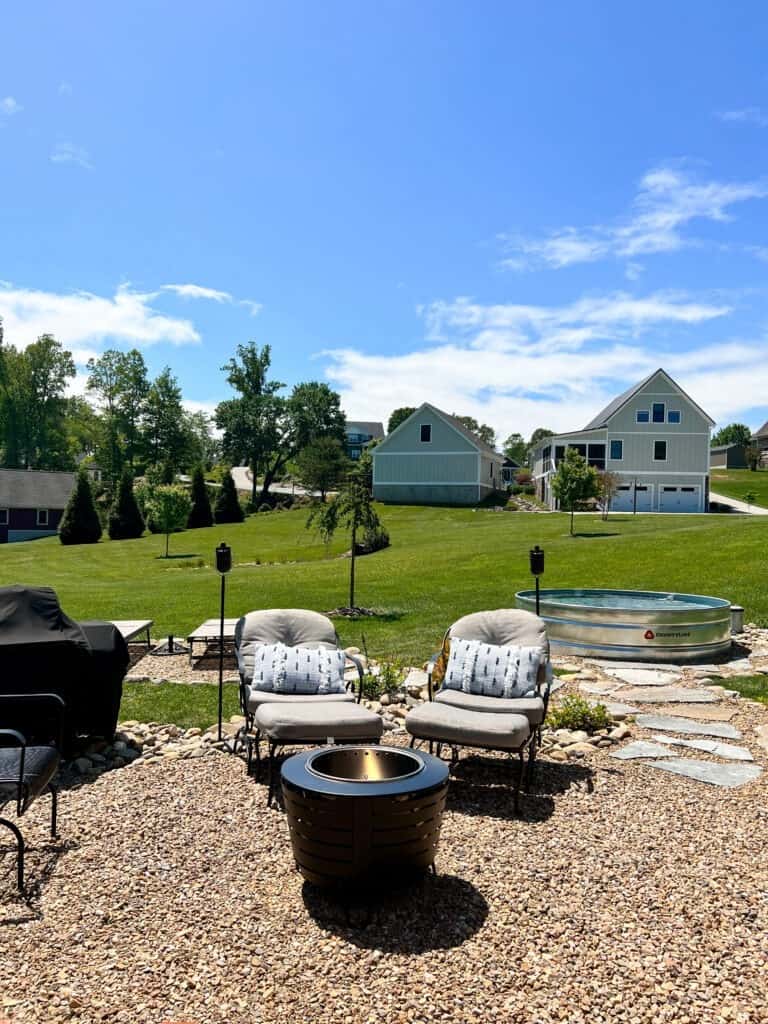
Y’all already know that we love hanging out in our backyard. With our DIY Fire Pit Area and Stock Tank Pool, there are plenty of outdoor options for fun here. However, I wanted to make it even better. And to do that, I thought adding in some outdoor lights would be perfect. So I am going to share today how to hang string lights in your backyard without trees.
We have a pretty open backyard with no big trees around so we were a little stumped on how to hang the lights at first. My inspiration was from our old camper string light project we did several years ago back when we had the camper.
Side note- I miss that little camper so much! Be sure to go check that post out if you weren’t here for when we had the camper!
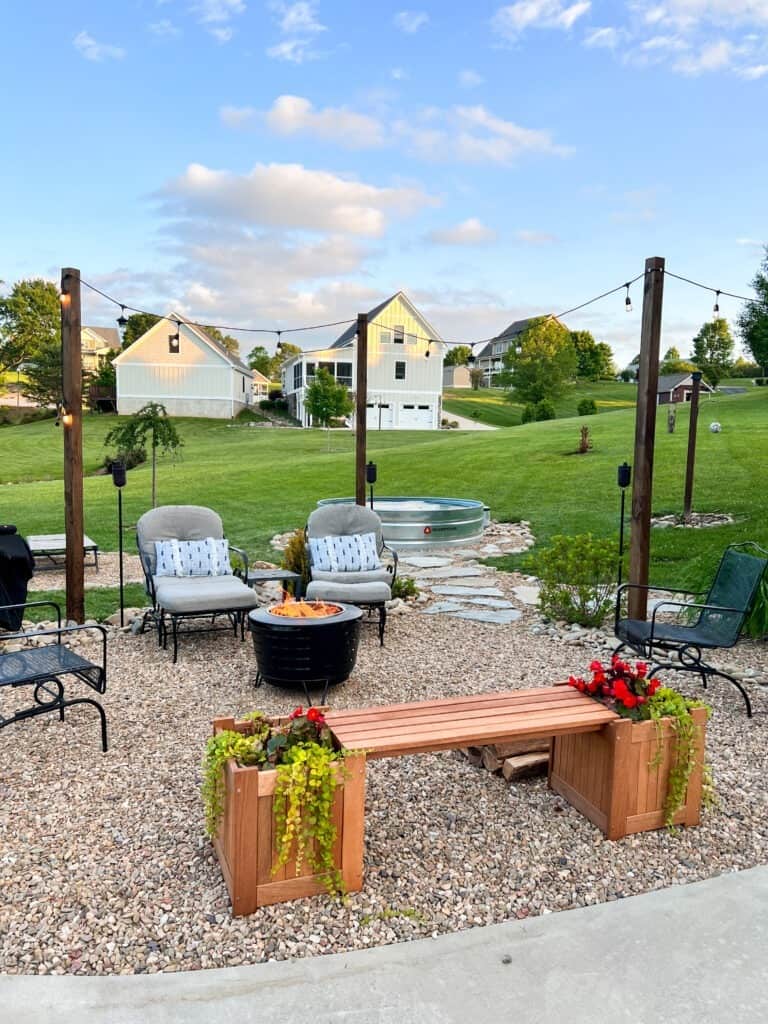
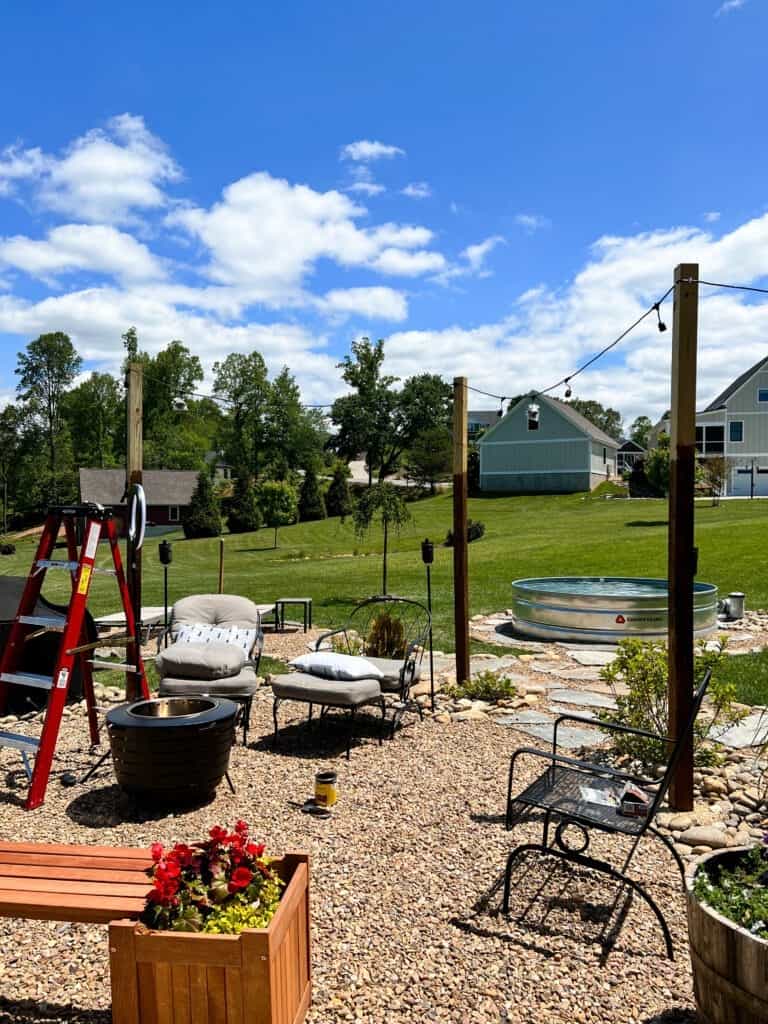
But, like I said it is a very open space, so I didn’t want it to look too weird or out of place. So we decided to kind of mirror our fire pit area and place the string lights around that spot specifically. And it turned out to be amazing! Keep on reading for my full tutorial on how to hang these beautiful outdoor string lights!
Also, this post is a part of our Cozy Creative Collective. So if you’re coming from Heidi’s post over at Eleanor Rose Home, Thank you! I hope you enjoy my outdoor project too! And be sure to check out all the other projects below too!
This post contains affiliate links. Click here for my privacy policy.


What Are The Best Kind Of String Lights?
We decided to use Tiki Brand’s Bitefighter LED String Lights + Repellent Pods for this project. I love the fact that these string lights are a proven mosquito repellent, without having to do an expensive yard treatment!
I always get ate up by mosquitoes anytime we have a fire in our fire pit area. So these string lights are an absolute lifesaver for me! They provide up to 200 hours of mosquito repellency and 330 square feet of coverage! And you can order more repellent pods easily once yours run out too!
The 2200K warm LED bulbs are also shatterproof and they come with 2 extra glass bulbs as well. One package of these string lights is a total of 36 feet long, so we had plenty of length to use for this space!
And if you have a super large space, you can connect up to 8 Tiki Brand String Lights end-to-end too! I am super impressed with these commercial-grade string lights and want to add in a few more in another outdoor space, such as the front porch, too!
Materials Needed to Hang String Lights
Now that we know what kind of string lights to use, here is everything else you need for this project:
- Wooden Post
- Post Hole Diggers
- Pea Gravel or Quikrete
- Level
- Tape Measure
- Stain (I used Minwax Early American)
- Paintbrush
- Coax Staples
- Drill
- Screws
- Outdoor Extension Cord

How To Hang String Lights In Backyard Without Trees
The easiest way in trying to figure out how to hang patio lights in your backyard without trees is to just simply use wooden posts! It’s an easy, cost effective solution if you don’t have big trees you can string the outdoor lights around with!
Another good option is to hang them around fence posts or a deck railing as well. Or you could even use a metal pole instead of a wooden post too if you prefer. But my personal preference is to just use wooden posts since they are so easy and cheap!
Installing The Wooden Posts
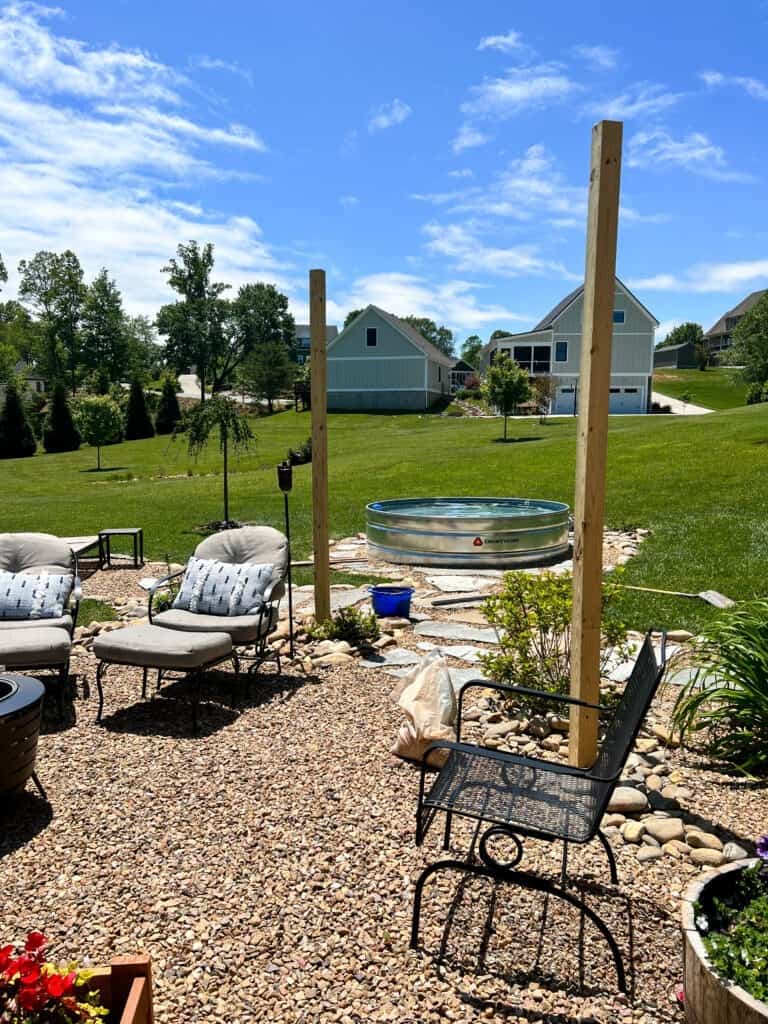
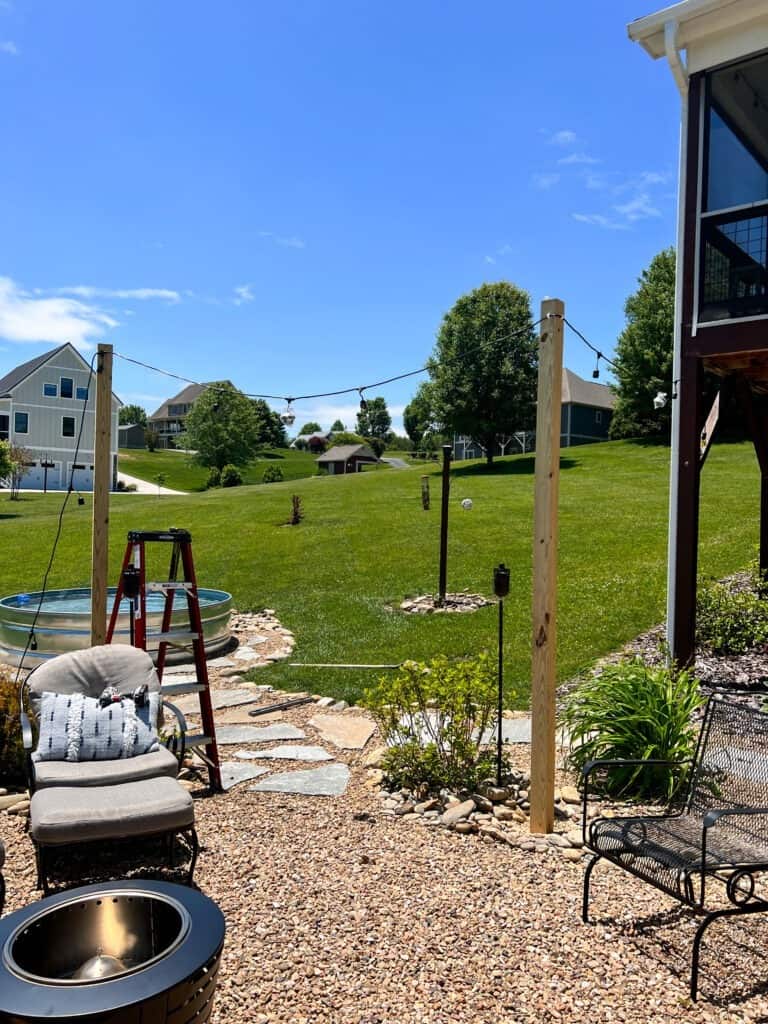
The first step in this project is to figure out where you are going to place each wooden pole at. I recommend using a tape measure so you measure your space out and see how many posts you need exactly. We ended up using a total of 3 wooden posts, and we started the string lights from the bottom of our screened in porch as well.
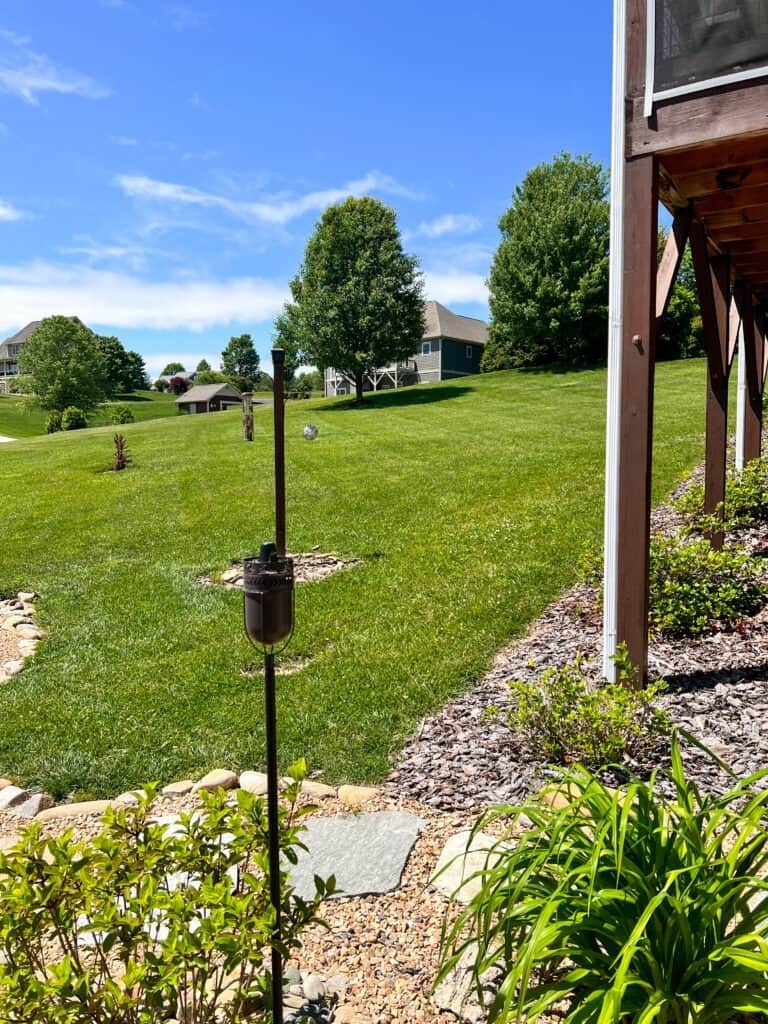
Once you have the anchor points of where the posts need to go, it’s time to use the post hole diggers and start digging! You want your string lights to be about 10 feet off the ground ideally. So measure how tall your posts are, and figure out how much you need to dig in order to make them around 10 feet high or whatever your desired height may be.

In the past, we have used Quikrete to set our wooden posts in the ground, like we did with our bird feeder upgrade last year. However, when we went to Lowe’s Home Improvement, they were actually all out of it.
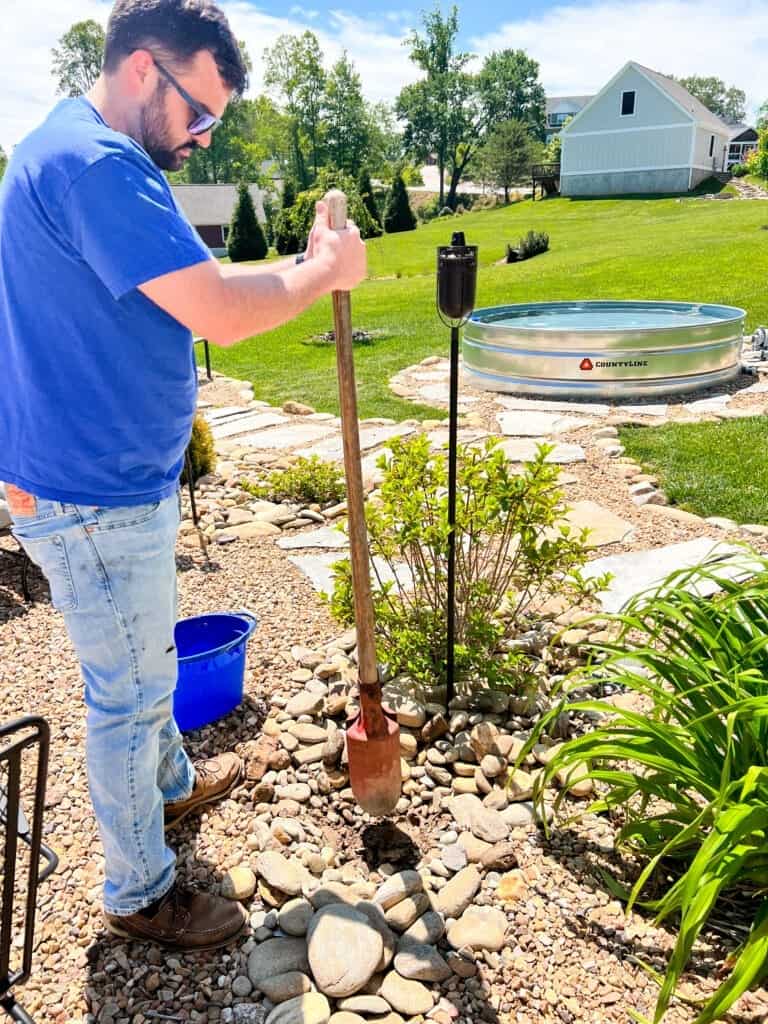
So we had to be innovative and think of something else to use instead. My hubby decided to use some pea gravel in place of the Quikrete in order to hold the poles in place. So once we got the hole dug for the first post, I held it in place while we checked it on the level to make sure it was properly in place.
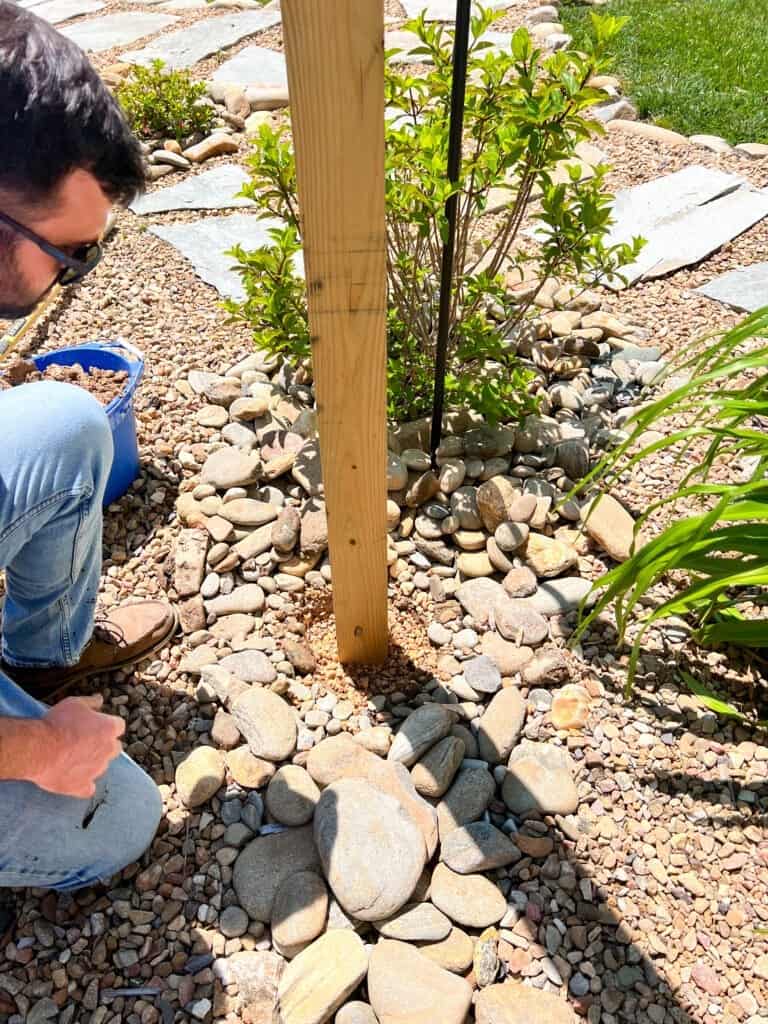
Then, we added in dirt that we just shoveled out from the hole and a lot of pea gravel to keep it in place as well. It seems pretty sturdy doing it this way, but we can always go back and add in some Quikrete in the future if we need more support as well. We placed each post in almost like a zigzag pattern, so it wasn’t too uniform looking but yet gave it a clean look still.
Attaching The Hanging Lights
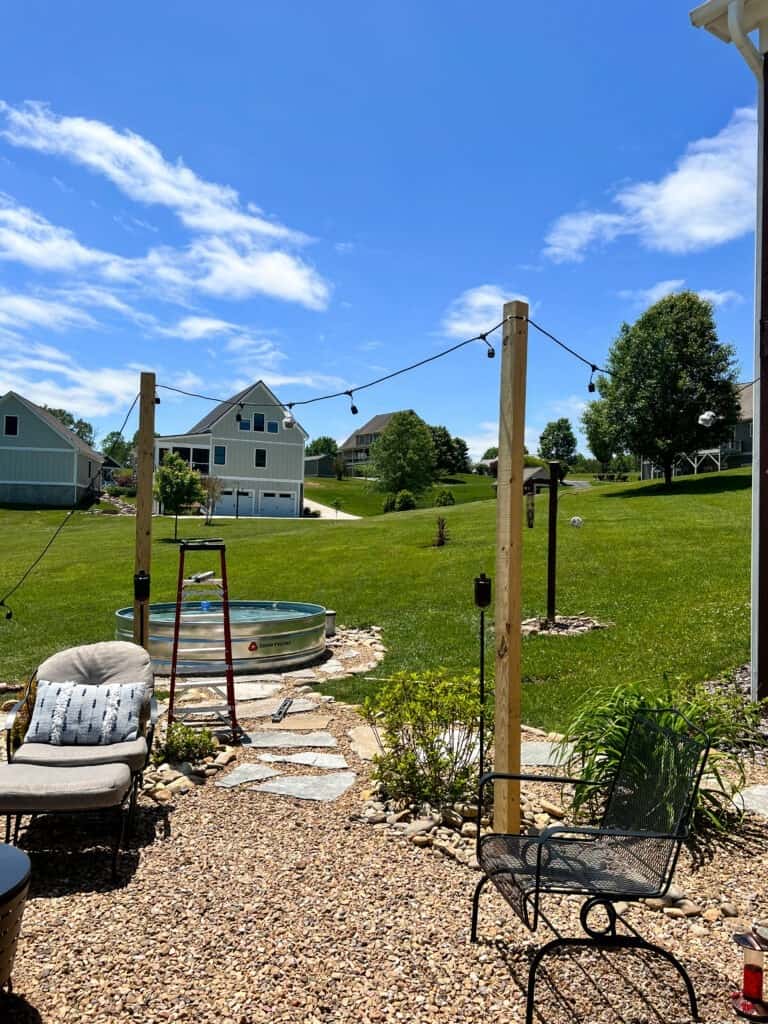
Now that you have all your posts up and ready to go, now you can attach your string lights! This process was super easy, although make sure you start with the plug side first! We got all our lights hung up and then realized we started backwards, so the plug was at the opposite end of the outdoor electrical outlets!
So don’t make that mistake too and check your lights first to make sure you are good to go! Another thing I recommend is to not screw in your bulbs before hanging them up. You are more at risk to break the larger bulbs once they are screwed in, rather than just waiting to screw them in once you have the light strings all set and in place.
These lights also come with their own supports, so you can drill directly above them into the wooden posts and adhere them that way. However, where our posts were, didn’t line up exactly with the attachments every single time.
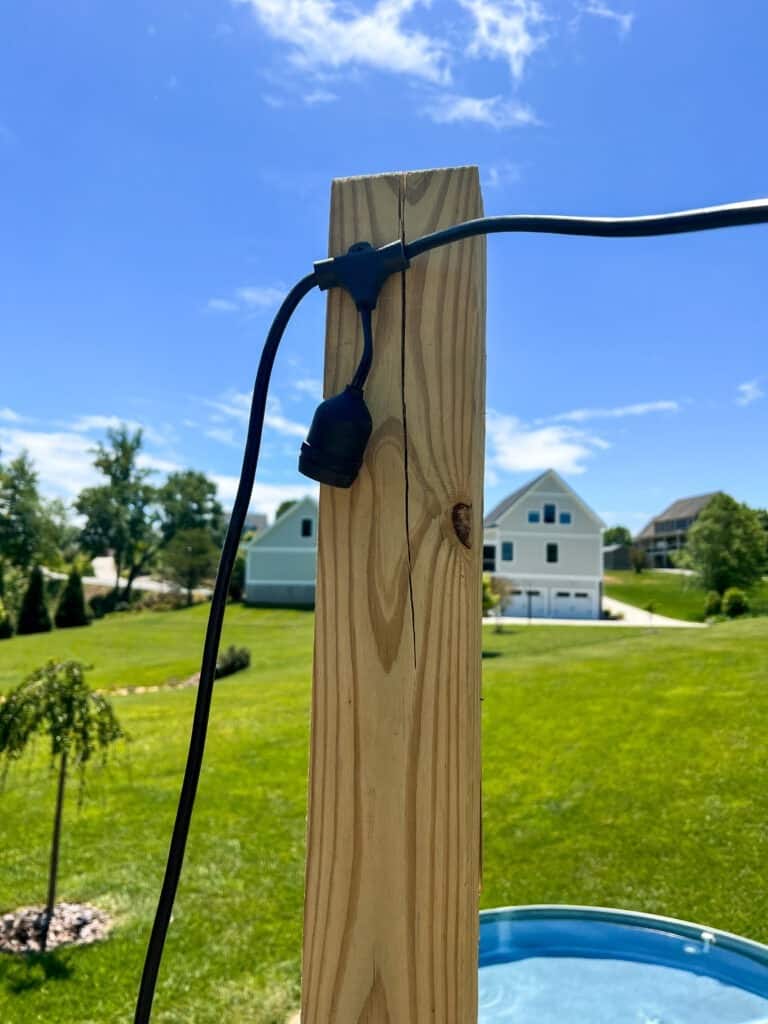
To remedy this, we used Coax Staples and attached the strings to the posts that way instead. You could also use zip ties if you needed to as well. Another option is to use metal hooks or adhesive hooks on your wooden posts and then drape the lights over the hooks too.
Stain The Wooden Posts
The last step in this backyard string lights project is to stain the posts. As I mentioned earlier, I used Minwax in Early American. We were going to use the exact same stain as our screened in porch, but the line at Lowe’s was so long.
We were impatient and didn’t want to wait so we figured this stain would work just as good, and it really did. I think it looks perfect with the existing stain we already have on our porch, and it was cheaper too. So it’s a win win!
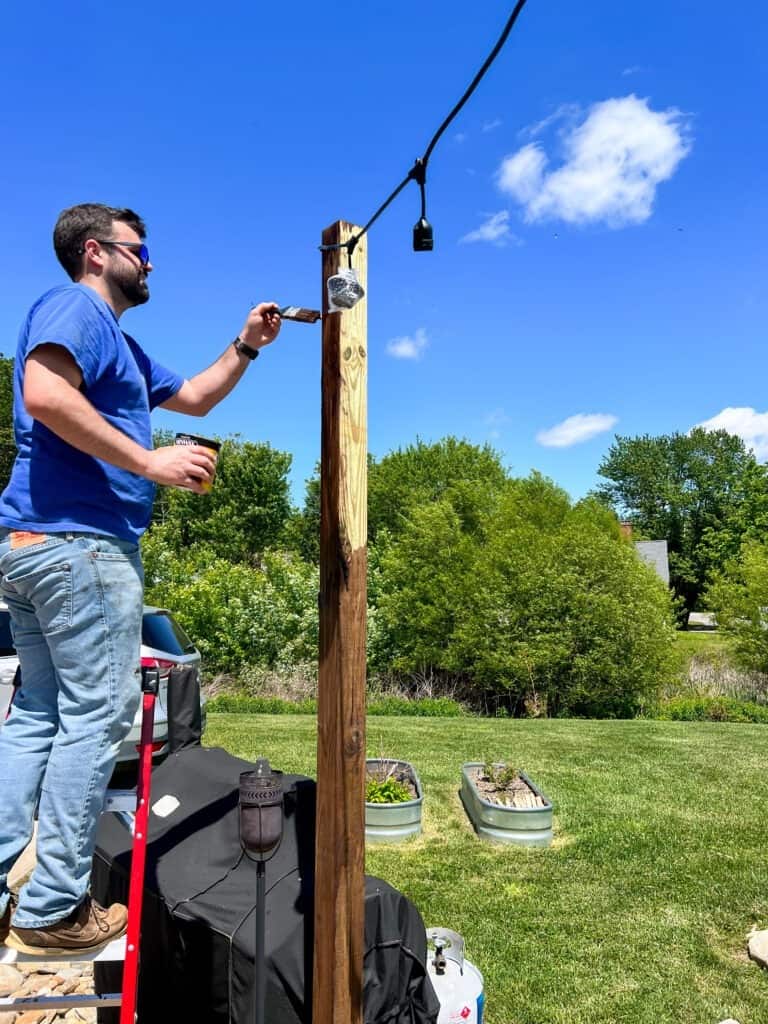
I was able to stain most of the posts myself, but couldn’t reach the top of the post because I am pretty short! So if you’re vertically challenged like me, you will definitely need a ladder to finish staining all the DIY posts!
Enjoy Your String Lights!
Well I hope you enjoyed this tutorial on how to hang string lights in your backyard without trees! Using the method I shared above is the perfect way to enjoy outdoor string lighting without having big trees in the yard!
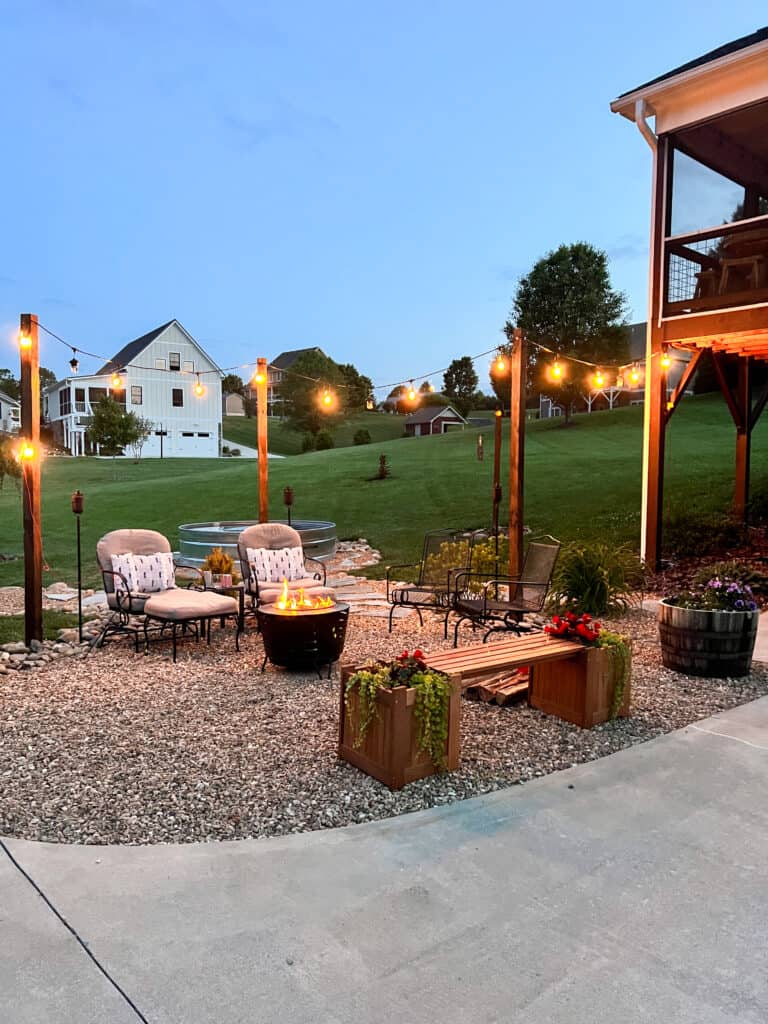
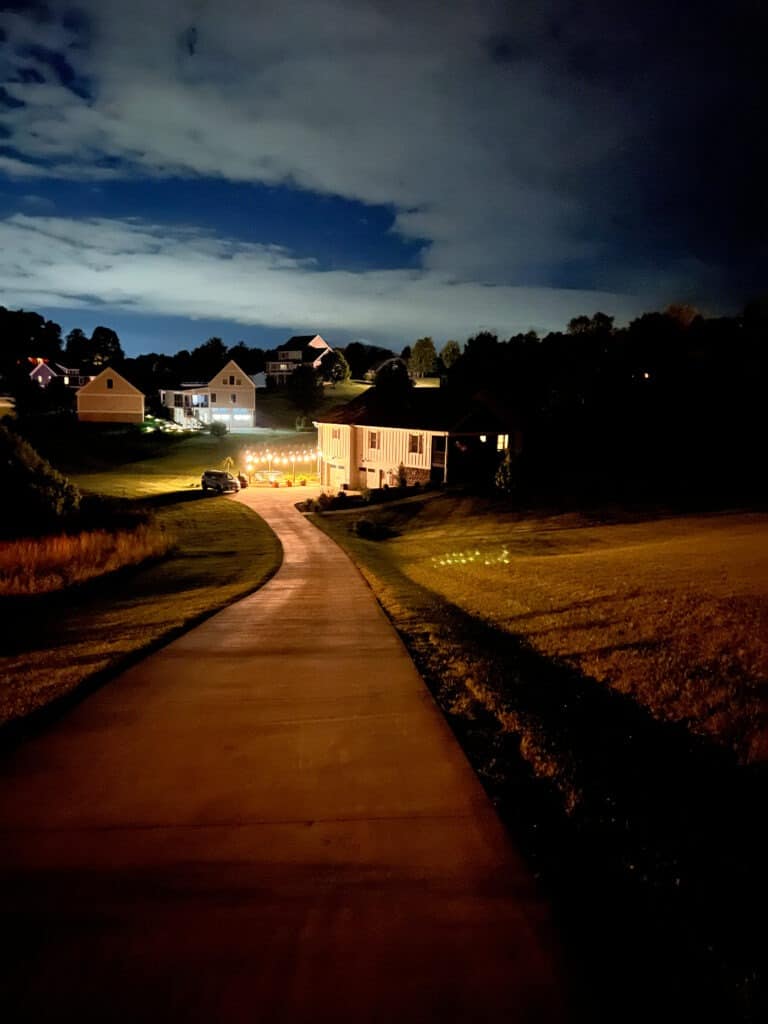
And now, you’re easily ready for a fun backyard party with this beautiful outdoor lighting system! I love the cozy, warm glow these lights bring to our backyard! We will definitely be spending a majority of our summer nights out here enjoying the lights!
And if you’re looking for even more outdoor project inspiration, be sure to head on over to Kelly’s post on how to create an easy DIY Solar Fountain in 3 Ways too!


Charity,
I just love your string lights. They make your outdoor area look magical. Thanks for all the tips.
Thank you Rachel! We are loving them too!
Charity what an incredible addition to your outdoor space. I love the light you chose and how they also repel mosquitoes! Genius. Thanks for the tutorial! Enjoy those gorgeous lights!
Thank you! I love the dual action for them as well! And we will definitely enjoy them all summer long!
Love this project Charity, looks so good! I also love that the lights repel mosquitoes. I get eaten alive too, so that is awesome!
Thank you! It is very beneficial for those of us who get eaten alive! Lol
Charity your garden space looks beautiful my friend! Also love your stock pool!
Thank you! My stock tank pool is my absolutely favorite DIY project we have ever done!
I love these lights. I’m putting in a tiny house soon so these would be perfect!
Oh that would be so perfect by a tiny house too!
Great post! I love string lights – it’s such a nice garden look 🙂 thank you for sharing your suggestions x
Thank you Eleanor. I am so glad you think so too!
I love these lights and I love how easy it is to hang them up! x
Lucy | http://www.lucymary.co.uk
Thank you Lucy! I do too!
This post is amazing! We’re tackling our garden this summer and I’ve always wanted lots of lights in the gard but no where to hang them. I can’t wait to use this post
Awe thank you so much! I am so glad you got some inspiration from it then!
I love string lights in gardens, they look so lovely but I actually really love the wooden posts you’ve done as well!
Thank you Jenny! I love the wooden posts too!
Oh wow I love this looks!! I bought some string lights for my deck this Summer and I can’t wait to hang them! Lovely post ☀️
Thank you so much Amanda! I am so glad you think so too. I am sure yours will look great too!
I love this. We’ve talked about adding lights to our backyard but weren’t sure how we’d pull that off. Thanks so much.
Thank you! You should definitely try to hang some up too! They really make the space much more cozy!
Wow! Your backyard looks amazing. It looks like a very relaxing place to hang out with friends and family.
Awe thank you so much! We are definitely loving having the lights out here for sure!
This looks amazing! Even though we have trees, we also have squirrels that chew everything. I think posts would be better, and would help discourage critters from chewing things. Your patio setup is beautiful!
Thank you so much! I am so glad you like it too! And yes, posts can be used regardless if you actually have trees or not!
Wow! Very informative and impressive lines. Transformative outdoor lighting installation. Enhance curb appeal and safety simultaneously. Consider incorporating solar-powered fixtures for eco-friendly brilliance.
Thank you.
This is a brilliant solution for adding ambiance to a backyard without trees! Love the idea of using wooden posts—it’s both practical and stylish. Thanks for the detailed guide!
Thank you so much!