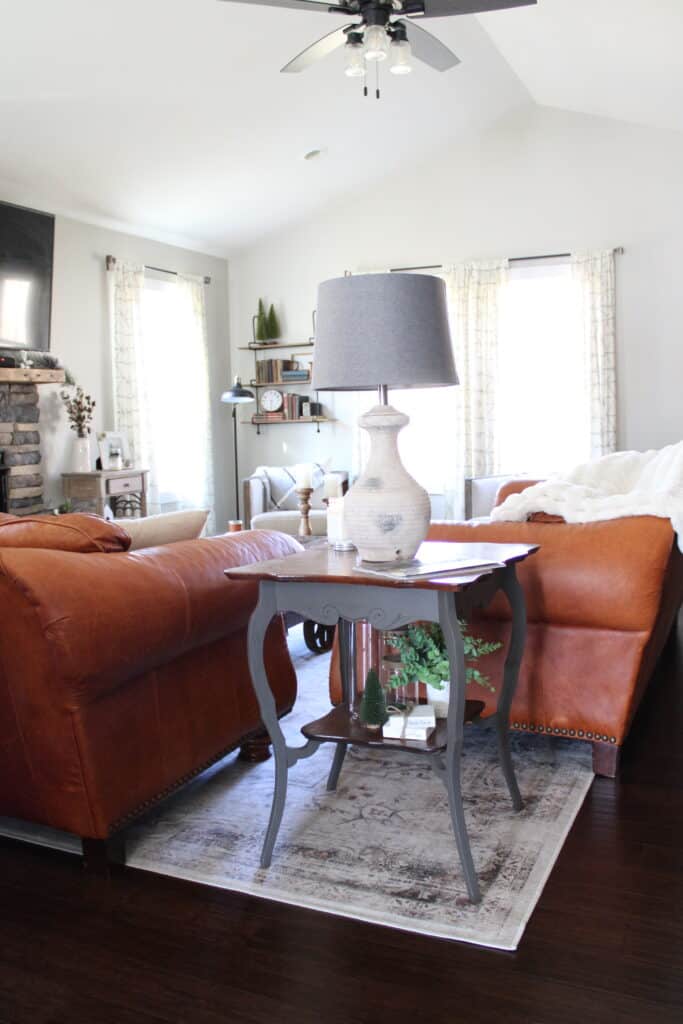
If you remember from a few weeks ago when I shared my Vintage Christmas Home Tour, I showed you a little snippet of this DIY corner table we made. Y’all know from that post too that we ended up selling our sectional and getting vintage leather sofas in our living room instead.
And I really do love them, but it created an open space in the corner, where the sectional used to be. So I needed to find a table that was just the right size to fit there. And thankfully I found one at a local thrift store that I love!
I was a little unsure when we first stumbled upon it, as it was a little unsteady. But, hubby reassured me that it was no problem and we could easily bring this piece back to life with just a few simple touches!
So keep on reading to see just how we transformed this little beauty into the perfect table for this small space!
This post contains affiliate links. Click here to read my full disclosure policy.
Materials Needed:
Old, antique table
Wood glue
Paint (I used Fusion Mineral Paint in the color Oakham)
Paintbrush
Danish Oil (I used Dark Walnut)
Old rag to apply the oil with
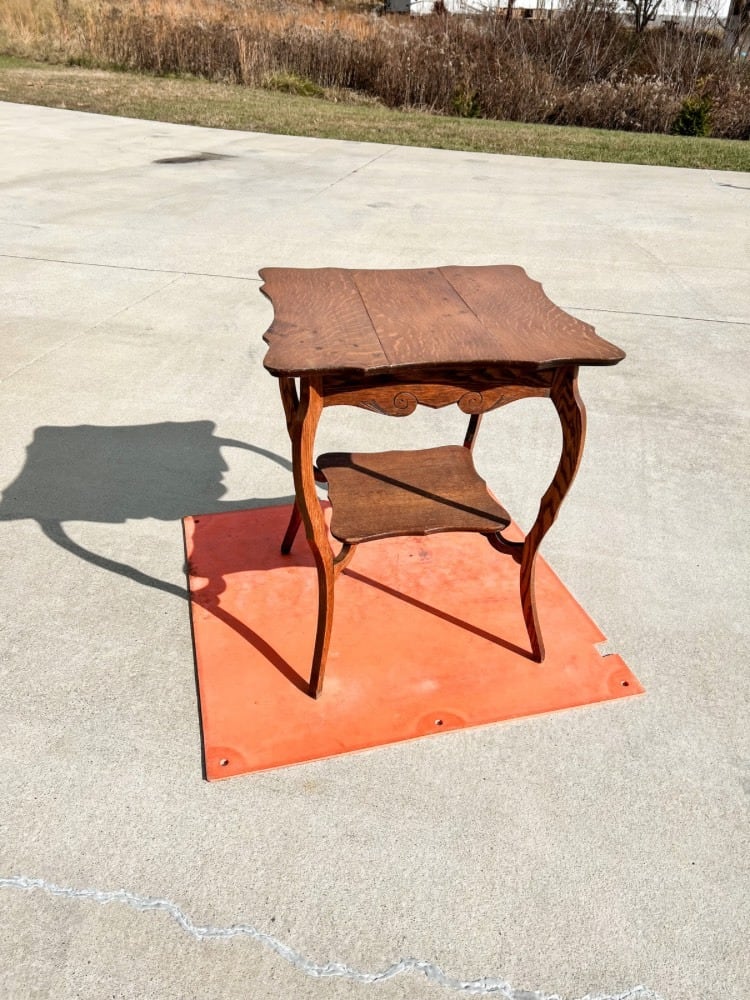
As you can probably tell, your list of materials needed for this DIY Project will vary. I’m just sharing what we used to transform this corner table to give you a little idea of where to start!
Finding the Right Table:
As I mentioned above, we got lucky and found our table at a local thrift store. Before going to shop for one, however, we definitely took notes of the corner space that the table needed to fill. We used a tape measure to try to get the right dimensions that we would need for the table too.
We also wanted to find a nice wooden table and the main goal was to find one at a great price. Hence, why shopping at a thrift store. You can usually find some great pieces at an affordable price. And they can easily be fixed up with just a little TLC and paint! If you shop at a mainstream, online store, you usually can’t find pieces like this with so much character.
I was worried that the couches and this side table would be two different heights and look a little weird together. But, when we brought it home, it was the perfect solution to this empty space we had. You couldn’t ask for a more perfect fit for this space!
Fixing Up The Table:
The first thing we ended up doing was cleaning the table off and removing any debris and dirt. My hubby then used some wood glue and tightened some of the existing screws to help secure the legs back on the corner table since it was a little wobbly. We wanted it to be secure before starting everything.
Our original plan was to sand the tabletops with fine-grit sandpaper and to just paint the legs of the table. I didn’t think I liked the original color of it, since this old wood had a little orange hue to it.
However, once we brought it up and placed it next to the sofas, I kinda liked the colors together. It was the same color hue as the leather couches almost. So we decided to take the easy route and not sand it down first. I figured I could at least paint the legs and see how we liked it then. And if we wanted to change it up, we could always sand it down later too.
Painting The Table:
As I mentioned above, I used Fusion Mineral Paint to paint the desk legs. Y’all know how much I love Fusion Mineral Paint, as I often use their paint in all of my DIY projects I share. Their coverage is phenomenal so you don’t really even need to use a white primer or anything like that before painting your piece.
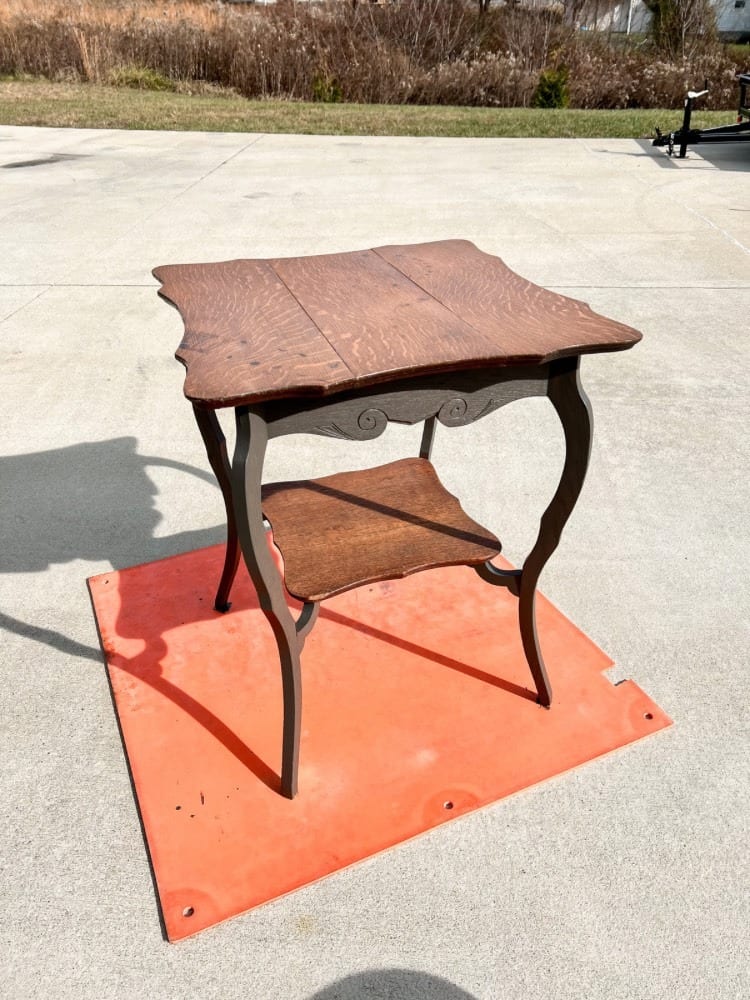
And a little bit goes a long way. You don’t need much and you don’t have to keep reapplying coats which is so nice. Especially if you are on a time crunch too. I used to always choose chalk paint, as I thought it was more of my personal style. However, now after using Fusion Mineral Paint so much, I don’t think I will ever go back!
When trying to chose a color to paint the legs with, I brought up all my paint bottles and placed them on the table. I looked at all the colors I already had around the area. Such as the rug, the couches, and the entryway wall color.
If you remember, we painted that a darker color last year too. So I figured it needed to be a somewhat dark color as well to play off all these existing colors in here. I chose to use the color, Oakham, which is a smoky gray color. And it really compliments the entryway wall color too I think.
I continued with the original plan, only painting the cute little table legs first. As you can see, this corner table has a main tabletop and a lower, smaller one at that bottom of the table top too. So I left both of those the natural color and only painted the legs and areas around them. It took me a total of just two coats and I was able to paint it all in one day!
Oiling The Tabletop:
Now that the table legs were dry, we needed to decide what to do with the tabletops. We again brought the table up to see how it was looking compared to everything around it. And again, we decided that the tabletop color looked great as is. We decided not to sand it and just enhance it’s original color.
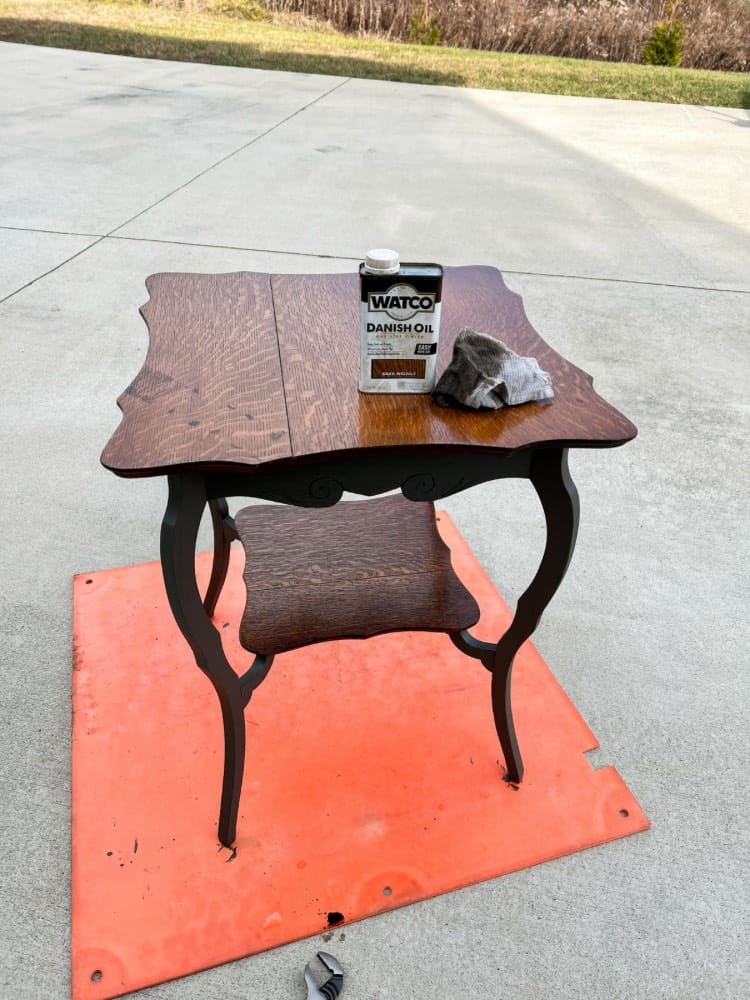
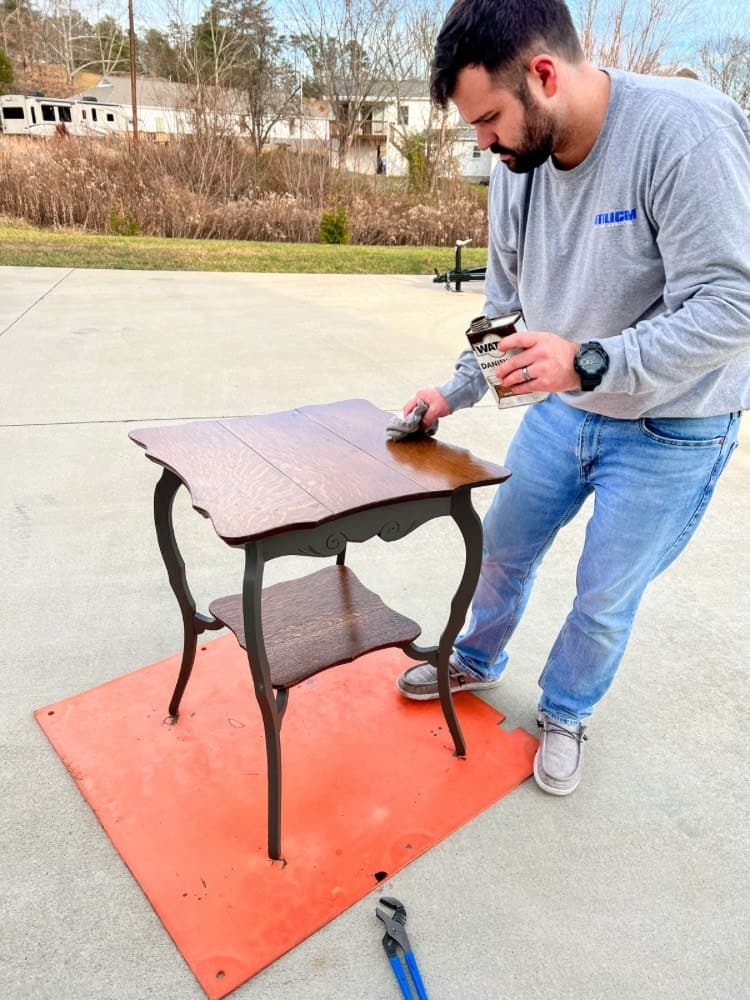
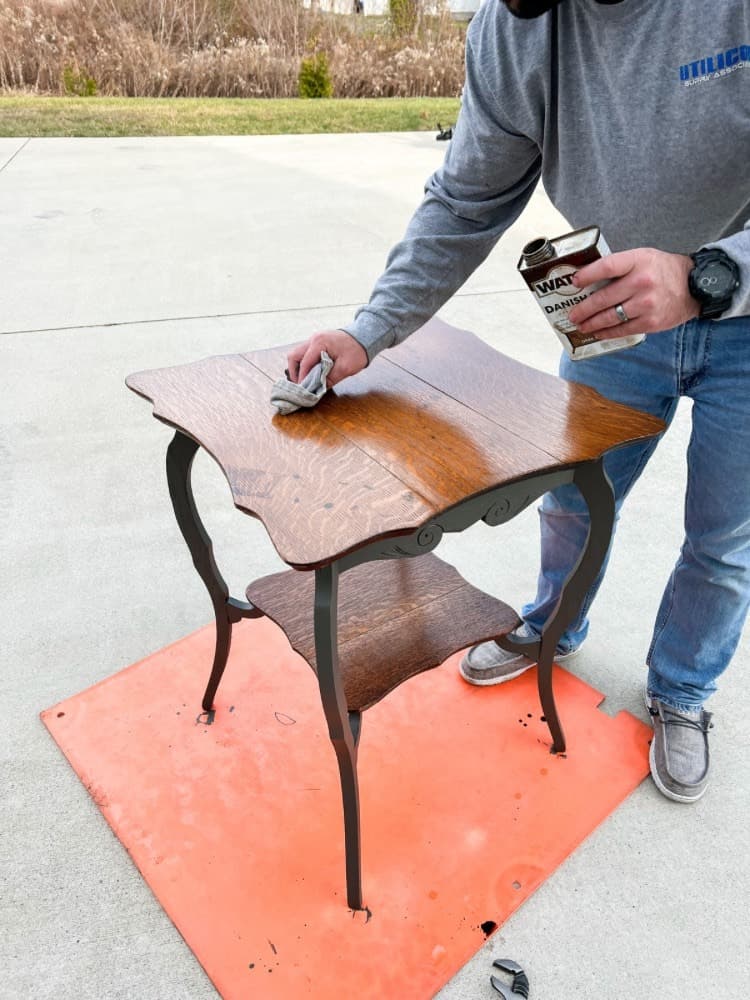
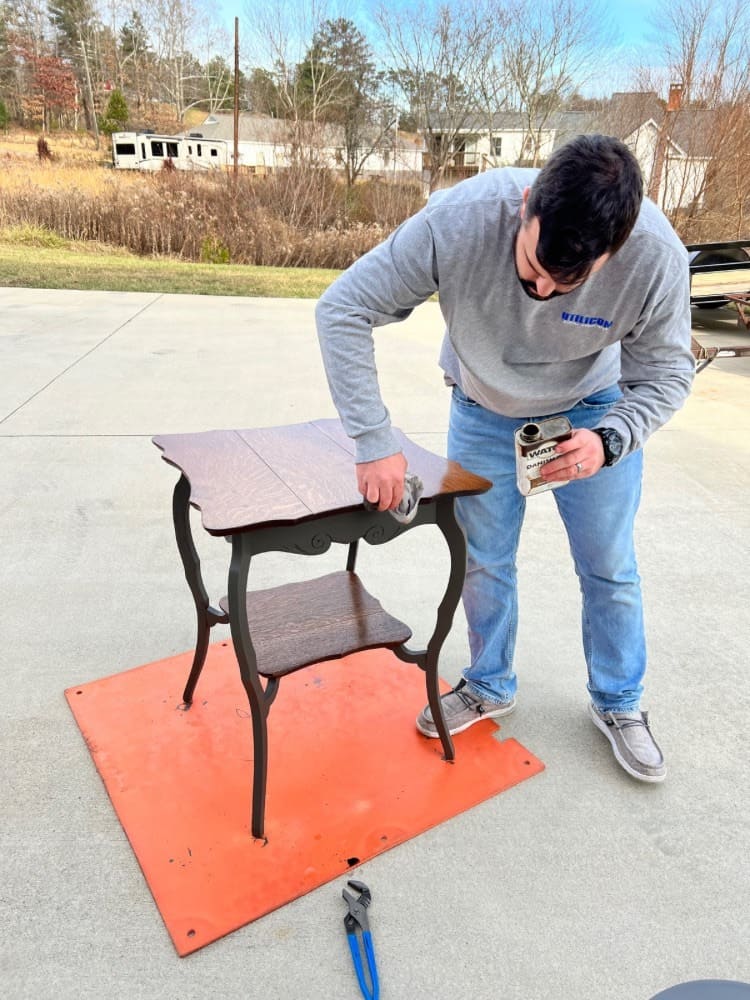
My husband found some Danish Oil that we already had in the garage and decided to try that on the tabletops. We had the Dark Walnut color and it worked out perfectly. The best part of DIY projects like this, is just rummaging through all your existing materials and craft supplies to see what you can use!

He just used an old rag to apply the oil with and let it dry fully in between coats. He used a total of two coats on the tabletops as well. I will say though, it was very sticky, even for several days after he applied the oil. So we thought we may have to sand it first and reapply the oil after.
But thankfully, after several days, it finally dried and was fine. I just think it needed a few days to completely cure. So as you can see, using this oil was a great option to enhance the natural beauty of this corner table!
Styling The Corner Table:
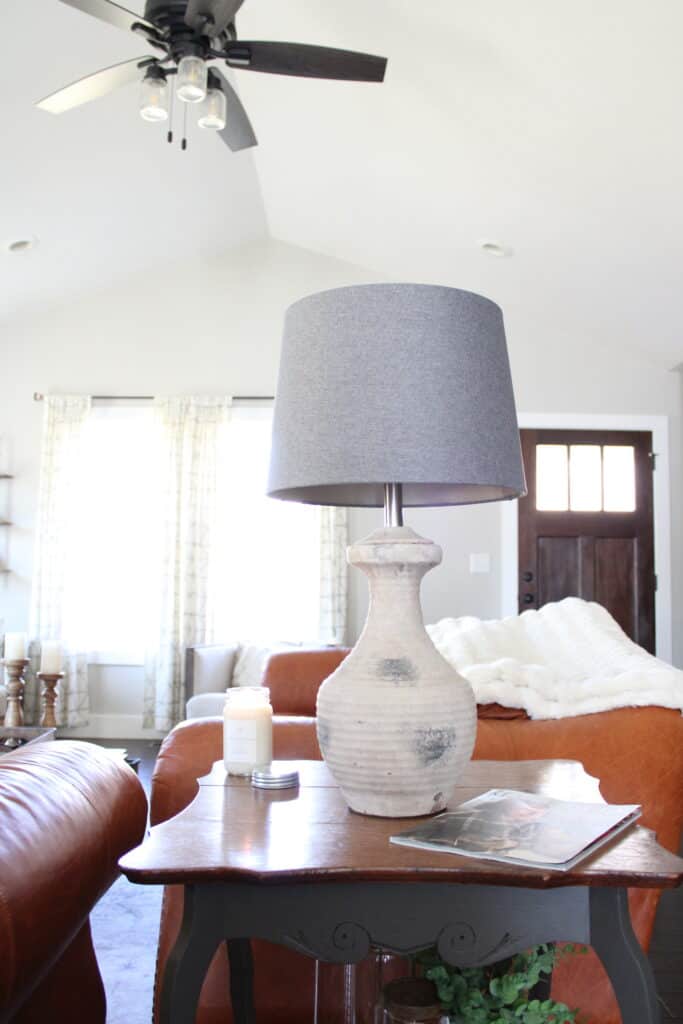
Now, for my favorite part, styling the corner table! I think the perfect way to style a side table like this is to add in a little lamp. But, since this table is in the corner of the room, we didn’t really have a plug near it. Therefore, we couldn’t just traditionally plug in a lamp there.
So we improvised. I found a tabletop lamp I loved from At Home store and even found a shade that was the perfect gray color to compliment the Oakham color too. The base of the lamp looks almost like concrete and has gray touches to it as well. So it was the best thing to add that matched the already existing colors.
But, to light it, my hubby found these amazing puck lights from Amazon that actually screw into the light base. And they are battery operated and can just turn off and on by the push of a button! How cool is that?!

If you remember, I used that puck light trick before on our entryway sconces, but those puck lights are flat and we had to tape them inside. I’ve never seen one shaped like an actual lightbulb before!
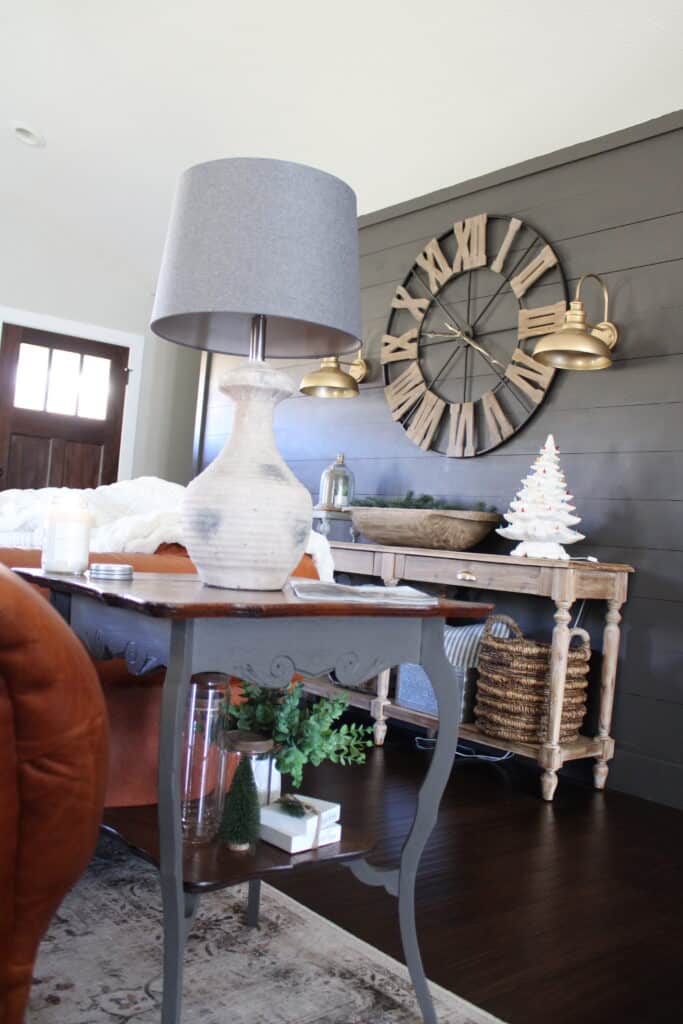
So I highly recommend these if you’re looking to add some lighting in a space where you don’t have a plug. And, we ended up just snipping the cord off from the lamp since we won’t be needing it anyway.
You can also add in an array of magazines and of course a seasonal candle. Y’all already know I have an Antique Candle Co. candle burning there as it is my favorite candle company!
And having this extra side table in the living room means I can burn more candles! This space is so big that sometimes one candle alone doesn’t cut it!
Enjoy the DIY Corner Table:
And that’s it! See how easy it is to create a custom desk or side table like this? You can really transform any piece of furniture you find with just a few simple touches like this! And we didn’t even have to use any power tools to create this DIY corner table! That’s the best part!
Also, we were able to cut out a lot of extra costs too since we already had all the materials needed, besides the table of course. So if you’re looking to create your own DIY desk or side table too, don’t forget to check out your local thrift stores or antique stores too. DIY doesn’t necessarily mean you have to build something from complete scratch!
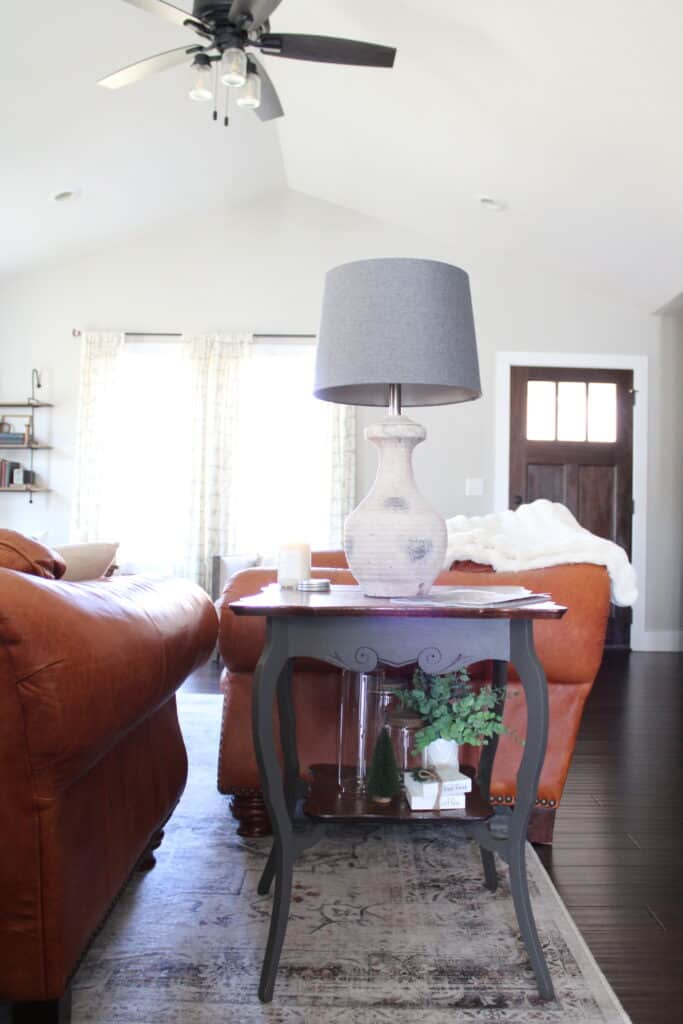
And plus, a lot of our home is already filled with made over antique pieces too. Such as our coffee table that’s an old railroad cart and my plant stand that my great-great uncle made! I love taking old pieces like this and making them more my style. And plus, can you even deal with how cute the legs are on this side table?!
I love the sassy little curves to them and I think the paint really enhances the curve and shape to them. I didn’t really notice them as much before painting!
Do you guys like to transform old furniture pieces like this to give them new life too?? If so, what is your favorite piece you have ever transformed? I would love to hear all about it below!


That was such a great thrift store find!!! It came out so pretty, love the color combo!
I’ve had those puck lights in my Amazon cart forever…you’ll have to tell me how you like them.
Awe thanks so much Jennifer. And I do really love the puck lights! They work perfectly for that lamp.
I love upcycling old furniture. It’s a great way to give a new lease of life to something that would otherwise end up in either a skip or a second-hand shop. If you can make use of it, then why not?
Thank you! I love up-cycling pieces like this too!
I love the way you have upcycled this corner table! It looks lovely in the room! x
Lucy | http://www.lucymary.co.uk
Thank you, I really appreciate it!
I’ve never up-cycled furniture before, but I’d love to start, and this table looks stunning. I love how you’ve styled it too, it really suits the space; your home looks gorgeous xx
Hannah | https://luxuryblush.co.uk/
Thank you so much Hannah. I really appreciate that!
I love your diy projects. You make it sound easy and fun. Beautifully done🤗
Pastor Natalie (ExamineThisMoment)
Letstakeamoment.com
Awe thank you so much! I really appreciate that!
That’s a lovely table and I love the finished result. I’ll be moving this year, so I have a feeling I’m going to want to take a lot of inspiration from you when it comes to furniture!
Thank you! I hope you do! And good luck with the move!
I love a good flip and it fits so perfectly in your home, the paint color and everything makes it look like it came with your home. Picture Perfect, and what I like about flips like this is you don’t have to spend tons to have that picturesque Pinterest/instagram look. Totally nailed it!
Thank you so much! I love that too! Always looking for a budget friendly makeover!
What a great find! This table turned out so beautiful. I have a few old furniture pieces and this definitely gave me some ideas. Thanks for sharing!
Thank you! So glad it gave you some ideas too!
I love the colour that you’ve used; it looks great and is such a great idea to upscale a table. Thanks for this idea!
Thank you so much! I love the color too!
Wonderful job on “fifth sparrow-ing no more” this cute table! And the puck light that is battery operated? Genius!
Thank you. And yes I love the puck lights! I use them often throughout the home!
Such a beautiful transformation, I love the colors you used
Thank you! I do too!