
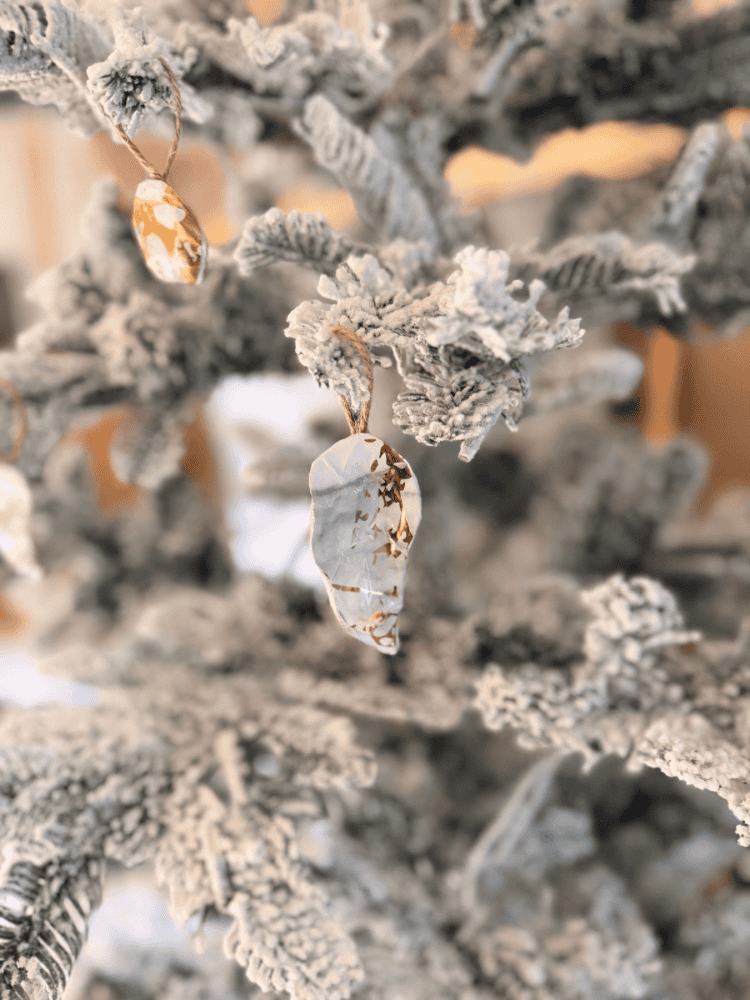
Is it ever too early to start making Christmas crafts?! I think not! Especially when they’re as cute and easy as these DIY oyster shell Christmas ornaments! 🎄
Y’all know how much I love Christmas decorating, and I’m always looking for fun and affordable ways to create unique holiday decorations for our home. So today, I’m sharing how I made these beautiful handmade oyster shell ornaments using just a few simple supplies!
You may remember the DIY oyster shell ghosts I made for Halloween a few weeks ago. Well, I still had quite a few oyster shells leftover from that project, and I started wondering what else I could make with them.
And then it hit me… Christmas ornaments, of course!
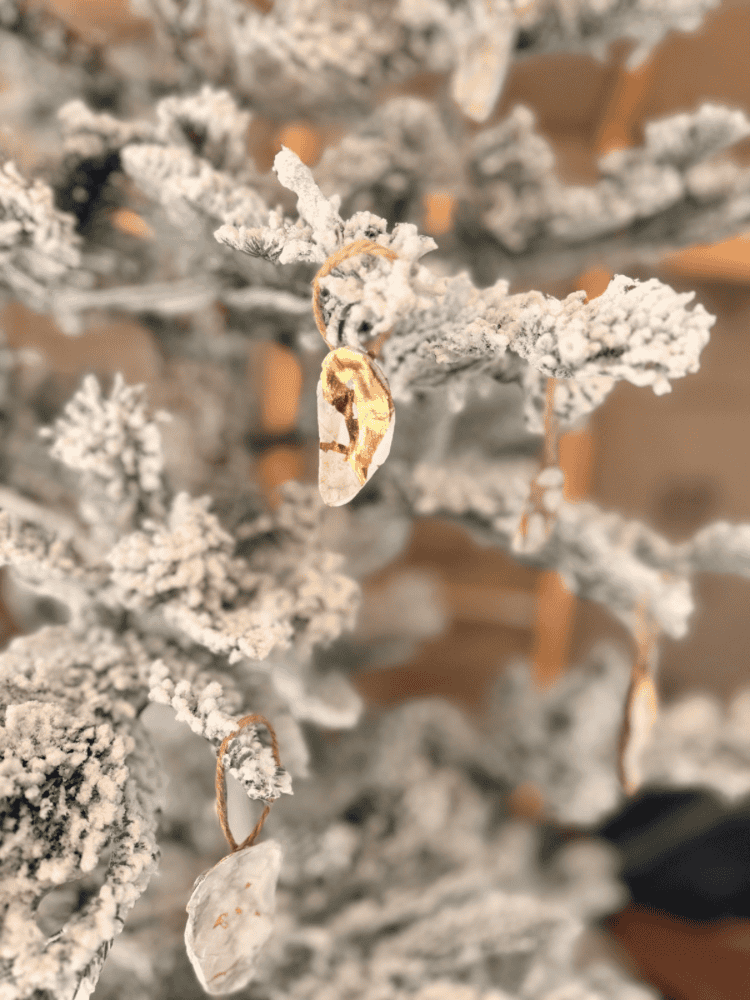
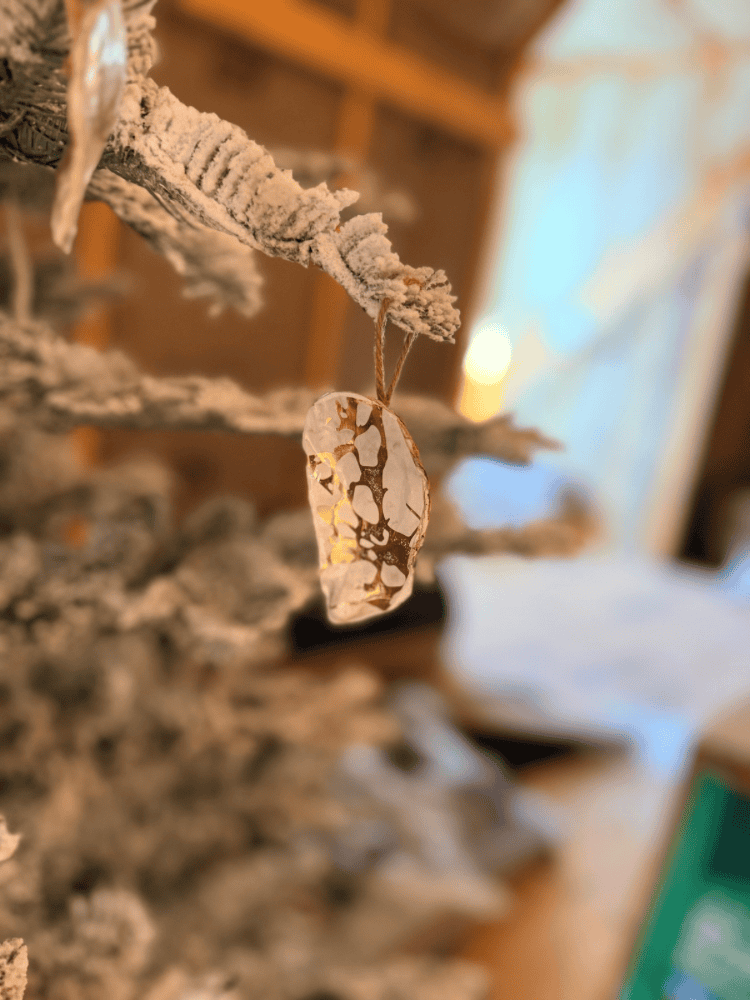
Since I love decorating our Christmas trees with gold accents, I decided to create these pretty decoupage oyster shell ornaments using metallic gold spray paint and festive wrapping paper.
And let me tell you, they turned out even prettier than I imagined!
Not only are these DIY coastal Christmas ornaments super easy to make, but they’re also a beautiful way to incorporate a little coastal charm into your holiday decor. Plus, if you collected your oyster shells during a beach vacation like I did, they make such a special keepsake too!
So if you’re looking for an easy Christmas craft, a unique handmade ornament idea, or a fun way to repurpose leftover oyster shells, keep reading for my full step-by-step tutorial!
This post also contains affiliate links, which means I make a small commission off anything you purchase through here, at no additional cost to you. Please read my full privacy policy for more details.
Why You’ll Love These DIY Oyster Shell Christmas Ornaments
There are so many reasons why I love making my own Christmas ornaments, but these oyster shell ornaments might just be one of my favorite holiday crafts yet!
First of all, they’re incredibly easy to make. You don’t need any fancy crafting equipment or advanced DIY skills to create something beautiful.
And since oyster shells come in all different shapes and sizes, every ornament turns out a little different. Which I think makes them even more special!
Here are a few reasons why these handmade Christmas ornaments are worth trying:
- They’re budget-friendly and require just a handful of supplies.
- You can customize them with different wrapping paper patterns and paint colors.
- They’re perfect for coastal, traditional, vintage, or neutral Christmas decorating styles.
- They make thoughtful handmade Christmas gifts.
- They’re a fun way to preserve memories from a beach vacation.
- They’re an easy Christmas craft you can make ahead of the busy holiday season.
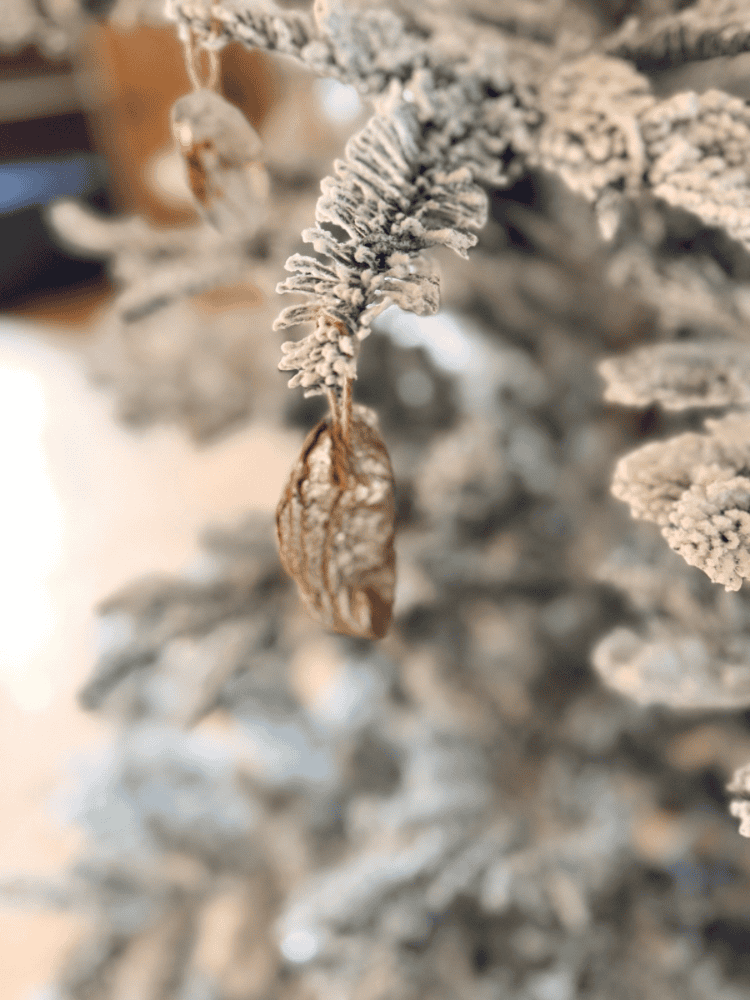
I also love that these ornaments look much more expensive than they actually are!
With the metallic gold finish and pretty Christmas wrapping paper, they have such an elegant, vintage-inspired look. And y’all know I’m all about that when it comes to Christmas decor!
Materials Needed for DIY Oyster Shell Christmas Ornaments
Before getting started, you’ll need to gather a few simple crafting supplies.
Thankfully, I already had most of these materials on hand from previous DIY projects, which made this Christmas craft even more affordable!
Here’s everything I used:
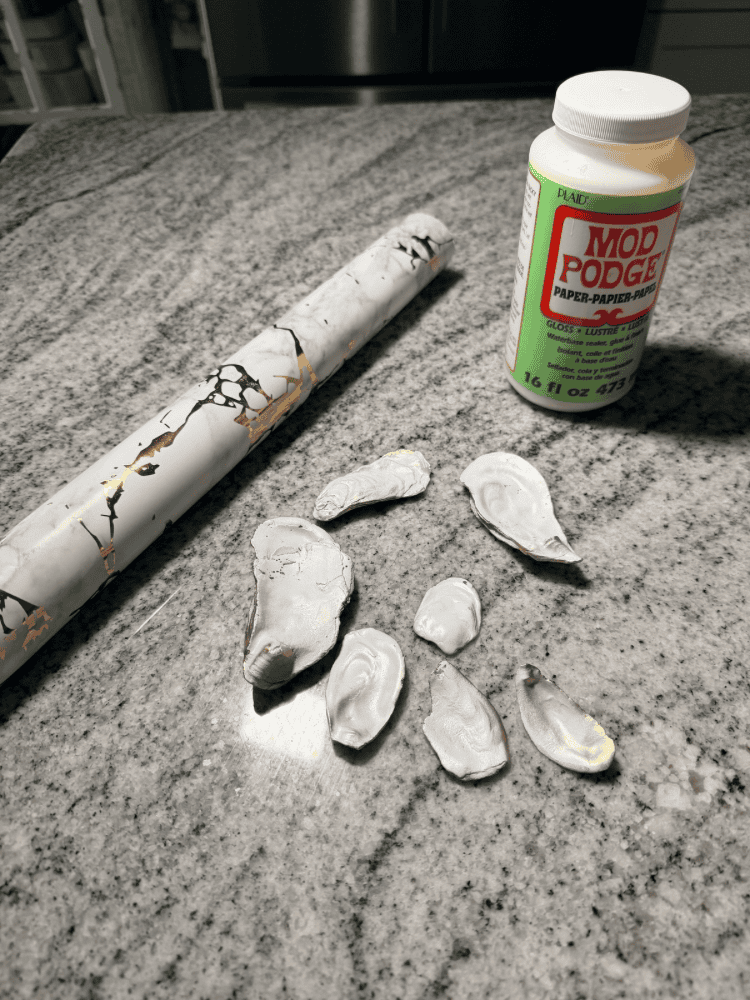
- Oyster shells (I brought a bunch home from our Myrtle Beach vacation this summer!)
- White spray paint
- Metallic gold spray paint
- Christmas wrapping paper
- Mod Podge
- Paintbrush
- Twine
- Hot glue gun and glue sticks
- Scissors
For my ornaments, I chose wrapping paper with beautiful white and gold details to coordinate with the rest of my Christmas decorations.
However, you can use whatever wrapping paper you love!
Traditional red and green patterns, vintage Christmas prints, blue and white designs, or even neutral botanical patterns would all look beautiful.
That’s one of my favorite things about this DIY project. You can completely customize the ornaments to match your own Christmas tree!
How to Make DIY Oyster Shell Christmas Ornaments
Now for the fun part!
These DIY decoupage oyster shell ornaments are surprisingly simple to make. And once you get the hang of the process, you can make several ornaments at once.
Here’s exactly how I made mine!
Step 1: Clean and Dry Your Oyster Shells
The first thing I did was thoroughly wash all my oyster shells.
Since I collected these during our summer trip to Myrtle Beach, I wanted to make sure there wasn’t any leftover sand, dirt, or debris on them before getting started.
I rinsed and cleaned each shell and then allowed them to dry completely.
This is an important step because you want the surface to be clean and dry before applying spray paint.
I also sorted through my shells to choose the ones I thought would make the prettiest Christmas ornaments.
I personally love using a variety of shapes and sizes because it gives the finished ornaments a more natural, handmade appearance!
Step 2: Spray Paint the Oyster Shells
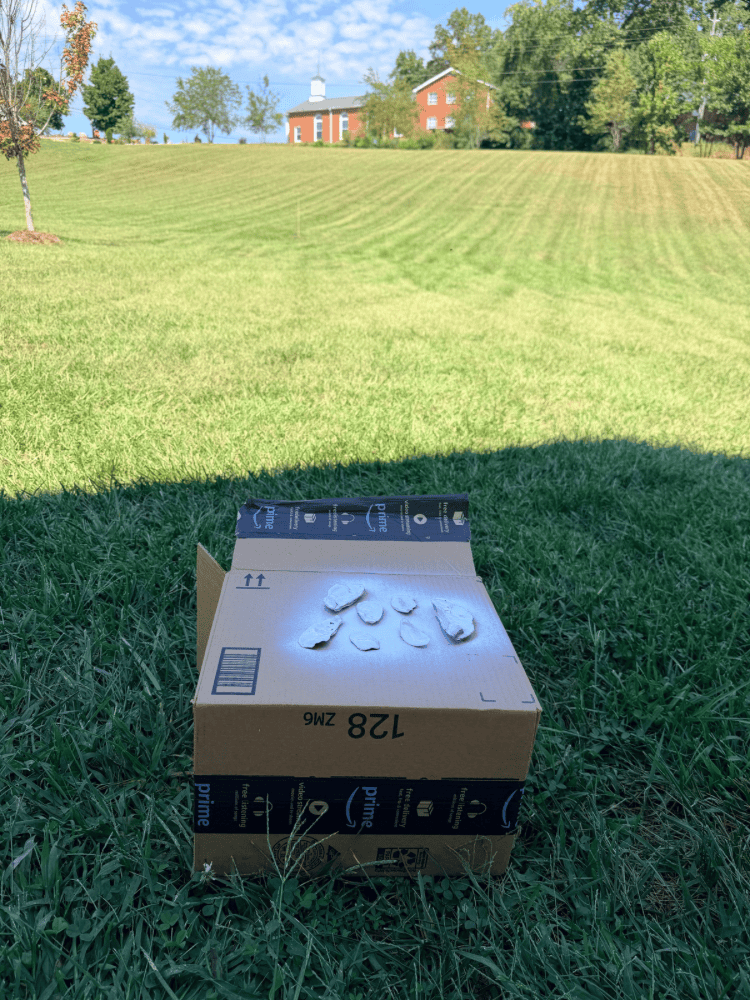
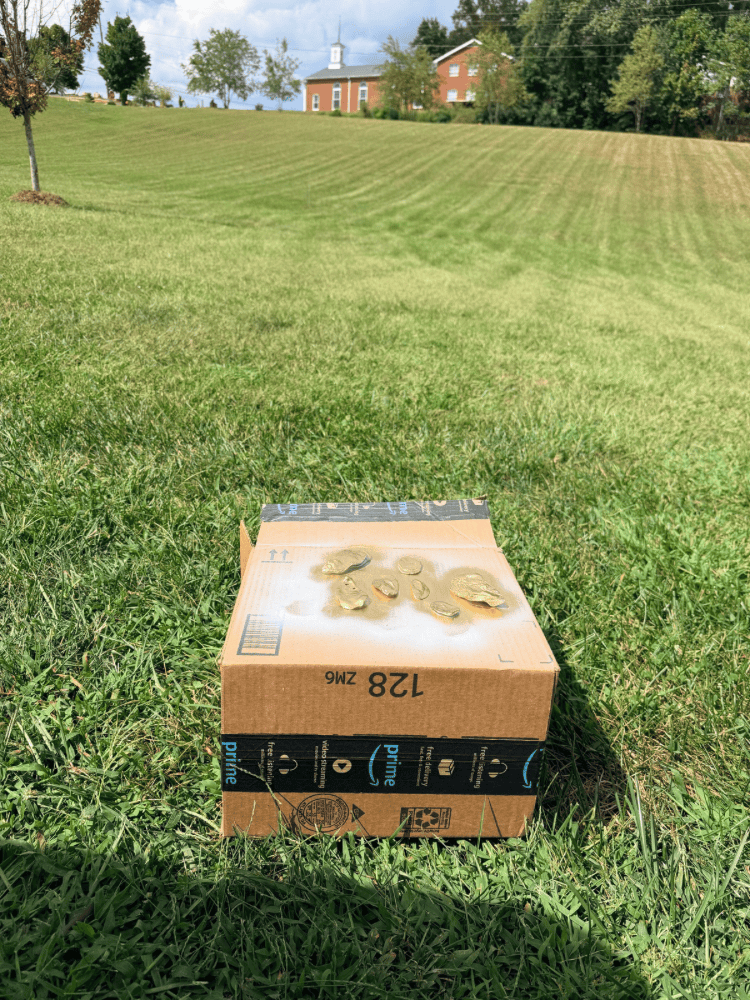
Once my oyster shells were completely dry, I took them outside to spray paint.
For the inside of each oyster shell, which is where I planned to apply the Christmas wrapping paper, I used white spray paint.
I wanted a nice, clean background underneath the paper so the pattern would show up beautifully.
Then, for the back of each oyster shell, I used metallic gold spray paint.
And y’all know how much I love gold Christmas decorations, so this was an easy choice for me!
The gold finish adds such a pretty, elegant touch to the ornaments and coordinates perfectly with the gold and white wrapping paper I chose.
I applied a couple of light coats of spray paint, allowing each coat to dry before applying the next.
Be sure to spray paint outdoors or in a properly ventilated area and follow the drying instructions on your paint can.
You could also use silver, champagne, white, or another color that coordinates with your Christmas tree.
Step 3: Trace and Cut Your Christmas Wrapping Paper
After the spray paint had completely dried, it was time to add the decorative wrapping paper!
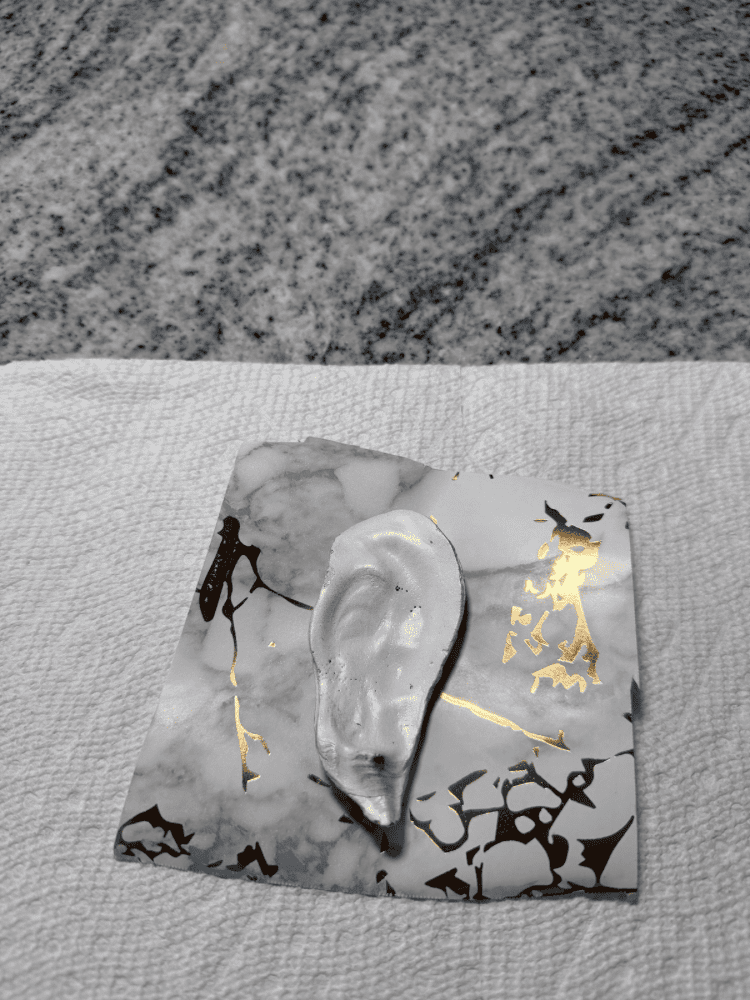
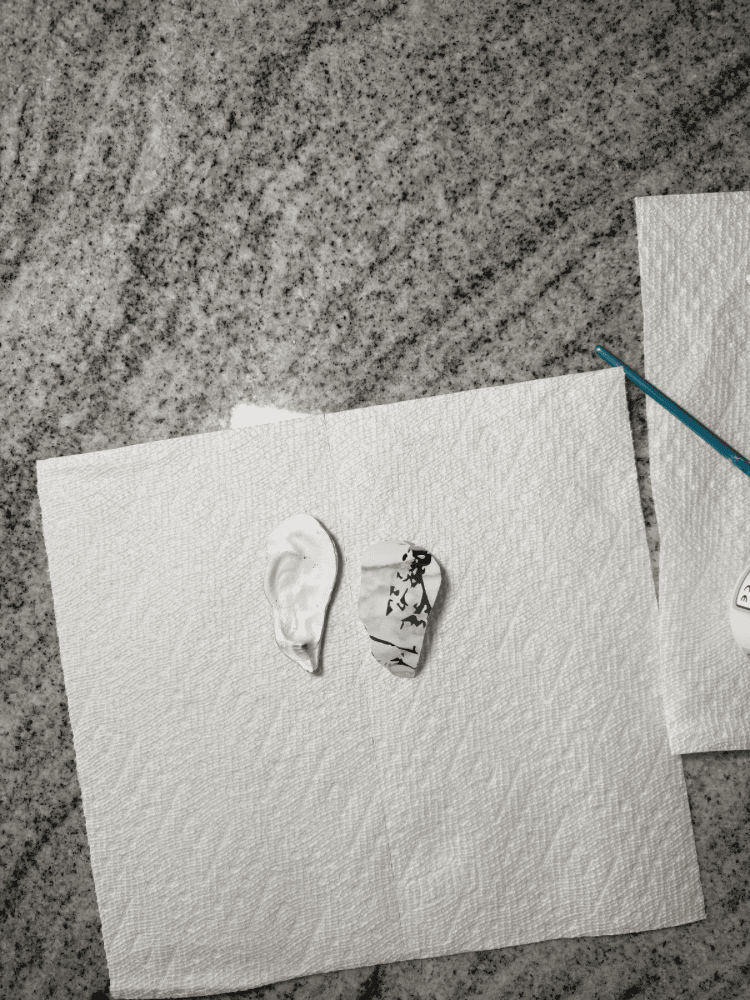
I placed each oyster shell onto my chosen wrapping paper and traced around its shape.
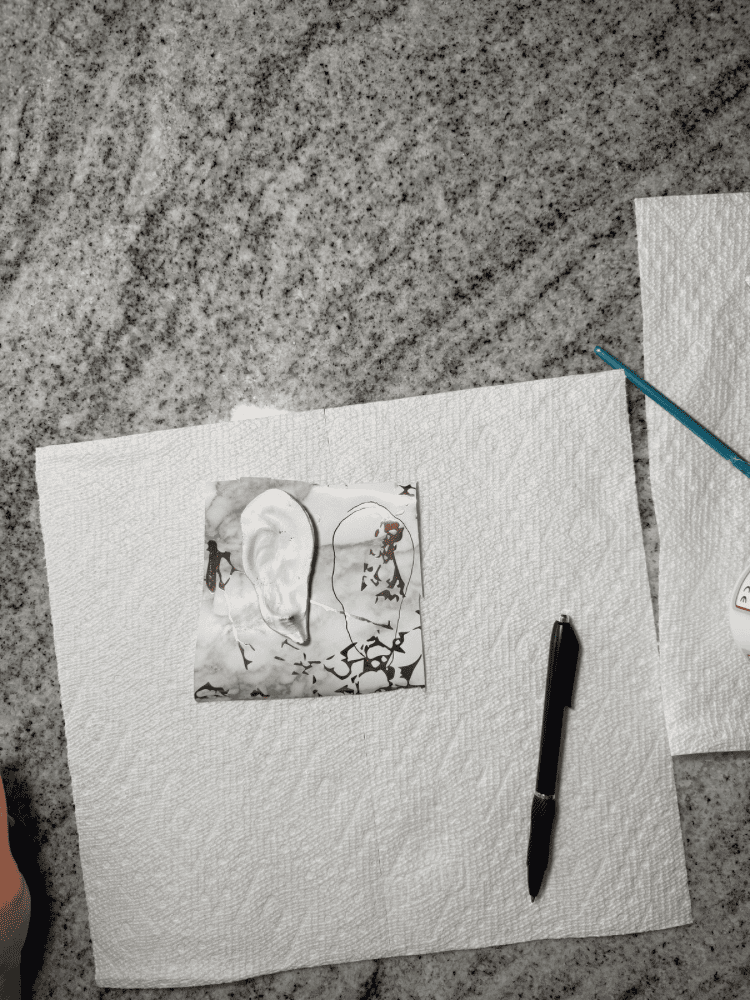
Then, using scissors, I carefully cut out the traced pieces.
Don’t worry if your wrapping paper pieces are a little too big at first!
You can always trim them down as needed to fit inside the oyster shells.
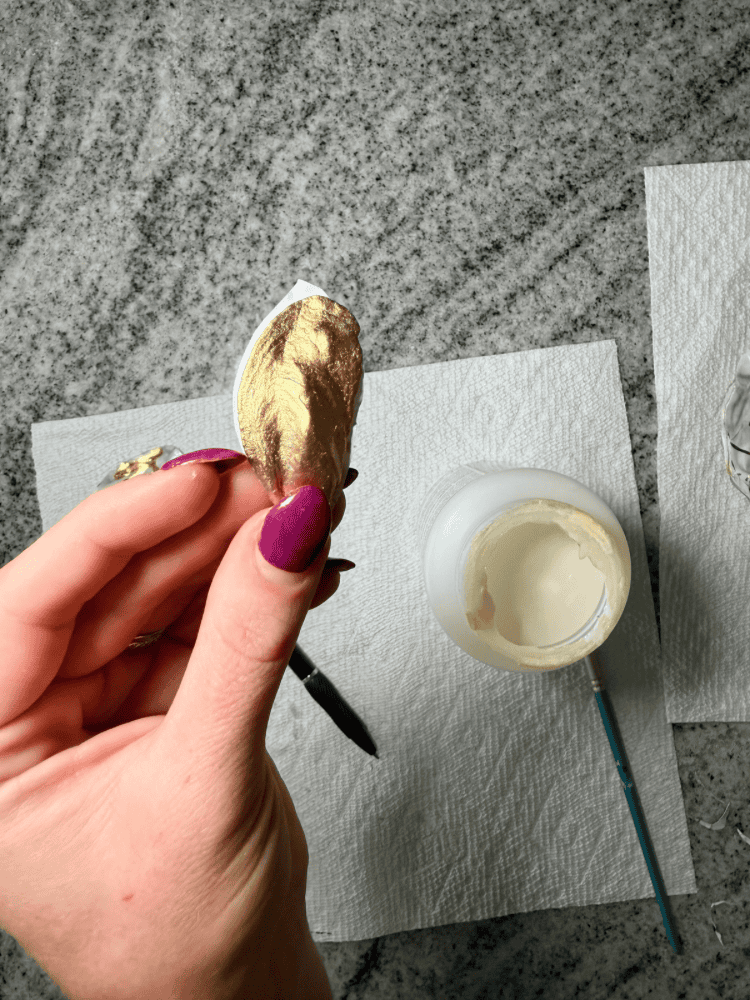
Since oyster shells aren’t perfectly shaped, you may need to make a few adjustments to get the paper to fit just right.
And that’s totally okay!
The goal is to cover the inside of the shell with your pretty Christmas pattern while still allowing some of the painted edges to show.
Step 4: Apply Mod Podge to the Oyster Shells
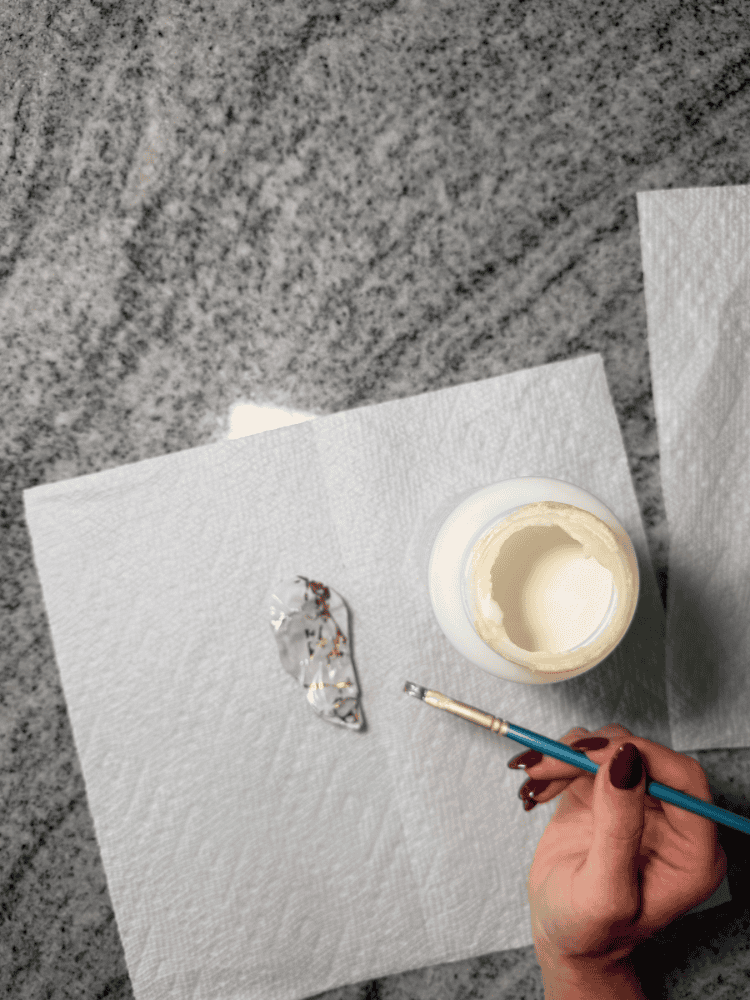
Next, I grabbed my Mod Podge and a paintbrush.
I applied a thin, even layer of Mod Podge to the inside of each oyster shell.
Then, I carefully placed my cut-out wrapping paper onto the shell, gently smoothing it into place.
Once the paper was positioned where I wanted it, I applied another thin layer of Mod Podge directly over the top.
This helps adhere the paper to the shell and gives the ornament a finished appearance.
Since oyster shells have a naturally curved and uneven surface, you may notice a few small wrinkles in the paper.
I wouldn’t stress too much about that!
I think the slightly imperfect look adds to the charm of these handmade Christmas ornaments.
After applying the Mod Podge, I set the shells aside and let them dry completely.
Step 5: Add Twine to Hang Your Ornaments
Once the Mod Podge had dried, it was time to turn the decorated oyster shells into actual Christmas ornaments!
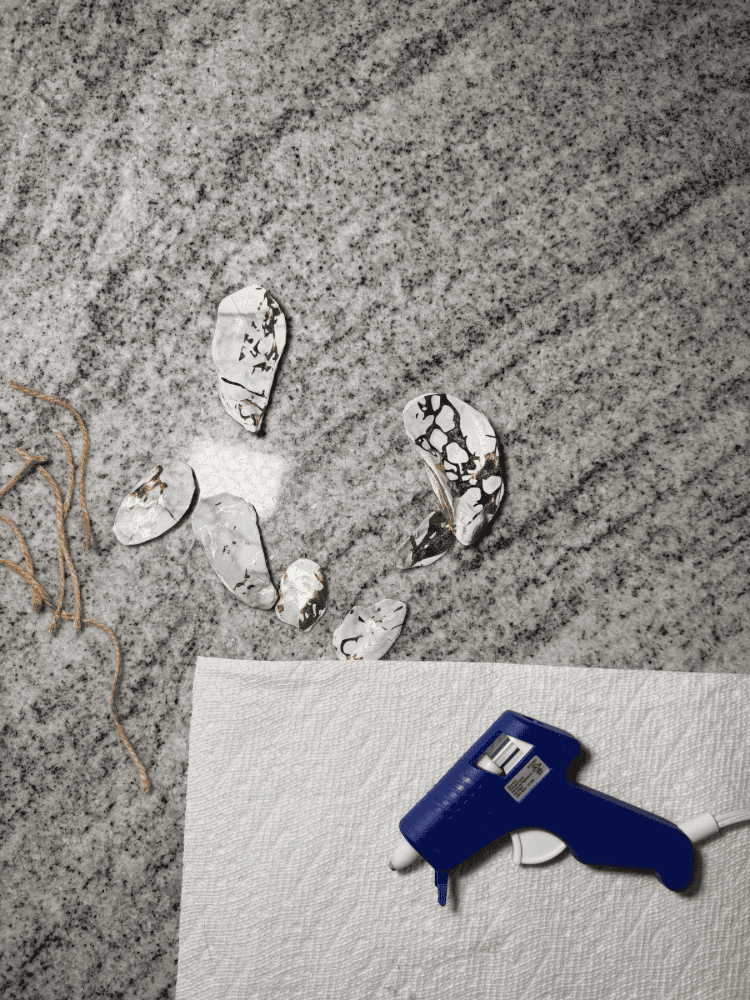
For this step, I used a hot glue gun and some twine.
I cut a small piece of twine and folded it into a loop to create a hanger.
Then, I added a dollop of hot glue to the back of each oyster shell and secured the ends of the twine in place.
I made sure to position the twine near the top of the shell so the ornament would hang nicely on the Christmas tree.
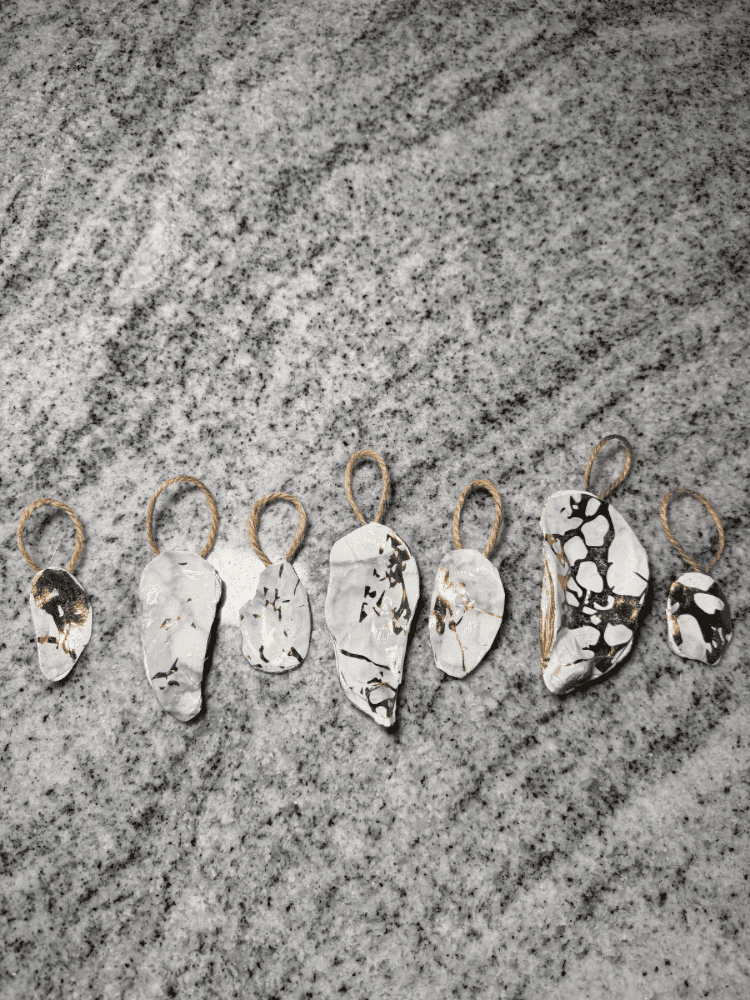
After allowing the hot glue to cool and harden, my DIY oyster shell Christmas ornaments were officially finished!
And that’s it!
Seriously, how easy was that?!
Tips for Making Beautiful Decoupage Oyster Shell Ornaments
Although this is a pretty straightforward Christmas craft, I wanted to share a few tips to help your ornaments turn out beautifully.
Choose Wrapping Paper With Smaller Patterns
Since oyster shells are relatively small, I recommend choosing wrapping paper with smaller designs.
That way, you can actually see the Christmas pattern once the paper is cut to fit inside the shell.
I love using delicate gold details, vintage-inspired prints, and simple holiday patterns for projects like this.
Don’t Use Too Much Mod Podge
A little Mod Podge goes a long way!
I recommend applying thin layers instead of using too much at once.
This can help prevent the wrapping paper from becoming overly saturated or wrinkled.
Let Everything Dry Completely
I know it’s tempting to rush through a fun Christmas craft, especially when you’re excited to see the finished product!
But allowing the spray paint and Mod Podge to dry fully will make the process much easier.
Customize the Colors to Match Your Christmas Tree
One of the best things about making your own ornaments is being able to choose exactly how you want them to look.
I went with white and metallic gold because those colors coordinate with my Christmas decorations.
But these would also be gorgeous with blue and white chinoiserie-style wrapping paper, traditional Christmas colors, or even vintage Santa designs!
The possibilities really are endless!
How to Decorate With Oyster Shell Christmas Ornaments
Of course, the most obvious way to display these handmade oyster shell ornaments is by hanging them on your Christmas tree!
But there are several other fun ways you could incorporate them into your holiday decorations too.
For example, you could hang them from a Christmas garland draped across your mantel or staircase.
They would also look beautiful tied onto wrapped Christmas presents as a special handmade gift topper.
And if you’re planning a coastal Christmas theme, these would be such a pretty addition to a tree decorated with seashells, starfish, neutral ribbons, and other beach-inspired ornaments.
You could even make several matching oyster shell ornaments to give as gifts to friends and family!
I especially love the idea of gifting them to someone you traveled to the beach with.
It’s such a sweet way to remember a special vacation while also creating something beautiful for Christmas.
Frequently Asked Questions About DIY Oyster Shell Ornaments
Can You Use Wrapping Paper to Decoupage Oyster Shells?
Yes! Wrapping paper works great for creating decoupage oyster shell ornaments.
Just keep in mind that some wrapping paper is thinner than others, so it’s best to use a light layer of Mod Podge and gently smooth the paper onto the shell.
Can You Use Napkins Instead of Wrapping Paper?
Absolutely! Decorative paper napkins are another popular option for decoupage crafts.
If you’re using printed napkins, separate the decorative top layer from the backing layers before applying it to your oyster shell.
What Kind of Paint Should You Use on Oyster Shells?
I used white and metallic gold spray paint for my ornaments.
However, you could also experiment with acrylic craft paint if you prefer to paint your oyster shells by hand.
Do You Have to Drill Holes in Oyster Shells to Make Ornaments?
Nope!
For this particular DIY oyster shell ornament tutorial, I simply attached a small loop of twine to the back of each shell using hot glue.
That means there’s no drilling required!
Can You Make These Oyster Shell Ornaments Ahead of Christmas?
Definitely!
In fact, I think this is the perfect Christmas craft to make early in the season.
Once everything is completely dry, you can carefully store the ornaments until you’re ready to decorate your Christmas tree.
Enjoy Your Handmade Oyster Shell Christmas Ornaments!
I am absolutely in love with how these DIY oyster shell Christmas ornaments turned out!
Who knew that a handful of leftover oyster shells, some spray paint, and Christmas wrapping paper could create such beautiful holiday decorations?!
I especially love that these ornaments are completely customizable. You can use whatever colors and patterns you want to coordinate with your Christmas tree and personal decorating style.
And since my oyster shells came from our Myrtle Beach vacation, they also have a little sentimental value, which makes them even more special!
I think handmade Christmas ornaments are some of the sweetest decorations because they tell a story and bring back memories year after year.
Plus, this is such an easy and affordable Christmas craft that you could make several ornaments in one afternoon!
If you love coastal Christmas decorations, DIY holiday crafts, or creating unique ornaments for your tree, I definitely recommend giving this project a try.
And if you make these DIY oyster shell Christmas ornaments too, be sure to let me know how they turned out in the comments below!
I’d love to hear what colors and wrapping paper patterns you decided to use!
Happy Christmas crafting, y’all! 🎄🤍
Other DIY Christmas Ornament Ideas:
- How to Make DIY Christmas Ornaments with a Cricut Machine
- DIY Mercury Glass Ornaments
- Salt Dough Ornaments
- DIY Wood Bead Ornament



Leave a Reply