Well, guess who caused a little neighborhood excit Well, guess who caused a little neighborhood excitement this morning and had to call 911?! 🙋🏻‍♀️😅

It all started when our carbon monoxide detector kept going off. Naturally, I tried replacing the battery first, but that didn’t help. 🙃

So there I was, frantically trying to get ahold of my husband, who OF COURSE was in a meeting and couldn’t answer, while simultaneously trying to round up all three cats and get everyone outside. 😹

And what does any responsible 33-year-old adult woman do in a situation like this?! CALL HER MOM. 🤣

Literally called my mom to ask if I should call 911 because apparently I still need adult supervision when it comes to adulting. 😂

Well, the fire department showed up, checked everything out, and THANKFULLY there was no carbon monoxide leak! 🙌🏻

Turns out our carbon monoxide alarm was just old and needed replacing. It was over five years old! 🙃

So now I feel a little ridiculous for causing such a commotion, but better safe than sorry, right?!

AND in my defense, our gas fireplace hasn’t been working, and my husband was messing with it last night. So naturally, my mind went straight to a possible gas leak. 😬

Thankfully, everyone is safe, the cats are probably traumatized from their unexpected evacuation, and I’ve officially had enough excitement for one morning. 🤣

So here’s your friendly reminder to check your carbon monoxide detectors, replace them according to the manufacturer’s recommendations, and NEVER ignore an alarm! 🚨

And if you’re one of my neighbors, sorry about all the fire trucks and sirens this morning. Just your local neighborhood drama queen keeping things interesting! 😜

Please tell me I’m not the only grown adult who still calls their mom when something goes wrong?! 🤣👇

Also, shoutout to the fire department for being so nice and telling me I did the right thing by calling. That made me feel slightly less ridiculous at least 😜
🚨 THE BIGGEST MINKY COUTURE BLANKET SALE OF THE YE 🚨 THE BIGGEST MINKY COUTURE BLANKET SALE OF THE YEAR IS HERE!! 🚨
And trust me, you do NOT want to miss this one! 😍

Today only, you can score 60% OFF Minky Couture blankets PLUS FREE SHIPPING on orders of $100 or more! 🎉

If you’ve never experienced a Minky Couture blanket before, you’re seriously missing out! These are hands down some of the softest, coziest luxury blankets EVER. And don’t just take my word for it… my three cats are officially Minky obsessed! 😹🐾 There’s nothing Toby, Riley, and Charlie love more than curling up for a cozy cat nap on one!

And with Christmas right around the corner, these blankets make the PERFECT Christmas gifts! 🎄🎁 Whether you’re shopping for your mom, best friend, husband, or just treating yourself (because you deserve it 😉), you really can’t go wrong with a Minky!

But here’s the catch… this HUGE Minky Couture sale only happens ONCE A YEAR! So if you’ve been waiting for the perfect time to stock up on cozy blankets or get a head start on Christmas shopping, THIS IS IT!

✨ 60% OFF blankets
✨ FREE shipping on orders $100+
✨ Once-a-year savings!

Comment “shop” below and I’ll send you the link! 👇🏻 Are you shopping for Christmas gifts or treating yourself?! Because I’m definitely team BOTH! 🤣

Save this post and send it to your blanket-obsessed bestie so they don’t miss out! 🛍️
POV: You’re craving cheesy, delicious chicken ench POV: You’re craving cheesy, delicious chicken enchiladas but have ZERO desire to go grocery shopping. 🤣🌮

If you’re looking for easy, high-protein dinner ideas that don’t require spending hours meal planning or wandering around the grocery store, you NEED to try @hungryroot! 🙌🏻

I made these high-protein green chile chicken enchiladas and y’all, they were SO good! 😍 Cheesy, flavorful, fresh, and seriously so easy to make!

The best part?! Hungryroot delivered all the fresh ingredients straight to my door, along with simple, step-by-step instructions. No complicated recipes, no last-minute grocery runs, and no stressing over what to make for dinner! 👏🏻

And with the busy holiday season right around the corner, I’m all about finding ways to make life a little easier! Between Christmas decorating, shopping, baking, and everything else on my to-do list, the LAST thing I want to worry about is what we’re having for dinner. 🤣🎄

✨ Want to try Hungryroot for yourself?Use my code CHARITY40 to get 40% off your first box!

Tell me below: Are you team meal planning or team figuring out dinner at the very last minute?! Because I’m definitely guilty of the latter! 🤣

#hungryrootpartner
Apparently being a homebody is a personality trait Apparently being a homebody is a personality trait now… and I’m fully embracing it. 😂

Sorry, but staying home with my cats, reading a good book, and being cozy sounds WAY better than having plans. 📚🐈

Don’t get me wrong, you might catch me out and about every once in a while… but just know I’ll need approximately 2–3 business days at home afterward to recover from all that socializing. 🤣

At this point, my ideal weekend is canceled plans, comfy clothes, a good book, and my cats nearby. Homebody life just suits me. 👏🏻

Please tell me I’m not alone! Where are all my fellow introverts, homebodies, book lovers, and cat moms?! 👇🏻

Comment SHOP below to receive a DM with the link to this post on my LTK ⬇ https://liketk.it/6o9N9

#introvertlife #introverting #homebody #homebodylife #catmom
Too early to start Christmas crafting?! I think no Too early to start Christmas crafting?! I think not! 😜🎄

I had some extra oyster shells left over from our beach trip this summer, so instead of letting them sit around, I turned them into these DIY oyster shell Christmas ornaments! You may remember I turned some of the shells into cute little ghosts for Halloween too 👻 But now we’re officially moving on to Christmas crafts!

And I am obsessed with how these turned out! All I needed was some spray paint, pretty wrapping paper, Mod Podge, twine, and hot glue to transform ordinary oyster shells into high-end looking coastal Christmas ornaments.

Not only are these such a pretty addition to your Christmas tree, but they’re also a sweet vacation keepsake! Every year when you pull them out, you’ll have a little reminder of that summer beach trip. 🥹

I always decorate my Christmas tree with gold, so these are going to fit in perfectly with my Christmas decor this year! 🎄

Save this easy DIY Christmas ornament idea for your holiday crafting list!

Would you turn your vacation seashells into Christmas ornaments too?! 🦪

Comment SHOP below to receive a DM with the link to this post on my LTK ⬇ https://liketk.it/6n6d0

#diychristmas #diyornaments #christmasdiy #coastalchristmas #shells
We had the BEST time this weekend at the Carolina We had the BEST time this weekend at the Carolina Charm event at @therevelry_clt benefiting the Isabella Santos Foundation! 💕

From the beautiful venue to the amazing food, drinks, and atmosphere, everything about this night was incredible! And getting to meet @relationshep and @salleycarson from Bravo’s Southern Charm was just the cherry on top! 🍒

Y’all already know how obsessed I am with Charleston and Southern Charm, so this event was basically MADE for me! 🤣 Plus, any excuse to get all dressed up, feel fancy, and enjoy a night out for a great cause? Count me in! 🥂

And the best part was knowing that all the fun was supporting the @isftorch and its mission to help children battling rare pediatric cancers. 💛

At this point, I’ve pretty much met the entire Southern Charm cast except Austen and Madison! So if y’all are reading this, I guess you’re next on my list! 🤣👏🏻

Now I need to know… are you a Southern Charm fan too?! And if so, who’s your favorite cast member?! 👀

Comment SHOP below to receive a DM with the link to this post on my LTK ⬇ https://liketk.it/6qajE
Things we’re ghosting this season: waiting until N Things we’re ghosting this season: waiting until November 1st to decorate for Christmas. 🤣

Sorry, but some of us have approximately 57 Christmas trees to put up, and that kind of commitment takes TIME. 😜🎄

And if you think I’m waiting until Halloween is over to start decorating for Christmas, you’ve got another thing coming. 🤣 I may or may not already have a few trees up around the house. 🤫

Listen, I love spooky season just as much as the next person, but there’s absolutely nothing wrong with having pumpkins AND Christmas trees out at the same time. It’s called balance, okay?! 👻🎄

So consider waiting until November to decorate for Christmas officially GHOSTED. ✌🏻

Now tell me, are you team Christmas decorating in October or team wait until after Thanksgiving?! 👀
Bless my poor husband’s heart because when he marr Bless my poor husband’s heart because when he married me, I don’t think he realized he was signing up for a lifetime of Christmas decorating chaos! 😂

But when you’re a Christmas-obsessed wife who believes EVERY single room in the house deserves its own Christmas tree, you have to start decorating early, right?! 🎅🏻

I mean, putting up multiple Christmas trees, hanging garland, and transforming our entire home into a cozy Christmas wonderland takes TIME! So obviously, October is a perfectly reasonable time to start decorating for Christmas. At least that’s what I keep telling him! 😜

Thankfully, after 10 years of marriage, he knows the drill and just goes along with all my crazy Christmas decorating ideas. He’s a keeper for sure! ❤️

Now PLEASE tell me I’m not the only one who starts decorating for Christmas in October?! 🎄🤣 And how many Christmas trees do you put up in your house?! 

Comment SHOP below to receive a DM with the link to this post on my LTK ⬇ https://liketk.it/6pAfP
#ad 🎃🐈‍⬛ Don’t throw away that empty cat litter ju #ad 🎃🐈‍⬛ Don’t throw away that empty cat litter jug… turn it into a Halloween boo basket for your cats instead! I’m partnering with @catspride today to put an empty Cat’s Pride litter jug to good use with the cutest little upcycling project. Since the jug was already the perfect Frankenstein green, I knew exactly what I wanted to make! 💚 After cleaning the empty jug thoroughly, we cut off the top to create a basket shape. Then I used my Cricut to add a Frankenstein face before filling it with some of Riley and Toby’s favorite cat treats and Halloween toys. And judging by Toby’s reaction to that catnip owl, I’d say this DIY cat boo basket was a success. 😹 And before the jug was transformed, Cat’s Pride made litter box duty a whole lot easier. I love the odor control and easy scooping, and Riley and Toby are always VERY interested when a fresh box of litter appears. 😂 So consider this your sign to save your next empty litter jug and get creative with it! And when it’s time to stock up on fresh litter, check out Cat’s Pride for your own feline crew. 🐾 Would you make a Halloween boo basket for your cats?! 🎃👇🏻
If you’re wondering what to do with all that lefto If you’re wondering what to do with all that leftover Halloween candy, these Leftover Halloween Candy Cookies are the answer! They combine two of my favorite things: candy AND cookies! So you really can’t go wrong. 🤣

Just chop up your favorite leftover chocolate candy bars, mix them into the cookie dough, and you’ve got the ultimate easy post-Halloween treat! Plus, every cookie is a little different depending on what candy you throw in. 🙌🏻

This is such a fun way to use up leftover Halloween candy instead of letting it sit around for the next six months. 😂

Want my Leftover Halloween Candy Cookies recipe? Comment “RECIPE” below and I’ll send it your way! 🍪
  • Home
  • Subscribe
  • About Me
  • The Blog
    • DIY
      • Turning a Builder Grade Home Into Something More
      • Outdoor
      • Home Improvement
      • Repurpose and Upcycling
      • Home Decor
        • Christmas
        • Everyday Decor
        • Fall
        • Spring
        • Summer
        • Winter
    • Recipes
      • What To Cook?
    • Travel
      • Traveling and Antiquing
      • Lifestyle
    • Whimsy Home Wednesday
  • Contact Me
  • Privacy Policy
    • Disclaimer

Mornings on Macedonia

DIY, Decor, & More

Repurpose and Upcycling · February 21, 2020

How to Paint and Distress a Mirror Frame

Hey guys! So I am finally getting around to sharing with you all about how I took my $15 mirror frame I found while out antique hunting in Pigeon Forge, and transformed it into something that fit my home esthetic better by using a little fusion mineral paint and some antiquing glaze. So I thought it would be fun to show you how to paint and distress a mirror frame just like I did here.

This was such a fun project to do and I am so happy with how it turned out. I will give you all the tips and details on just how I painted and distressed this mirror frame and I will show you just how easy it was!

I was surprised it was so simple and easy to transform it into something I love even more. Keep on reading for the directions.
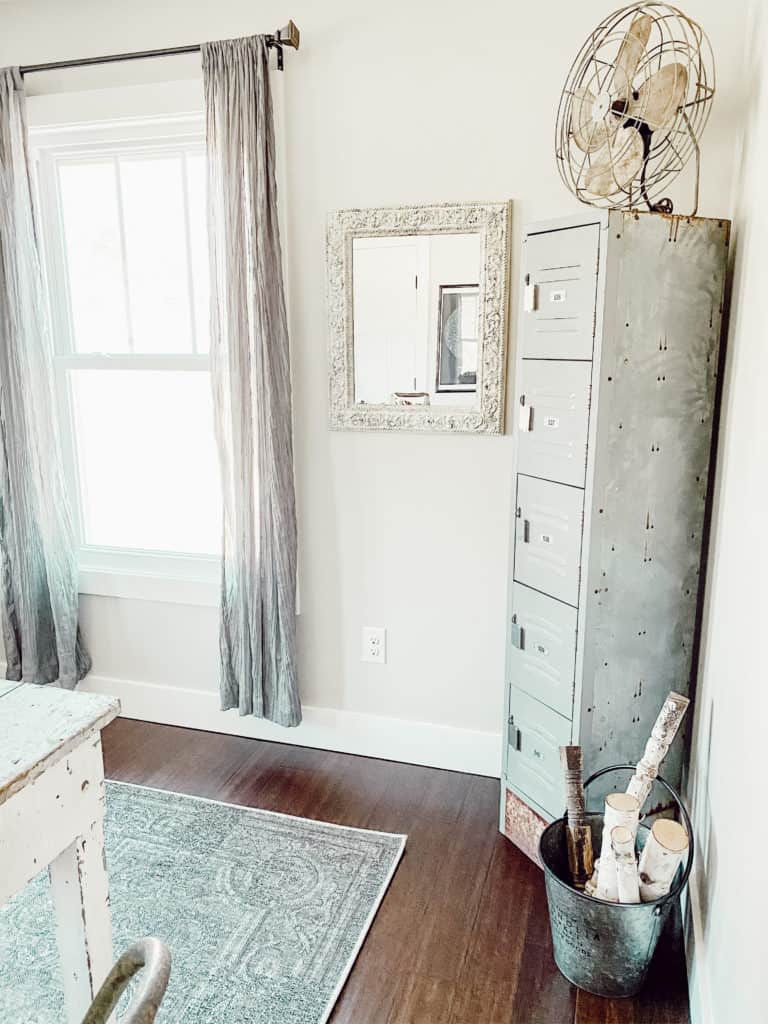
Painted and distressed Mirror frame
I think it turned out perfectly for my office space!

Supplies Needed:

  • Mirror frame (you could also use a picture frame too)
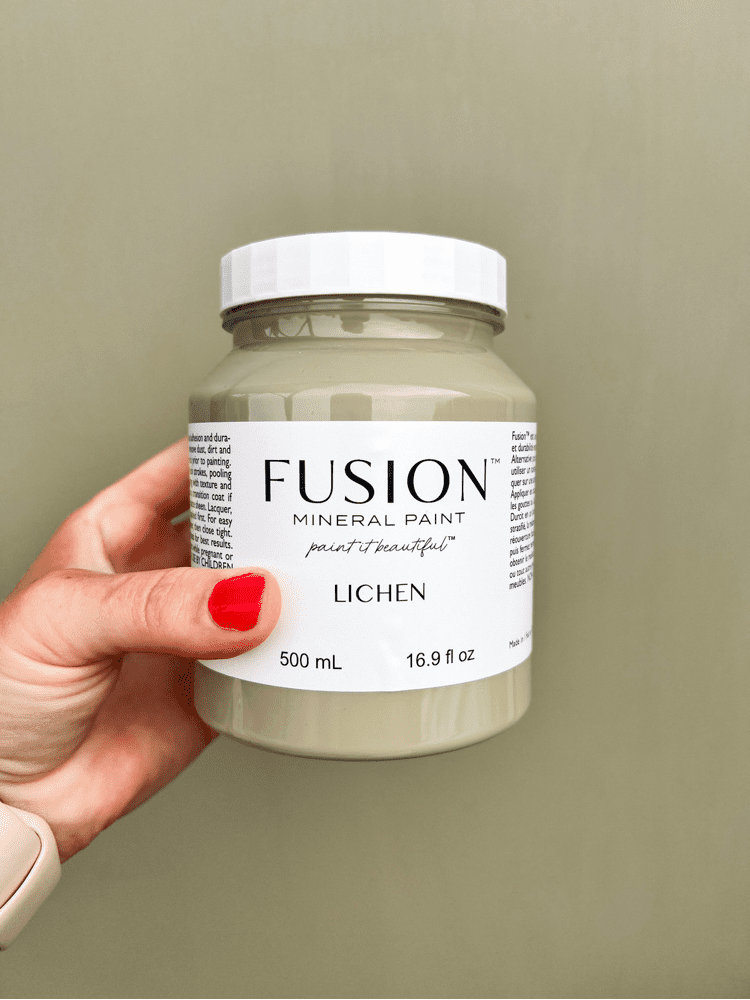
  • Fusion mineral paint (I used Raw Silk)
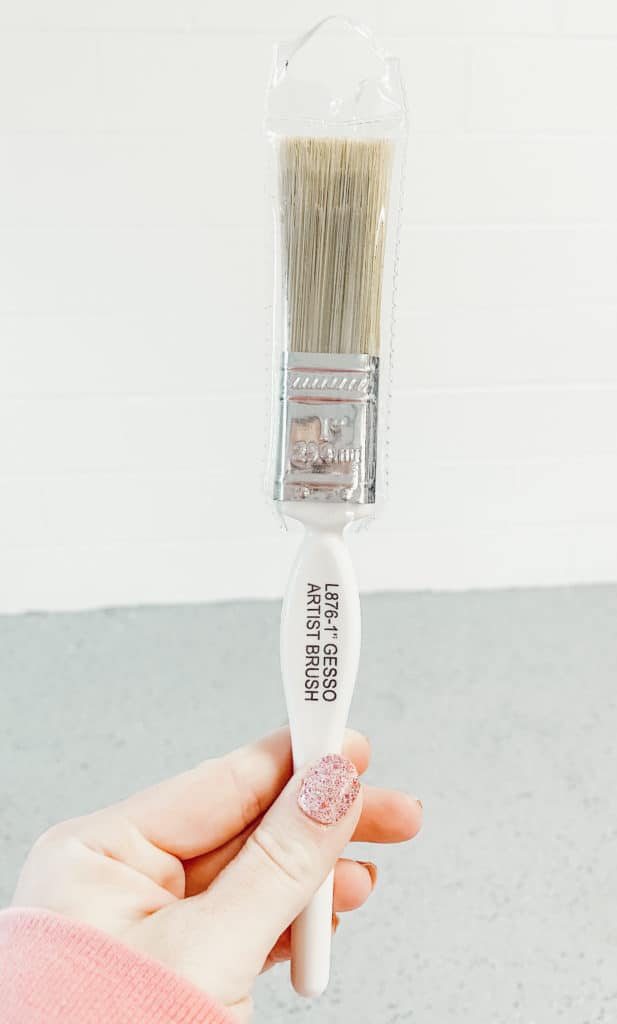
  • Paint brush
  • Antiquing Glaze (I used this Valspar Antiquing Glaze)
  • Painters tape (I did not need to use any because this mirror frame actually detached from the mirror itself, but it yours doesn’t do that, you will need to use some painters tape to prevent paint from getting all over the mirror)
Supplies needed for painting and distressing a mirror frame
This is the paintbrush I used for this project, but I honestly think a cheap little foam brush would have been better. The mirror had a lot of detail to it so it was hard to get the paint around with this brush. But it ended up working out just fine!
Supplies Needed for painting and distressing mirror frame
Here you can see the back of my mirror frame and why I did not need any painters tape. I just had to unscrew the frame from the mirror and then remove the mirror and start painting the frame by itself!

Wash The Mirror Frame

The first thing I did was take a damp rag and wiped all around the mirror frame. I wanted to make sure it was free from any dirt or debris before I started painting it. Then, I used another rag to dry it off with.
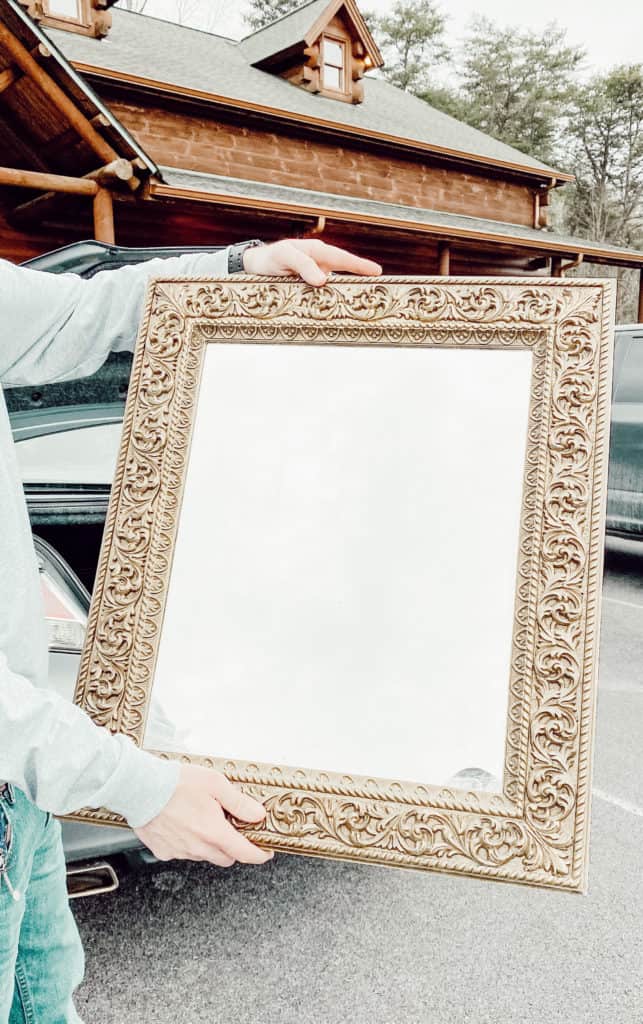
How to paint and distress Mirror frame
Here is a full before view of the mirror frame.
Wash the mirror before painting and distressing it
Toby of course had to check the mirror out before I started working on it.

Paint the First Coat of Paint

So after you washed and dried your mirror frame, the next thing to do is apply the first coat of paint! Like I said above I used fusion mineral paint in Raw Silk for this project but you could use whatever paint you like best and whatever color that will work best for your home.

I was very impressed with this paint (see my honest review about it) and I only used a small sample sized pot for this entire mirror.

The sample size is only 1.25 fluid ounces and as you can see the mirror frame was pretty large and intricate so the coverage on fusion mineral paint is phenomenal.
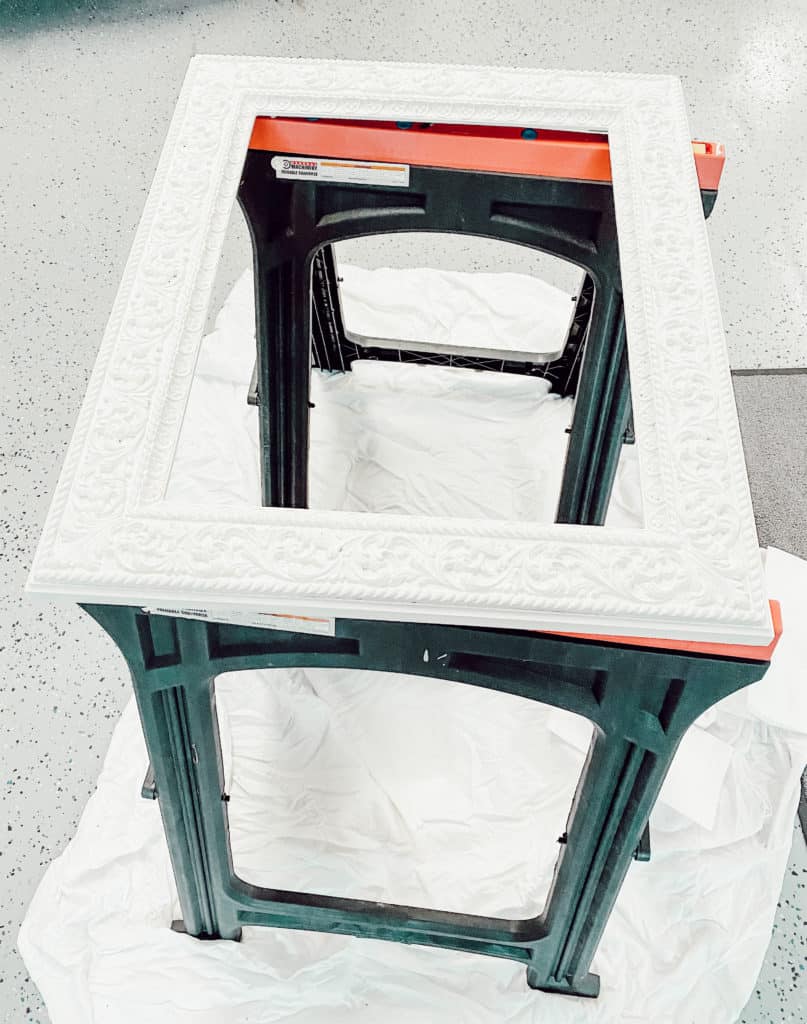
Painting the first coat of fusion mineral paint
Here she is all done after her first coat of fusion mineral paint!

Let Mirror Frame Dry and Then Apply the Second Coat of Paint

I let the first coat dry for about 3 hours. For fusion mineral paint, it is dry to touch after only 30 minutes but you want to be sure to wait at least 1-2 hours before applying a second coat.

So I gave it plenty of time before applying the second coat. After I applied the second coat, I just let it dry overnight before applying the antiquing glaze.

This was mainly because I did not have any glaze on hand and I had to go get some the next day!

Apply the Antiquing Glaze

After your frame is completely dry, now you can apply the antiquing glaze! This was super fun to me to do because I have never used antiquing glaze before and I was also impressed by this product as well.

It definitely gave the painted mirror frame a distressed look to it, which is what I was going for. I used the antiquing wax pictured below. You don’t need much at all to do this.

First, I mixed the glaze well and then I used a damp rag and dipped it in there, getting just a tad bit on the rag.

Then, using small circular motions, I applied it all around the mirror frame. I used more in some spots to give it a darker appearance and then less in some spots to give it more dimension.

It really made the appearance of the mirror frame look antique and vintage which is definitely my style! Click here to view the exact glaze that I used for this project.
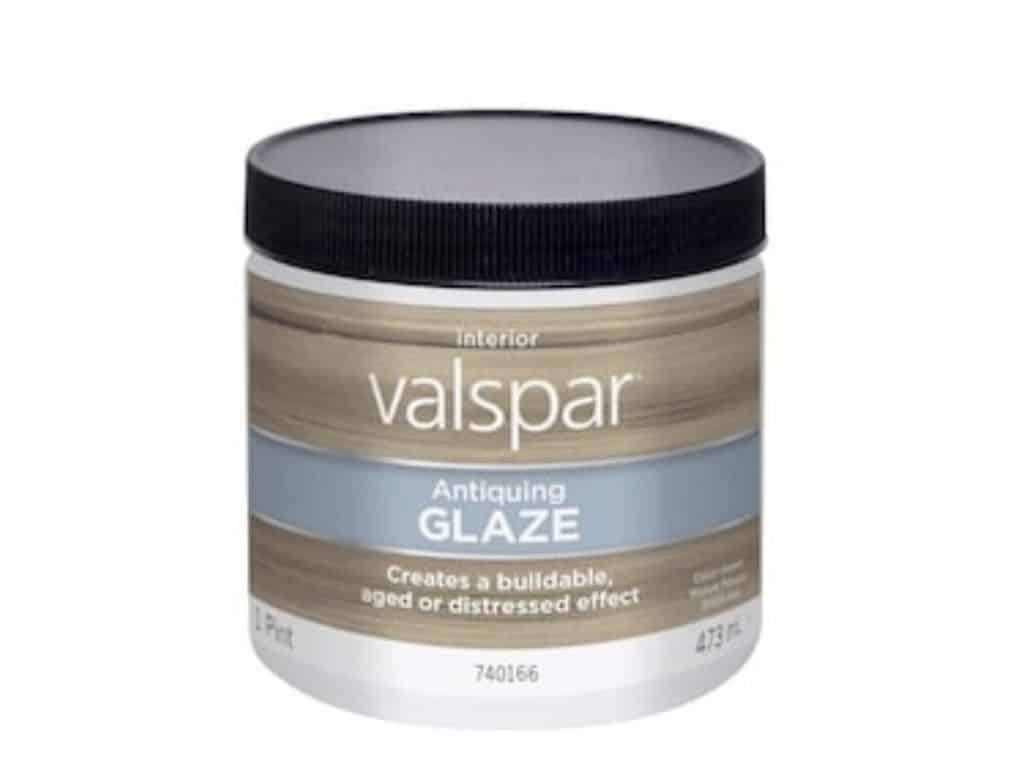
Antiquing glaze for distressing mirror frame
This is the antiquing glaze I used for this project. And it was only $13.98 and I still have plenty left to use for another project!

Let Mirror Frame Dry Completely

Again, after applying the antique glaze, I let the mirror frame dry overnight. I wanted to be sure it was completely dry before I hung it up.

It is also important to note the drying time if you are just painting the mirror frame with fusion mineral paint and not applying the antiquing glaze- Curing time with all acrylic paints is 21 days, but painted surfaces can be used gently after just 24-48 hours of drying time.

However, longer dry times and curing times are required when painting is done in high humidity and cooler temperatures.

So use your best judgement to determine when your mirror frame is completely dry from being painted and distressed!
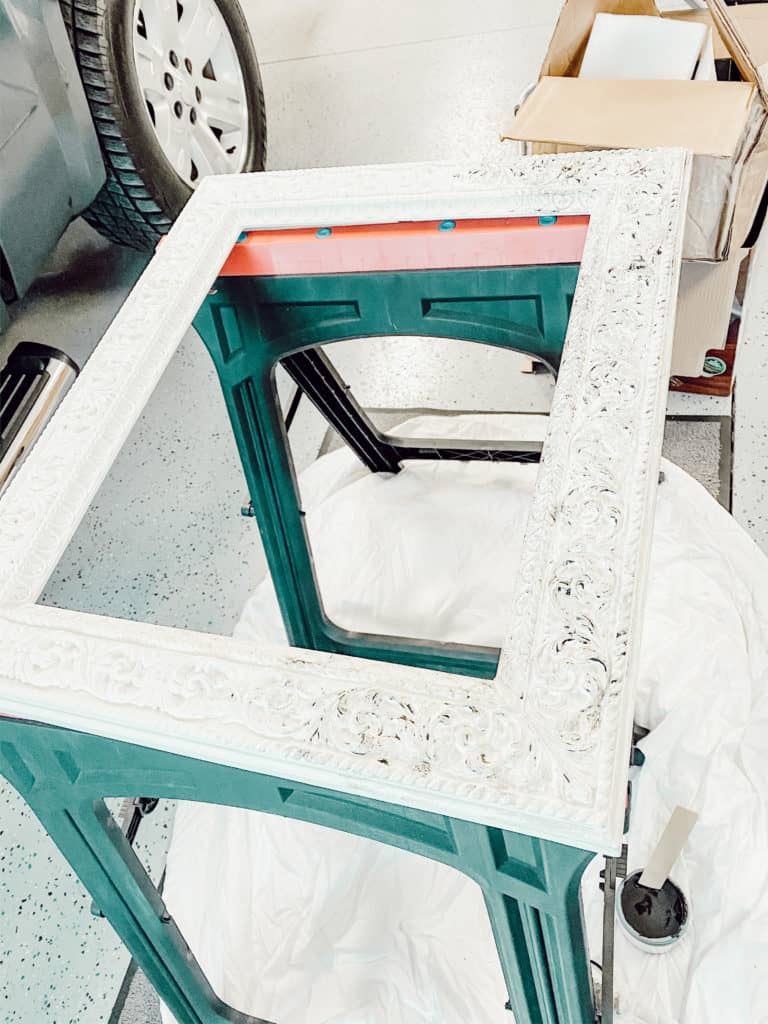
Applying antiquing glaze to mirror frame
Here you can see where I started applying the antiquing glaze to the mirror frame.

Hang Up The Mirror Frame

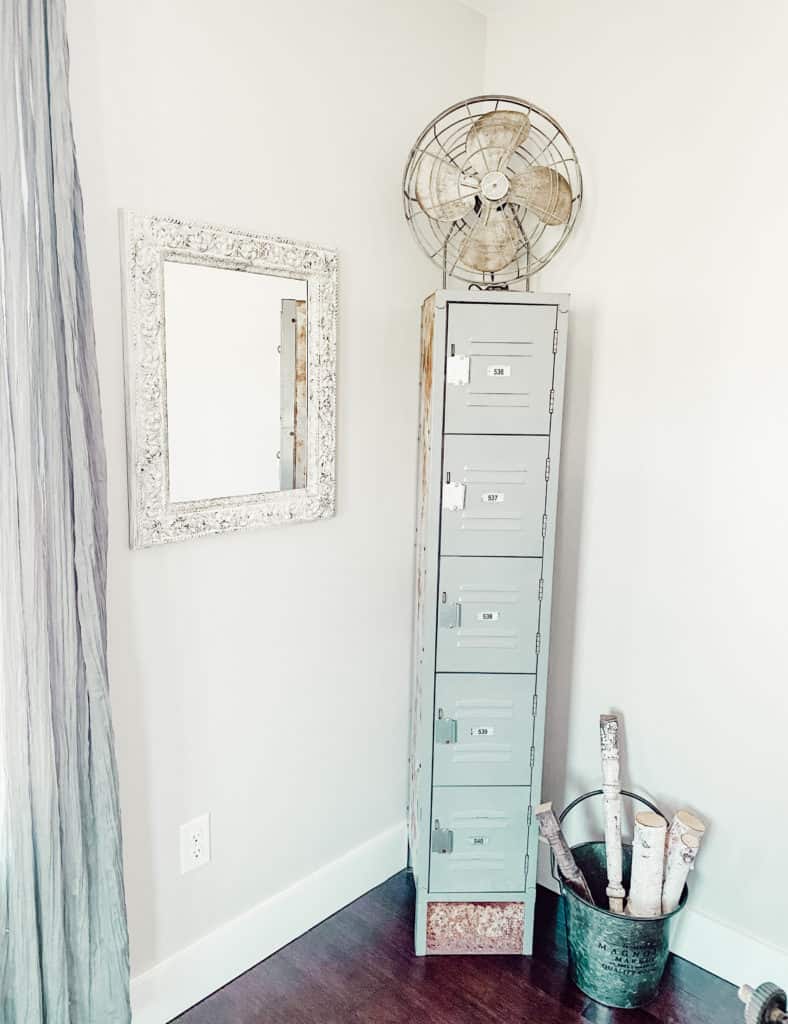
The last step is obvious, but once you have let your mirror frame dry completely, it is time to hang it up! I wanted to hang it in our office because I had some wall space next to my lockers that needed a little something.

And I think it is the perfect touch! I love how the painted and distressed mirror frame looks next to my old, rusty lockers. It’s like it was made for this space!
Hanging up Antique Mirror
Here she is in all her finished glory!

I hope this post was helpful for you if you are planing on painting a mirror frame, or anything else for that matter! These techniques can definitely be used for any kind of furniture as well.

I would love to find an entryway table to paint next so hopefully I can find one of those soon too. I will of course let you all know if I do!

Have a lovely day my friends and as usual, thank you so much for stopping by! I appreciate you all!
How to paint Mirror frame
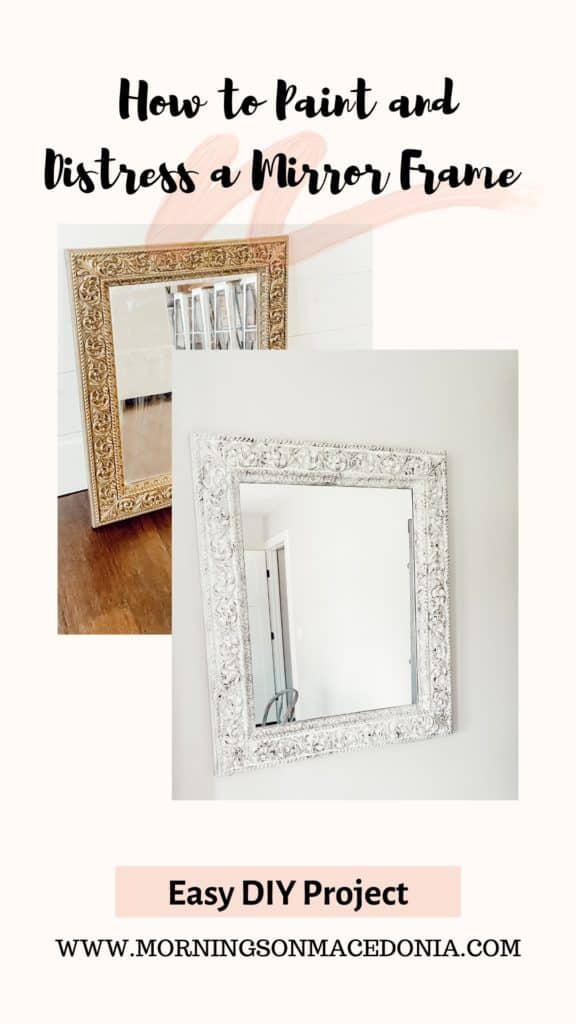
Pin for later!

Learn more about how to turn your builder grade home into something more here too!

In: Repurpose and Upcycling · Tagged: antique glaze, DIY, fusion mineral paint, Painted mirror frame, Simple and easy DIY

About Charity Gentry

I love Jesus, coffee, and home decor. I also love to cook and bake as well as read in my spare time! Follow along with me for all my latest DIY projects and ideas!

join the club

You’ll Also Love

Close Up of DIY Wooden RiserEasy and Simple DIY Wooden Risers
Antique Frame WreathHow to Make a Fall Wreath Out of An Antique Frame
Exterior Door Painted With Fusion Mineral PaintHow to Paint Exterior Doors

Comments

  1. Hannah says

    February 21, 2020 at 1:03 pm

    This is such a lovely idea to upcycle old peices of furniture! Will definitely keep it in mind when I’m looking for bits in the future x

    Reply
    • Charity Gentry says

      February 21, 2020 at 1:20 pm

      Yes it really is! I can’t wait to find a larger piece of furniture to paint!

      Reply
  2. Jupiter says

    February 21, 2020 at 1:20 pm

    This came out really cute!

    Reply
    • Charity Gentry says

      February 21, 2020 at 1:21 pm

      Thank you so much! I appreciate that!

      Reply
  3. Lisa says

    February 21, 2020 at 1:45 pm

    Such a cool idea – looks great!

    Reply
    • Charity Gentry says

      February 21, 2020 at 6:42 pm

      Thank you so much Lisa. I appreciate you stopping by.

      Reply
  4. Carolyn says

    February 21, 2020 at 2:55 pm

    What a fun DIY project! I love creating things from scratch for my apartment, and this looks like a great product. I also read your review of the mineral fusion paint, and may have to take a took into that as well, considering how good it looks for this finished project. Thanks!

    Reply
    • Charity Gentry says

      February 21, 2020 at 6:43 pm

      No problem! And yes, I am a huge Fusion Mineral Paint fan now! It’s such a great product and so easy to use as well.

      Reply
  5. Je says

    February 21, 2020 at 3:20 pm

    First of all, your photos are absolutely lovely!
    You’ve got me primed to go through my much ignored attic and find something I can do a similar job with. Wish me luck haha!
    xx

    Reply
    • Charity Gentry says

      February 21, 2020 at 6:43 pm

      Good luck! That will be fun though once you find something to paint!

      Reply
  6. Chloe May Blogs says

    February 21, 2020 at 7:09 pm

    Love an up-cycle project! The mirror now really suits your space x

    Reply
    • Charity Gentry says

      February 21, 2020 at 7:10 pm

      Thank you so much! I love up-cycle things to and make it exactly what I want!

      Reply
  7. That Travel Blogger says

    February 21, 2020 at 8:35 pm

    What a great idea for making something second hand look so luxurious and pretty!

    Reply
    • Charity Gentry says

      February 21, 2020 at 8:46 pm

      Awe thank you! I love giving old things new life again!

      Reply
  8. Lia says

    February 21, 2020 at 9:33 pm

    Thank you for this post. Very creative and makes me think of how I can revamp an old mirror in my house!

    Reply
    • Charity Gentry says

      February 21, 2020 at 9:47 pm

      Thank you so much! I love to revamp old things and bring them new life!

      Reply
  9. Yaya says

    February 21, 2020 at 10:10 pm

    How absolutely beautiful! Well worth the effort I can see! Really enjoyed this!

    Reply
    • Charity Gentry says

      February 22, 2020 at 12:07 am

      Thank you! It definitely was worth the effort I think too!

      Reply
  10. Nancy says

    February 21, 2020 at 11:08 pm

    I love that there are furniture pieces that can easily be refurbished with some fresh paint. You made the mirror frame look popping!! I love the antique touches to the frame. Thanks for sharing the DIY!

    Nancy ♥ exquisitely.me

    Reply
    • Charity Gentry says

      February 22, 2020 at 12:08 am

      No problem! Yes, I love painting furniture! I am hoping to find a bigger piece of furniture to try out with this paint soon too!

      Reply
  11. Philemon Pie says

    February 21, 2020 at 11:48 pm

    Thank you for sharing. I love personalised touches to my furniture or restoring unique items. Your post was helpful plus the results were stunning

    Reply
    • Charity Gentry says

      February 22, 2020 at 12:08 am

      Awe thank you! I appreciate you stopping by and letting me know!

      Reply
  12. Philemon Pie says

    February 22, 2020 at 12:09 am

    I love personalised touches as well as sprucing antique / unique items. Your post was helpful and the results are stunning

    Reply
  13. Nick Nalbach says

    February 22, 2020 at 12:40 am

    This is very cool! And great walk-through.
    I love that distressed look. The pictures do a great job of illustrating the entire process from start to finish.

    Now if only I were good enough to do this… Lol

    Thanks for sharing!

    Reply
    • Charity Gentry says

      February 22, 2020 at 12:49 am

      Awe thank you so much! I believe you could do this too! It really was easy! The longest part was just waiting on all the paint and glaze to dry!

      Reply
  14. Kinga says

    February 22, 2020 at 12:47 am

    I love the effect<3

    Reply
    • Charity Gentry says

      February 22, 2020 at 12:49 am

      Thank you so much! I do too!

      Reply
  15. Jody says

    February 22, 2020 at 1:32 am

    This came out great! I love the mirror. The way you upcycled it is fantastic!

    Reply
    • Charity Gentry says

      February 22, 2020 at 12:49 pm

      Thank you so much! I appreciate it Jody

      Reply
  16. Melissa says

    February 22, 2020 at 4:13 am

    I love how you upcycled and refurbished an old piece of furniture to give it a new life! The white paint made such a big difference! It looks great! Thanks for sharing! 🙂

    melissakacar.blogspot.com

    Reply
    • Charity Gentry says

      February 22, 2020 at 12:51 pm

      No problem! I love giving things new life with a little paint!

      Reply
  17. Holly says

    February 22, 2020 at 9:22 am

    Great post – I love what you’ve done with the mirror it looks so good! It’s amazing what the outcome can be from a little DIY project.

    Holly x
    http://www.adailydoseofholly.com

    Reply
    • Charity Gentry says

      February 22, 2020 at 12:52 pm

      Thank you so much Holly. I totally agree. It was such a fun DIY and I love the results from it!

      Reply
  18. Beka says

    February 22, 2020 at 10:27 am

    The transformation is amazing! I love the antiquing glaze, I think it really made this project 🧡 I’m going to start looking out for bits and pieces when I’m next at any second-hand shops that I can revamp like this one!

    Beka | http://www.bekadaisies.com

    Reply
    • Charity Gentry says

      February 22, 2020 at 12:53 pm

      Thank you Beka! I do too. I was a little hesitant to add the antiquing glaze since I have never used it before, but now I am so glad that I did!

      Reply
  19. Lisa says

    February 22, 2020 at 2:31 pm

    Wow, your new mirror looks stunning, it fits perfectly in your room and decor. You made this look so easy, I’m very tempted to give it a go too now. I’d much prefer to upcycle rather than buy new, thank you for laying out the steps so clearly!

    Reply
    • Charity Gentry says

      February 22, 2020 at 6:29 pm

      No problem! You should definitely try it out. It was super easy and the longest part about it was just letting the paint dry!

      Reply
  20. Daisy says

    February 22, 2020 at 7:07 pm

    This looks like so much fun to do! Could we get a Toby with this tutorial? Haha!

    Reply
    • Charity Gentry says

      February 22, 2020 at 8:09 pm

      Lol yes he is quite the helper with my DIY projects!!

      Reply
  21. Fransic verso says

    February 22, 2020 at 7:11 pm

    This is nice idea, you can paint it any color you want and easy to do it. Also, It’s good for saving money.

    Reply
    • Charity Gentry says

      February 22, 2020 at 8:10 pm

      Yes it really is. Better to paint something old to what you want rather than buying something new that is more expensive!

      Reply
  22. Sophie says

    February 22, 2020 at 7:45 pm

    It looks incredible with just the paint but it looks lovely with the antique coat too. The end product looks amazing, I love your interiors style x

    Sophie

    Reply
    • Charity Gentry says

      February 22, 2020 at 8:11 pm

      Awe thank you so much Sophie! I am so glad I went ahead with the antiquing glaze. I was a little worried about it at first because I haven’t ever used it before, but I like it much better with the glaze on it!

      Reply
  23. Quinn says

    February 22, 2020 at 8:26 pm

    I absolutely love that you up-cycled this, it turned out gorgeous! Also I must say, your decor with the rusty locker and the fan is absolutely delightful. Another fabulous blog hun!

    Quinn x

    Reply
    • Charity Gentry says

      February 22, 2020 at 8:28 pm

      Awe thank you Quinn! You are too sweet. I really appreciate it!

      Reply
  24. Gemma @ Makeup Muddle says

    February 22, 2020 at 9:11 pm

    Oh wow you did such an amazing job! It looks so pretty, and shabby chic xo

    MakeupMuddle.com

    Reply
    • Charity Gentry says

      February 22, 2020 at 9:17 pm

      Awe thank you so much! I love how it turned out as well!

      Reply
  25. Syreeta Simone mitchell says

    February 22, 2020 at 9:46 pm

    I’ve never tried any DIY décor myself but this looks great. I will be getting a new mirror in the near future so that might be the time I try something new!

    Reply
    • Charity Gentry says

      February 23, 2020 at 1:05 pm

      You should definitely try it! It wasn’t hard at all and it was so much fun to do!

      Reply
  26. Shana says

    February 23, 2020 at 12:37 am

    That turned out beautiful, and whatever camera you use takes amazing pictures.

    Reply
    • Charity Gentry says

      February 23, 2020 at 1:06 pm

      Awe thank you so much! And I don’t even have a fancy camera, I just use my iPhone and edit all my pictures with the Lightroom app!

      Reply
  27. Mark Crone says

    February 23, 2020 at 12:56 am

    What great idea and lovely DIY post. The how to makes it simple.

    Reply
    • Charity Gentry says

      February 23, 2020 at 1:07 pm

      Thank you so much! It was very simple and I am so happy with how it turned out!

      Reply
  28. Nathalie says

    February 23, 2020 at 12:41 pm

    So well done!
    Thank you for teaching us how we can be hanging up our environment
    and upcycling items to give them new life 🙂
    Also, if we check out some thrift stores we know how to change up the
    items a bit to our liking 🙂

    https://www.ecoislogical.com/

    /Nathalie

    Reply
    • Charity Gentry says

      February 23, 2020 at 1:09 pm

      Yes! I love finding things at thrift stores and giving them new life! It’s amazing what a little paint can do for sure!

      Reply
  29. Julie says

    February 23, 2020 at 2:11 pm

    This looks great! I have a mirror I want to try this on!

    Reply
    • Charity Gentry says

      February 23, 2020 at 6:49 pm

      You definitely should! It was so easy and I am so happy with how it turned out!

      Reply
  30. Athena Christy says

    February 23, 2020 at 2:49 pm

    I love how clean and neat it turned out. Thanks for sharing this helpful project ♡

    —Athena Christy
    https://athenachristy.wordpress.com/

    Reply
    • Charity Gentry says

      February 23, 2020 at 6:51 pm

      No problem! I love to share easy and fun DIYs.

      Reply
  31. Becky says

    February 23, 2020 at 7:17 pm

    Such a lovely idea! Would love a mirror like this in my home, so will need to look in some thrift stores and get some paint!

    Becky | Uptown Oracle

    Reply
    • Charity Gentry says

      February 23, 2020 at 9:13 pm

      Yes you definitely should! I saw a mirror similar to this one at Goodwill and it was only $4! So it’s definitely worth it to check out the thrift shops so you can keep this project pretty cheap!

      Reply
  32. Heidi Caedere says

    February 23, 2020 at 8:20 pm

    Thank you for sharing the details of this process! You made me want to try my hand at this 🙂

    Reply
    • Charity Gentry says

      February 23, 2020 at 9:18 pm

      Thank you so much! You should definitely try it! It’s so simple and easy!

      Reply
  33. Baby Boomer Super Saver says

    February 24, 2020 at 2:20 am

    This is such a fantastic way to make your living space beautiful without spending a lot of money! Instead of spending money, you can score savings on things you find in thrift stores and transform them with a little paint and creativity! I love it! I would put my savings directly into my retirement savings account, to help me catch-up my retirement savings.

    Reply
    • Charity Gentry says

      February 24, 2020 at 11:15 pm

      Yes! I love finding cheap things at thrift stores and giving them new life with a little paint! It’s so much fun and cost effective too!

      Reply
  34. Meredith Dent says

    February 24, 2020 at 4:58 am

    Oh I adore this! Totally saving this post for when I start decorating my apartment a little more. I love a good DIY!

    Reply
    • Charity Gentry says

      February 24, 2020 at 11:16 pm

      Awe thank you so much Meredith! Yes, you should definitely try this out whenever you can!

      Reply
  35. Allie Mackin says

    February 24, 2020 at 9:32 pm

    Ah very inspiring and helpful tutorial and lover your furry helper, thanks for posting 🙂

    Allie of
    http://www.allienyc.com

    Reply
    • Charity Gentry says

      February 24, 2020 at 11:30 pm

      Awe thank you so much! He is a good little helper for sure!

      Reply
  36. Sumedha says

    February 25, 2020 at 12:08 pm

    Wow you’re very artsy and it’s come out SO WELL!

    Reply
    • Charity Gentry says

      February 25, 2020 at 11:07 pm

      Awe thank you! Funny thing is I don’t think I am that artsy at all! Lol glad you think so though!

      Reply
  37. Ney says

    February 25, 2020 at 10:58 pm

    Wow, you are so brave! The mirror looks wonderful. Good job!

    Reply
    • Charity Gentry says

      February 25, 2020 at 11:23 pm

      Thank you! I was so happy that it turned out well!

      Reply
  38. Lauren says

    February 26, 2020 at 5:00 pm

    What a great way to decorate and re use a piece of furniture rather than donating it or throwing it away. Thank you for sharing!

    Reply
    • Charity Gentry says

      February 26, 2020 at 10:31 pm

      Thank you! I think so too! I love giving things new life with a little paint!

      Reply
  39. Kelly Diane says

    February 28, 2020 at 12:24 pm

    Oh my gosh this is such an good idea. You’ve made it sound so easy that I want to try it for myself. The end result looks so pretty

    Reply
    • Charity Gentry says

      February 28, 2020 at 4:40 pm

      You should definitely try it out, it was very easy. The hardest part was just letting the paint dry in between!

      Reply
  40. Sophie says

    February 29, 2020 at 2:11 pm

    Such a great idea – The finished frame looks great!

    Sophie // SophieMLoves

    Reply
    • Charity Gentry says

      February 29, 2020 at 3:29 pm

      Thank you Sophie. I was very happy with how it turned out!

      Reply
  41. Jenny in Neverland says

    March 4, 2020 at 1:03 pm

    Such a good idea, it looks fab afterwards! x

    Reply
    • Charity Gentry says

      March 4, 2020 at 11:00 pm

      Thank you Jenny! I am very pleased with the results after too!

      Reply

Leave a Reply Cancel reply

Your email address will not be published. Required fields are marked *

Recipe Rating


Next Post >

My Honest Review of Fusion Mineral Paint

Recent Posts

  • Easy Halloween Sprinkle Cookies Recipe (Soft & Chewy!)
  • DIY Oyster Shell Christmas Ornaments 
  • Easy Football Cheese Ball Recipe for Game Day
  • Easy Halloween Oreo Cookies
  • DIY Halloween Cat Statue: Easy Target Cat Makeover

Archives

Categories

  • About Me
  • Christmas
  • DIY
  • Everyday Decor
  • Fall
  • Home Improvement
  • Lifestyle
  • Outdoor
  • Recipes
  • Repurpose and Upcycling
  • Spring
  • Summer
  • The Blog
  • Travel
  • Uncategorized
  • Whimsy Home Wednesday
  • Winter

About Me

About Me

Follow along with me for all things home decor and modern farmhouse style! I also love sharing simple DIY projects and how to style and decorate every room of your house! Thanks for stopping by!


Shop My Home!

join the club

trending now

instagram

Follow @mornings_on_macedonia

Well, guess who caused a little neighborhood excit Well, guess who caused a little neighborhood excitement this morning and had to call 911?! 🙋🏻‍♀️😅

It all started when our carbon monoxide detector kept going off. Naturally, I tried replacing the battery first, but that didn’t help. 🙃

So there I was, frantically trying to get ahold of my husband, who OF COURSE was in a meeting and couldn’t answer, while simultaneously trying to round up all three cats and get everyone outside. 😹

And what does any responsible 33-year-old adult woman do in a situation like this?! CALL HER MOM. 🤣

Literally called my mom to ask if I should call 911 because apparently I still need adult supervision when it comes to adulting. 😂

Well, the fire department showed up, checked everything out, and THANKFULLY there was no carbon monoxide leak! 🙌🏻

Turns out our carbon monoxide alarm was just old and needed replacing. It was over five years old! 🙃

So now I feel a little ridiculous for causing such a commotion, but better safe than sorry, right?!

AND in my defense, our gas fireplace hasn’t been working, and my husband was messing with it last night. So naturally, my mind went straight to a possible gas leak. 😬

Thankfully, everyone is safe, the cats are probably traumatized from their unexpected evacuation, and I’ve officially had enough excitement for one morning. 🤣

So here’s your friendly reminder to check your carbon monoxide detectors, replace them according to the manufacturer’s recommendations, and NEVER ignore an alarm! 🚨

And if you’re one of my neighbors, sorry about all the fire trucks and sirens this morning. Just your local neighborhood drama queen keeping things interesting! 😜

Please tell me I’m not the only grown adult who still calls their mom when something goes wrong?! 🤣👇

Also, shoutout to the fire department for being so nice and telling me I did the right thing by calling. That made me feel slightly less ridiculous at least 😜
🚨 THE BIGGEST MINKY COUTURE BLANKET SALE OF THE YE 🚨 THE BIGGEST MINKY COUTURE BLANKET SALE OF THE YEAR IS HERE!! 🚨
And trust me, you do NOT want to miss this one! 😍

Today only, you can score 60% OFF Minky Couture blankets PLUS FREE SHIPPING on orders of $100 or more! 🎉

If you’ve never experienced a Minky Couture blanket before, you’re seriously missing out! These are hands down some of the softest, coziest luxury blankets EVER. And don’t just take my word for it… my three cats are officially Minky obsessed! 😹🐾 There’s nothing Toby, Riley, and Charlie love more than curling up for a cozy cat nap on one!

And with Christmas right around the corner, these blankets make the PERFECT Christmas gifts! 🎄🎁 Whether you’re shopping for your mom, best friend, husband, or just treating yourself (because you deserve it 😉), you really can’t go wrong with a Minky!

But here’s the catch… this HUGE Minky Couture sale only happens ONCE A YEAR! So if you’ve been waiting for the perfect time to stock up on cozy blankets or get a head start on Christmas shopping, THIS IS IT!

✨ 60% OFF blankets
✨ FREE shipping on orders $100+
✨ Once-a-year savings!

Comment “shop” below and I’ll send you the link! 👇🏻 Are you shopping for Christmas gifts or treating yourself?! Because I’m definitely team BOTH! 🤣

Save this post and send it to your blanket-obsessed bestie so they don’t miss out! 🛍️
POV: You’re craving cheesy, delicious chicken ench POV: You’re craving cheesy, delicious chicken enchiladas but have ZERO desire to go grocery shopping. 🤣🌮

If you’re looking for easy, high-protein dinner ideas that don’t require spending hours meal planning or wandering around the grocery store, you NEED to try @hungryroot! 🙌🏻

I made these high-protein green chile chicken enchiladas and y’all, they were SO good! 😍 Cheesy, flavorful, fresh, and seriously so easy to make!

The best part?! Hungryroot delivered all the fresh ingredients straight to my door, along with simple, step-by-step instructions. No complicated recipes, no last-minute grocery runs, and no stressing over what to make for dinner! 👏🏻

And with the busy holiday season right around the corner, I’m all about finding ways to make life a little easier! Between Christmas decorating, shopping, baking, and everything else on my to-do list, the LAST thing I want to worry about is what we’re having for dinner. 🤣🎄

✨ Want to try Hungryroot for yourself?Use my code CHARITY40 to get 40% off your first box!

Tell me below: Are you team meal planning or team figuring out dinner at the very last minute?! Because I’m definitely guilty of the latter! 🤣

#hungryrootpartner
Apparently being a homebody is a personality trait Apparently being a homebody is a personality trait now… and I’m fully embracing it. 😂

Sorry, but staying home with my cats, reading a good book, and being cozy sounds WAY better than having plans. 📚🐈

Don’t get me wrong, you might catch me out and about every once in a while… but just know I’ll need approximately 2–3 business days at home afterward to recover from all that socializing. 🤣

At this point, my ideal weekend is canceled plans, comfy clothes, a good book, and my cats nearby. Homebody life just suits me. 👏🏻

Please tell me I’m not alone! Where are all my fellow introverts, homebodies, book lovers, and cat moms?! 👇🏻

Comment SHOP below to receive a DM with the link to this post on my LTK ⬇ https://liketk.it/6o9N9

#introvertlife #introverting #homebody #homebodylife #catmom
Too early to start Christmas crafting?! I think no Too early to start Christmas crafting?! I think not! 😜🎄

I had some extra oyster shells left over from our beach trip this summer, so instead of letting them sit around, I turned them into these DIY oyster shell Christmas ornaments! You may remember I turned some of the shells into cute little ghosts for Halloween too 👻 But now we’re officially moving on to Christmas crafts!

And I am obsessed with how these turned out! All I needed was some spray paint, pretty wrapping paper, Mod Podge, twine, and hot glue to transform ordinary oyster shells into high-end looking coastal Christmas ornaments.

Not only are these such a pretty addition to your Christmas tree, but they’re also a sweet vacation keepsake! Every year when you pull them out, you’ll have a little reminder of that summer beach trip. 🥹

I always decorate my Christmas tree with gold, so these are going to fit in perfectly with my Christmas decor this year! 🎄

Save this easy DIY Christmas ornament idea for your holiday crafting list!

Would you turn your vacation seashells into Christmas ornaments too?! 🦪

Comment SHOP below to receive a DM with the link to this post on my LTK ⬇ https://liketk.it/6n6d0

#diychristmas #diyornaments #christmasdiy #coastalchristmas #shells
We had the BEST time this weekend at the Carolina We had the BEST time this weekend at the Carolina Charm event at @therevelry_clt benefiting the Isabella Santos Foundation! 💕

From the beautiful venue to the amazing food, drinks, and atmosphere, everything about this night was incredible! And getting to meet @relationshep and @salleycarson from Bravo’s Southern Charm was just the cherry on top! 🍒

Y’all already know how obsessed I am with Charleston and Southern Charm, so this event was basically MADE for me! 🤣 Plus, any excuse to get all dressed up, feel fancy, and enjoy a night out for a great cause? Count me in! 🥂

And the best part was knowing that all the fun was supporting the @isftorch and its mission to help children battling rare pediatric cancers. 💛

At this point, I’ve pretty much met the entire Southern Charm cast except Austen and Madison! So if y’all are reading this, I guess you’re next on my list! 🤣👏🏻

Now I need to know… are you a Southern Charm fan too?! And if so, who’s your favorite cast member?! 👀

Comment SHOP below to receive a DM with the link to this post on my LTK ⬇ https://liketk.it/6qajE
Things we’re ghosting this season: waiting until N Things we’re ghosting this season: waiting until November 1st to decorate for Christmas. 🤣

Sorry, but some of us have approximately 57 Christmas trees to put up, and that kind of commitment takes TIME. 😜🎄

And if you think I’m waiting until Halloween is over to start decorating for Christmas, you’ve got another thing coming. 🤣 I may or may not already have a few trees up around the house. 🤫

Listen, I love spooky season just as much as the next person, but there’s absolutely nothing wrong with having pumpkins AND Christmas trees out at the same time. It’s called balance, okay?! 👻🎄

So consider waiting until November to decorate for Christmas officially GHOSTED. ✌🏻

Now tell me, are you team Christmas decorating in October or team wait until after Thanksgiving?! 👀
Bless my poor husband’s heart because when he marr Bless my poor husband’s heart because when he married me, I don’t think he realized he was signing up for a lifetime of Christmas decorating chaos! 😂

But when you’re a Christmas-obsessed wife who believes EVERY single room in the house deserves its own Christmas tree, you have to start decorating early, right?! 🎅🏻

I mean, putting up multiple Christmas trees, hanging garland, and transforming our entire home into a cozy Christmas wonderland takes TIME! So obviously, October is a perfectly reasonable time to start decorating for Christmas. At least that’s what I keep telling him! 😜

Thankfully, after 10 years of marriage, he knows the drill and just goes along with all my crazy Christmas decorating ideas. He’s a keeper for sure! ❤️

Now PLEASE tell me I’m not the only one who starts decorating for Christmas in October?! 🎄🤣 And how many Christmas trees do you put up in your house?! 

Comment SHOP below to receive a DM with the link to this post on my LTK ⬇ https://liketk.it/6pAfP
#ad 🎃🐈‍⬛ Don’t throw away that empty cat litter ju #ad 🎃🐈‍⬛ Don’t throw away that empty cat litter jug… turn it into a Halloween boo basket for your cats instead! I’m partnering with @catspride today to put an empty Cat’s Pride litter jug to good use with the cutest little upcycling project. Since the jug was already the perfect Frankenstein green, I knew exactly what I wanted to make! 💚 After cleaning the empty jug thoroughly, we cut off the top to create a basket shape. Then I used my Cricut to add a Frankenstein face before filling it with some of Riley and Toby’s favorite cat treats and Halloween toys. And judging by Toby’s reaction to that catnip owl, I’d say this DIY cat boo basket was a success. 😹 And before the jug was transformed, Cat’s Pride made litter box duty a whole lot easier. I love the odor control and easy scooping, and Riley and Toby are always VERY interested when a fresh box of litter appears. 😂 So consider this your sign to save your next empty litter jug and get creative with it! And when it’s time to stock up on fresh litter, check out Cat’s Pride for your own feline crew. 🐾 Would you make a Halloween boo basket for your cats?! 🎃👇🏻
If you’re wondering what to do with all that lefto If you’re wondering what to do with all that leftover Halloween candy, these Leftover Halloween Candy Cookies are the answer! They combine two of my favorite things: candy AND cookies! So you really can’t go wrong. 🤣

Just chop up your favorite leftover chocolate candy bars, mix them into the cookie dough, and you’ve got the ultimate easy post-Halloween treat! Plus, every cookie is a little different depending on what candy you throw in. 🙌🏻

This is such a fun way to use up leftover Halloween candy instead of letting it sit around for the next six months. 😂

Want my Leftover Halloween Candy Cookies recipe? Comment “RECIPE” below and I’ll send it your way! 🍪

Copyright © 2026 Mornings on Macedonia · Theme by 17th Avenue